• NOTE: THE MEMBERS MARKETPLACE SECTION IS FOR PERSONAL USE ONLY - I.E. SELLING ITEMS/PARTS FROM YOUR PERSONAL VEHICLE ONLY. ANY SALES OF ITEMS MADE FOR COMMERCIAL PURPOSES (I.E. MAKING/SELLING MULTIPLE ITEMS, TAKING ORDERS, ETC) BY ACCOUNTS NOT AUTHORIZED TO CONDUCT COMMERCIAL SALES ON THE SITE IS A DIRECT VIOLATION OF OUR FORUM RULES AND TERMS OF SERVICE AND WILL RESULT IN THE PERMANENT SUSPENSION OF YOUR ACCOUNT.

    ATTENTION SELLERS: All users who wish to sell in the marketplace are REQUIRED to abide by the following RULES. If a sales thread/post does not comply, it is subject to DELETION without notice.

    ATTENTION BUYERS: If you see a non-compliant sales thread, please REPORT the thread and take CAUTION when transacting.

    Rule #1 - Post a picture of the actual item you are selling (NO stock photos).
    Rule #2 - The picture must include a REAL piece of paper with your Username and the Date written on it next to the product you are selling. NO photoshop or digitally edited photos are allowed.
    Rule #3 - NO "feeler" threads are permitted. This section is only for items that are actually available and ready to be sold currently.
    Rule #4 - The listing must include an asking price. OBO (or best offer) is allowed but it must be accompanied by an asking price.
    Rule #5 - No "threadcrapping." Classifieds threads are not meant for negative discussions. Comments on pricing are not allowed. Only people with genuine questions and interest in the item for sale should be posting in the classifieds threads.
Sponsored

Ranger raptor front missing decal

thndr8

Member
Joined
Apr 18, 2024
Threads
3
Messages
18
Reaction score
8
Location
Denver
Vehicle(s)
Raptor Ranger
I have the actual ford part. It was expensive. Tarrifs and shipping. It did come to North America from a different continent.
Can you provide specifics? Is there a part number? What did it cost? Is there a link? I'm at a point of having a graphics guy try to reproduce it but design is expensive too.
Sponsored


stirfry

Member
First Name
Scott
Joined
Jan 29, 2026
Threads
4
Messages
23
Reaction score
78
Location
Detroit, MI
Vehicle(s)
2025 Ford Ranger Raptor
Occupation
Engineer
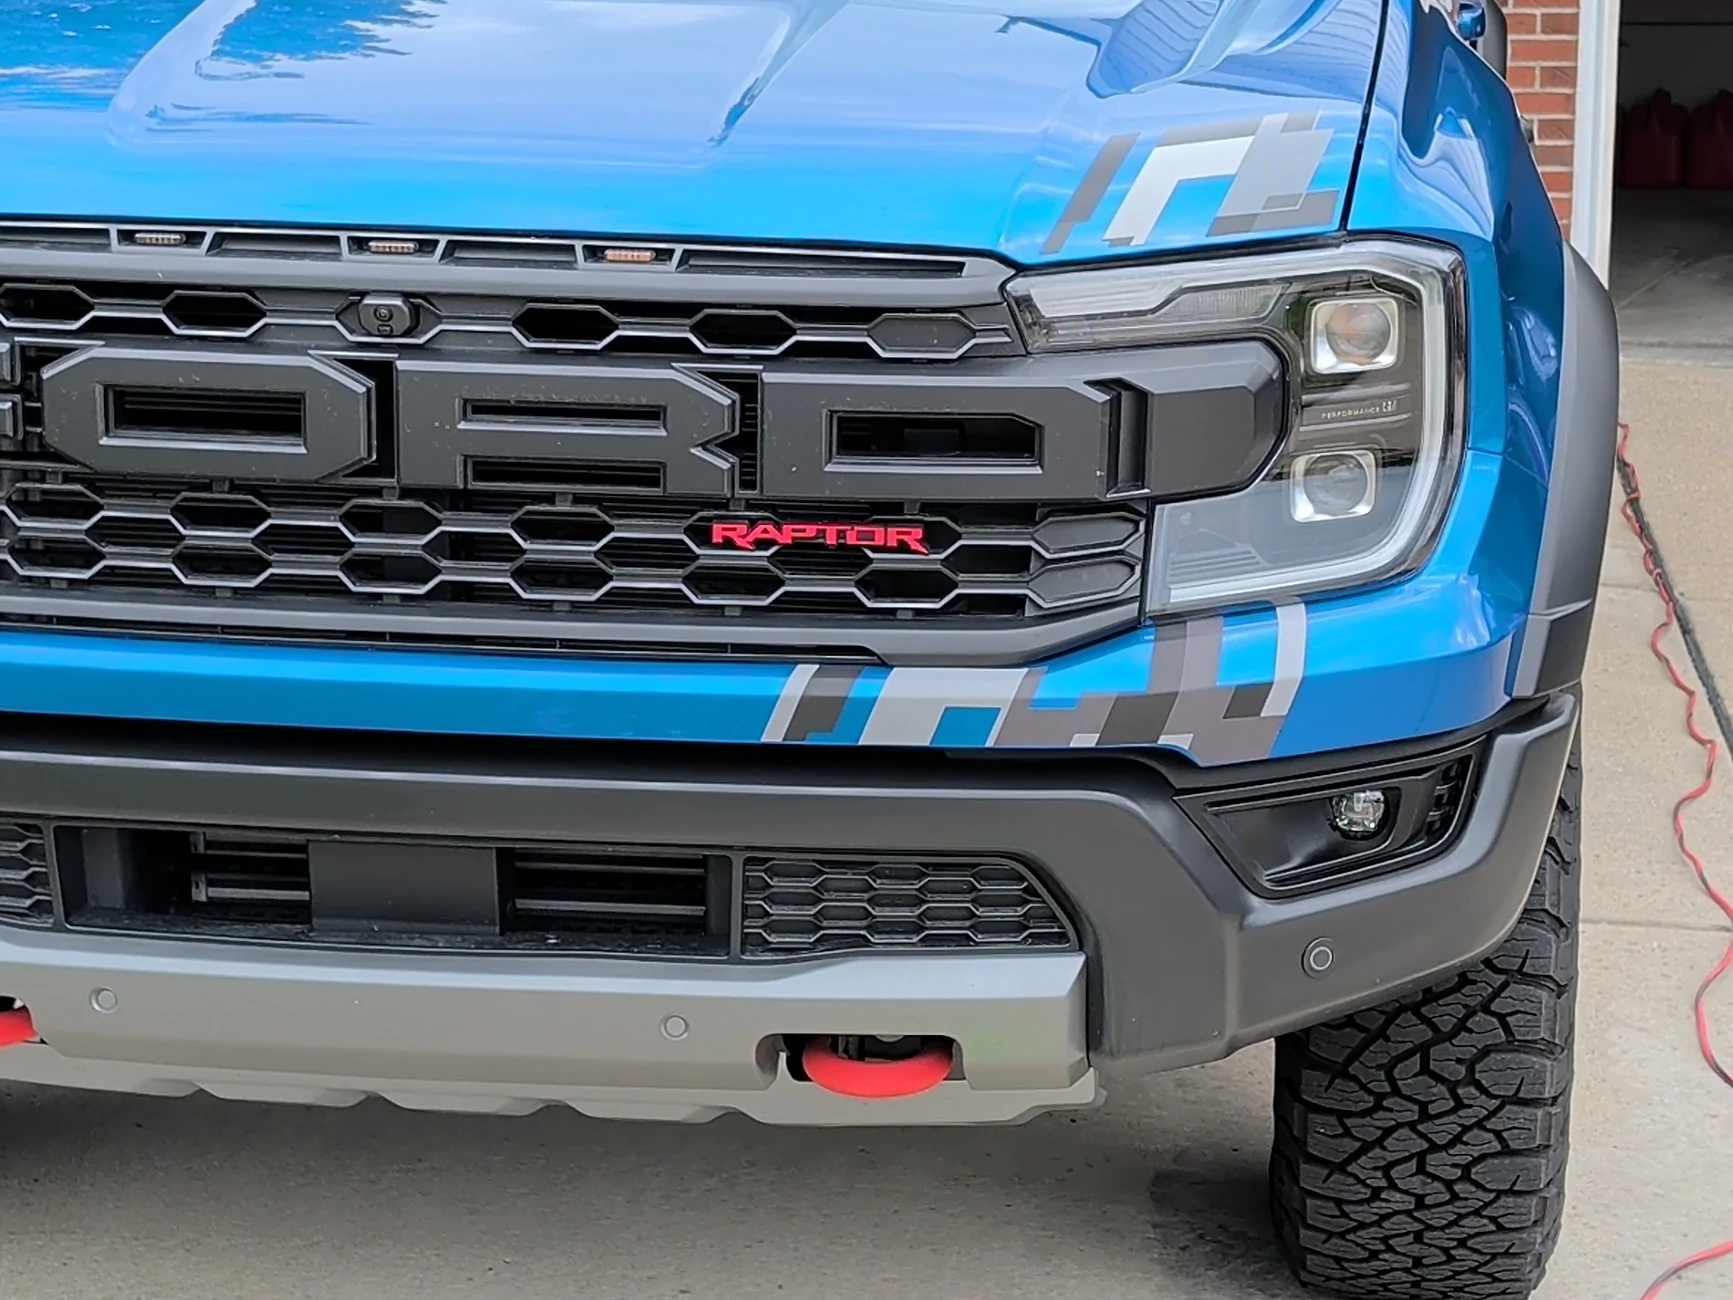
I decided to take a chance and order the $35 Yotto decal and give it a try. Here is a summary of my experience. I have installed a few decals in the past, but never on a surface with this much contour.

I ordered in mid-July of 2026 and it arrived about 4 days later. The decal was sealed in plastic and rolled up into a 1 inch cylindrical plastic sleeve. It was packaged in a small rectangluar box. There were no instructions for installation, but I watched a 3 minute YouTube video to remind me of the basics.

Upon unpackaging, I held it up to my stock graphics and the colors were a near perfect match. The texture was different and of course there was no hex pattern on the medium gray. Nothing different than what was expected. I did notice that a small amount of trimming would be needed near the headlight--this was stated on the Yotto website.

For installation, I gathered the following tools: A spray bottle with soapy water, a 4" wide plastic squeegee, isopropal rubbing alcohol, a microfiber cloth, my wife's hairdryer, and a newly bladed exacto knife. You will need a bit of patience, as well.

Process:
  1. Cleaned the bumper with the microfiber cloth and alcohol to remove any embedded dirt, wax, or other contaminants. I did this several times, and then waited about a minute for everything to evaporate.
  2. Sprayed the bumper liberally with the soapy water mix, probably about 30 pumps so it was dripping wet.
  3. Removed the WHITE backing off the decal, being careful that the CLEAR backing stayed on. This did get a little tricky for the left-most side of the decal because that small section is separate from the rest of the decal. I started on the right side and worked my way left, and then when I got to the small independent section, I started on the left and worked right. Otherwise, you will lose the intended spacing and parallell lines of this independent section if it separates from the clear backing.
  4. Sprayed the decal liberally with soapy water, and the resprayed the bumper with more soapy water.
  5. Roughly placed the decal in its proper position, using the lower curved feature near the center of the decal as a guide--a similar feature is on the bumper. The soapy water allows you to slide the decal around for a little bit before it starts to stick a little better in the large flat areas of the bumper.
  6. At this point, because of the complex surface of the bumper and the legs / shape of the decal, I started to slowly and gently use the squeegee to smooth out the decal and remove some of the soapy water from under the decal. Once the decal started to adhere on the flat areas, I removed the CLEAR backing, as it was now starting to get in the way and I was confident the decal was not going to shift position anymore.
  7. It was at this step that I really thought I was going to not have a successful install. There were several edges that would not shape over the bumper curved surfaces, corners were not adhering, edges were not adhering, I was starting to get nervous. But the hairdryer was the saving grace. Now I see why it's a must mentioned in the YouTube videos.
  8. I worked through the problem areas by using the low heat setting on the hair dryer, along with the squeegee and my fingers, to smooth out the decal, remove trapped air bubbles, make it more pliable, and guide / shape it around the curved surfaces. Slowly, the edges and corners adhered and I was able to butt the edge of the decal against the base of the headlight (some trimming would be needed). This step took the longest, about 10 minutes.
  9. Once everything was pretty much adhered, I went over the entire decal several times with the hairdryer to do the final lock-in of the adhesive and make sure all the water mixture had evalorated out from underneath and around the decal. This step took another 3-4 minutes.
  10. The final step was taking the exacto knife and trimming off the extra 1/4 inch of decal at the base of the headlamp with a gentle but consistent pressure. Much easier than I thought. I used the haridryer and squeegee to finalize those edges. I noticed in photos that some people trimmed right at the headlamp base (like me) and others trimmed it a little farther away. I think it's a matter of preference.

The entire installation took me just over half an hour. The only small complaint I have is that the curved surface at the bottom center of the decal is not quite the same as the bumper facia--so the decal is a little off there. No big deal for me--you have to look pretty closely to notice it.

I always thought this decal delete was a bit of a miss for the US market, so I'm glad I took the chance with the Yotto decal. With a higher quality aftermarket vinyl, it should last as least five to seven years, if properly cared for. Most of my other aftermarket vinyl on my other vehicles have lasted well over 10, so I'm hoping for the best.

If you decide to take this project on, good luck and I hope this post helps. I can take some additional close-ups if anyone requests them.

Ford Ranger Ranger raptor front missing decal 57201f82-0291-4d2a-9264-076286475fb0


Top