OP
OP
AdventureLab
Diamond Sponsor
- First Name
- Brit
- Joined
- Mar 14, 2025
- Threads
- 48
- Messages
- 864
- Reaction score
- 1,246
- Location
- St George, UT
- Vehicle(s)
- '24 RR
- Thread starter
- #61
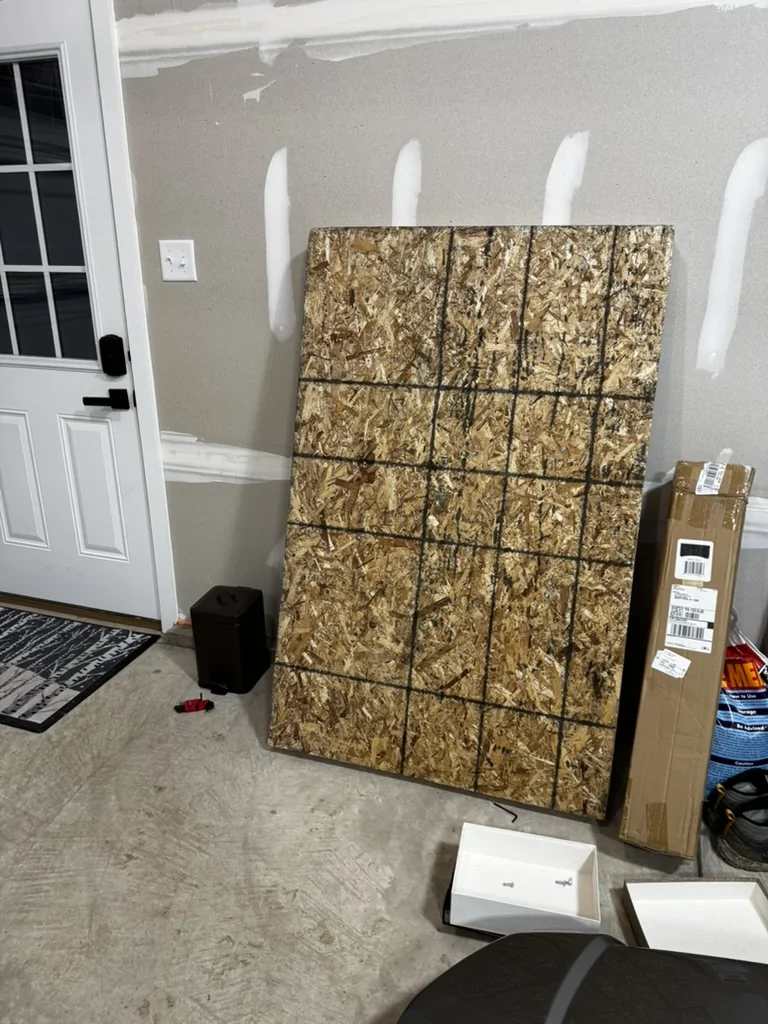
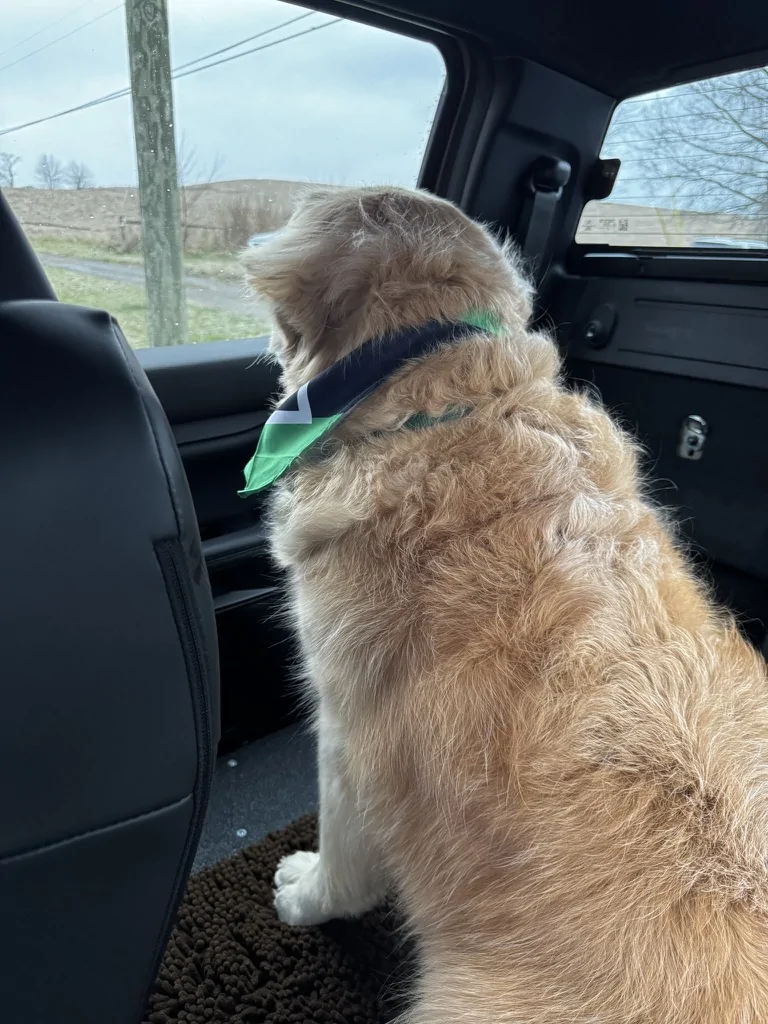
Huge thanks for the detailed reply! I really appreciate all of the feedback, especially the part about the outer bolts. We have installed quite a few of these at the shop now and haven't had the issues you mentioned. However, it's good to have a differing perspective and I'm always open to evolving the process.Well finally (ordered this on Oct 15, 2025) installed my rear seat delete Dec 2025. Let me preface this by saying @AdventureLab Customer Service is outstanding. My order included the rear seat delete, rear panel and optional molle panel. There was one item that was on back order and by the time it would have arrived we would have been out of our home and into our new home. They constantly touched base with me and when they had my order fulfilled I asked for them to hold it because we were going to move within that week (and I had enough things on my mind besides this mod!). And wow... I'm so thankful they held onto the kit because this thing ships in a freakin wooden pallet. Zero damage... and this is not something you want to pack up and move. Much easier shipping to the new address!

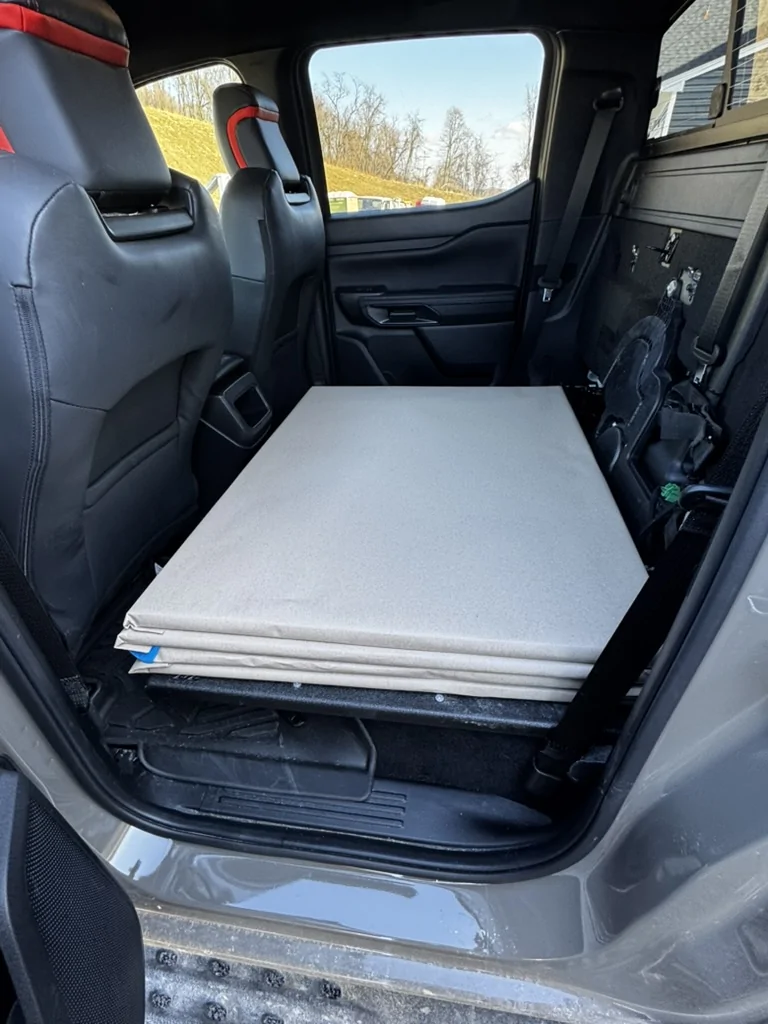
Onto the install. On their website they rate this 2 out of 5 on the install. I would agree with this rating IF you have an helper. I did not. If you are doing this by yourself this is more like a 3.5-4 install simply because of the size/weight of the piece of metal. Definitely doable on your own, just be prepared on sliding this into the truck you will drop some F-bombs.
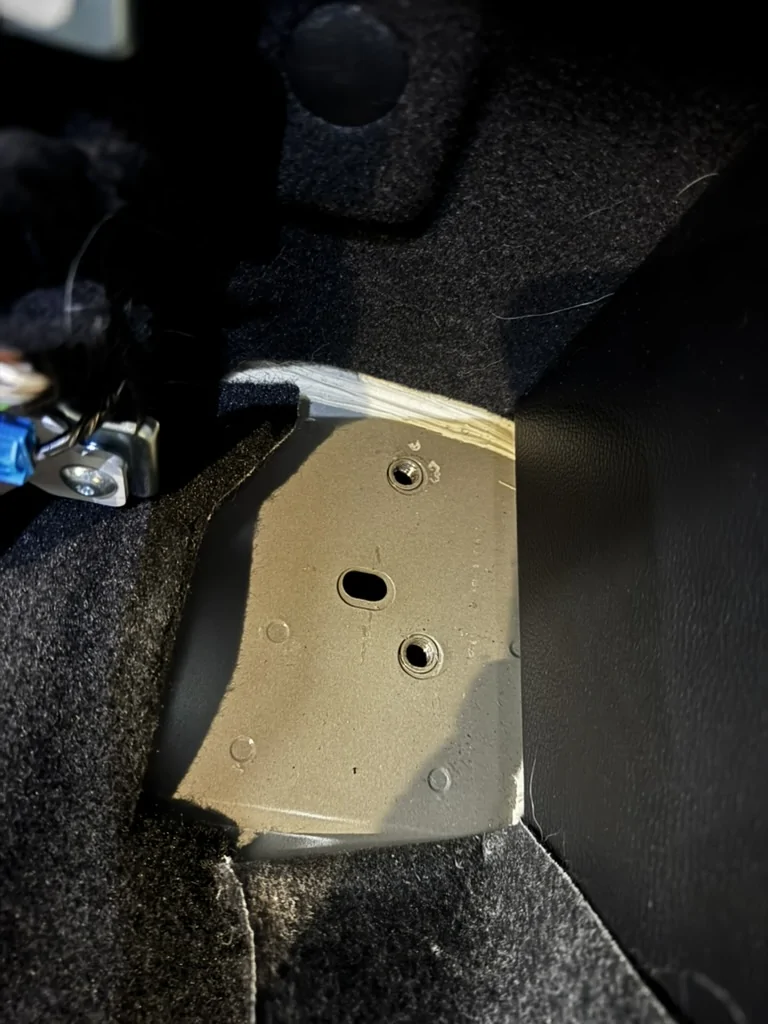
To the install. The directions they have on their site are spot on. After sucessfully doing this I would adjust some of the instructions to make it a bit easier w/o giving up anything. IMO... you do not need the most outer two (driver/passenger) side guide screws. They do provide a very unique piece of engineered metal that gives you a nut for the guide screw (and when you do this you will understand) with a 3M piece of tape. In all fairness, I was doing this in my garage with the temps in the 40s. My heat gun was still in storage so the adhesive never really took. These two screws along with 2 in front using the storage bin holes are for guidance. They are not needed to secure the seat deck to the truck. That is done via the 4 x 13MM bolts (2 outboard on each side securing the now removed seat) and 2 x T50 torqx seatbelt screws.
If I would have forgone these two guide screws and the front 2 guide screws the install with a single person is easily a 3 (it's still a bulky/heavy piece of metal). But.. I didn't so if you are doing this on your own you might save yourself some aggravation. When it was time to slide the seat deck into the truck w/o any help it was inevitable that the heavy deck would hit the said screws I mentioned above. Since the temps were low the 3M tape did not hold the screws in place. They fell down underneath the storage bins. Not happy and at this point the F bombs starting dropping. So... I removed the deck... retrieved the nut holders and got my wife's hair dryer out to try and get the adhesive to stick. No dice. Although a hair dryer can get hot, it's not a heat gun and as I stated before it was in storage unit lost amongst boxes of ornaments and stuff we don't need (but that's a different topic).
The second go around was pretty much the same as the first. I put a rug on my console to protect it and then slid the deck using the 2 front most and 2 out screws as guides. They fell in again. At this point I just used the 2 T-50 seat belt bolts to guide the deck in. Once I had those lined up I then could align the 4x 13mm outer bolts (the same ones that secure the rear seat).
Once those are lined up and loosely tied down you are good to go. Screw the 4 allen key screws. They are simply guides but the 4 x 13MM and 2 xT50 bolts are what is securing the deck to your truck.
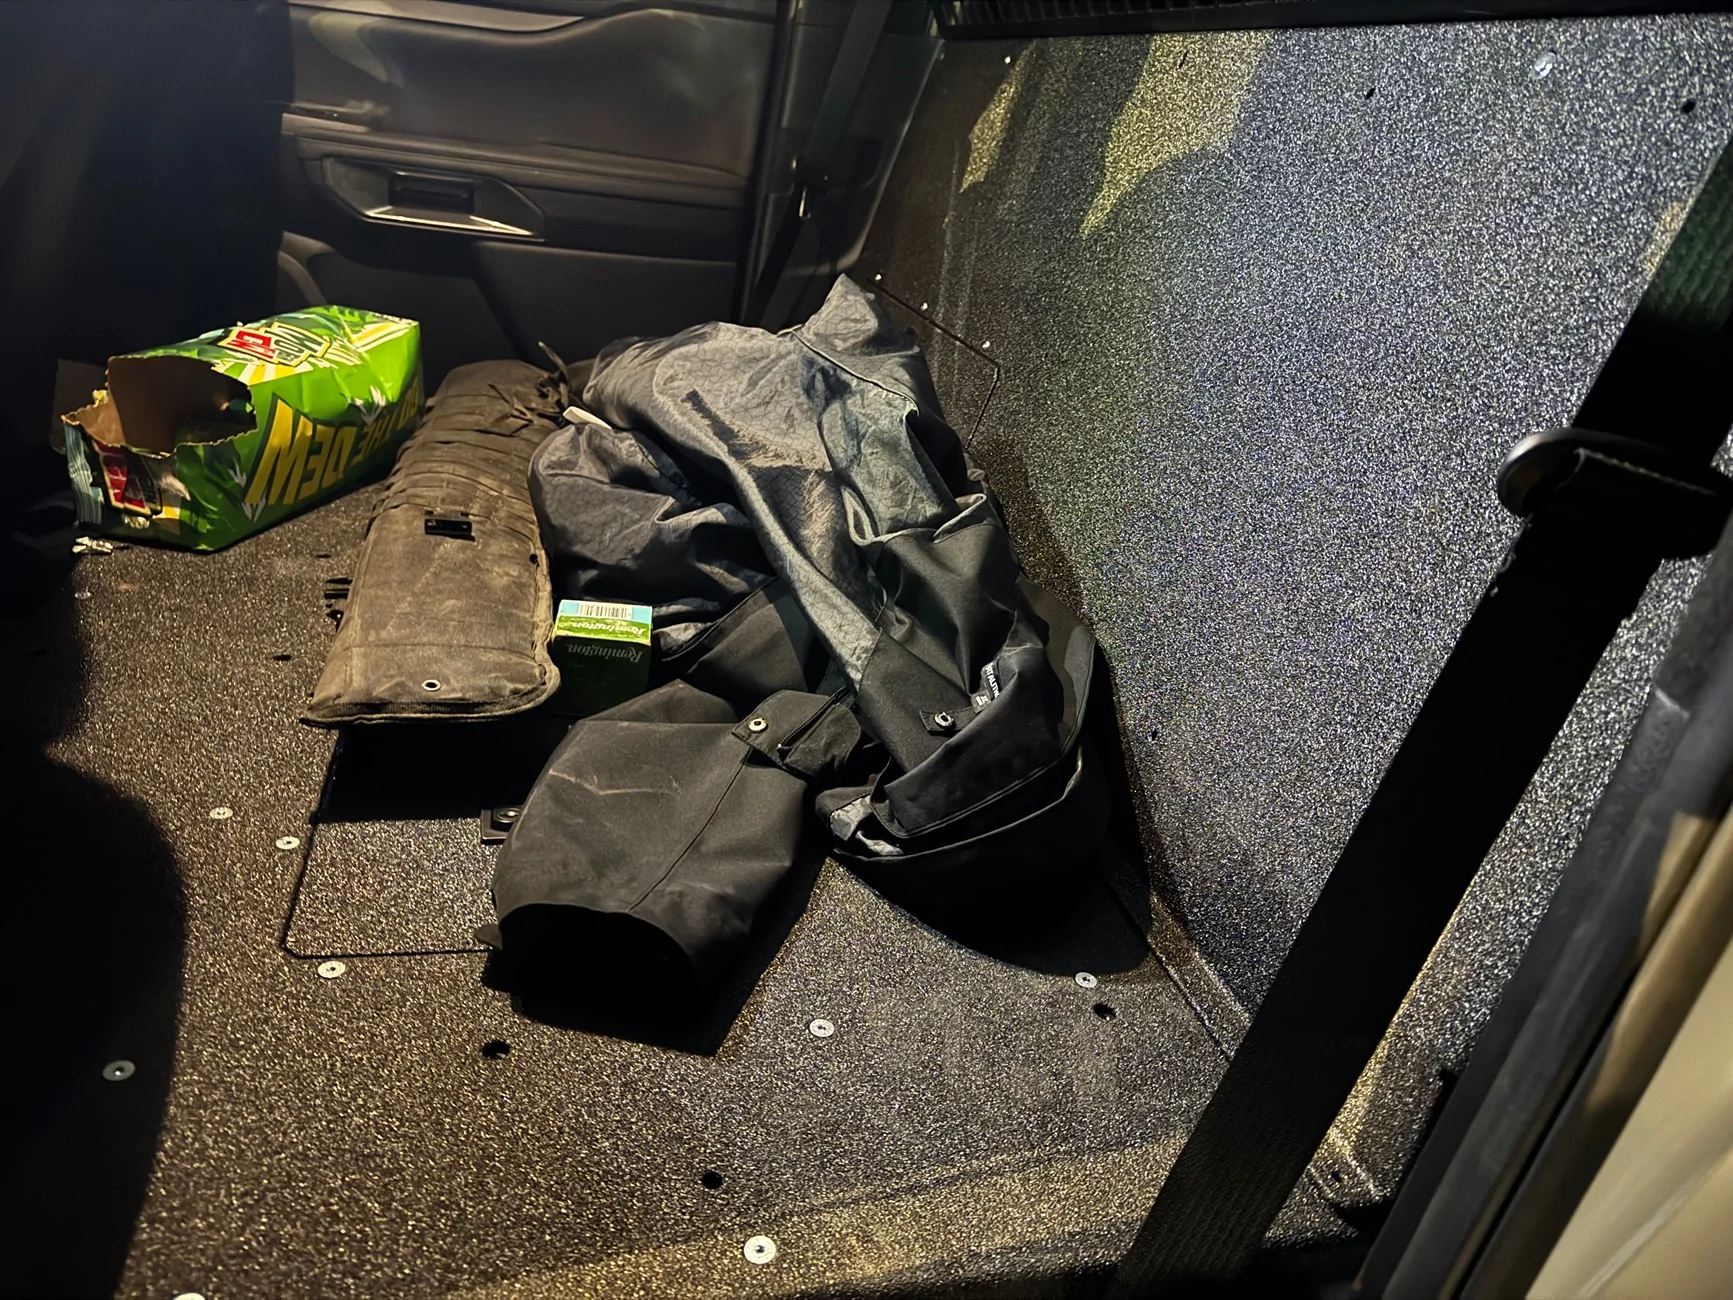
Onto the rear panel... I ditched the rear panel and molle panel. Honestly, I was pretty frustrated at this point and saw no need to continue down this path. The rear panel WOULD make it a very clean install, but in hindsight I didn't need it. I have the rear tether loops on the back wall to hang stuff. I have super easy access to my jack. Oh, BTW you will have to move your jack tools as you will not have access to them. I have a swing box in the bed so this is where they went. The sub is exposed, but my dog (which is the only reason I did this mod) doesn't care and you actually get a bit more space to shove stuff in there.
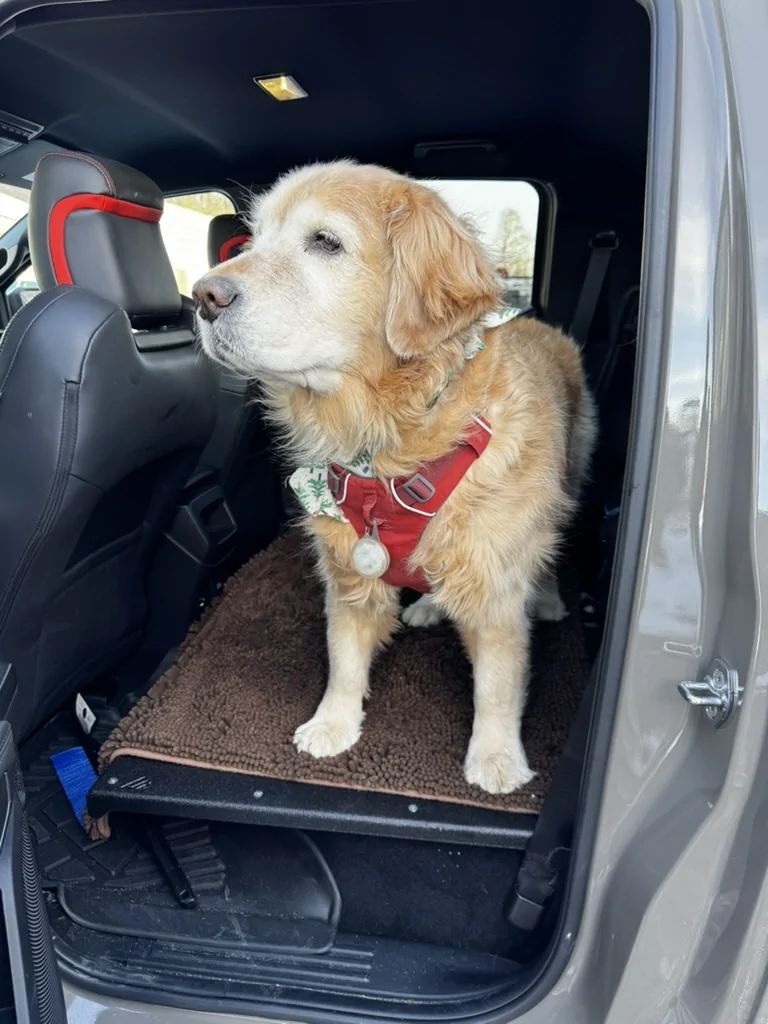
So my project was complete. I sold my 24 RR becaue my dog was not comfortable laying on the bench seat, nor could she easily get up or down from that height (she's 8.5 years old at this point). Adventure Labs unfortunately did not come out with this solution unitl after I sold my RR. Soon as I saw their post about this mod I ordred a new 25 RR (love this truck, but I love my dog more). Now everyone is happy. She can get up and down much easier. She has a completely flat sturdy platform to sit and take a nap. And I now have way more room in the back. As I stated earlier, we moved during this time and the amount of "stuff" I can get in my back is close to an SUV now. We had a bunch of custom prints that were in storage. I was able to easily transport them in the RR (before we had to use the wife's GX) becaue of the large flat surface. It's over 2.5 FT of space before you would hit the console.
And finally Luna. She's happy (happier.. cause what dog isn't happy)
Oh... forgot. I have zero rattles now. I did have some some noise but I found the silver allen bolts securing the decking to the frame were lose. Likely from transit. Once I tightened them up I have zero rattles and I mentioned I was not using the 2 outer most guide screws.
Really happy I did this. Super appreciative of Adventure Labs Customer Service.
Some tips:
- Zip tie the middle seatbelt to the rear wall
- Use sound deadening materiel around the seat belt receptacles and stow them behind the jack.
- Don't use the outer two most guide screws (IMO not needed and just aggravation)
- Have a helper to slide the deck into the truck
- Lock the 2 cubby hole access doors. Luna kept stepping on them and they would pop up (they do not need a lot of pressure to release them).
- Do it. My objective was to make my truck less stressful and more relaxing to my pup (she's 8.5 but still my pup).
Very happy to support vendors who do quality work and have CS high on their priority list.

I'm a little confused about what fell down into the storage bins. Would you mind elaborating on that some? All of the bolts should have been installed into the nut plates, preventing them from falling even if the adhesive isn't secure yet. In our experience, the nut plates are extremely hard to remove (almost impossible w/o bending them) when the adhesive is cured. All of the attachment points of the support rails are slotted so the platform can just slide into place, making installation as easy as possible.
As for leaving those two screws out, that all depends on what you're using it for. If you're securing cargo (and pulling upward with straps), I would leave them in. If you're carrying around your furry friends, it should be fine to leave them out. However, that should not create installation headache either way, since they are just additional slots at the correct spacing to allow the platform to slide in. That's what I would like to learn more about if you don't mind.
Love seeing the photos of the crates! We put a lot of effort into the design and assembly of those to ensure it makes it to you guys in perfect condition. We have more time in our crates than some companies have in building their products.

Our R&D and production team puts a huge amount of effort into this product. I'm glad it's having such a positive effect on so many people. We're shipping these all over the world now, even to Australia, where they have had this truck for years. Thanks for the support!
Would you mind if I added a few of those photos to the product page?
Sponsored