nate.co
Well-Known Member
- First Name
- Nate
- Joined
- Sep 1, 2023
- Threads
- 11
- Messages
- 159
- Reaction score
- 350
- Location
- Lafayette, Colorado, USA
- Vehicle(s)
- 2024 Ranger Raptor
- Thread starter
- #1
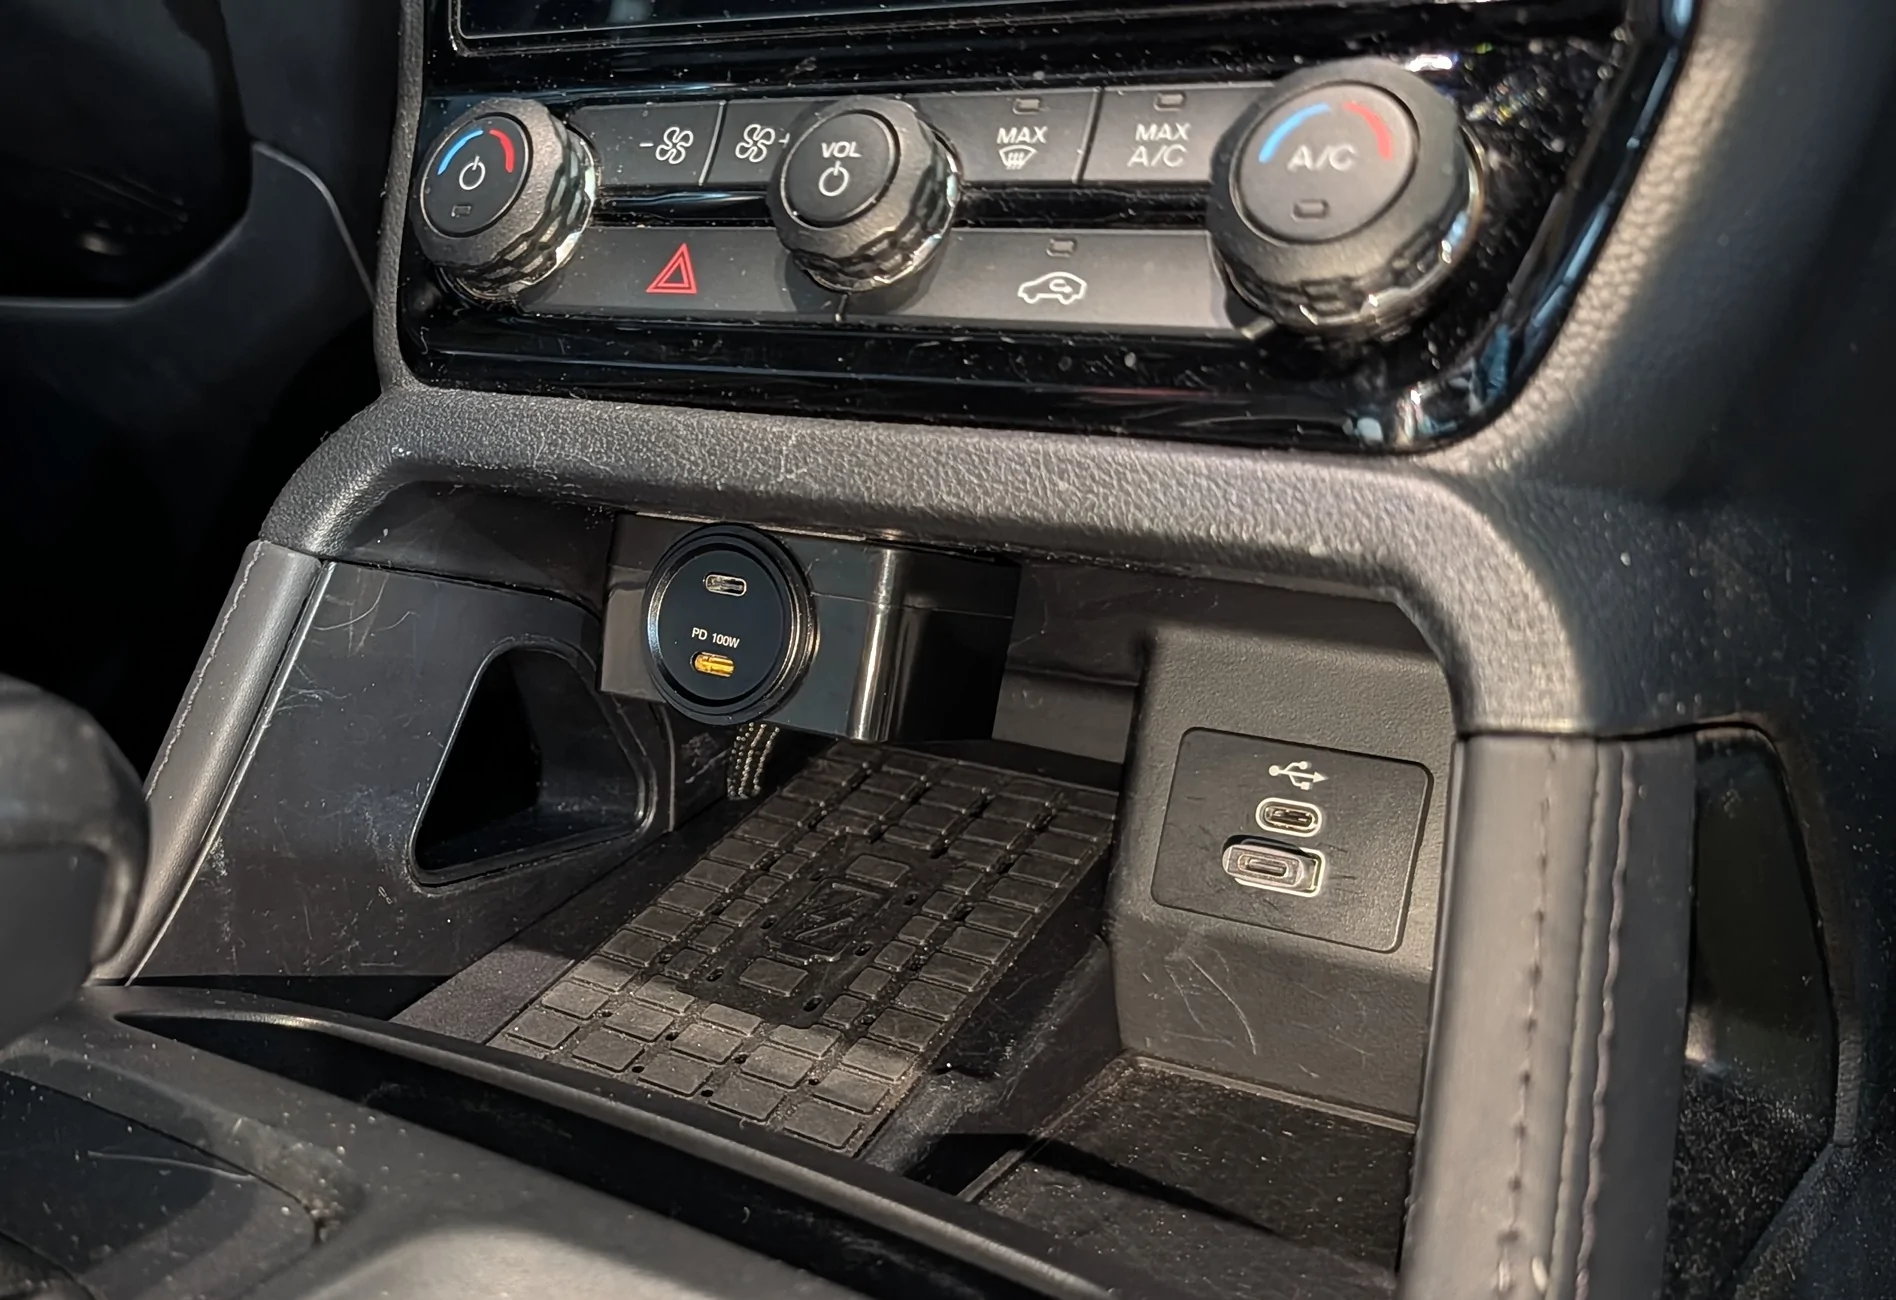
I wanted to add some extra USB-C ports in the center console to run a GoPro and just for extra charging. When I did my big audio upgrade, I removed the 12v port in the storage cubby and decided to re-use that for more power ports.
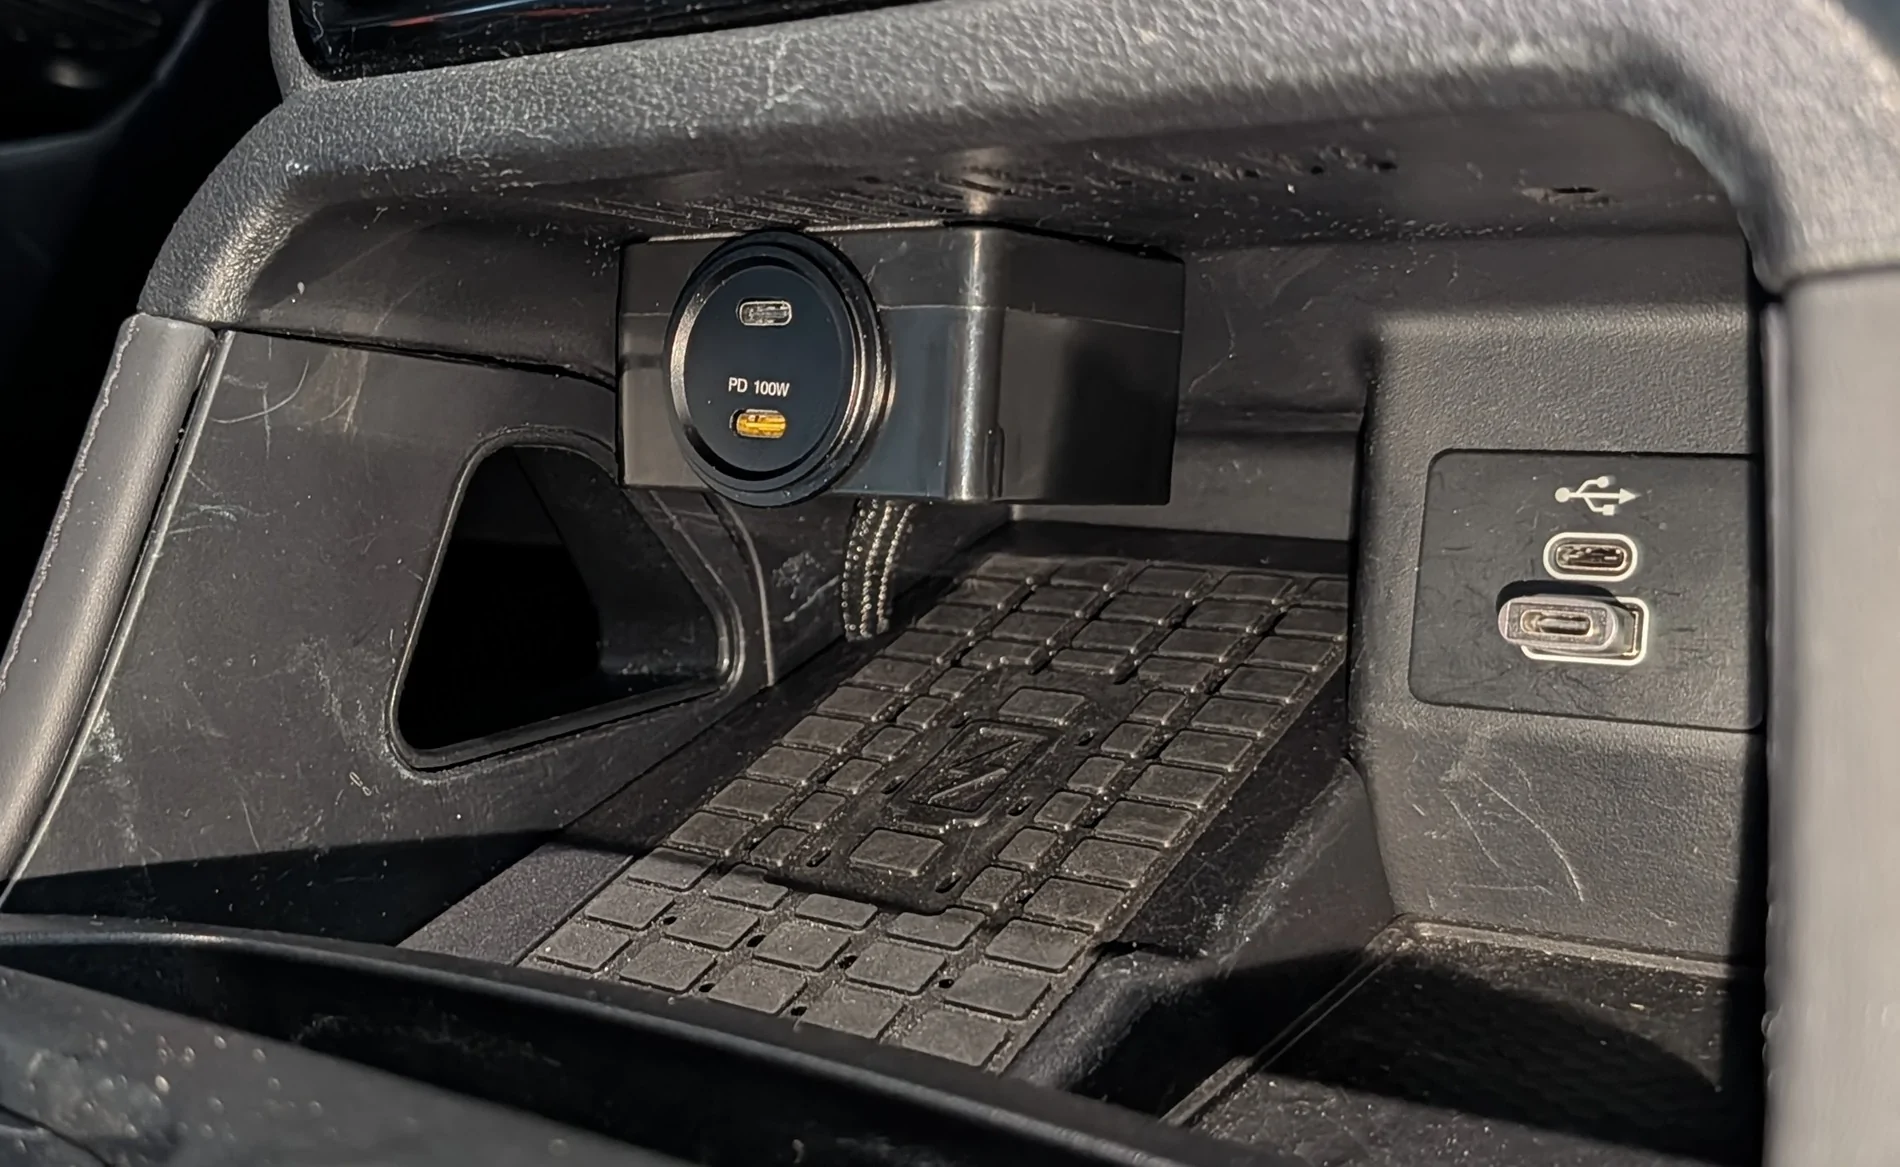
It turned out pretty nicely, just used off the shelf bits and it tucks away above the wireless charging mat. Added a dual USB-C 12v adapter with one 20 watt port and one 100 watt port (which seems to cap out at about 75 watts) and it fits into the storage area so you can't really see it when sitting in the front seats.

Parts and Tools Used
Parts
Tools
Prep and Drilling
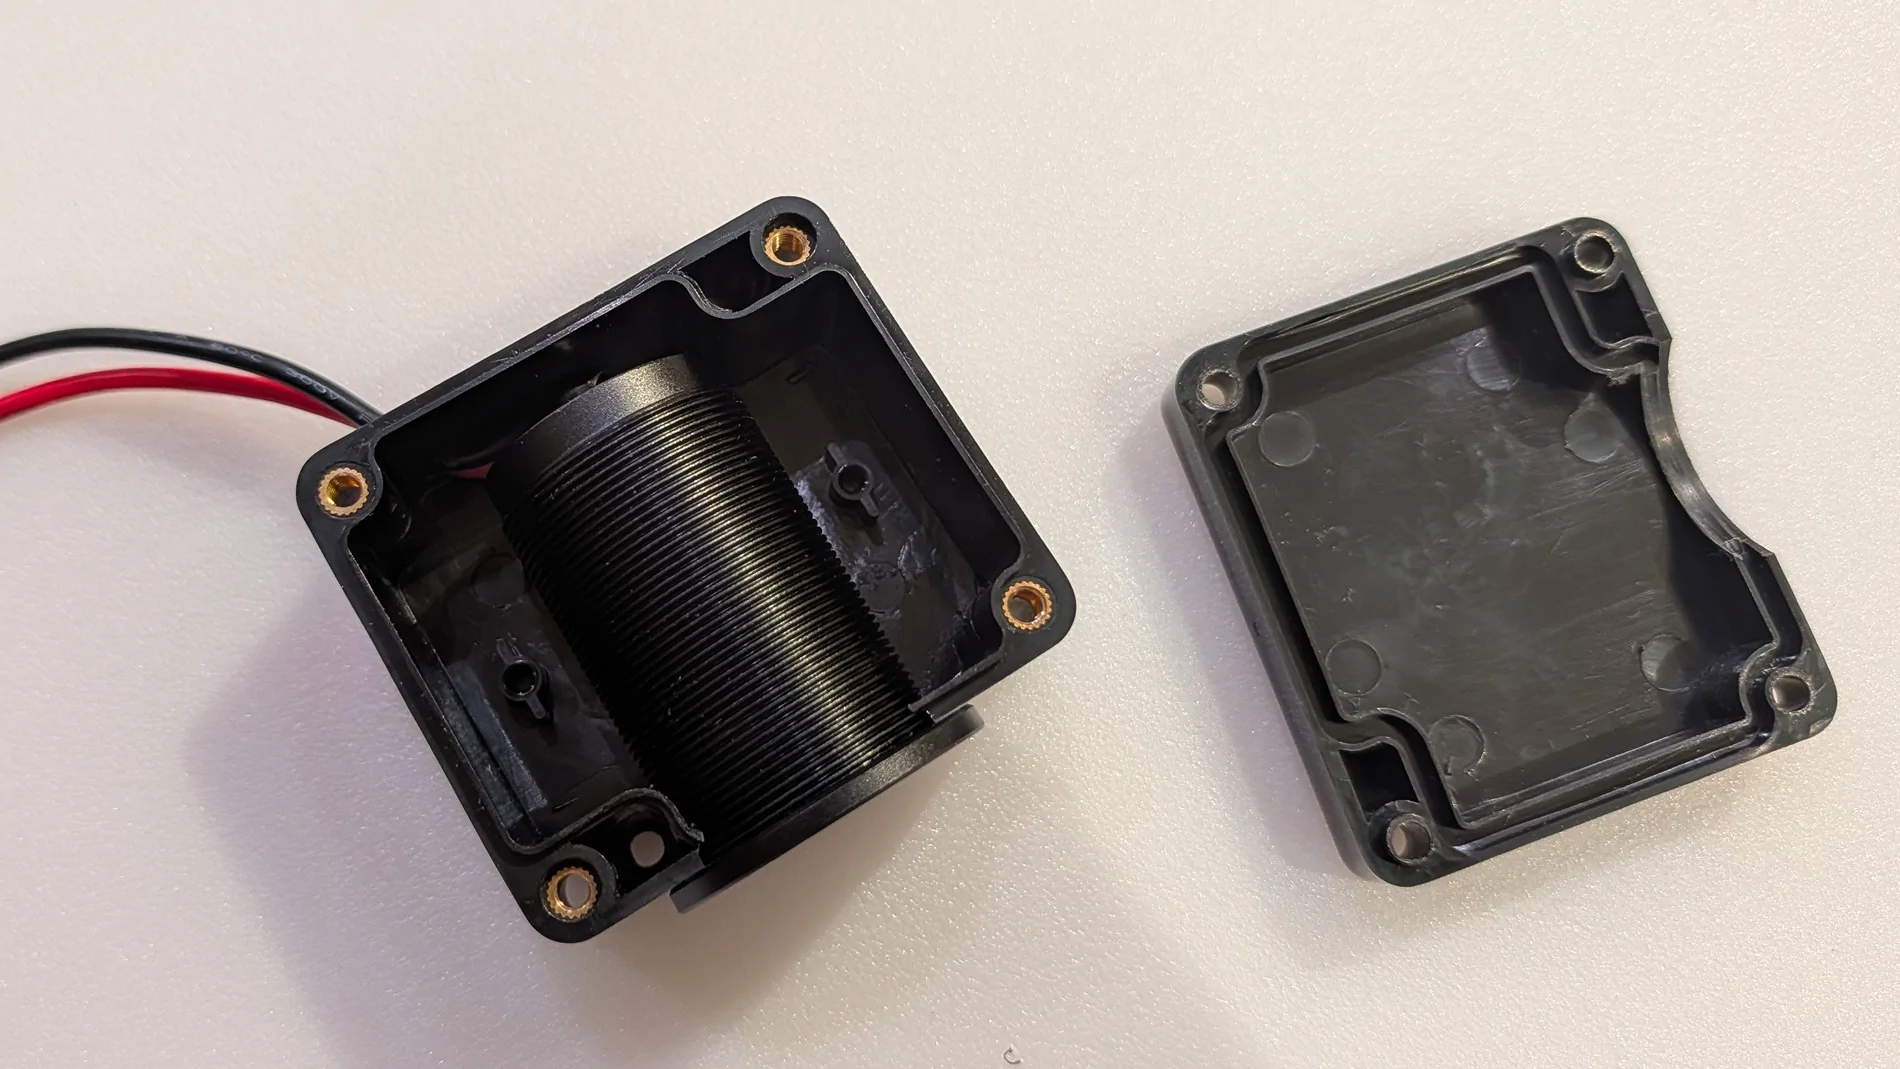
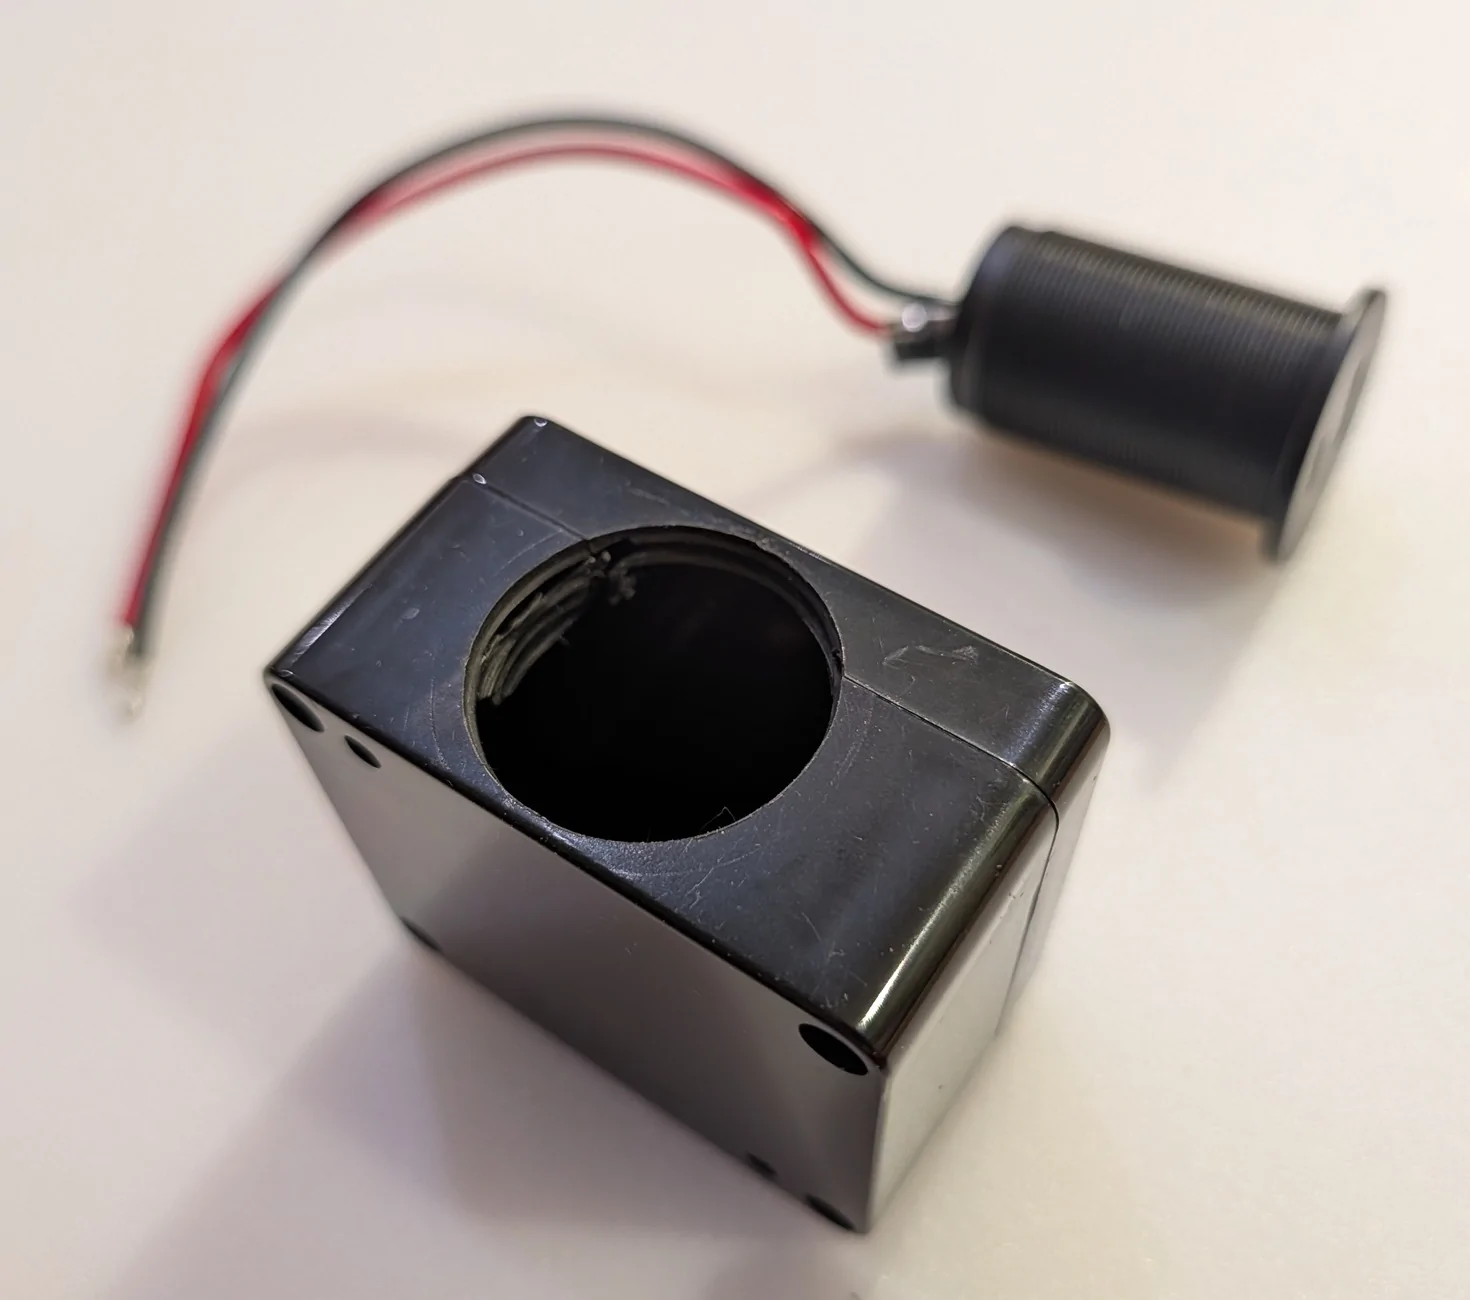
I tried a couple different boxes and found one that's a pretty good fit -- there's just barely enough room to drill a 1 1/8" hole using the step bit and to fit the adapter inside the box.


Install
To get the center panel open, you need to use a trim removal tool to take the trim off from around the gear shift. Under there are three 7mm socket head screws to remove, then the whole center console removes just by pulling up, there are a few clips but it's pretty easy to get removed. You don't need to unplug the console, it can just move to the side.
The power pad is very easy to remove, once those two screws are out you can just pull it up and then back. There are two clips at the front end that come out easily.
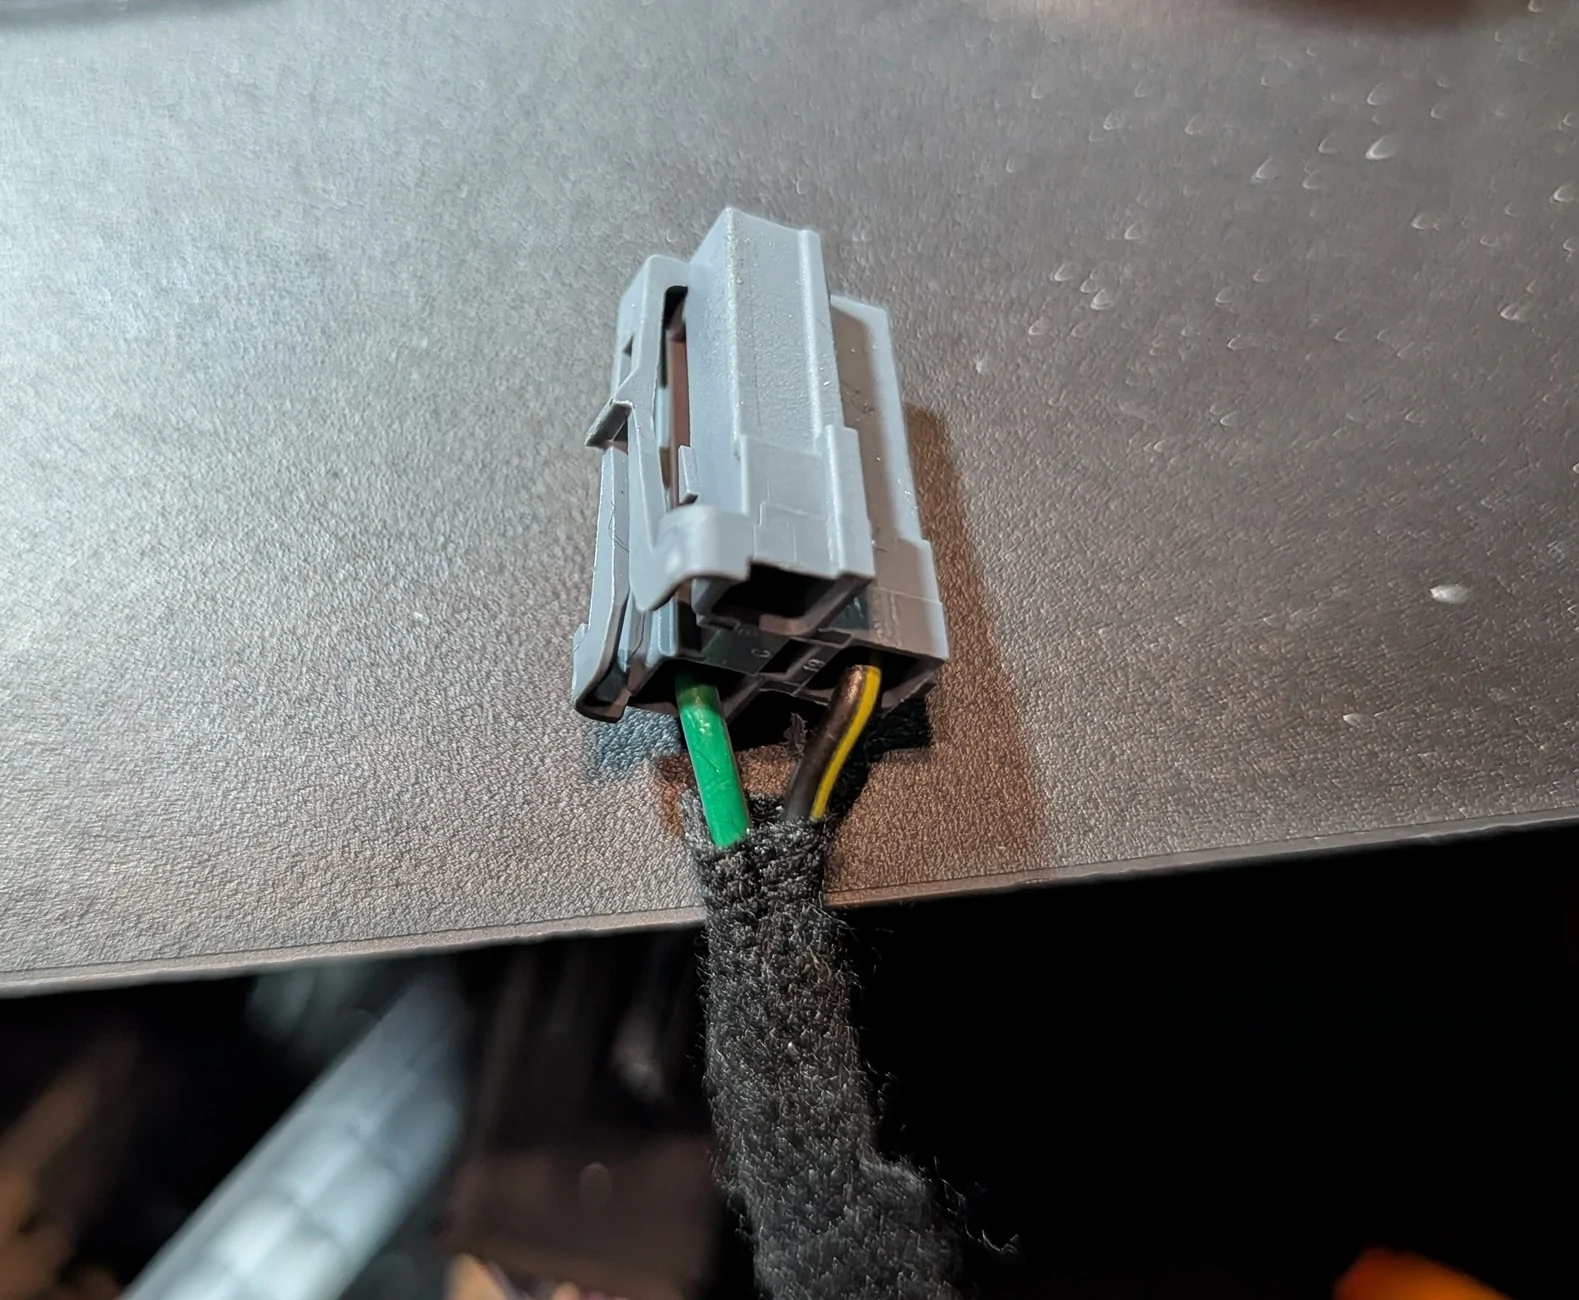
Here is the gore under the console and the highlighted plug from the 12v socket in the storage bin. See my previous thread about removing that socket -- I find those sockets basically useless, and I used that location for a GMRS radio handset RJ45 socket.

The green wire is positive (+) and the black wire is ground (-).

Once that's removed, at the front of the console are two more screws to remove so that the wireless power pad can be removed.
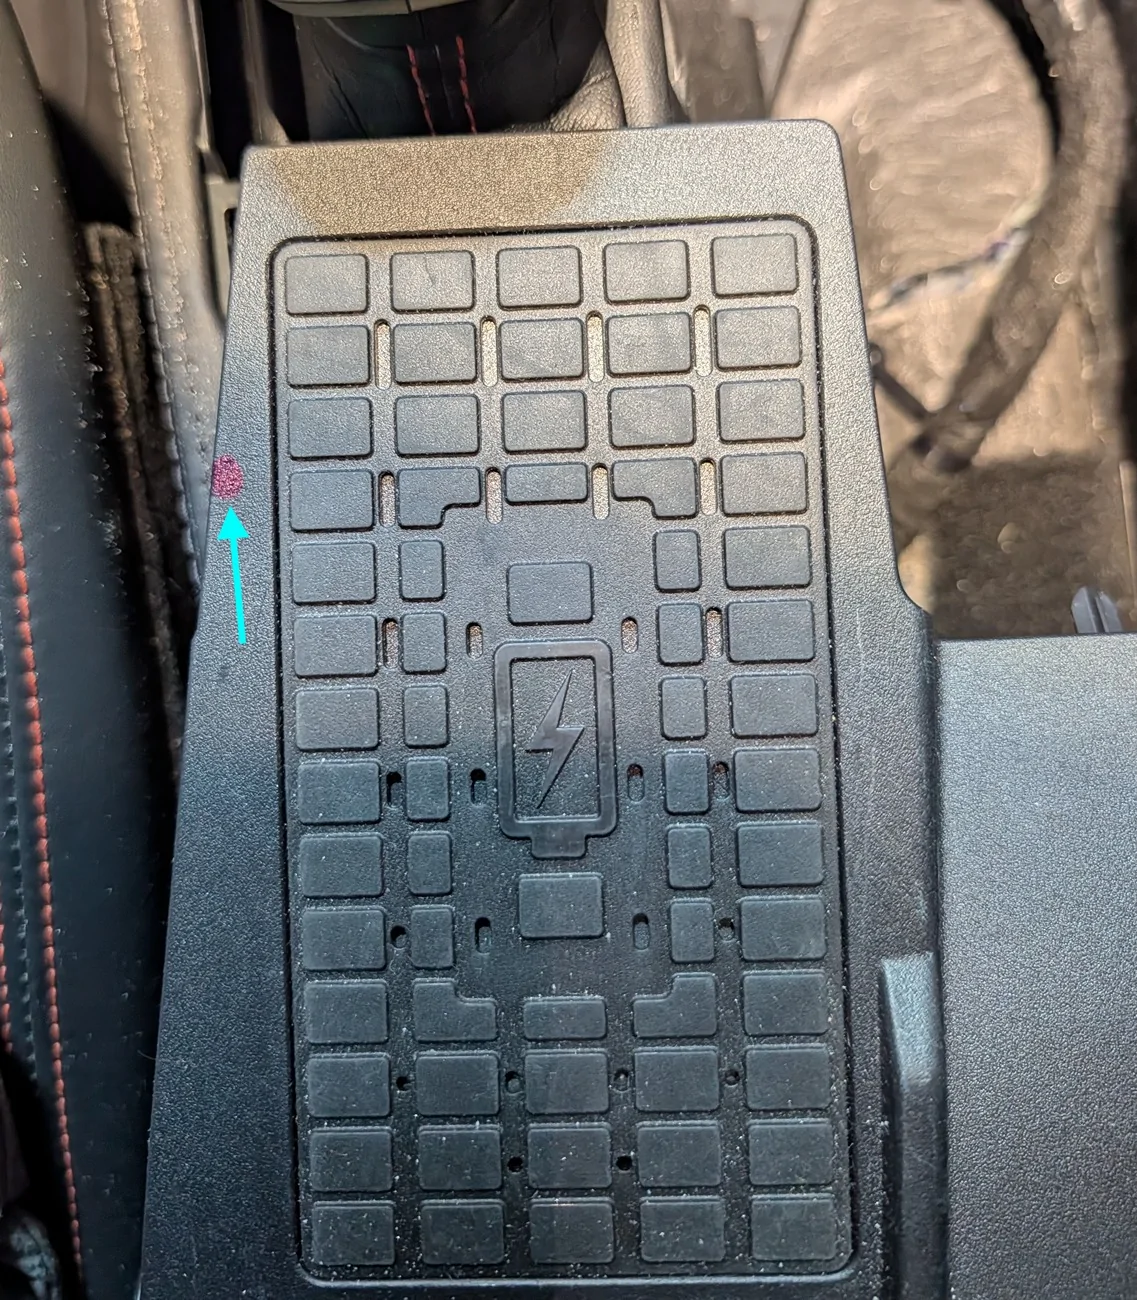
Using the rotary tool and bit, I cut a 1/4" hole in the side of the wireless charger mat, this is just the plastic trim around the charger.

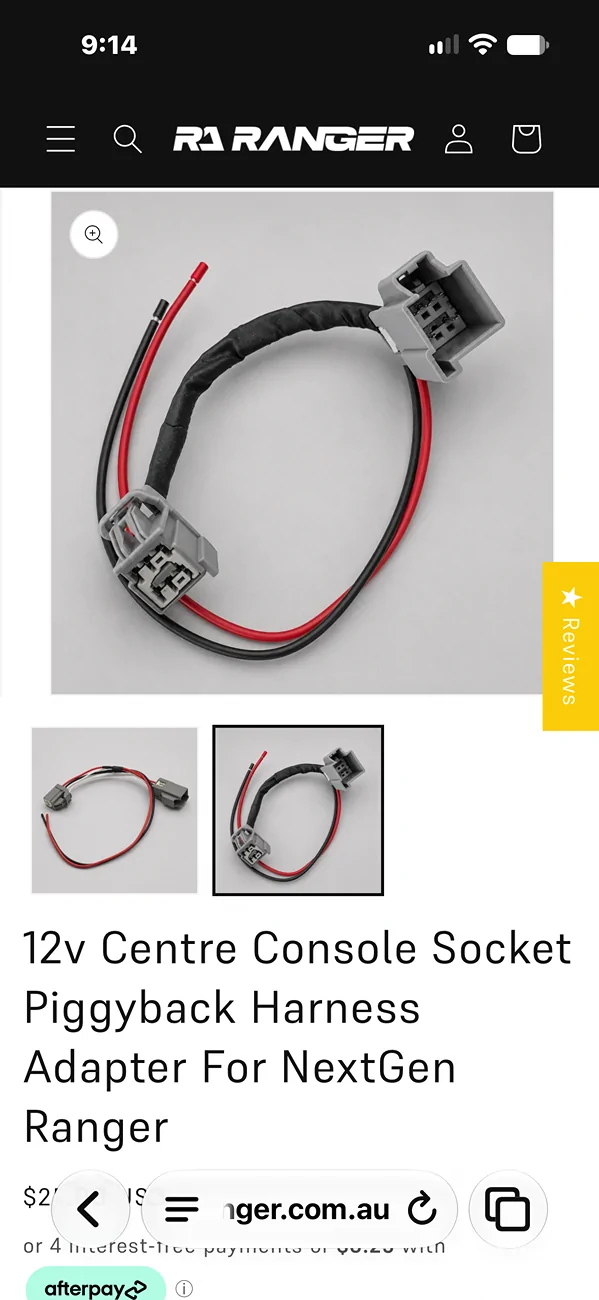
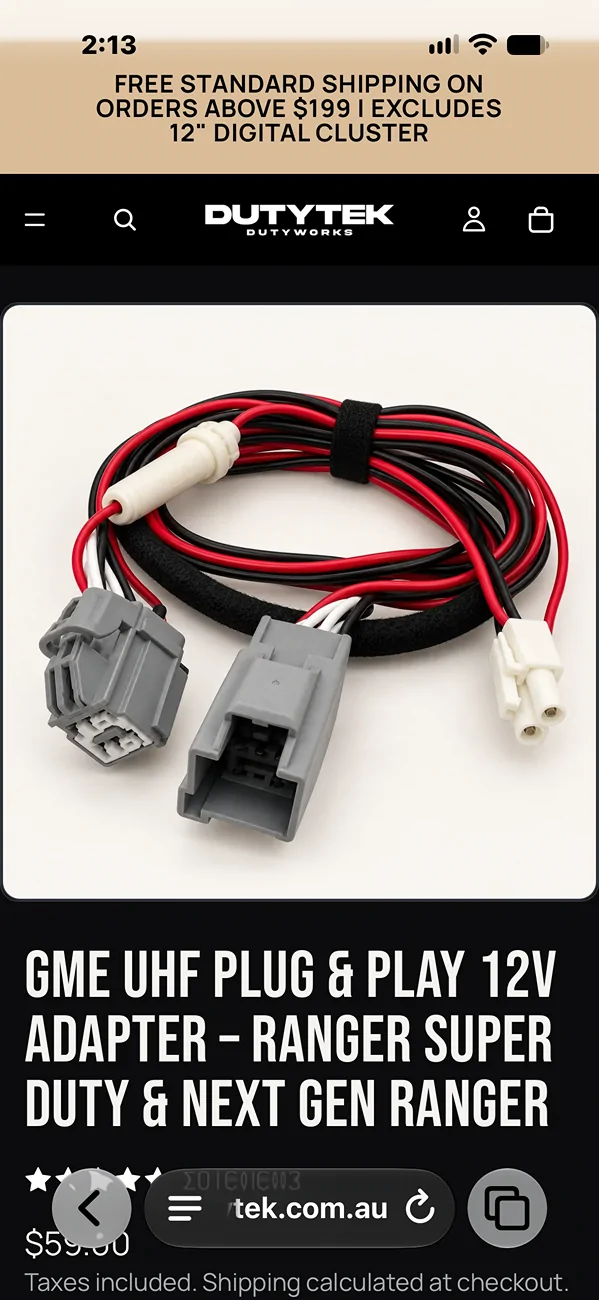
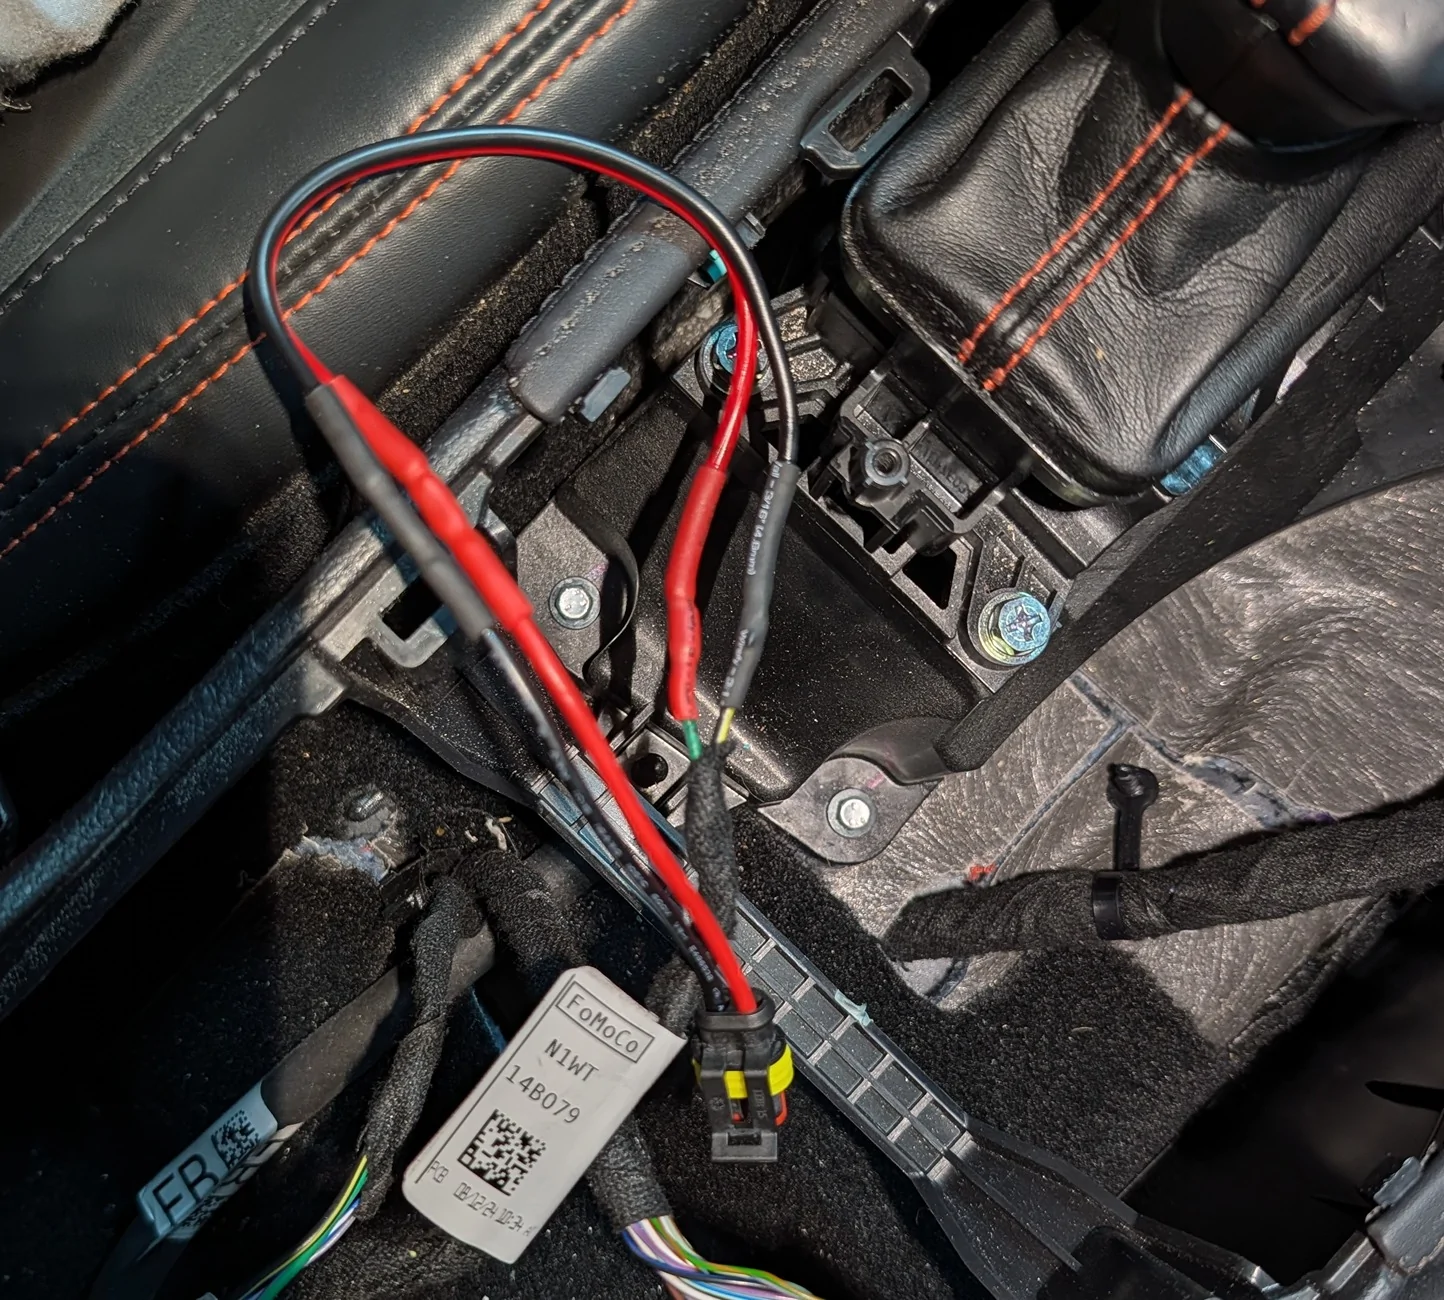
I added 6" of the 14g red/black wire after clipping off the socket that went to the storage bin 12v power port. I tried to find the same socket as Ford uses but I could only find replacement cigarette ports and didn't want to cannibalize one of those. Just easier to clip the existing plug off and replace it with something else.
Here you can see the extra wire and the new plug, soldered in and shrink wrapped. After this I wrapped it all in the black cable wrap and tucked it away.

Once you have the plug replaced and the hole drilled in the wireless pad, you pretty much just put everything back together. Tuck the cable away in the center console, plug everything in and assemble. I used 3M "VHB" trim attachment tape to stick the little box to the underside of the center console.

It turned out pretty nicely, just used off the shelf bits and it tucks away above the wireless charging mat. Added a dual USB-C 12v adapter with one 20 watt port and one 100 watt port (which seems to cap out at about 75 watts) and it fits into the storage area so you can't really see it when sitting in the front seats.
Parts and Tools Used
Parts
- 12v USB-C adapter: https://link.amazon/B05izrhdh
- 2.48 x 2.28 x 1.38 inch box: https://link.amazon/B05N6fszB
- 14g red/black wire: https://link.amazon/B00WZX5Fp
- 1/4" cable wrap: https://link.amazon/B01ZZtvWS
- Connectors: https://link.amazon/B05DsXiXg
Tools
- Step drill bit: https://link.amazon/B00VaENEy
- Vise: https://link.amazon/B0fs9nqTZ
- Trim removal tools: https://link.amazon/B0byuJEcO
- Also used a "rotary tool" and bit and a drill
Prep and Drilling
I tried a couple different boxes and found one that's a pretty good fit -- there's just barely enough room to drill a 1 1/8" hole using the step bit and to fit the adapter inside the box.
Install
To get the center panel open, you need to use a trim removal tool to take the trim off from around the gear shift. Under there are three 7mm socket head screws to remove, then the whole center console removes just by pulling up, there are a few clips but it's pretty easy to get removed. You don't need to unplug the console, it can just move to the side.
The power pad is very easy to remove, once those two screws are out you can just pull it up and then back. There are two clips at the front end that come out easily.
Here is the gore under the console and the highlighted plug from the 12v socket in the storage bin. See my previous thread about removing that socket -- I find those sockets basically useless, and I used that location for a GMRS radio handset RJ45 socket.
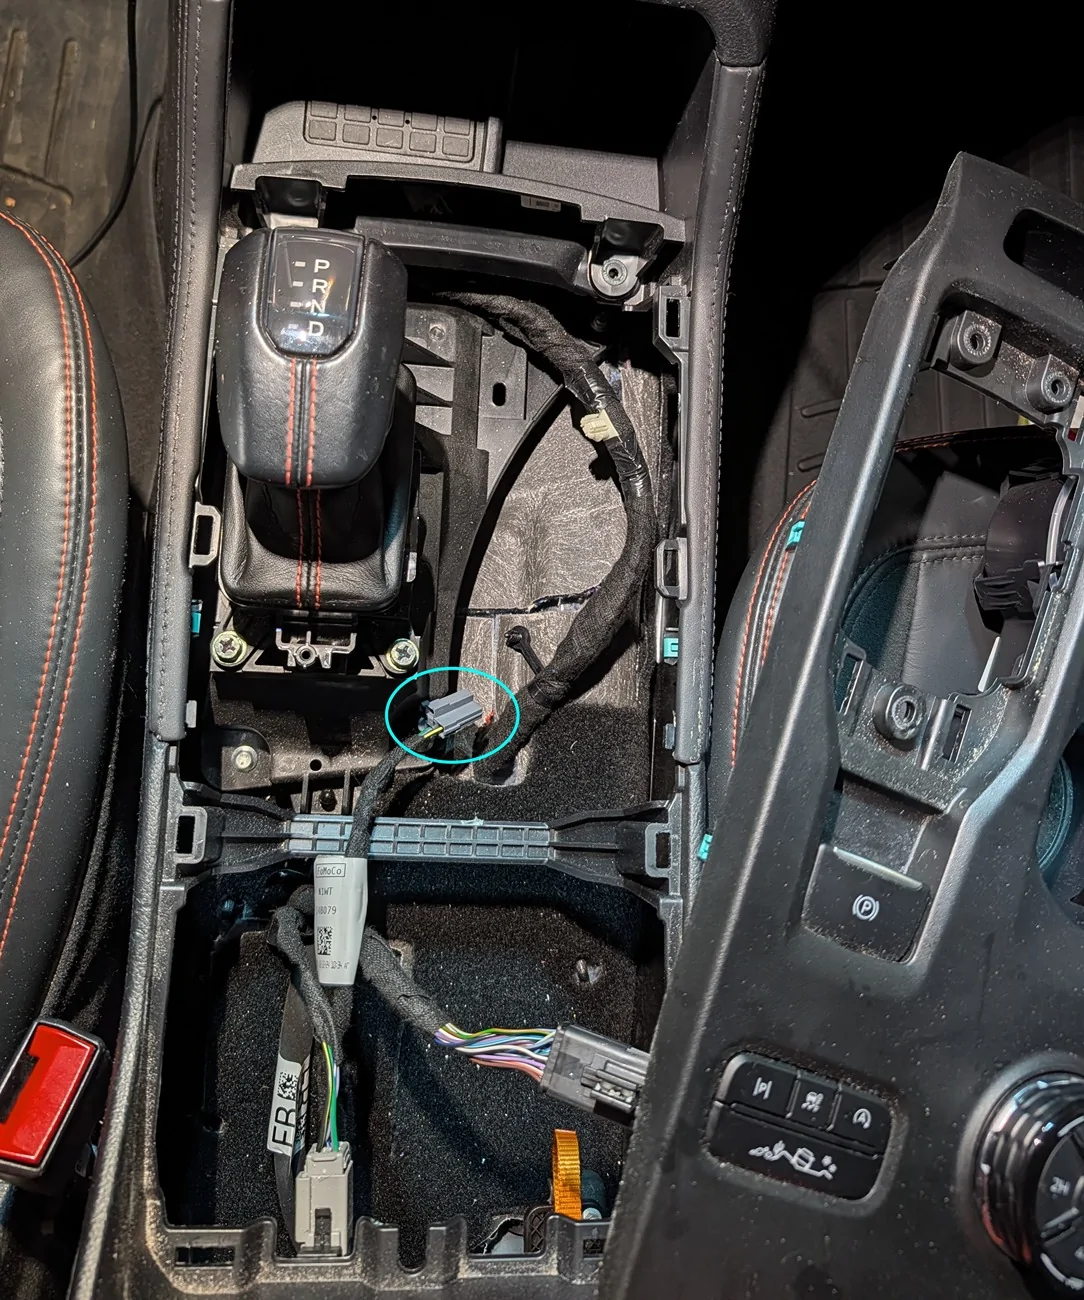
The green wire is positive (+) and the black wire is ground (-).
Once that's removed, at the front of the console are two more screws to remove so that the wireless power pad can be removed.
Using the rotary tool and bit, I cut a 1/4" hole in the side of the wireless charger mat, this is just the plastic trim around the charger.
I added 6" of the 14g red/black wire after clipping off the socket that went to the storage bin 12v power port. I tried to find the same socket as Ford uses but I could only find replacement cigarette ports and didn't want to cannibalize one of those. Just easier to clip the existing plug off and replace it with something else.
Here you can see the extra wire and the new plug, soldered in and shrink wrapped. After this I wrapped it all in the black cable wrap and tucked it away.
Once you have the plug replaced and the hole drilled in the wireless pad, you pretty much just put everything back together. Tuck the cable away in the center console, plug everything in and assemble. I used 3M "VHB" trim attachment tape to stick the little box to the underside of the center console.
Sponsored
Last edited: