duhtroll
Member
- Thread starter
- #1
Well I finally got to this yesterday and today. Not that it took that long but I doubled up on the install of a couple of light kits (ditch lights for my upcoming trailer build plus a bed light kit) and I went back and forth between them with the Lion's share of time to the running of wires through our extremely crowded and unforgiving engine bay when it comes to finding space.
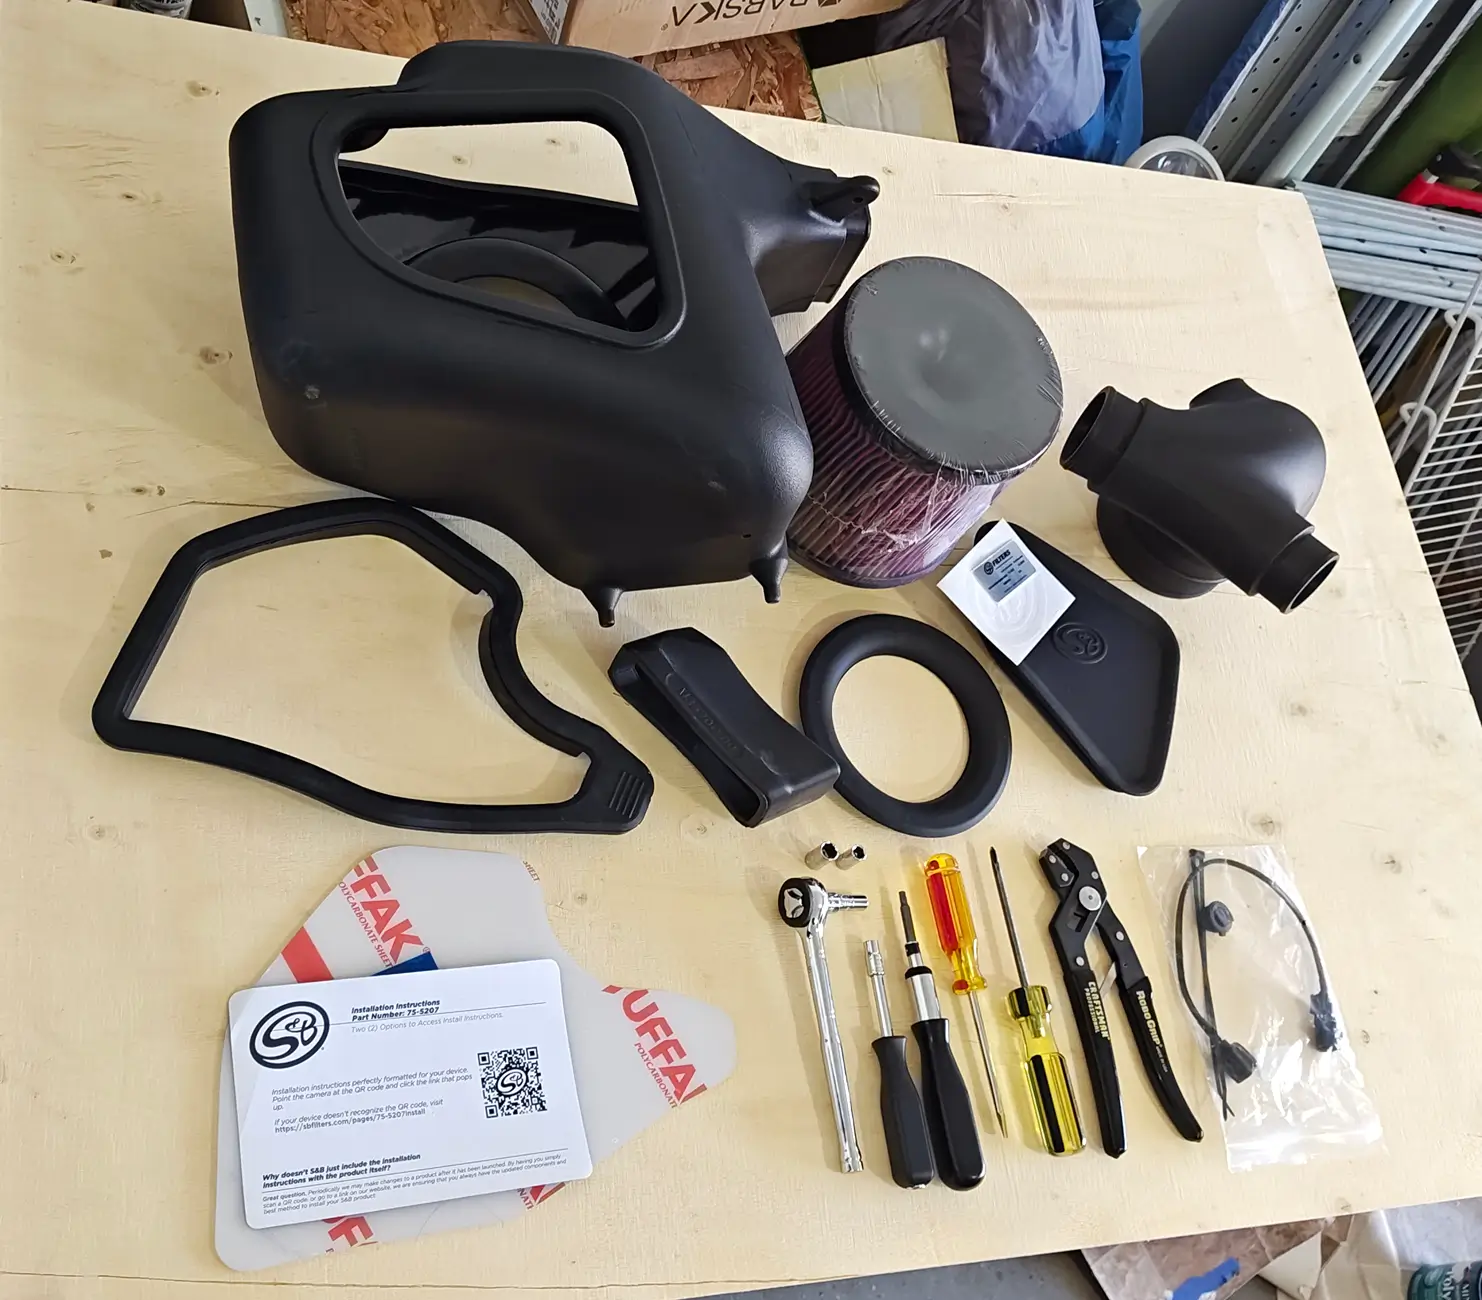
Anyway, right out of the box this is not a difficult install. I am not a mechanic and I am better with fine tools and magnifying glasses than with larger stuff like cars. This is the third intake I have done in my life so it was not unfamiliar. If you're wondering if you can do this, you can if you have the tools listed on the QR code page in the kit. A few sockets, screwdrivers, a trim tool (which you can use a large flathead - I just cut the pins and re-zip tied things back in place as I find those Christmas tree style pins really annoying).
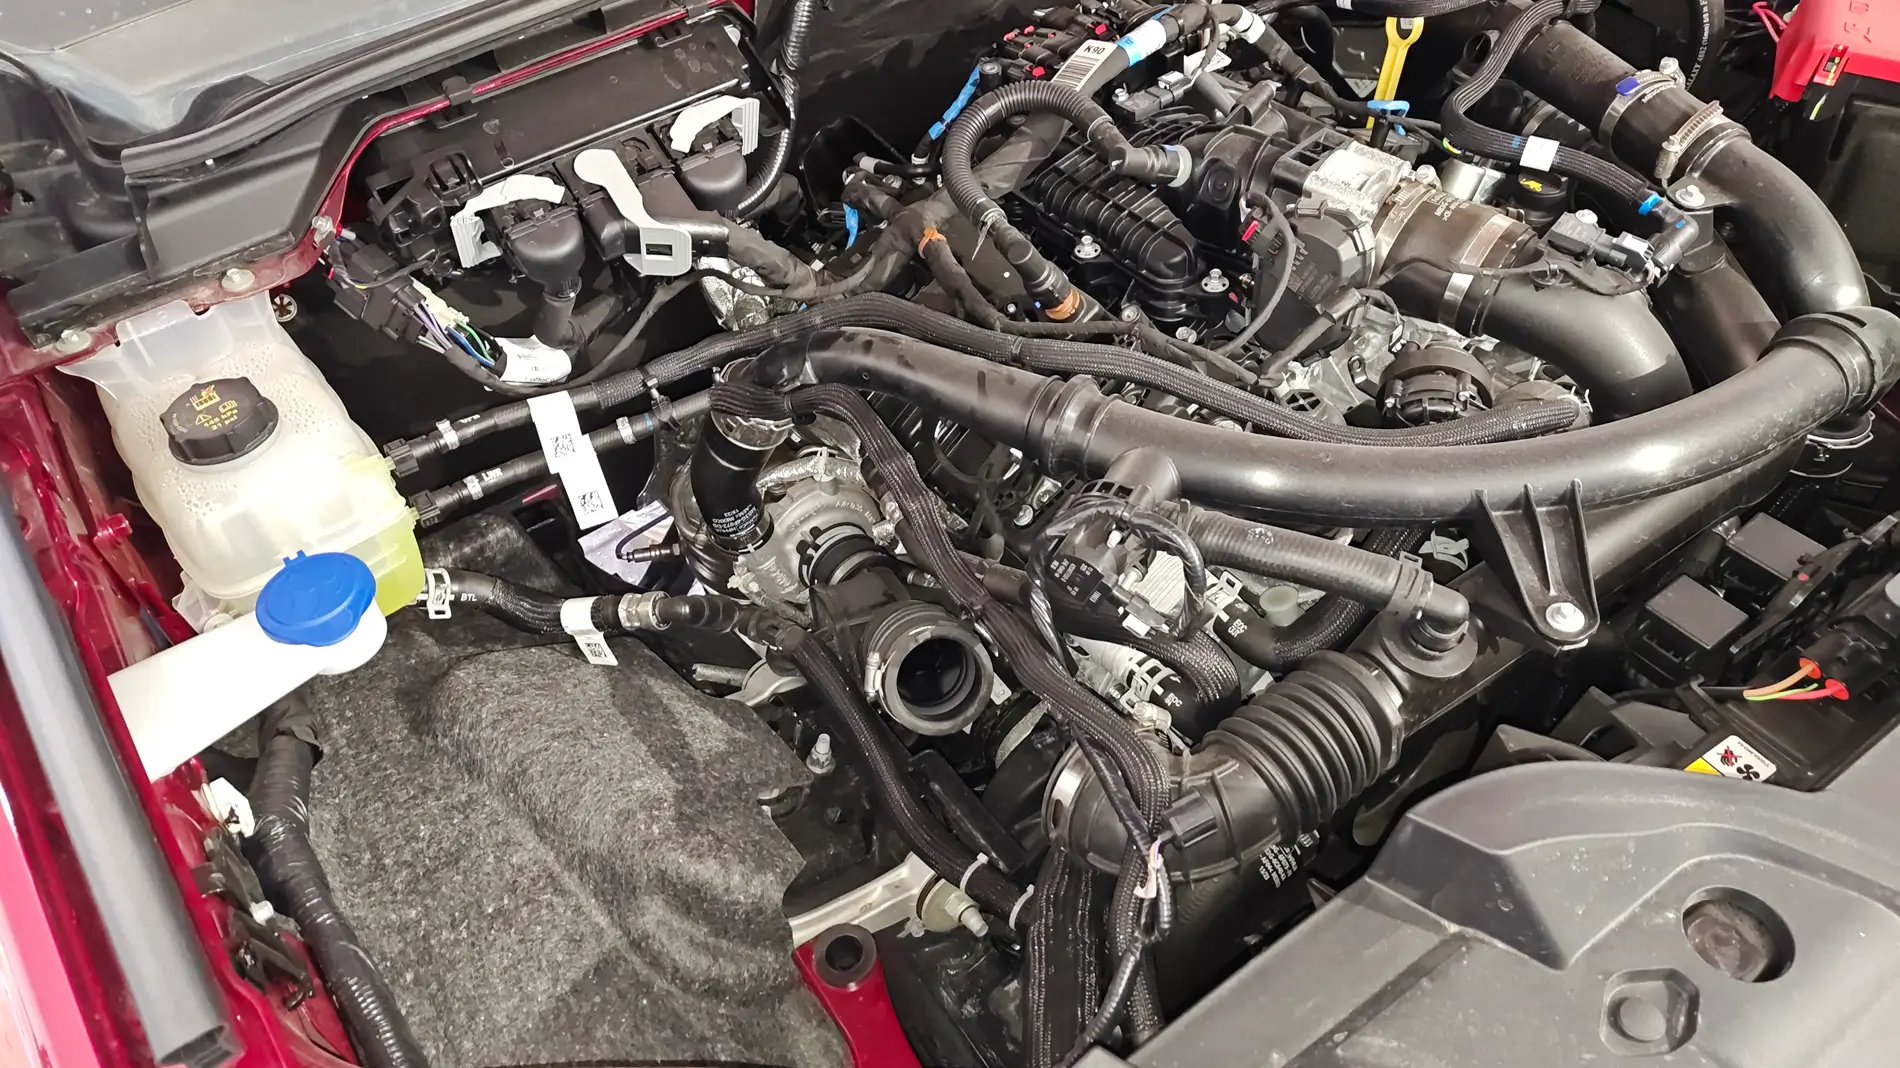
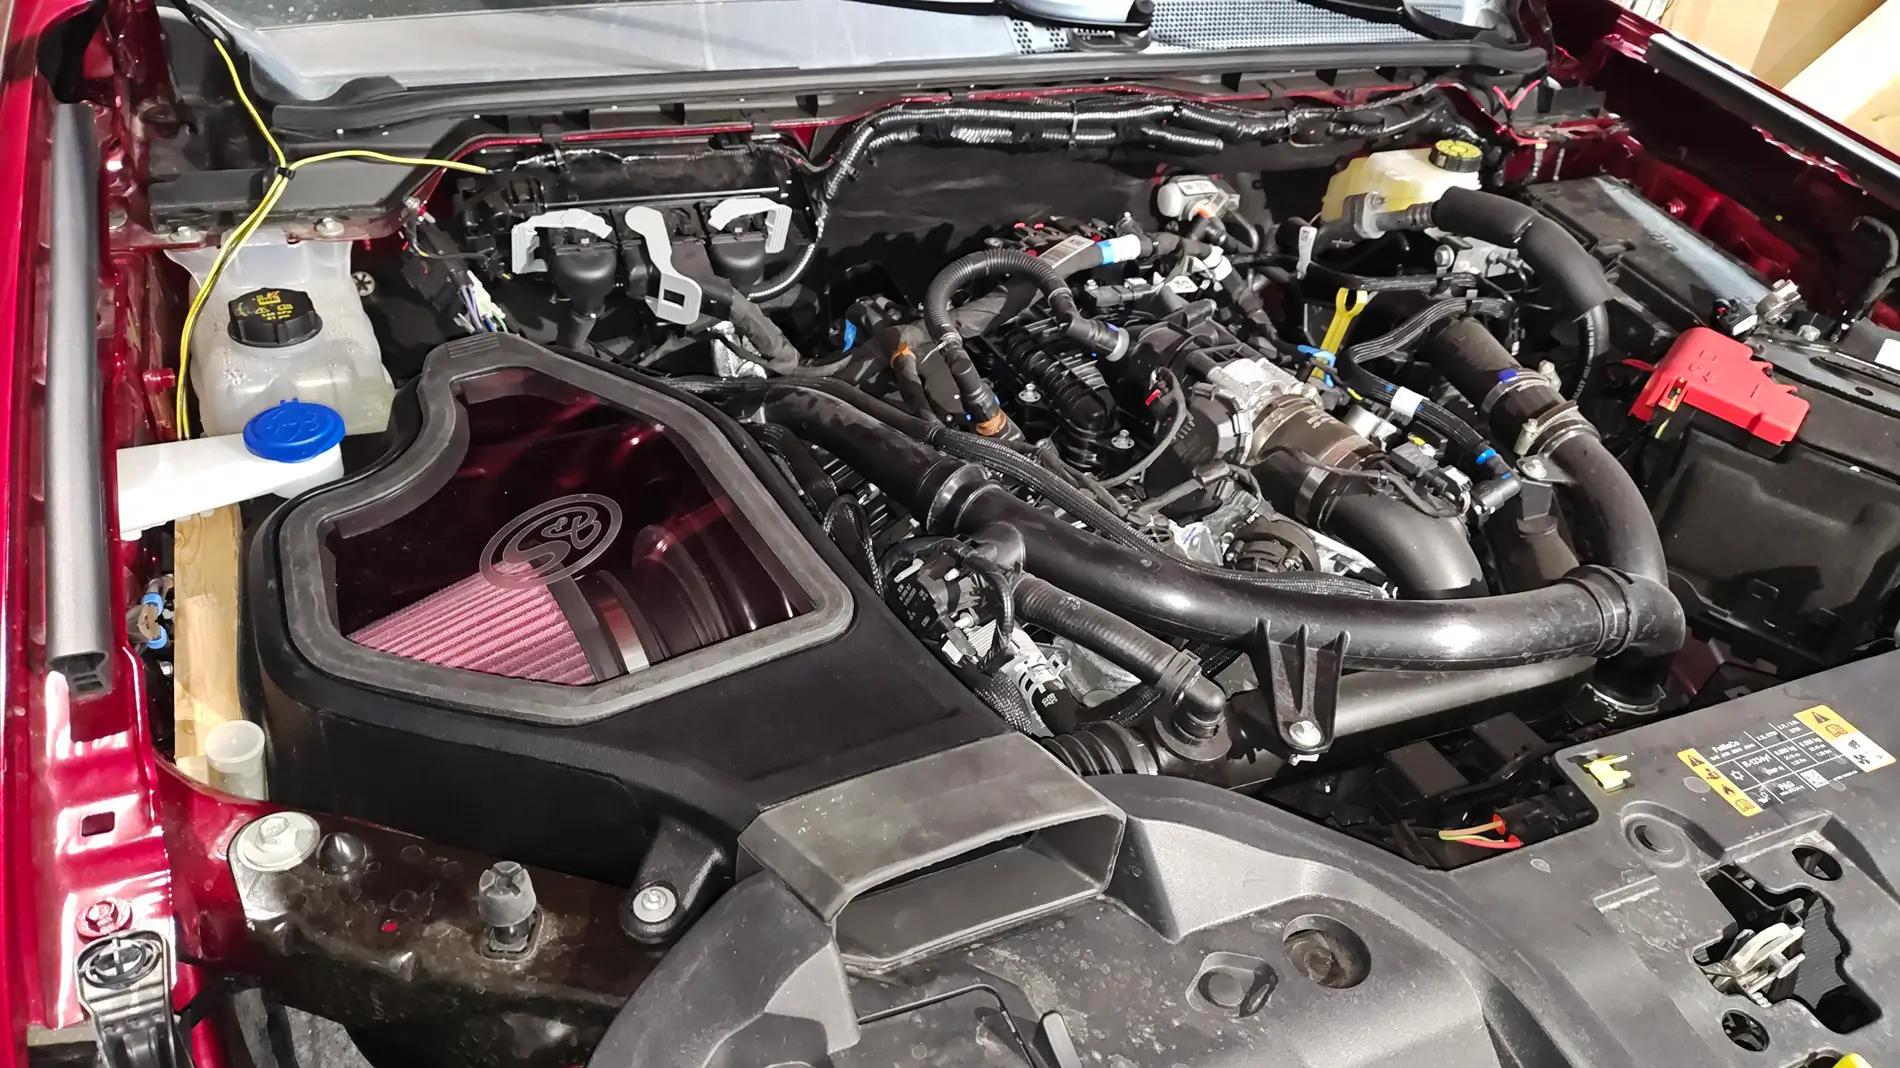
I figured with the bulk of this thing it would take quite a bit of shimmying etc. to get it to fit where the stock box was. Really that part only took about 15 minutes including tightening the intake clamps. Since I am very deliberate there was the mandatory hour of taking everything out of the box and staring at it, watching the video twice, laying out parts and tools, etc. before I started. Then while the adhesive was drying (not supposedly necessary but the fender/side cover to the airbox - which is optional it says - didn't fit properly and kept popping out of its place so I glued it down with some e6000 and will let it cure a couple days) I went back to swearing at the light cables paths. That's what the wood block and epoxy tube are doing in the photo - holding the side rubber plug in place while it dries.
The sensor was a little trouble to get removed but that was the angle at which it was installed and not that it would have been difficult otherwise. The new extension cable popped right in.
Since I followed the instructions on keeping the negative battery terminal off for several hours (it recommends two), I have no codes upon restart. I won't drive it tomorrow until I finish the cables in the bed but everything looks like it went in with no problems.


Anyway, right out of the box this is not a difficult install. I am not a mechanic and I am better with fine tools and magnifying glasses than with larger stuff like cars. This is the third intake I have done in my life so it was not unfamiliar. If you're wondering if you can do this, you can if you have the tools listed on the QR code page in the kit. A few sockets, screwdrivers, a trim tool (which you can use a large flathead - I just cut the pins and re-zip tied things back in place as I find those Christmas tree style pins really annoying).
I figured with the bulk of this thing it would take quite a bit of shimmying etc. to get it to fit where the stock box was. Really that part only took about 15 minutes including tightening the intake clamps. Since I am very deliberate there was the mandatory hour of taking everything out of the box and staring at it, watching the video twice, laying out parts and tools, etc. before I started. Then while the adhesive was drying (not supposedly necessary but the fender/side cover to the airbox - which is optional it says - didn't fit properly and kept popping out of its place so I glued it down with some e6000 and will let it cure a couple days) I went back to swearing at the light cables paths. That's what the wood block and epoxy tube are doing in the photo - holding the side rubber plug in place while it dries.
The sensor was a little trouble to get removed but that was the angle at which it was installed and not that it would have been difficult otherwise. The new extension cable popped right in.
Since I followed the instructions on keeping the negative battery terminal off for several hours (it recommends two), I have no codes upon restart. I won't drive it tomorrow until I finish the cables in the bed but everything looks like it went in with no problems.

Sponsored
Last edited: