HyperM3
Well-Known Member
- First Name
- Alex
- Joined
- Jan 11, 2024
- Threads
- 39
- Messages
- 626
- Reaction score
- 570
- Location
- Lawrenceville, NJ
- Vehicle(s)
- 2024 Ranger Raptor Velocity Blue
- Thread starter
- #1
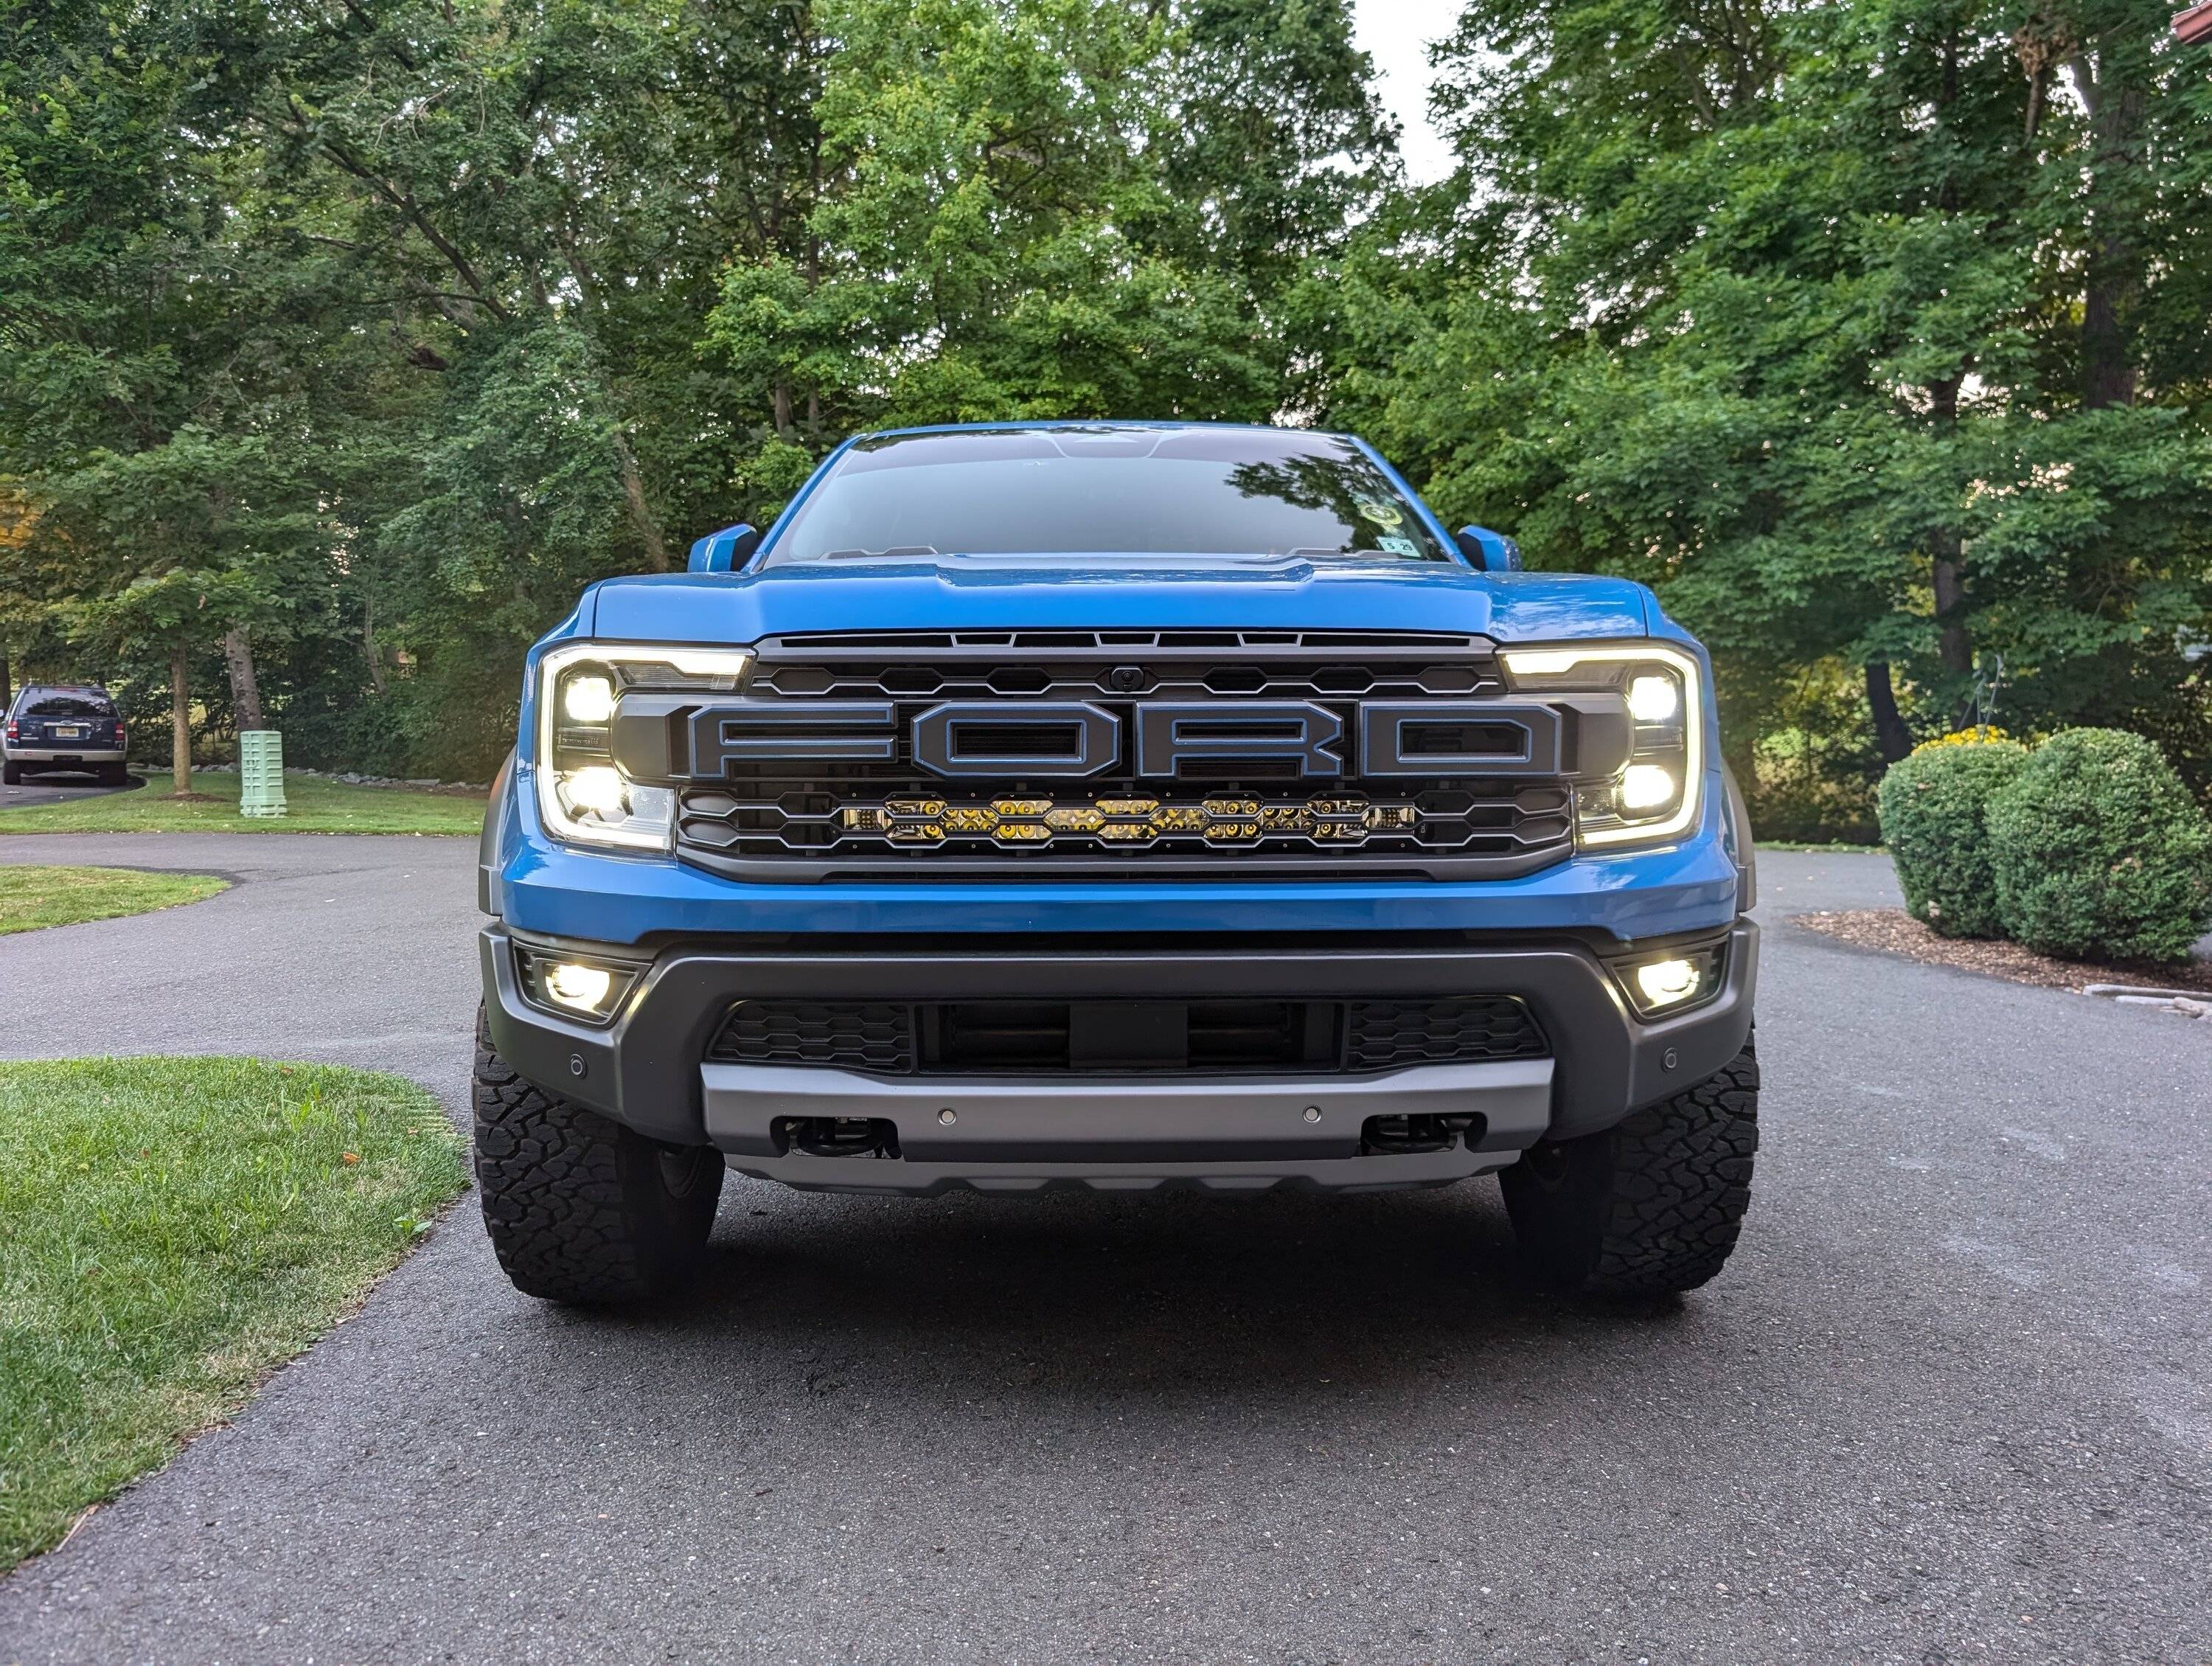
I ordered the light bar from Altiq in Australia. It took almost a month for it to arrive. So dont get discouraged if you order one and dont get any updates on the shipping for a while.
I would say the install is about a 3 out of 5. Not really challenging if you follow the youtube videos already online, and dont fear popping things out of place when they make noises like you are breaking them but you really arent.
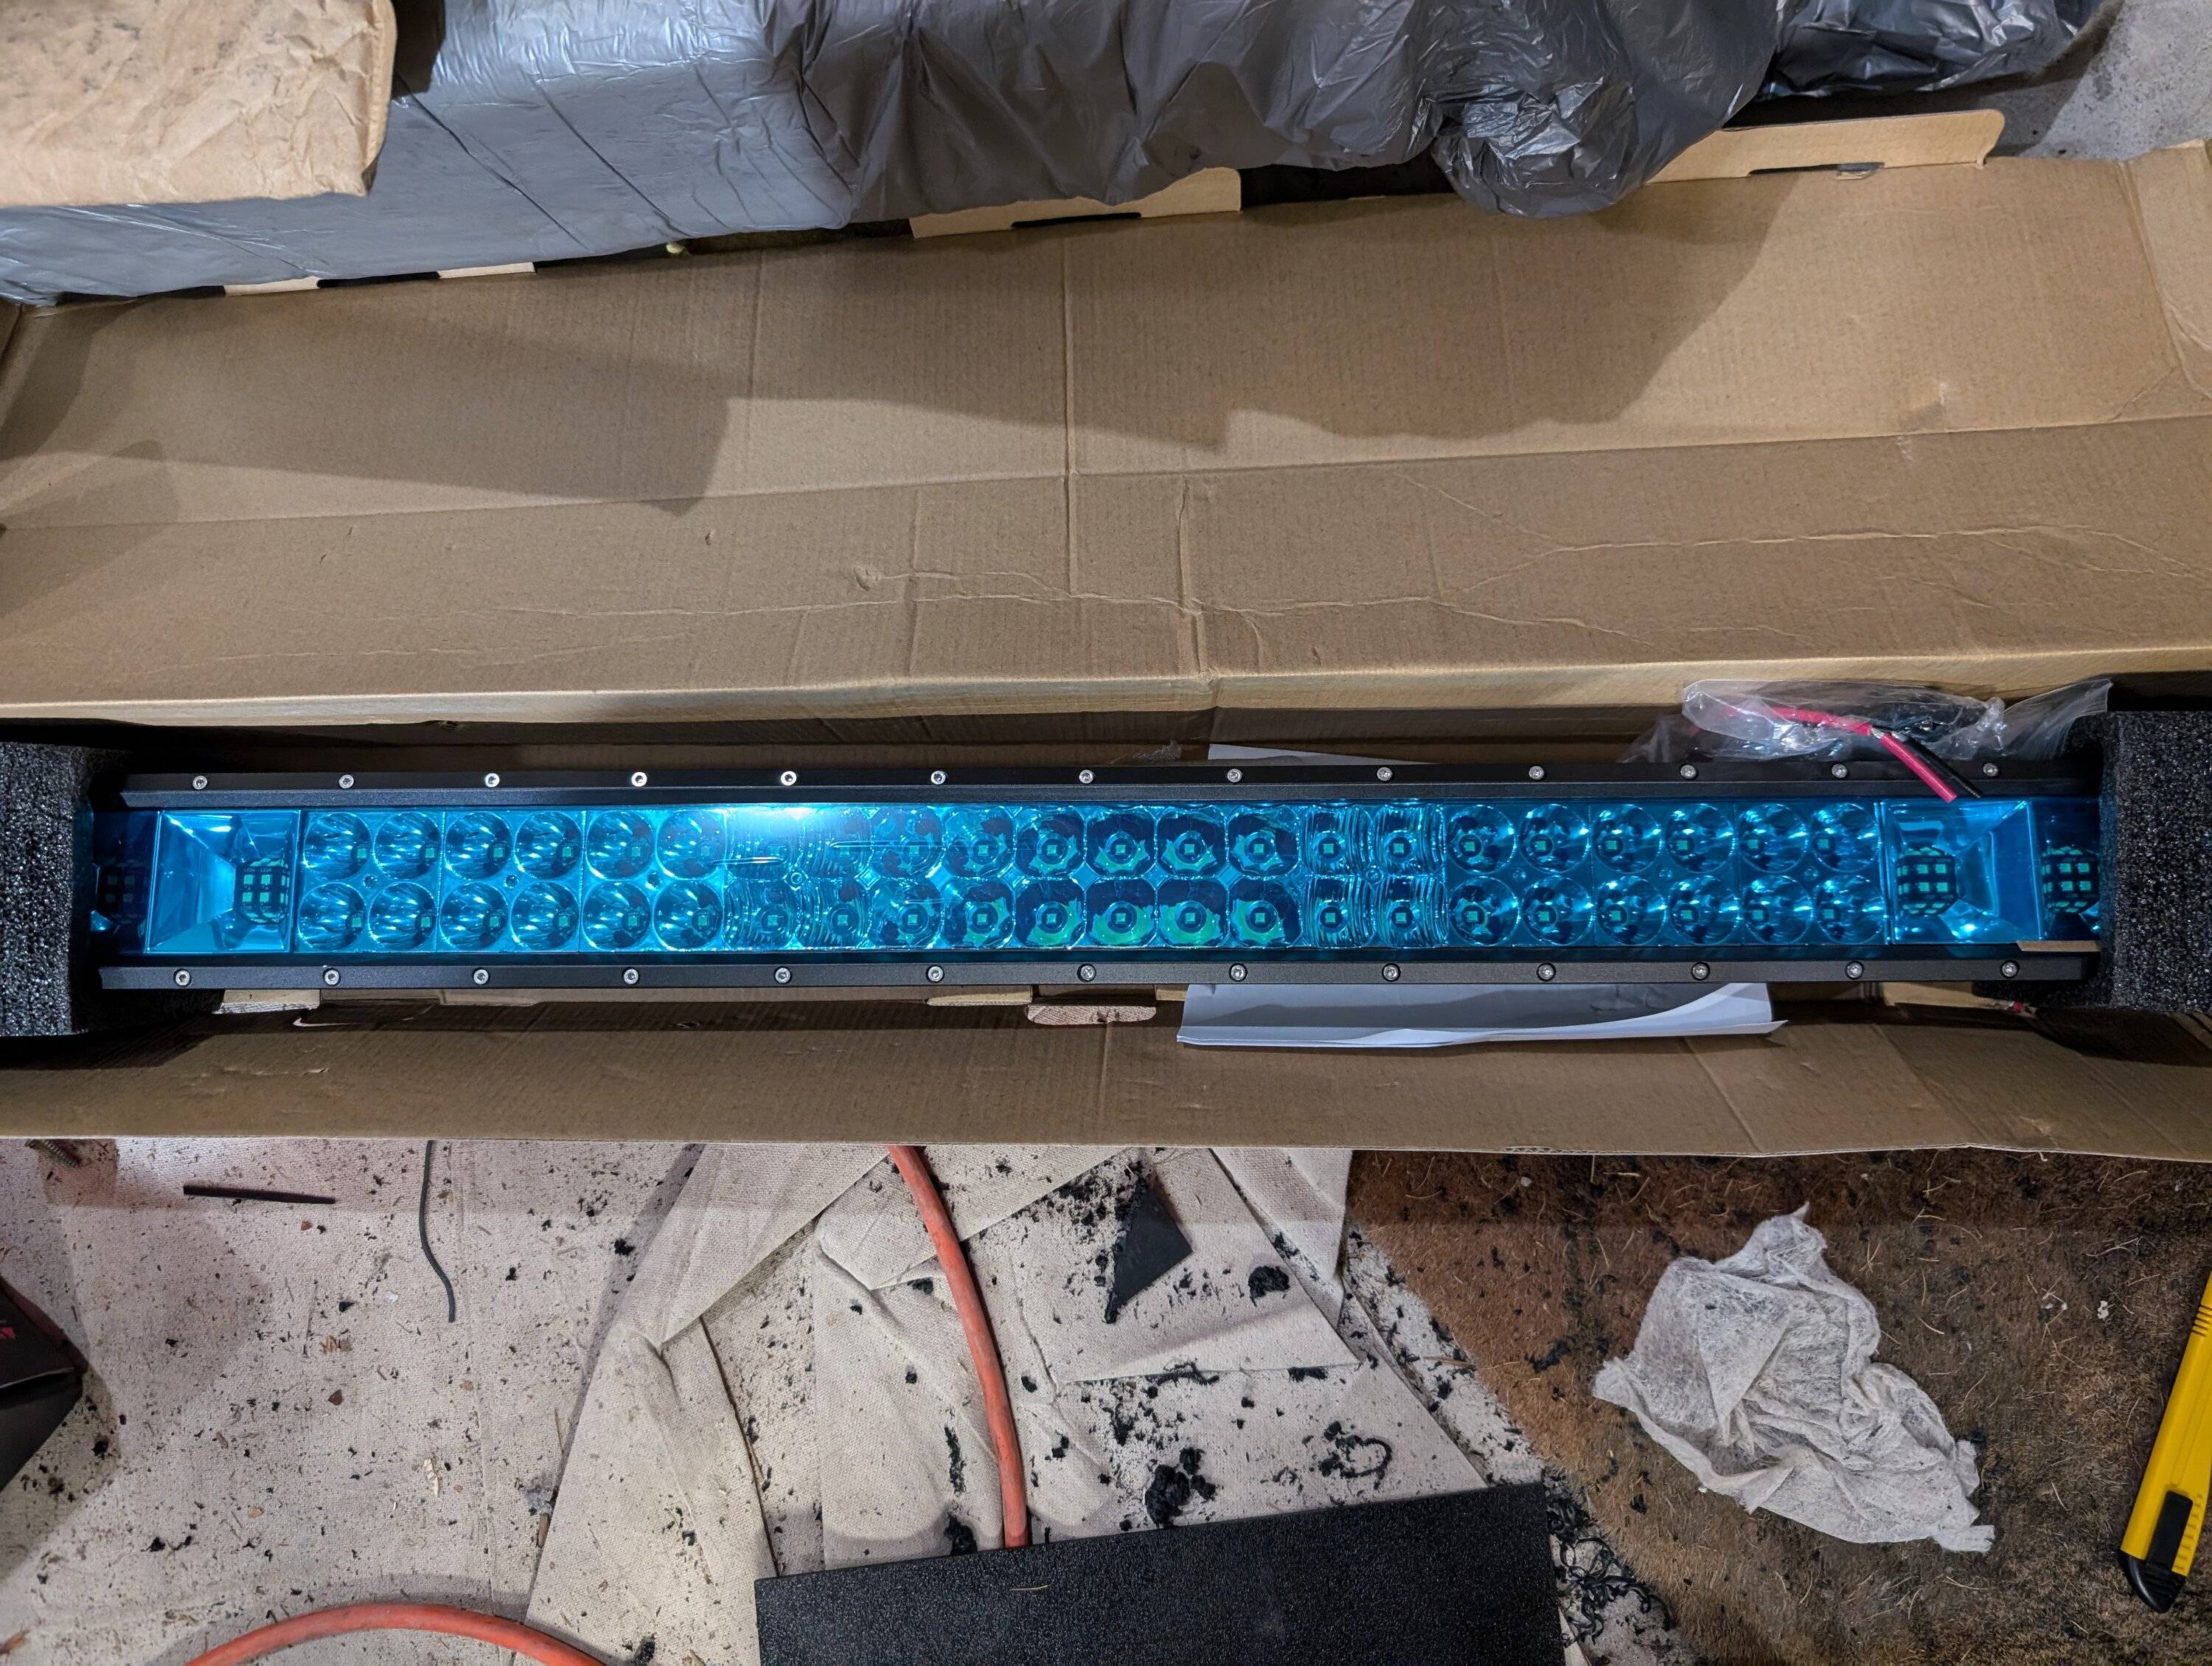
After removing the bar from the box I installed the mounts to the sides. Pretty simple. Then I popped all the little plastic rivets out of the top plastic to remove that piece. After that I removed the bottom plastic bar below the grill starting from the passenger side moving to the right. Once you get past the first pop, the rest are pretty easy.
Then you have the 3 screws on the bottom and the two at the top. Like the videos state, dont forget to disconnect the hose for the front sprayer and the cable for the front camera.
Then I removed the grill again from the passenger side to the drivers side. Pops off pretty easy once you get a good grip on it.
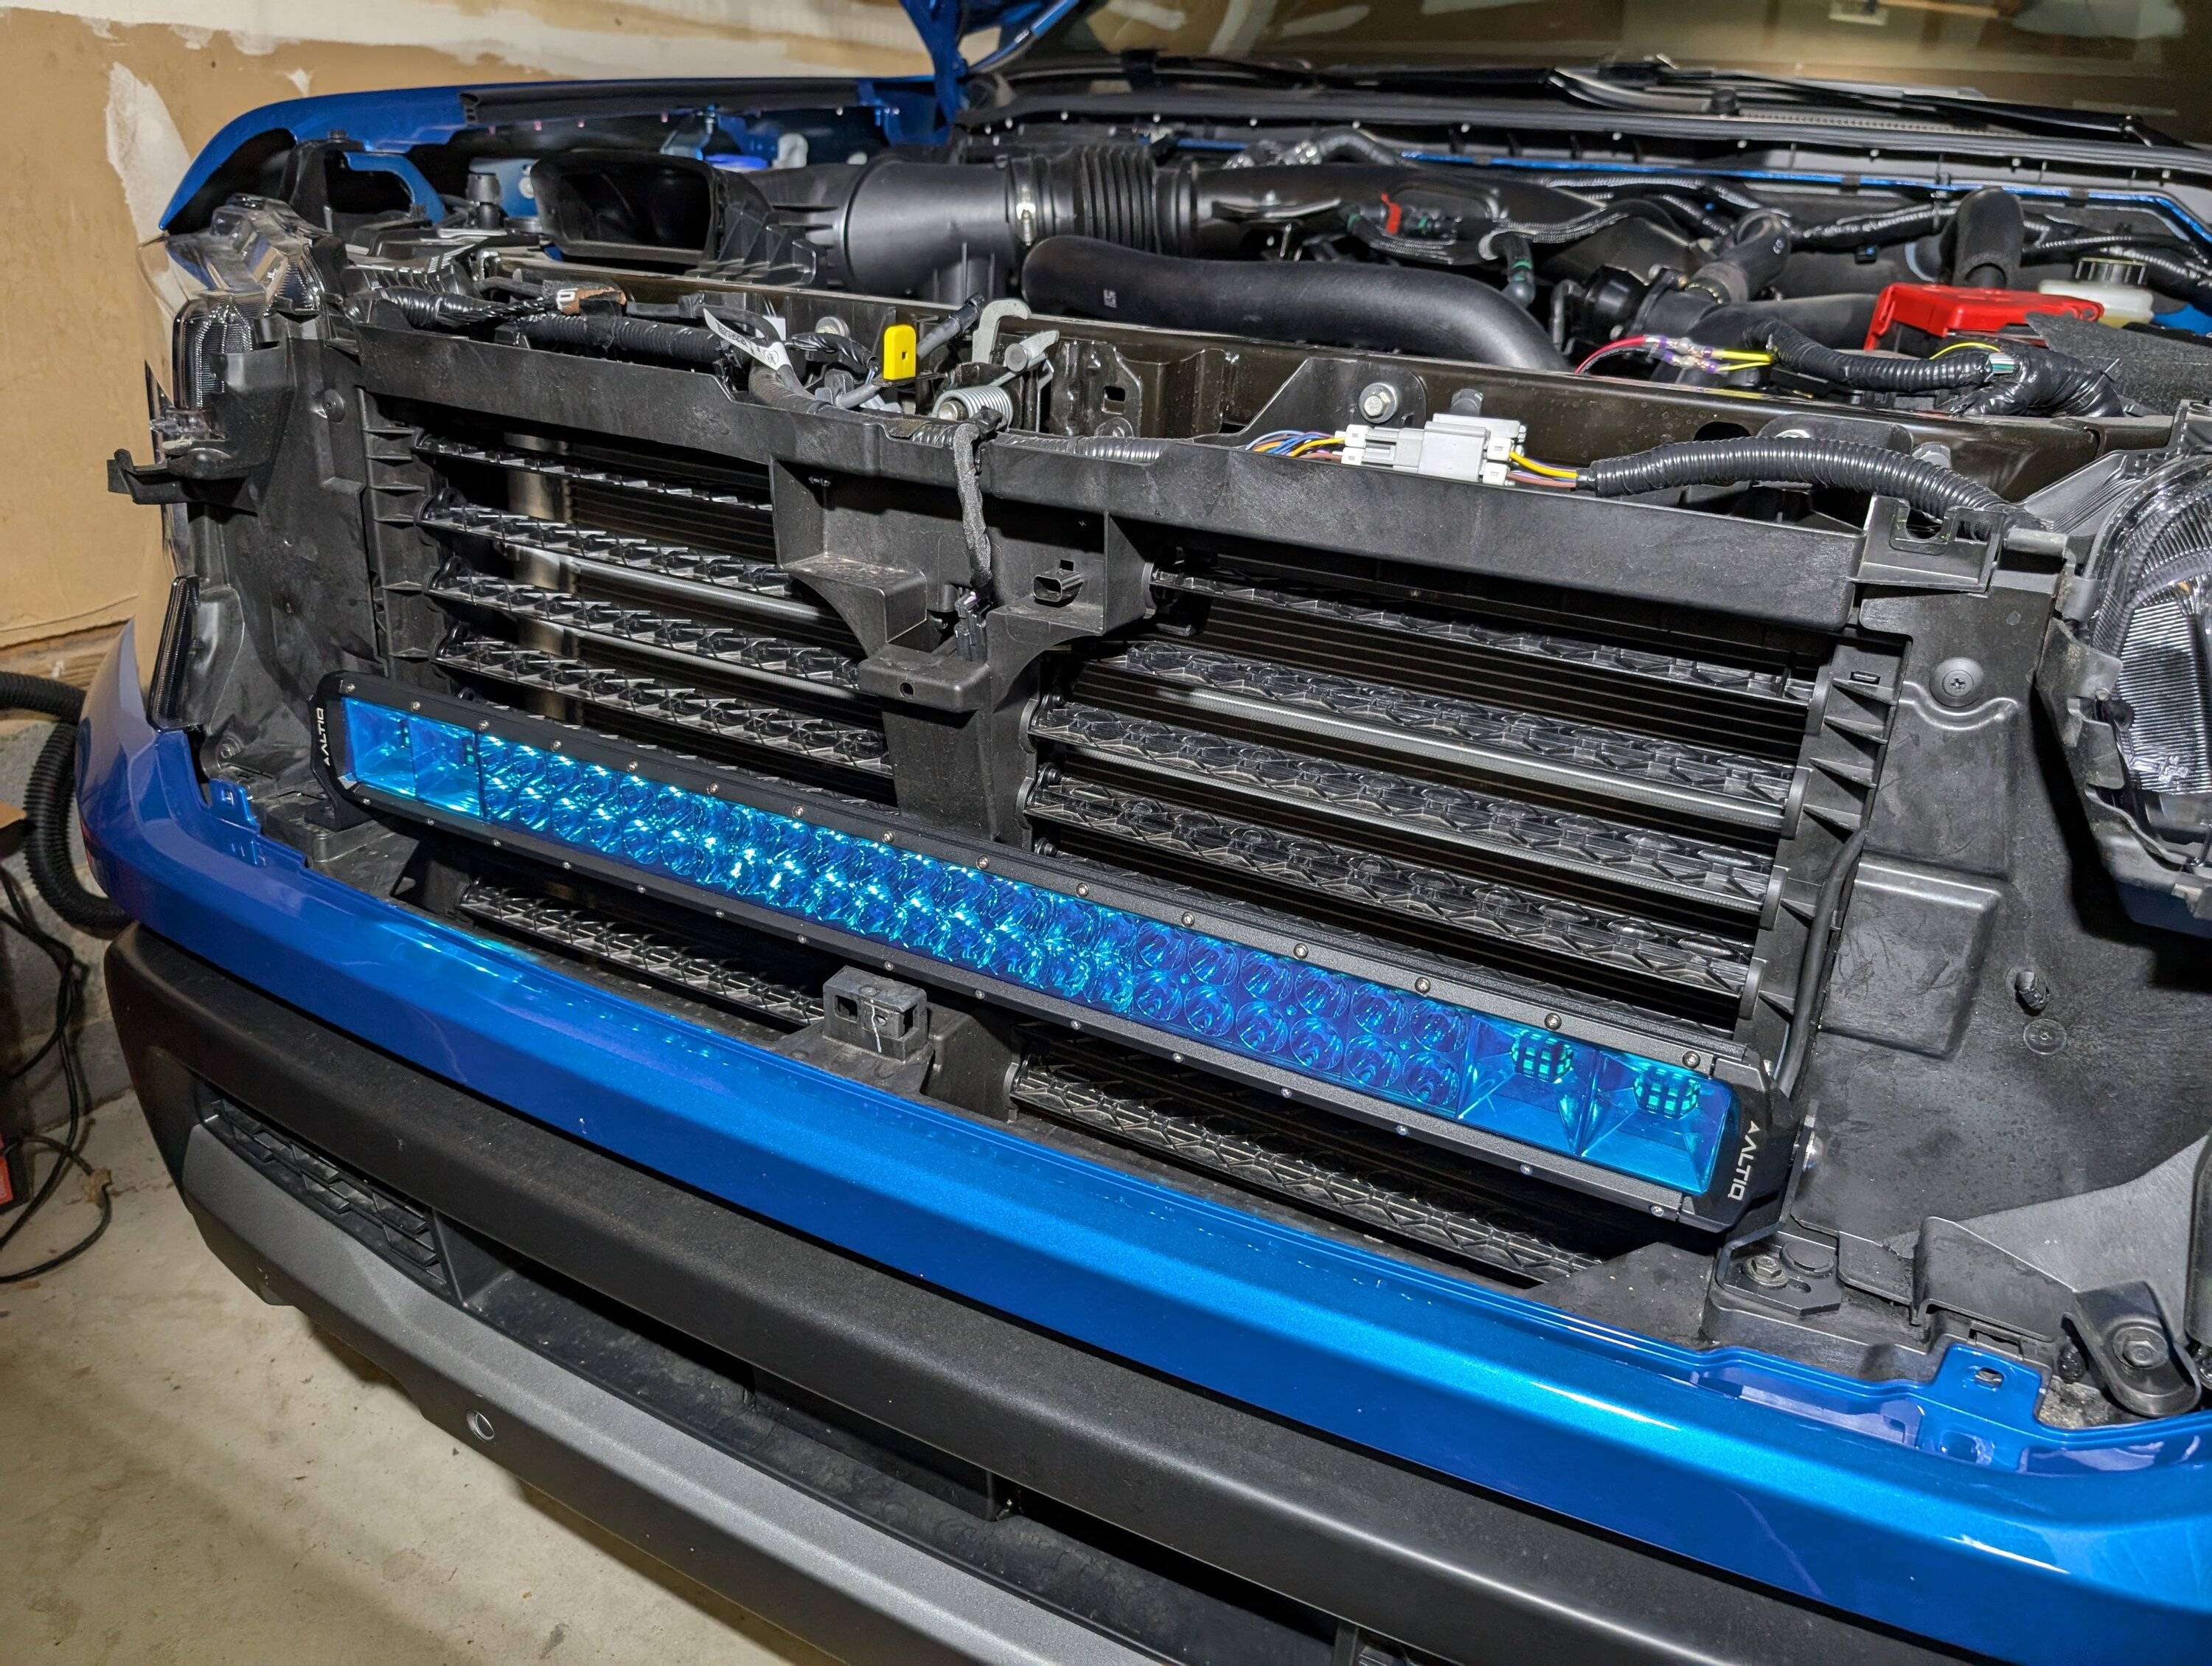
Now I removed the screw and plastic rivet on both sides and placed the light bar over those holes. Then replaced and tightened those two items on both sides. There is a slot on the mounts where you can move the light bar up and down about an inch. I tightened those bolts so the bar was in the middle of that slot.
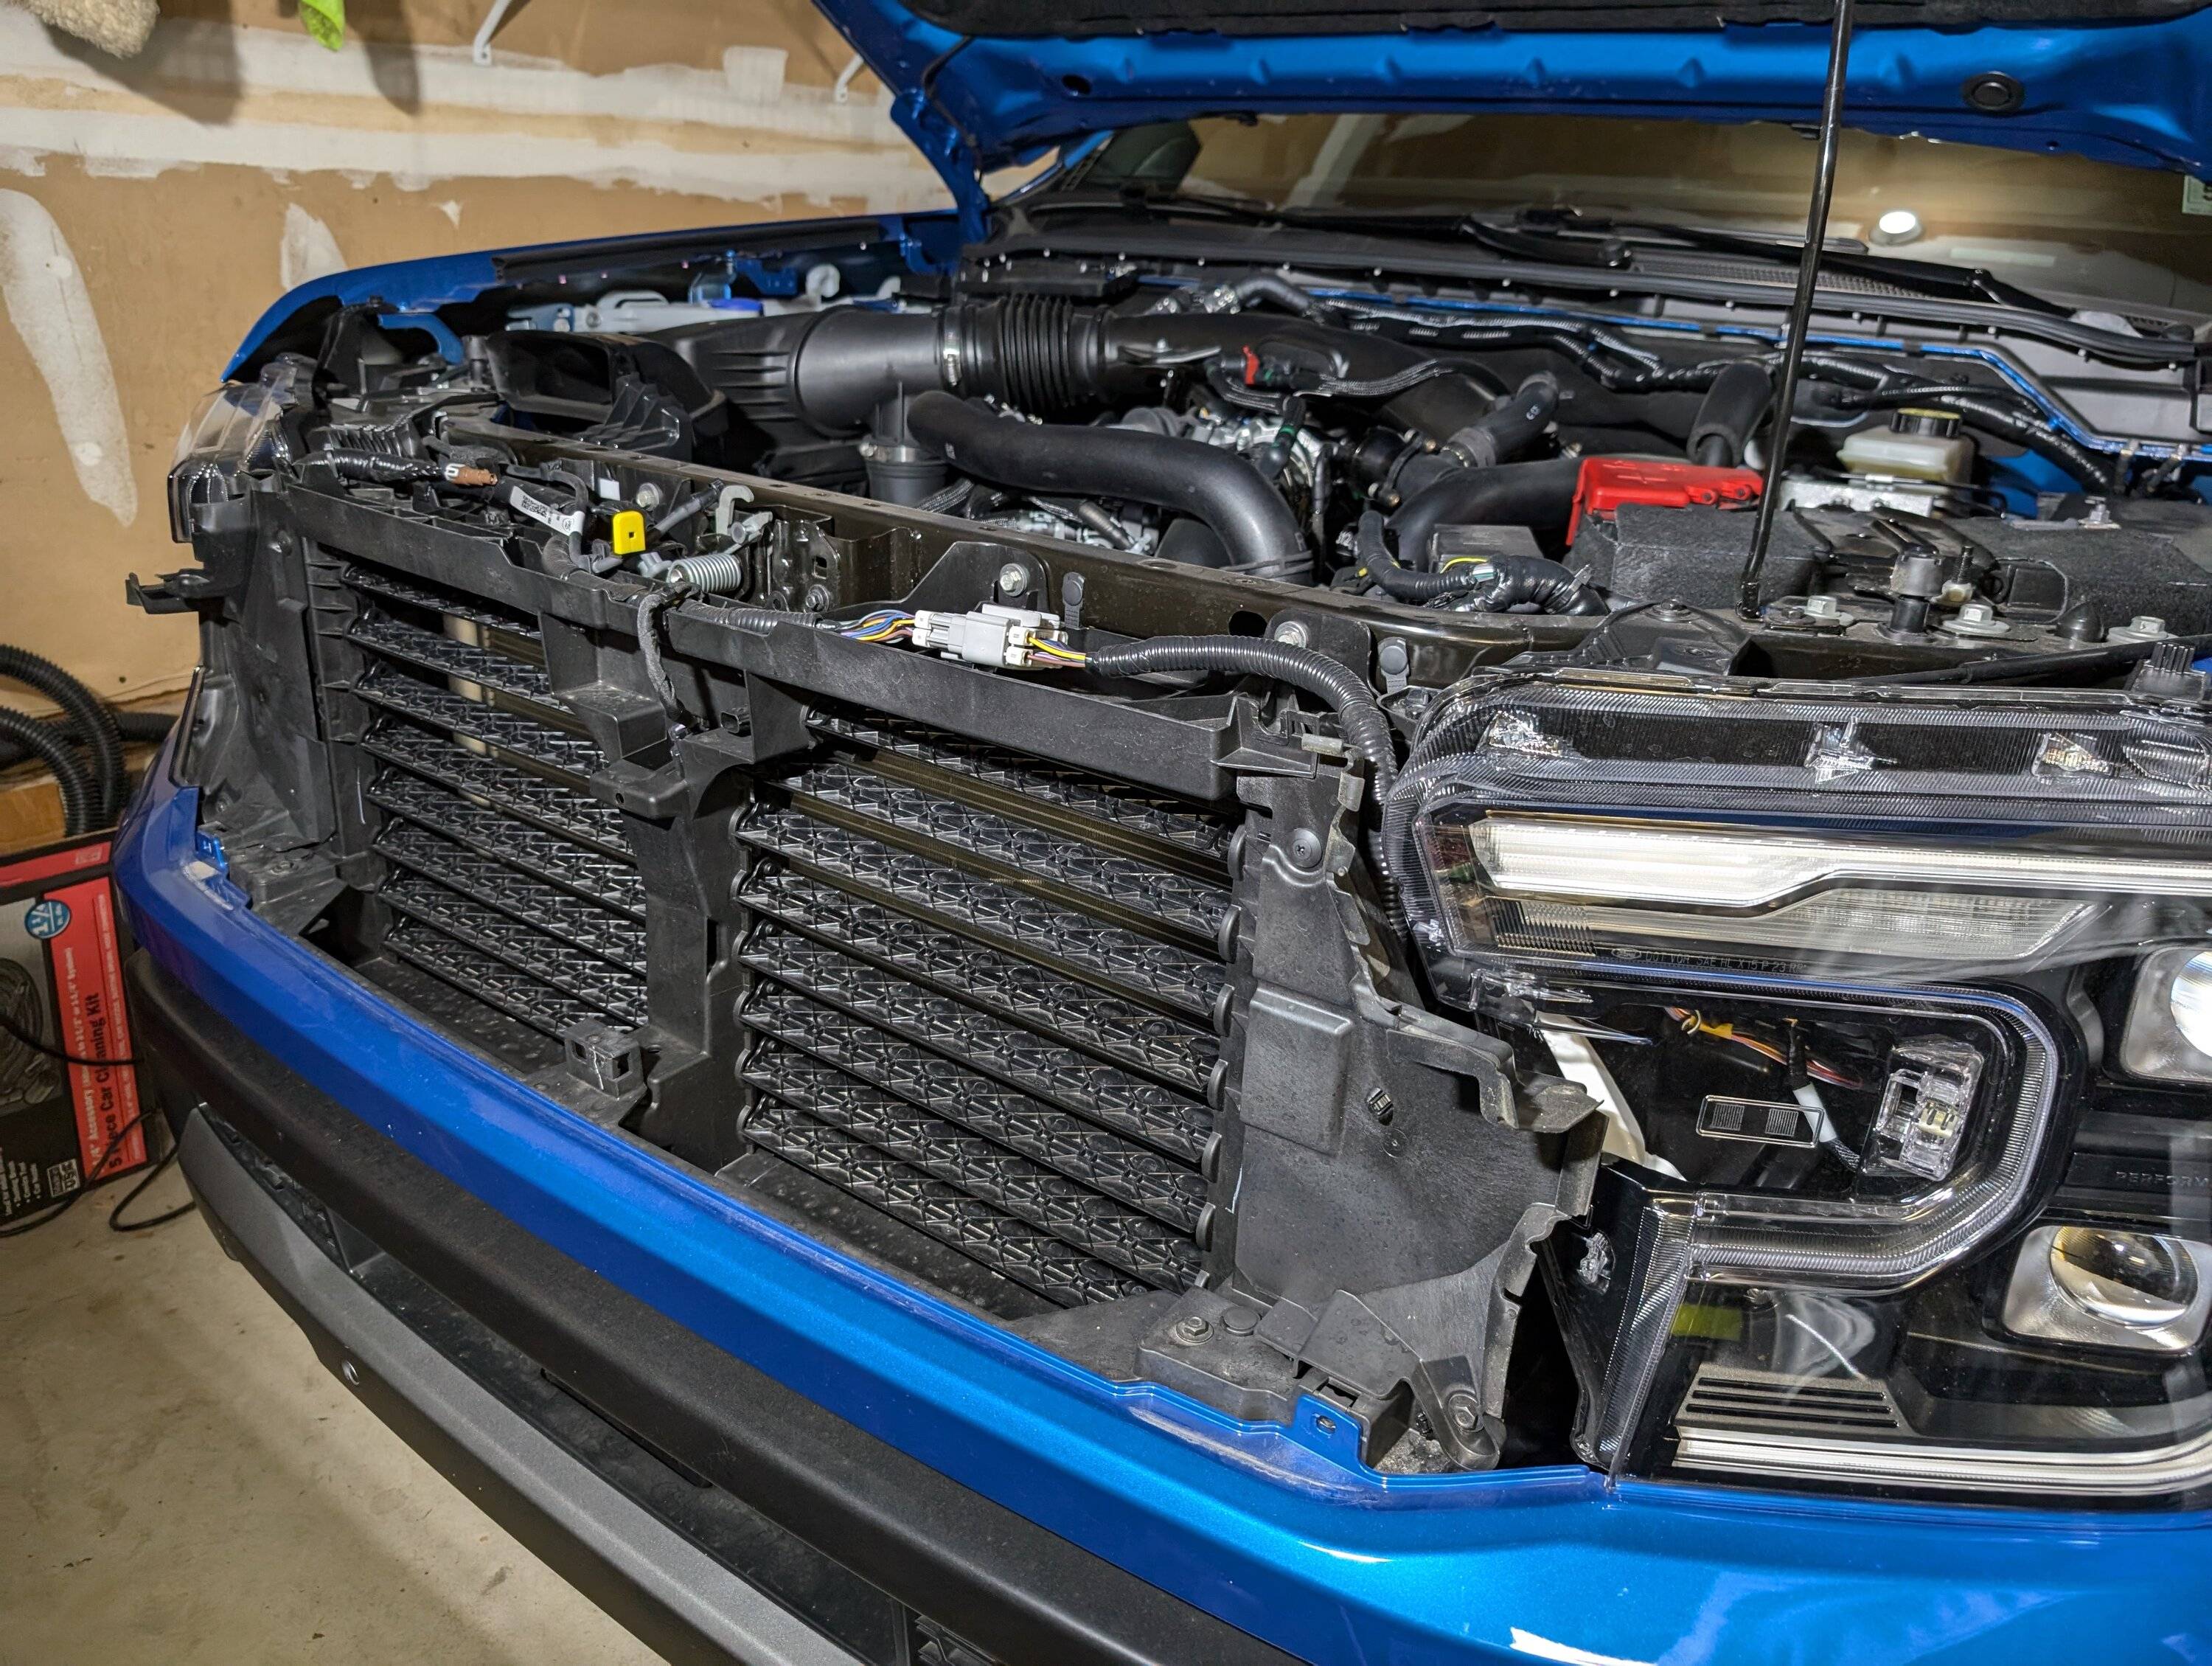
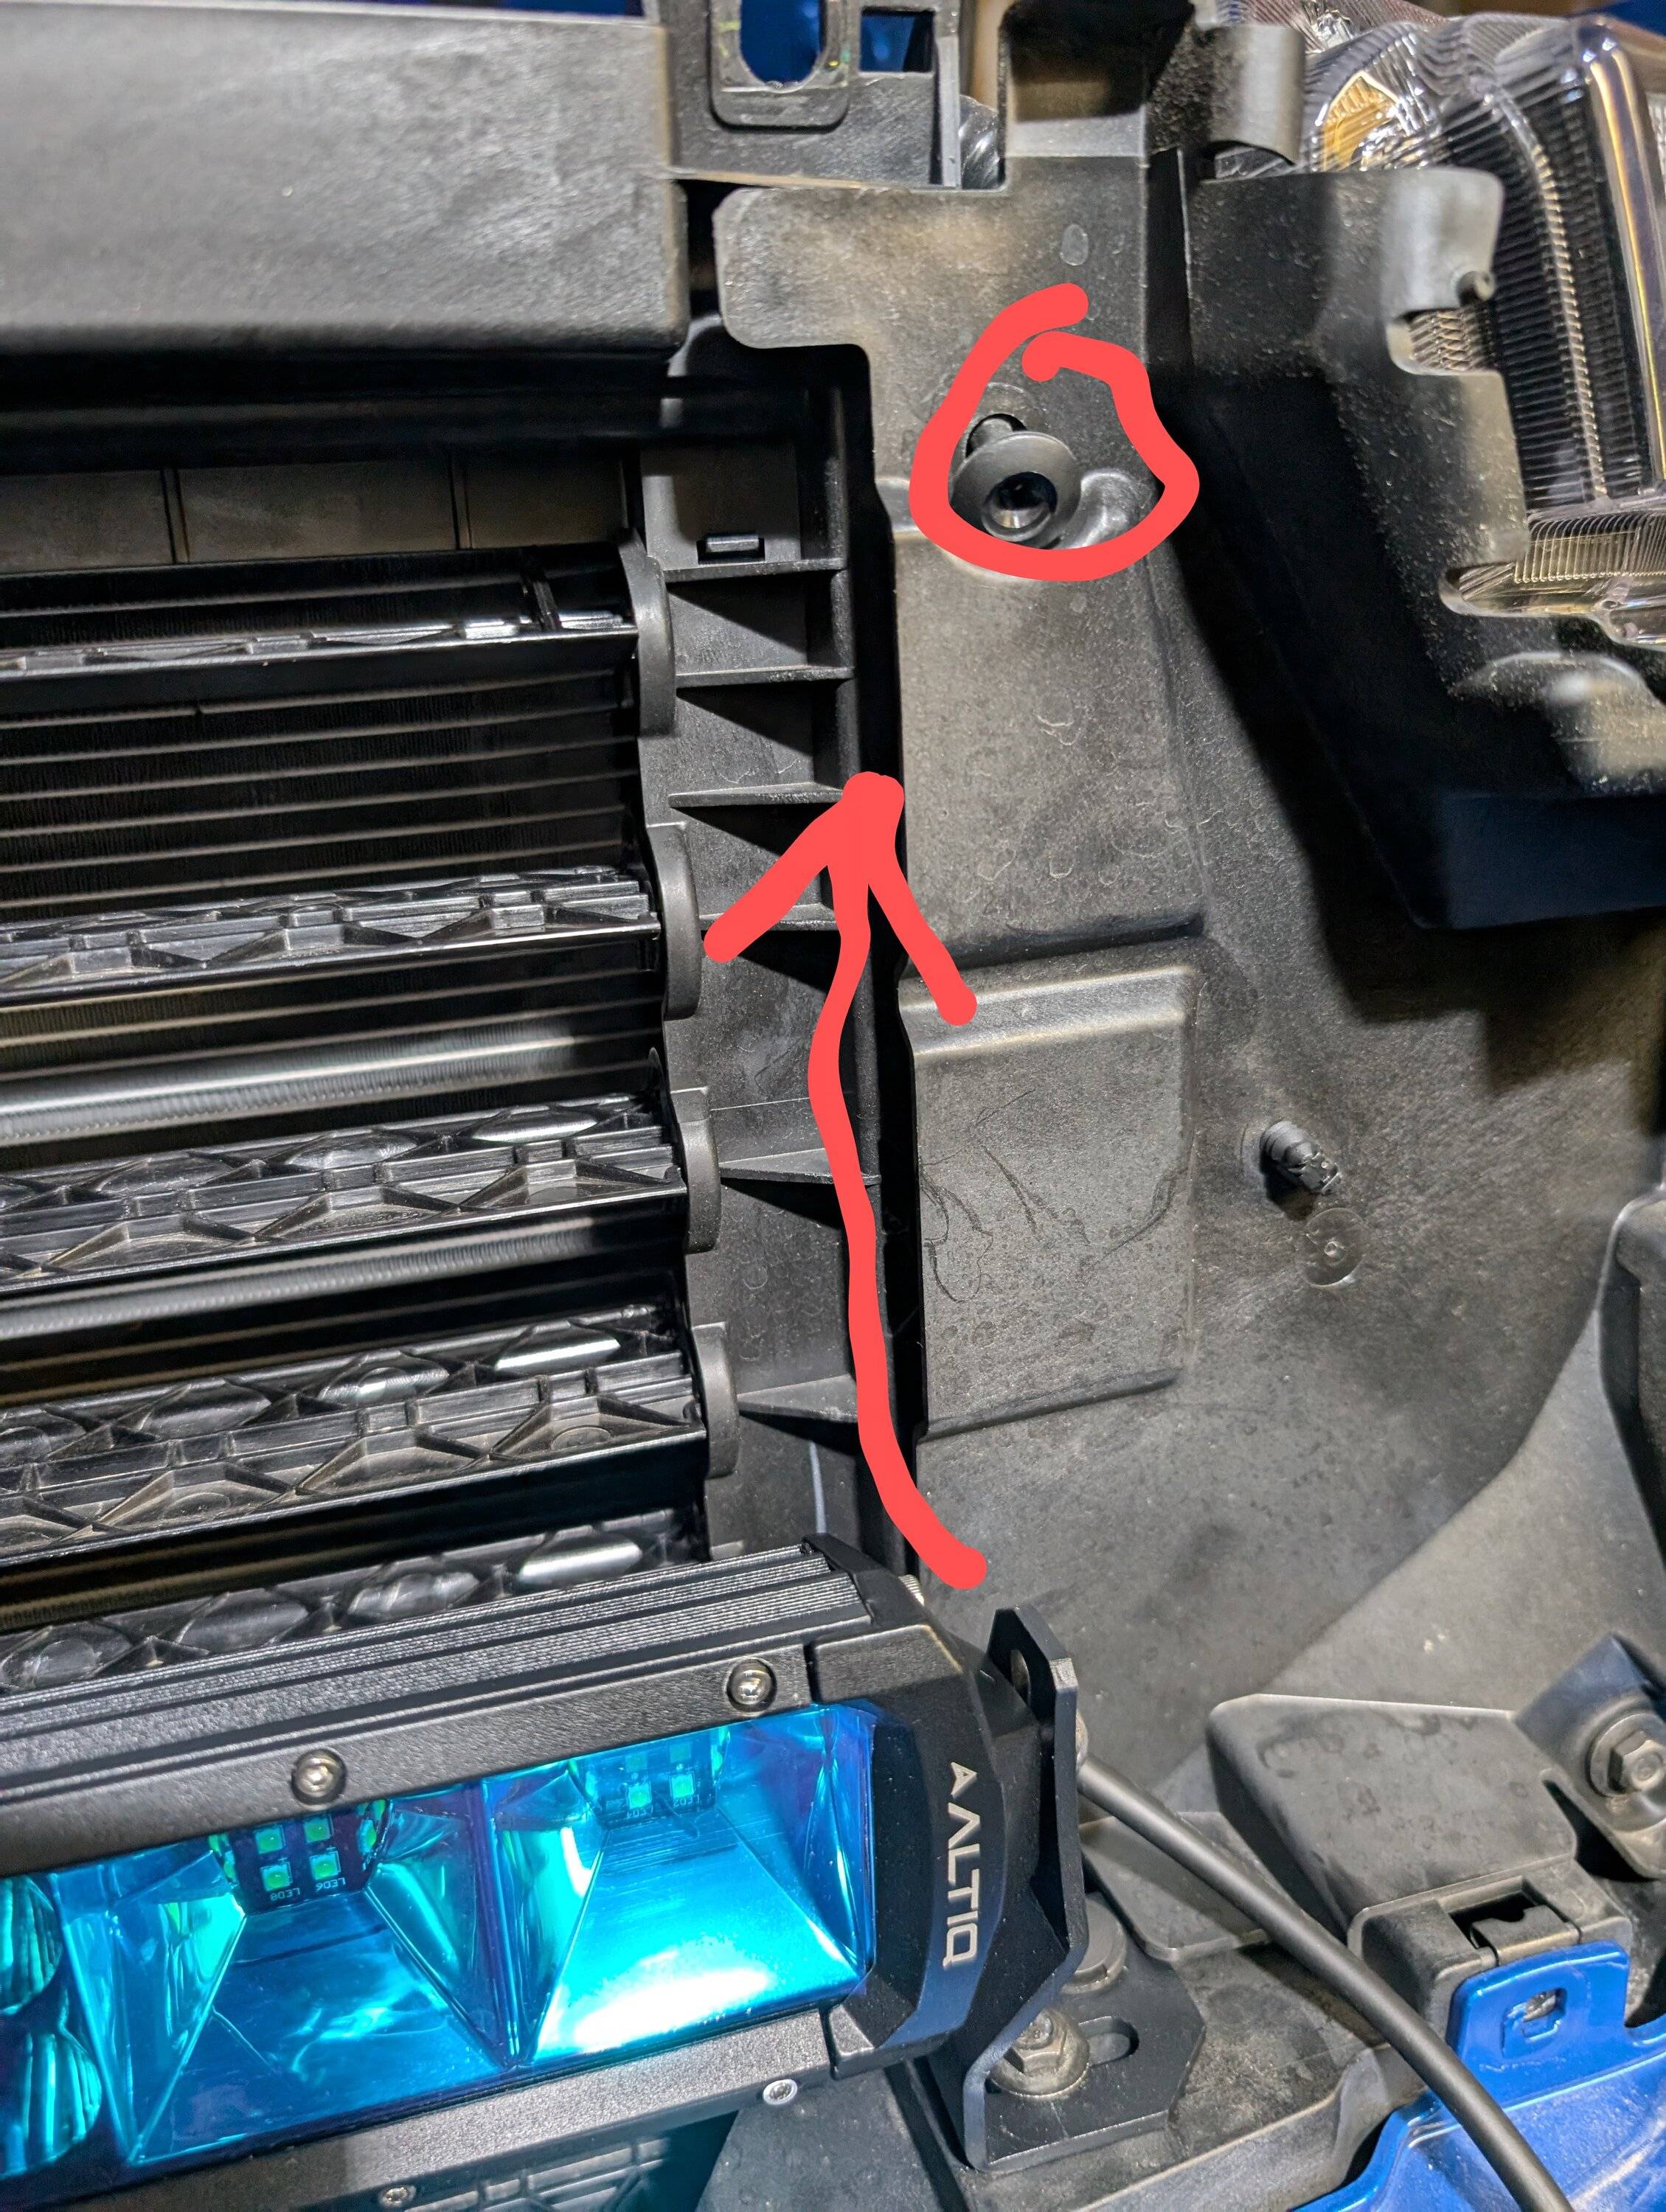
Next I followed the instructions on the video for routing the power cable up the radiator into the engine bay. The big difference it seems is that the US trucks have the moving slots going all the way up. So there was no way to route the cable through that area. In the one picture I included, I removed that side plastic piece and routed the power cable up through there and it was very easy.
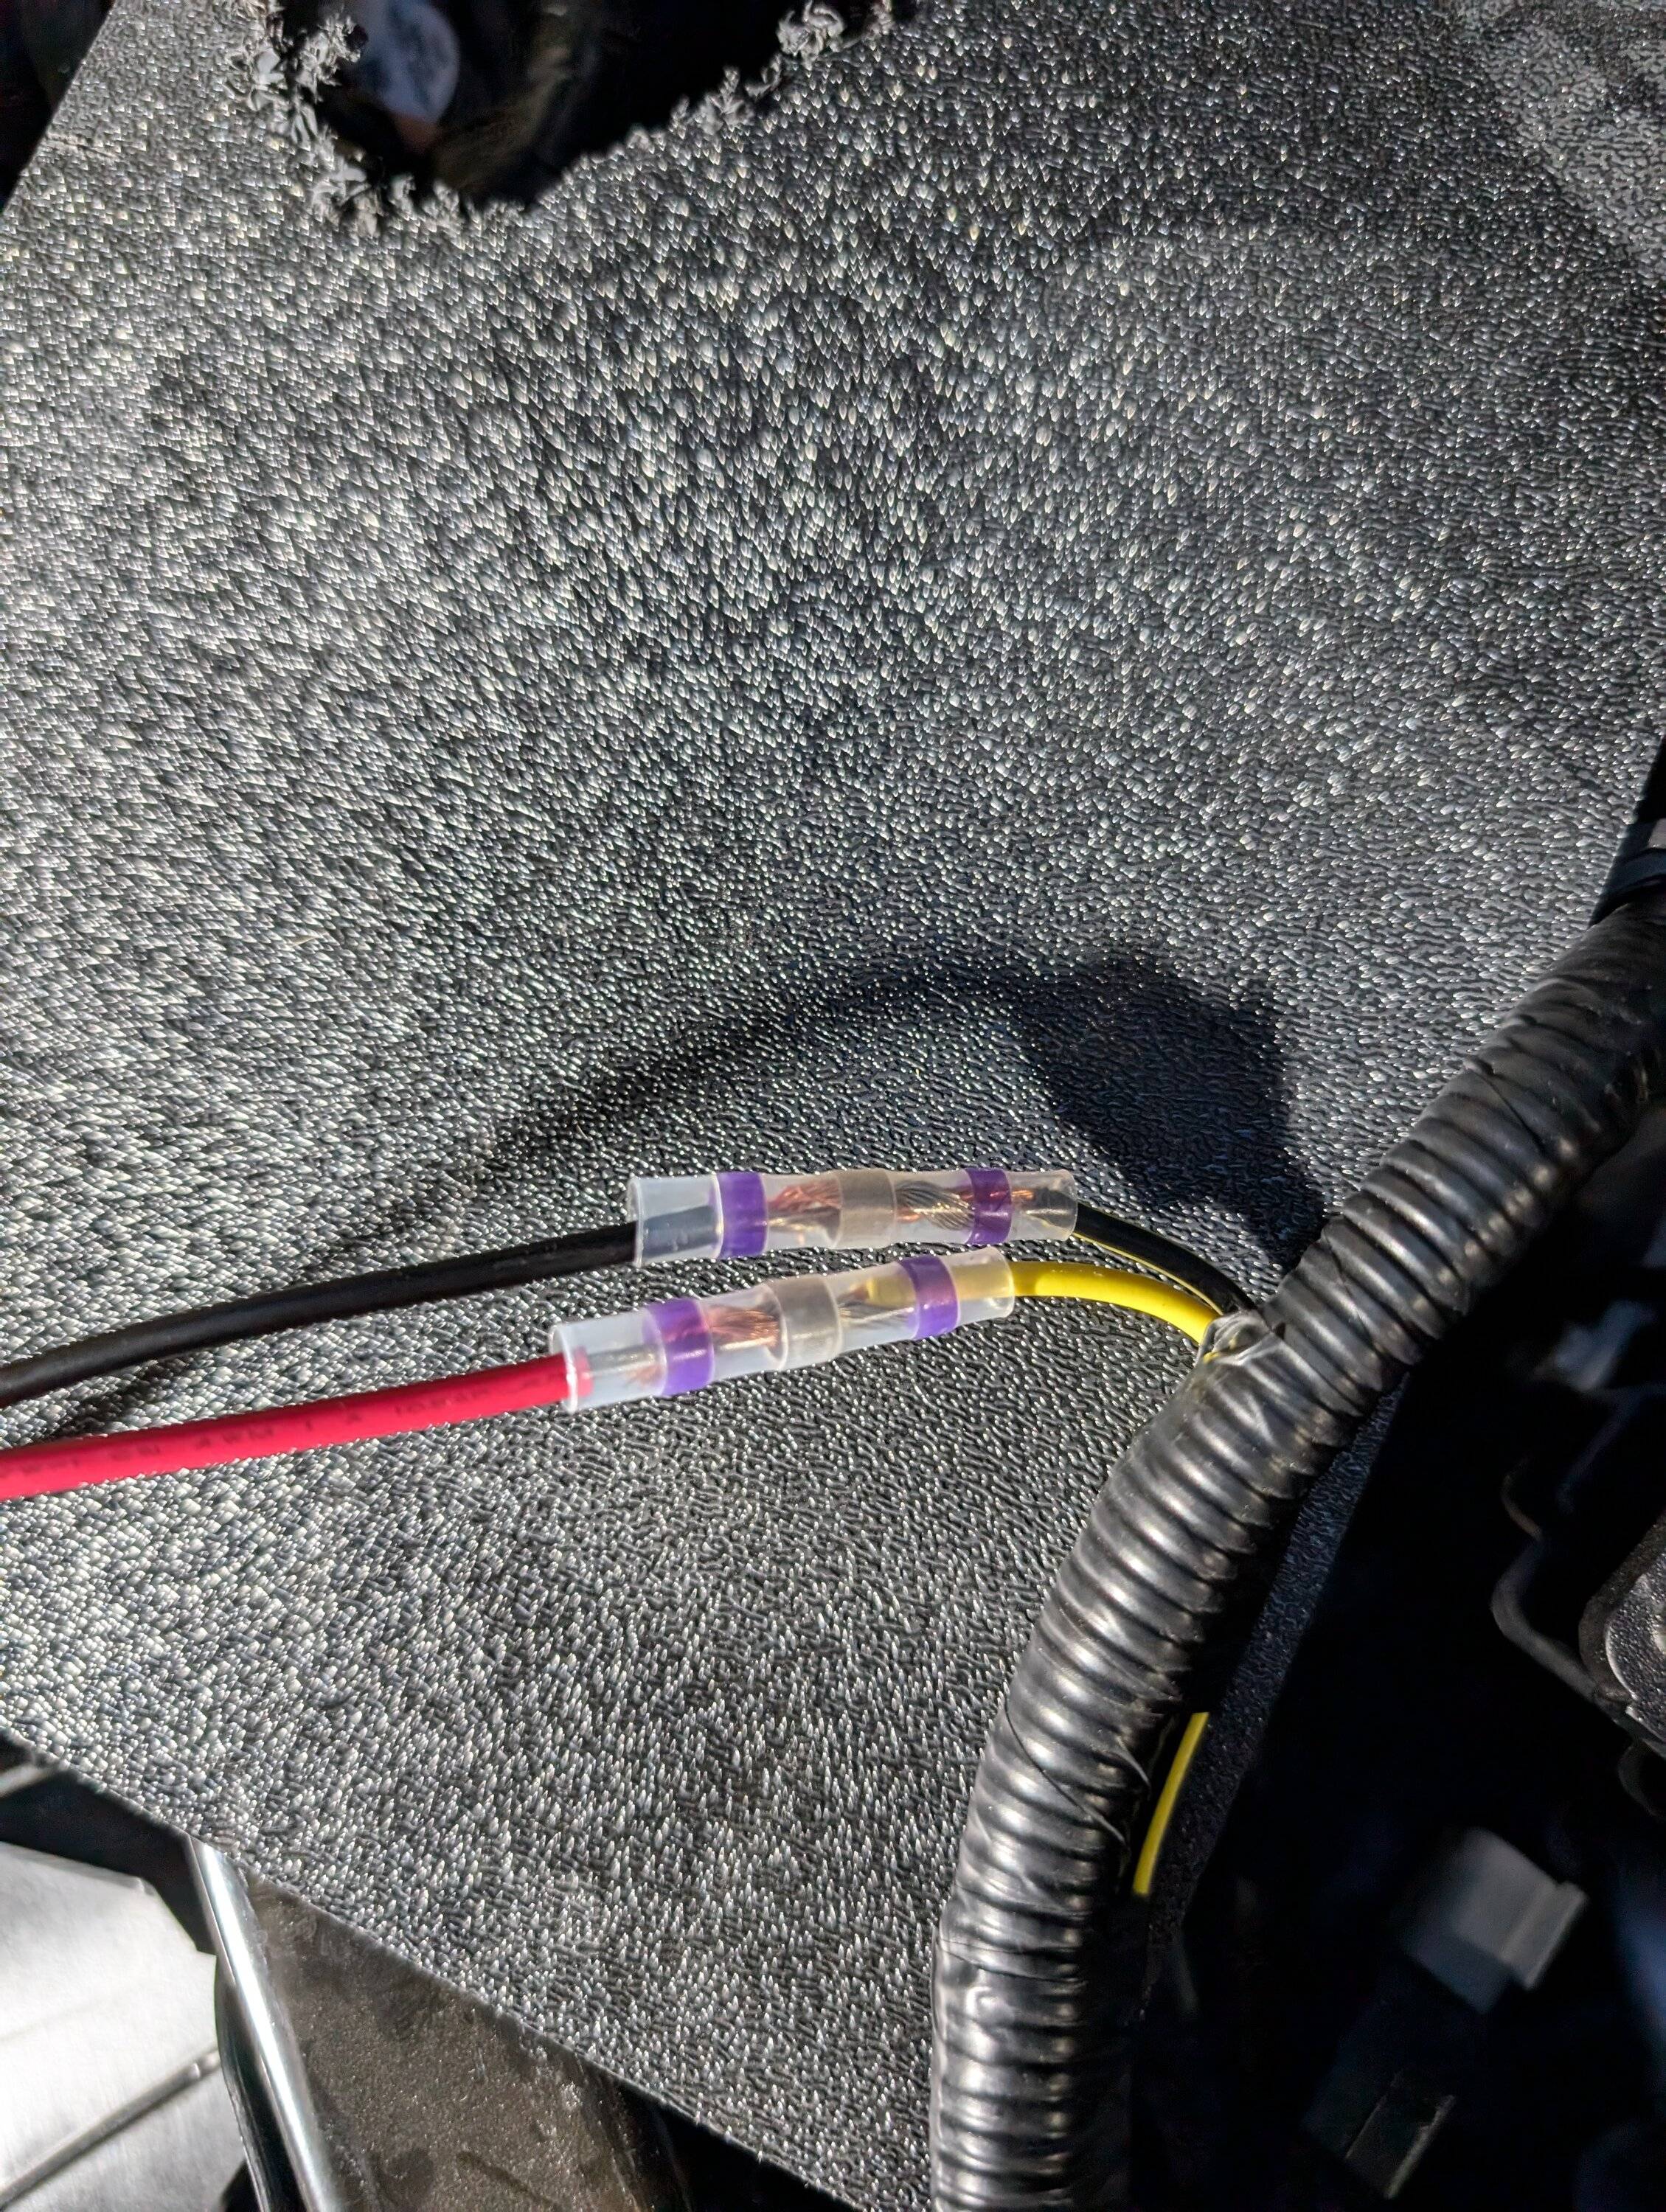
After that I found the two wires(yellow and yellow/black) for the aux 6 switch. I connected the two wires to the cable adapter with the included heat shrink. As you can see in the picture, I put a piece of abs plastic underneath so nothing else melted when I used my heat gun on the heat shrink. Then plugged the adapter cable into the power cable from the light bar. Make sure the light bar mount bolts are pretty tight at this point where it wont move unless you use a little force.
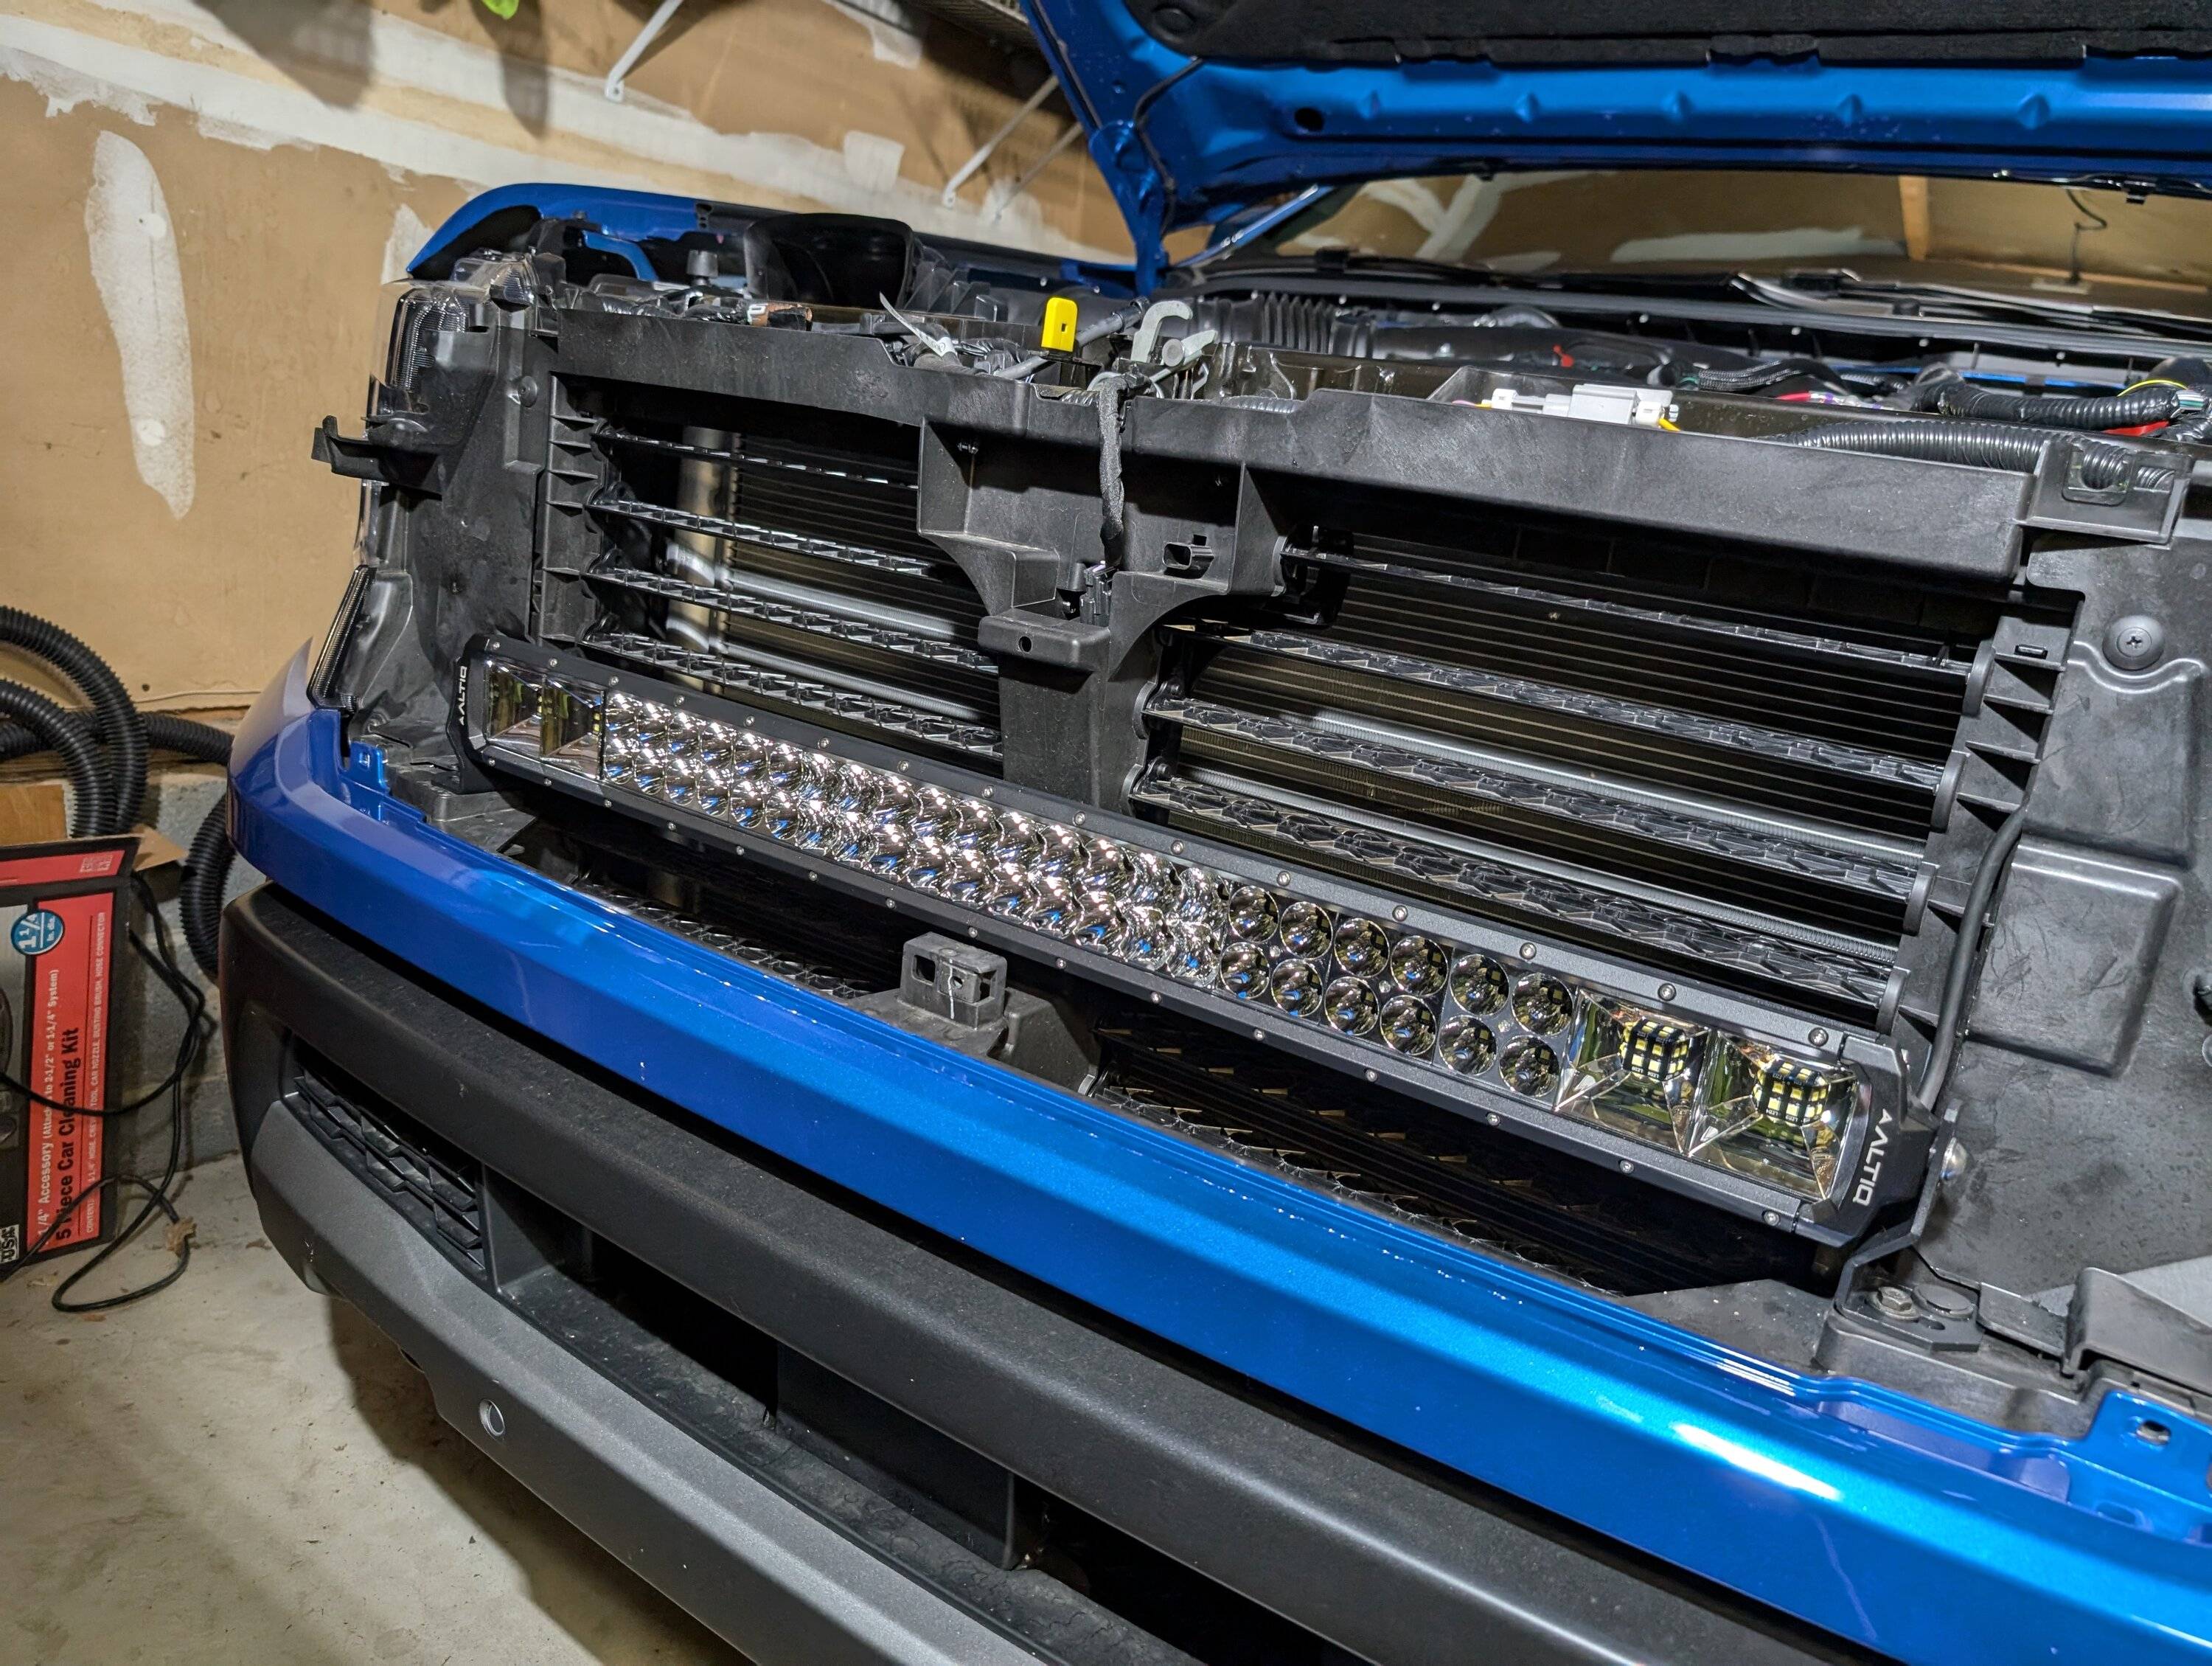
Now its time to put everything back together in reverse order. Also, dont forget to remove the blue plastic film from the light bar otherwise it will be a facepalm situation after you put everything back together.
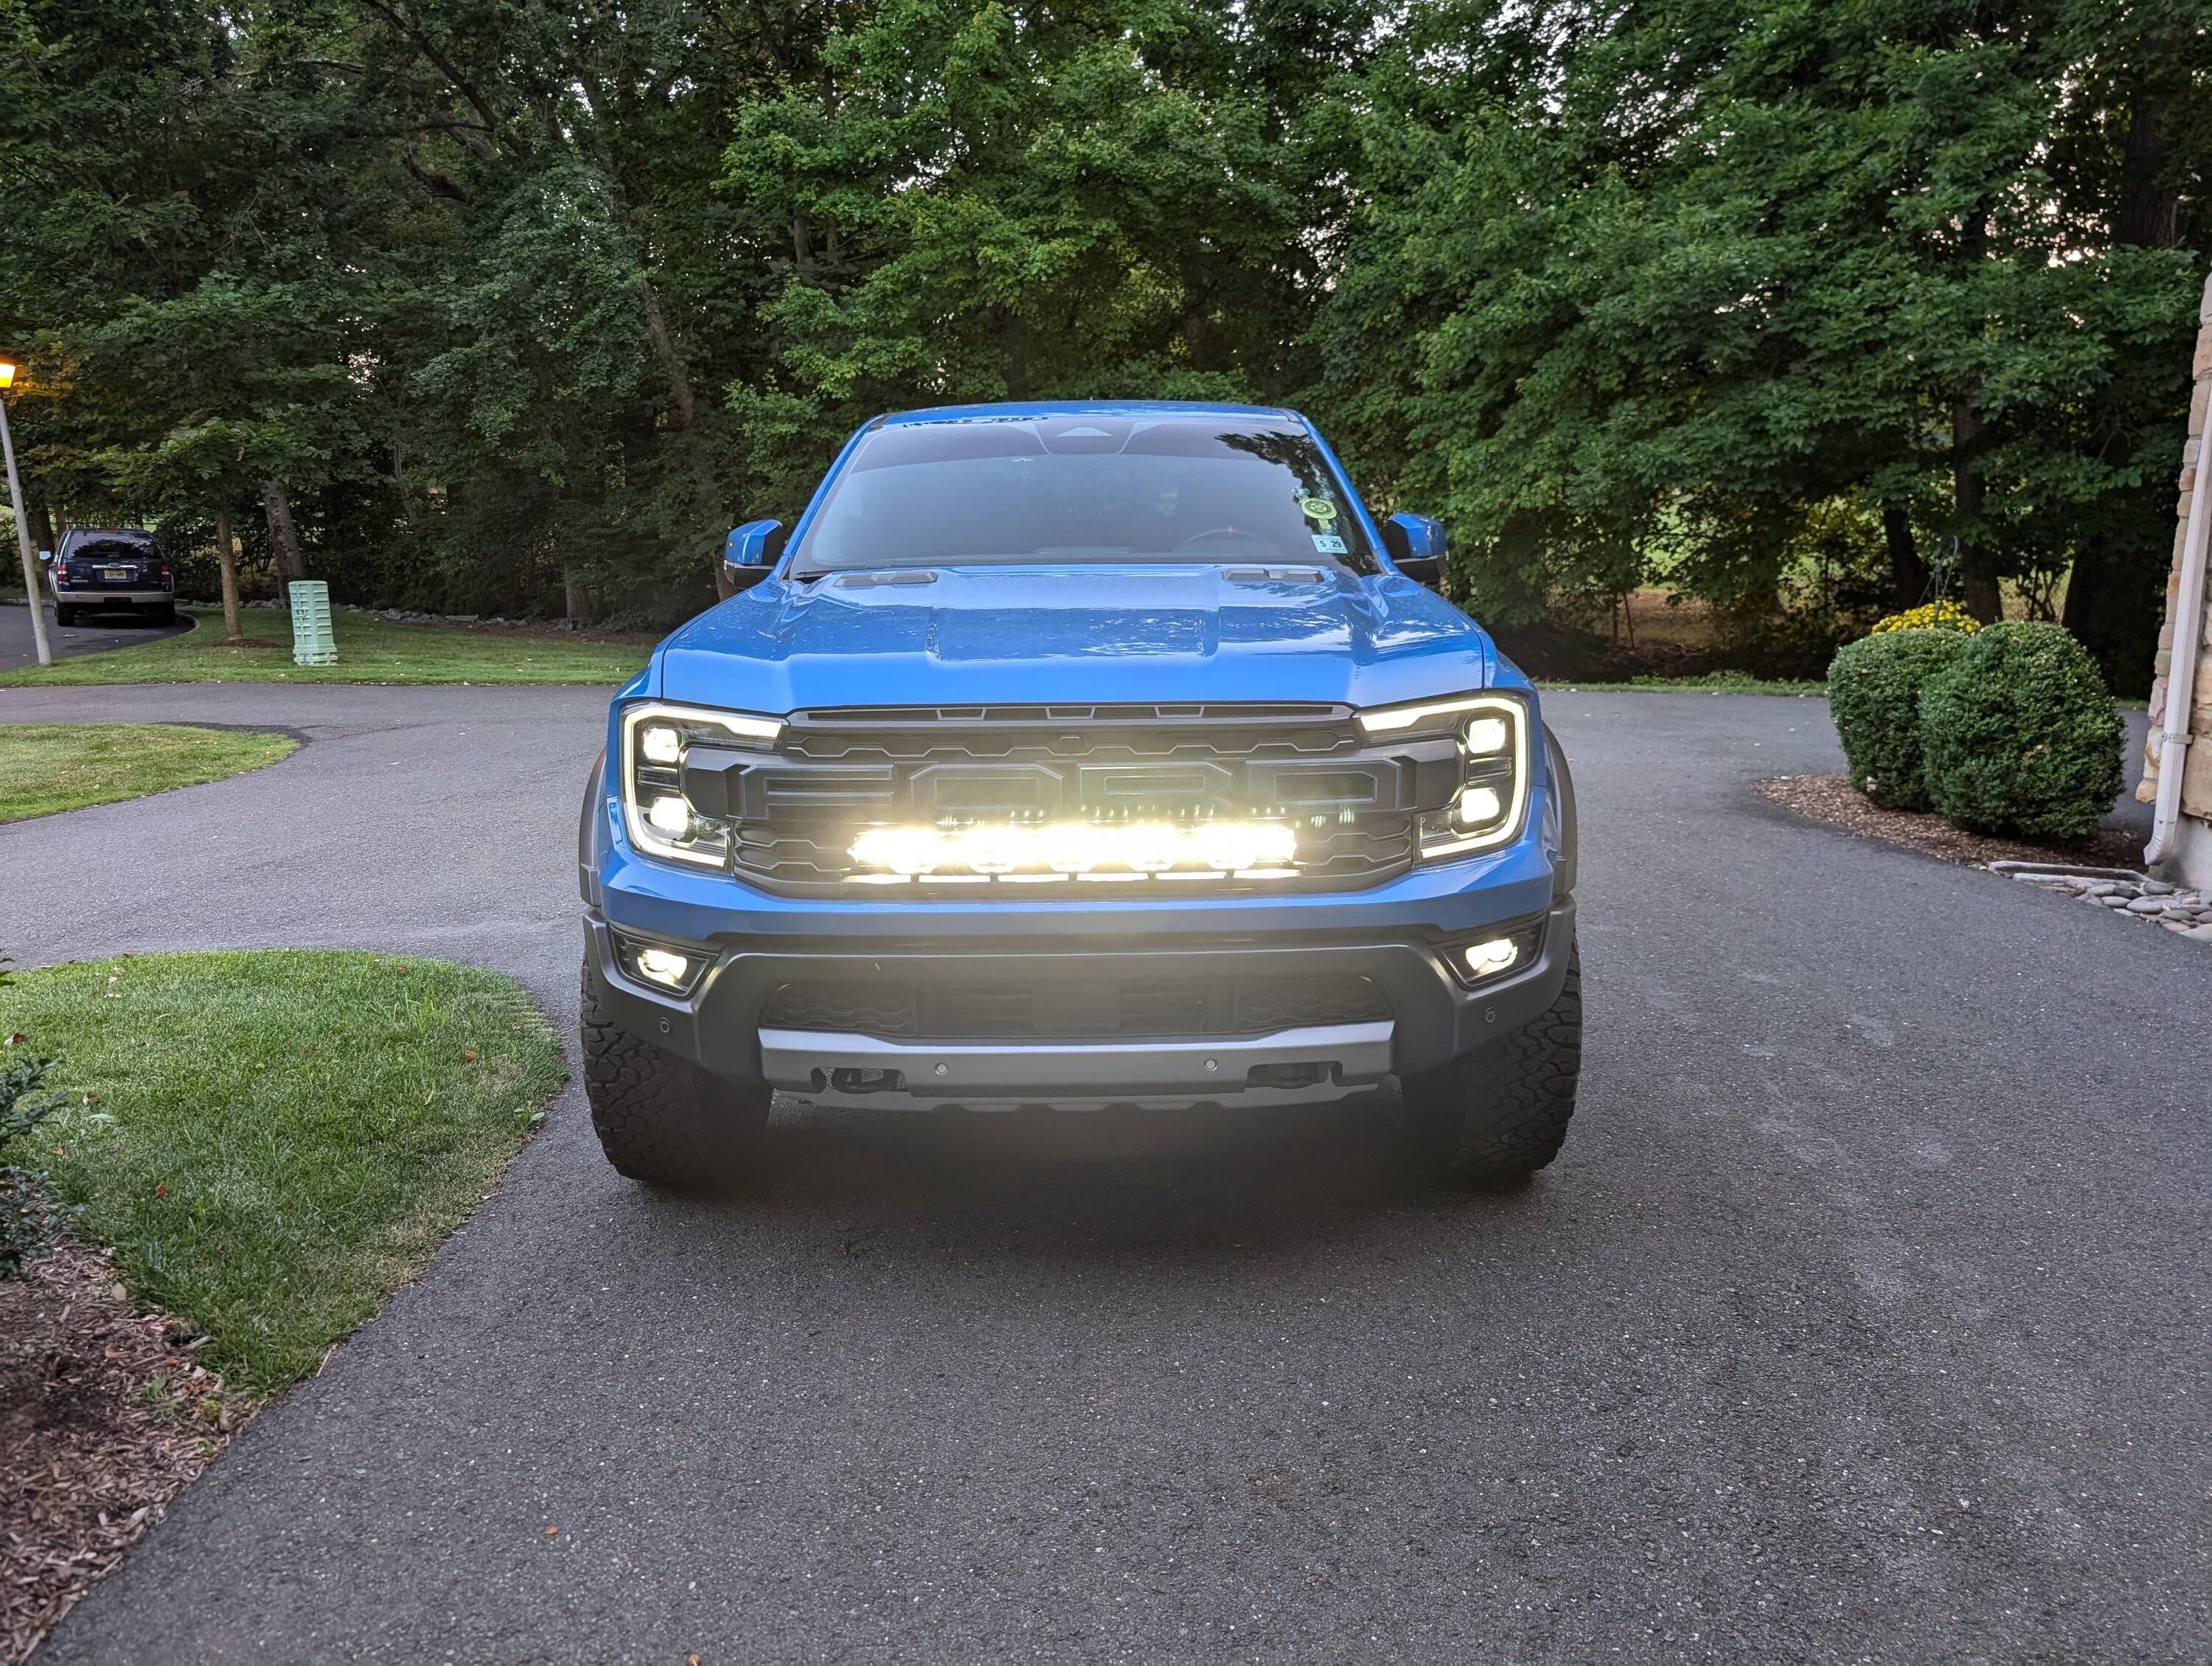
Once everything is back together its time to test. I used my garage doors to make sure the bar was lined up but Ill do more testing when it starts getting darker earlier in the fall. That being said, I was able to get my fingers through the grill to just twist the bar up a tad to be a little higher than the top line of my lights. All in all it took maybe 30 minutes to do it all and that was including starting and stopping the youtube video to follow along.


I would say the install is about a 3 out of 5. Not really challenging if you follow the youtube videos already online, and dont fear popping things out of place when they make noises like you are breaking them but you really arent.
After removing the bar from the box I installed the mounts to the sides. Pretty simple. Then I popped all the little plastic rivets out of the top plastic to remove that piece. After that I removed the bottom plastic bar below the grill starting from the passenger side moving to the right. Once you get past the first pop, the rest are pretty easy.
Then you have the 3 screws on the bottom and the two at the top. Like the videos state, dont forget to disconnect the hose for the front sprayer and the cable for the front camera.
Then I removed the grill again from the passenger side to the drivers side. Pops off pretty easy once you get a good grip on it.
Now I removed the screw and plastic rivet on both sides and placed the light bar over those holes. Then replaced and tightened those two items on both sides. There is a slot on the mounts where you can move the light bar up and down about an inch. I tightened those bolts so the bar was in the middle of that slot.
Next I followed the instructions on the video for routing the power cable up the radiator into the engine bay. The big difference it seems is that the US trucks have the moving slots going all the way up. So there was no way to route the cable through that area. In the one picture I included, I removed that side plastic piece and routed the power cable up through there and it was very easy.
After that I found the two wires(yellow and yellow/black) for the aux 6 switch. I connected the two wires to the cable adapter with the included heat shrink. As you can see in the picture, I put a piece of abs plastic underneath so nothing else melted when I used my heat gun on the heat shrink. Then plugged the adapter cable into the power cable from the light bar. Make sure the light bar mount bolts are pretty tight at this point where it wont move unless you use a little force.
Now its time to put everything back together in reverse order. Also, dont forget to remove the blue plastic film from the light bar otherwise it will be a facepalm situation after you put everything back together.
Once everything is back together its time to test. I used my garage doors to make sure the bar was lined up but Ill do more testing when it starts getting darker earlier in the fall. That being said, I was able to get my fingers through the grill to just twist the bar up a tad to be a little higher than the top line of my lights. All in all it took maybe 30 minutes to do it all and that was including starting and stopping the youtube video to follow along.
Sponsored