
wannagofast
Member
- Thread starter
- #1
I took the bed rail caps off (yikes that sucked thanks Ford) but was not happy with just sealing the holes with vinyl and a strip of silicon. I want to be able to use the stake pockets for mounting rails and the similar. I also want to be able to run nothing sometimes. But I want the bed to be decently weather tight. Saw lots of interesting posts here:
- 2026 models have less shitty less gappy caps
- Water leaks
- Tonneau that doesn't leak
- Stake pocket plugs
- More I've not left open in a tab I'm sure
Wasn't really happy with a lot of the options, especially considering the rails are not structural.
First step was finding a way to close the gap from the bed rail to the top of the cap so that things can mount well. I saw that there are various threads on making shims with nuts, bolts, washers etc as well as solutions from companies like Go Fast Campers (who apparently will not sell it alone). Then I found @AdventureLab spacer setup that comes with or apart from BRAPs. Getting a solid piece made by Xometry or the like was more of a hassle and I figured it would be cool to support them so I grabbed their spacer kit. It fits well except for one little quirk. I think it comes with 20mm long bolts that secure all the plates together in the spacer. This is great except that the rear 2 pockets are shorter by 2~3mm so you remove a plate there. The problem with that is now the bolt is too long and protrudes from the top and its not longer a flat surface. No big deal for the BRAPs but won't work for my setup. Lucky my hardware store had some 16mm that worked perfectly. I did re-thread a few of the spacer plates and do a bit of de-burring. After that they work perfectly.
I didn't want the BRAPs (though they're very cool). I do want a mounting surface and I want it water tight (within reason). This lead me to designing an aluminum plate in CAD and sending it off to Xometry. I ordered it in 6061 aluminum with black anodization. It was about $65 and I was able to get it American made! I'm sure there are way cheaper ways to make this happen but I don't have a machine shop and am not a machinist etc. The plates came out great. If I were to make them again I would adjust the fillet to be slightly more aggressive. It looks like the tight curve was maybe a bit tighter than the water jet or whatever does best.
I then needed to decide on the seal. The gap between this new plate and the top of the bed rail cap varies between 1~3mm. So I needed something that would be at least 3~3.5mm tall but able to compress to about 1mm without failing. I also wanted a nice clean line and a lot of weatherstripping can't make tight corners. I opted for EPDM foam strips. I think if I were to do it again I would opt for 8mm wide instead of 5mm for a bit of extra wiggle room. The good news is they're pretty secure, close the gap well, compress well, and seem stable-ish. It's pretty easy to remove this 'gasket' and clean it up with automotive googone if I end up wanting something stiffer or these fail.
The last step of the puzzle is OCD. I wanted this to look OEM the best I can. I also wanted all black. Not all black hardware is outdoor/weather/corrosion resistant so I spent a decent amount of time on McMaster figuring it all out. Ended up looking pretty great. Would have preferred button head bolts but 13mm is fine as I carry it anyway for other stuff on the Ranger. I've got the mounting order: bolt head -> metal washer -> santoprene washer -> plate. The santoprene is somewhere in the middle on hardness and does risk failing when over torqued. The real test will be when I get some rack parts and if the torque required for that stuff makes me change the EPDM weather seal and this washer for something harder. Using the metal washer on top seems to spread the load pretty well though so far.
I sprayed these with a hose to good effect and will maybe report back when I've taken it through a heavy rain.
If you want the CAD file let me know (.step). I'm not an engineer by trade so no warranty and I have no idea how well it work, last, handle load, etc. This was a fun experiment for me to try something new :]
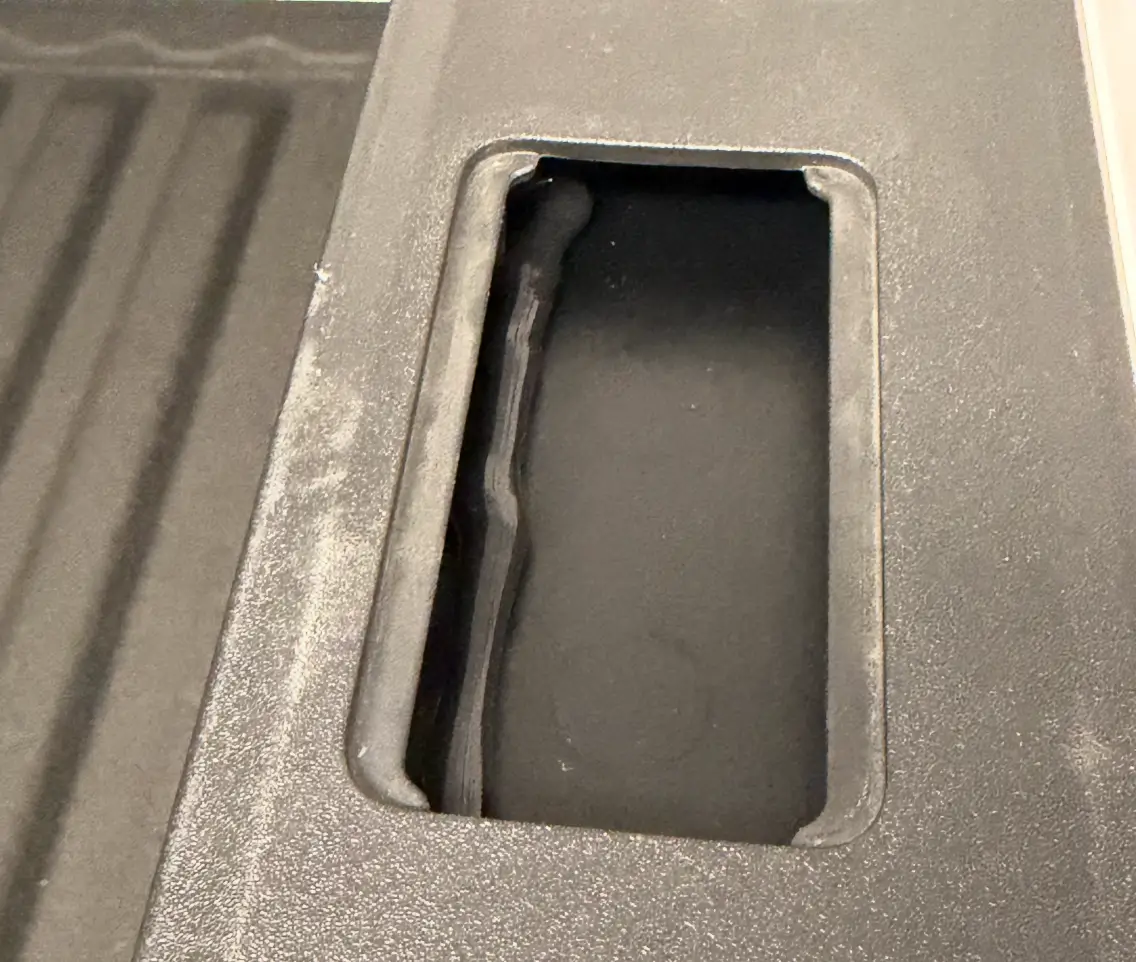
Bead of silicon on top of Vinyl.

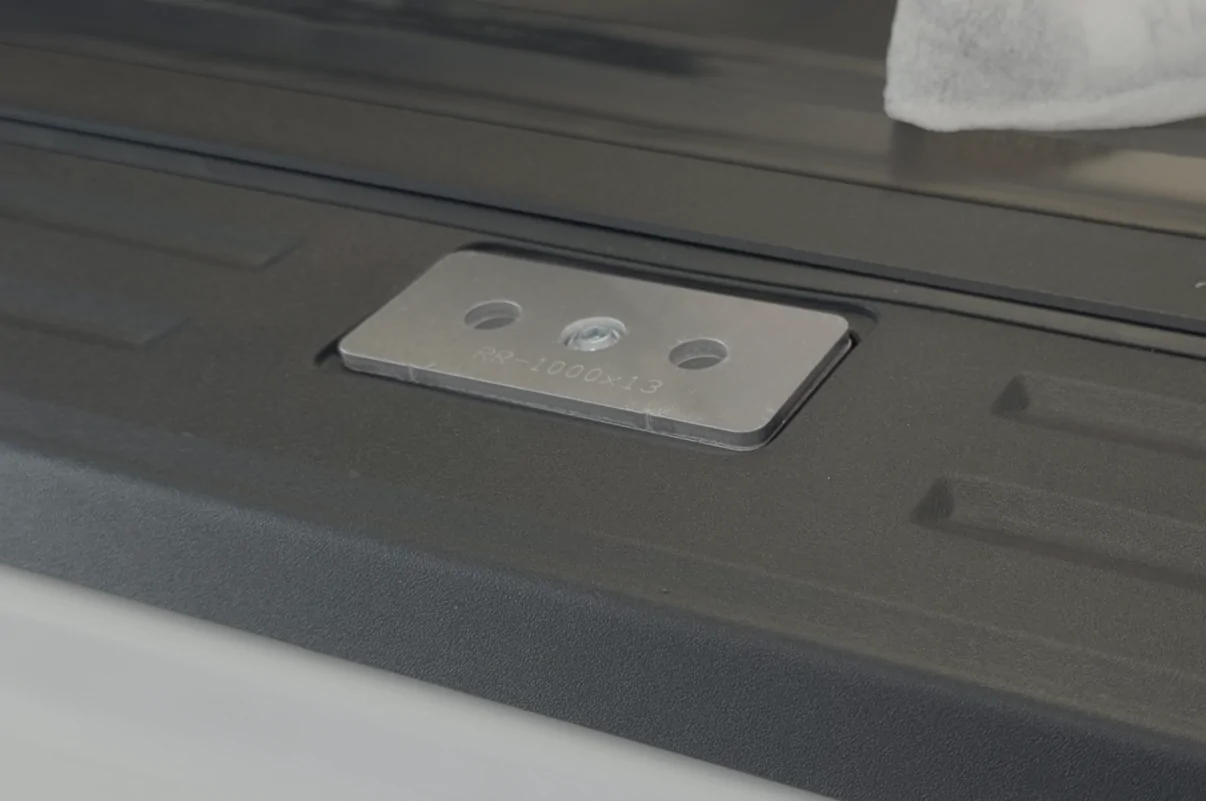
Spacer plates in place.

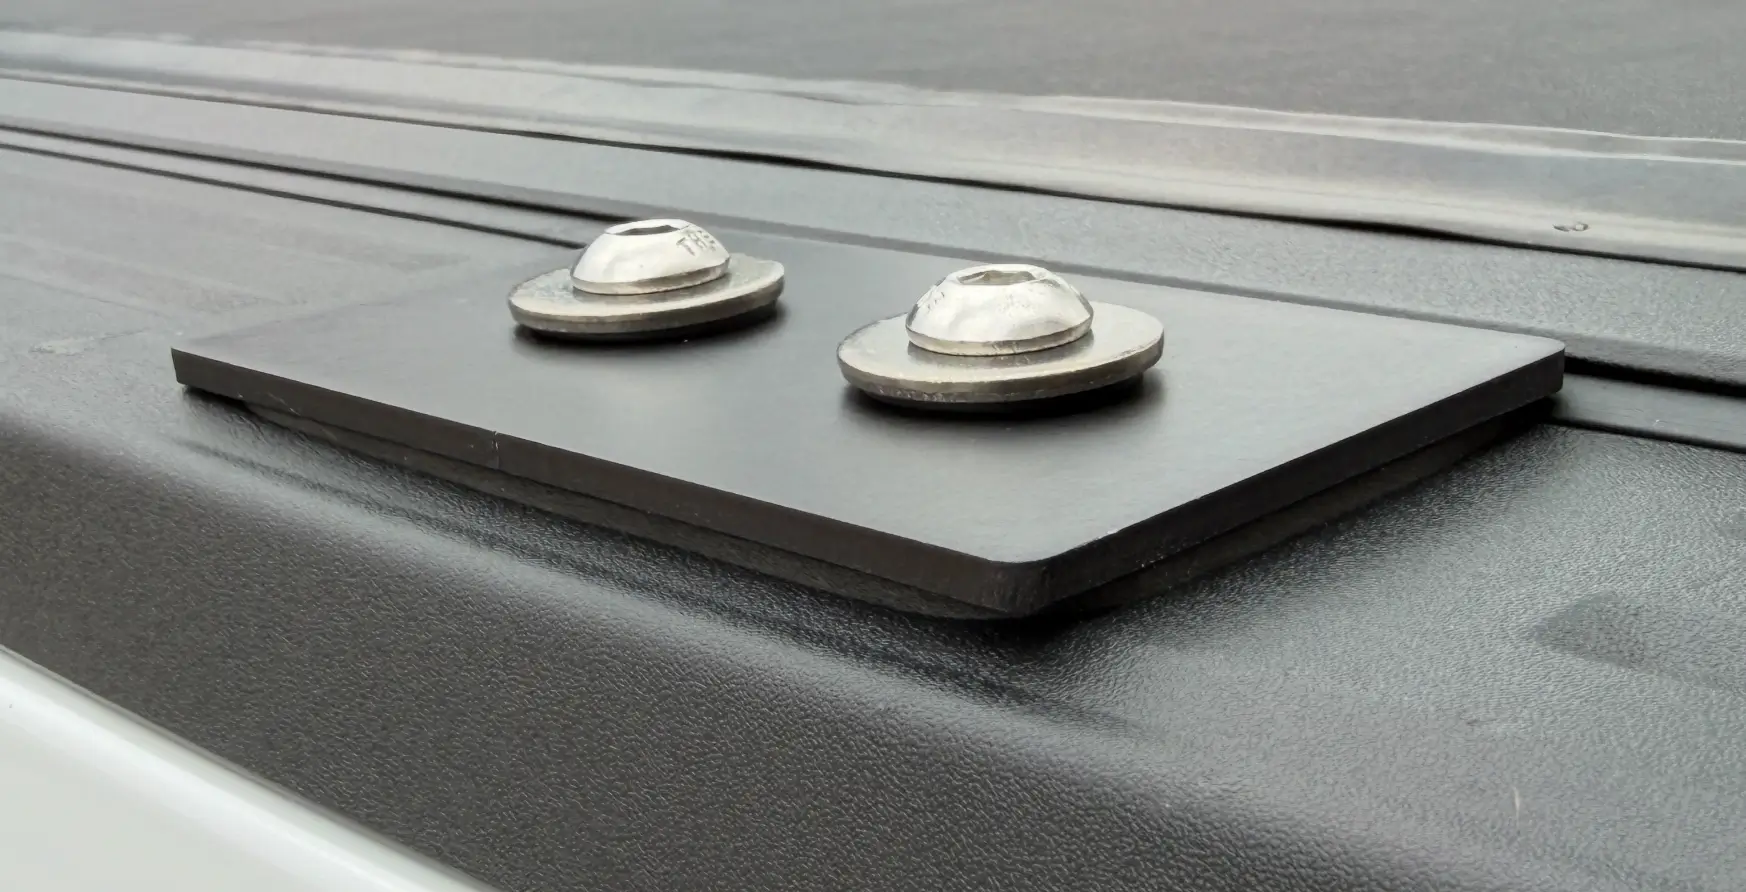
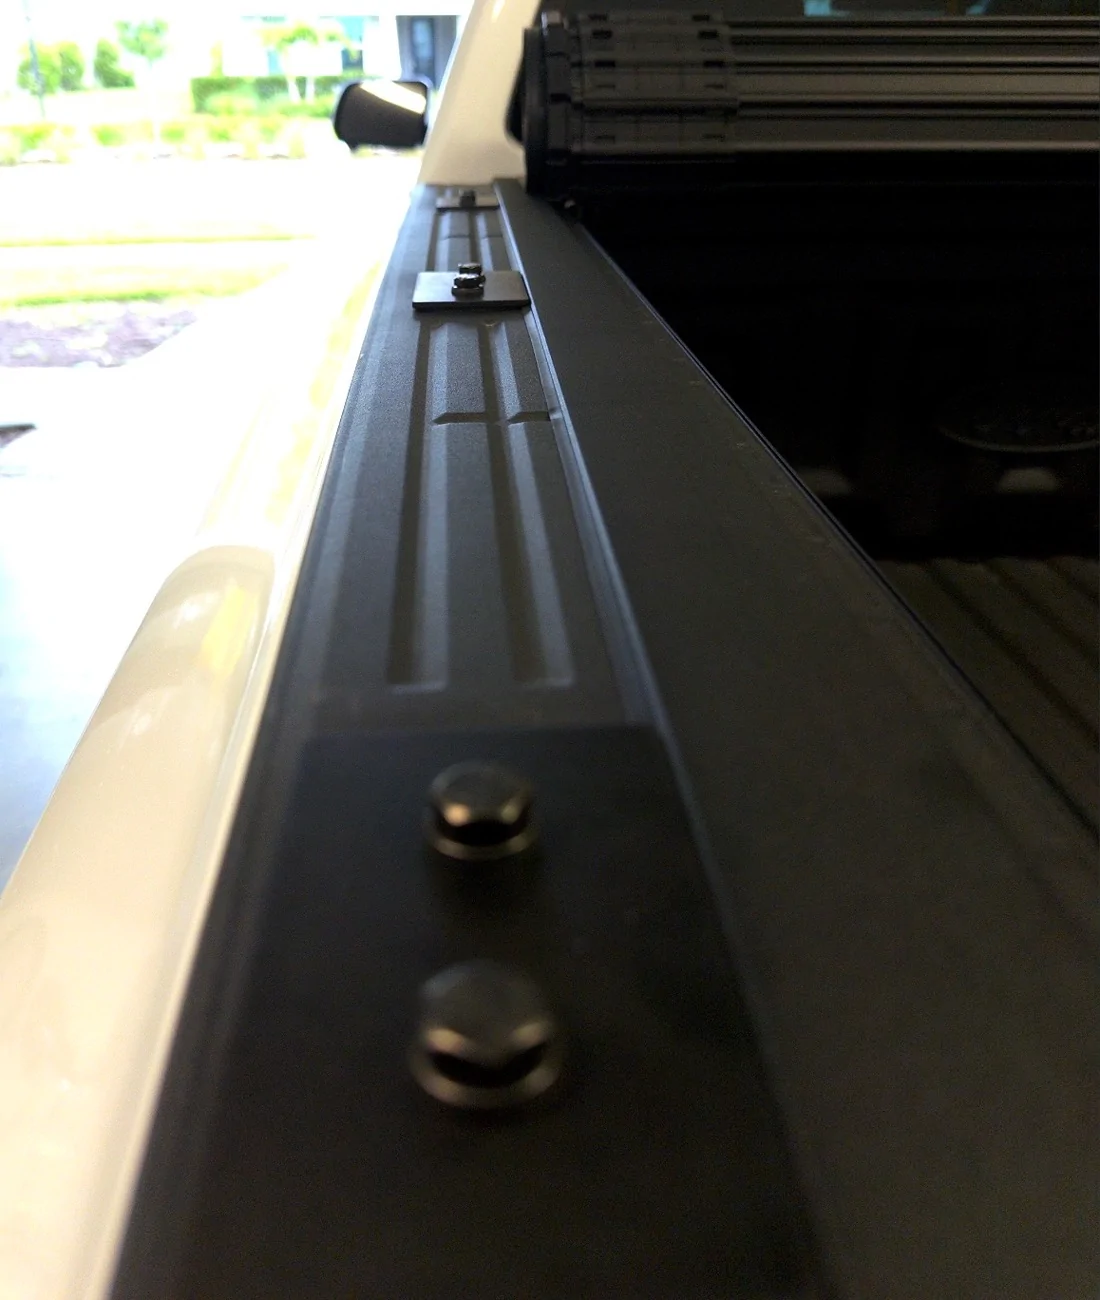
Test fit with hardware from local shop.

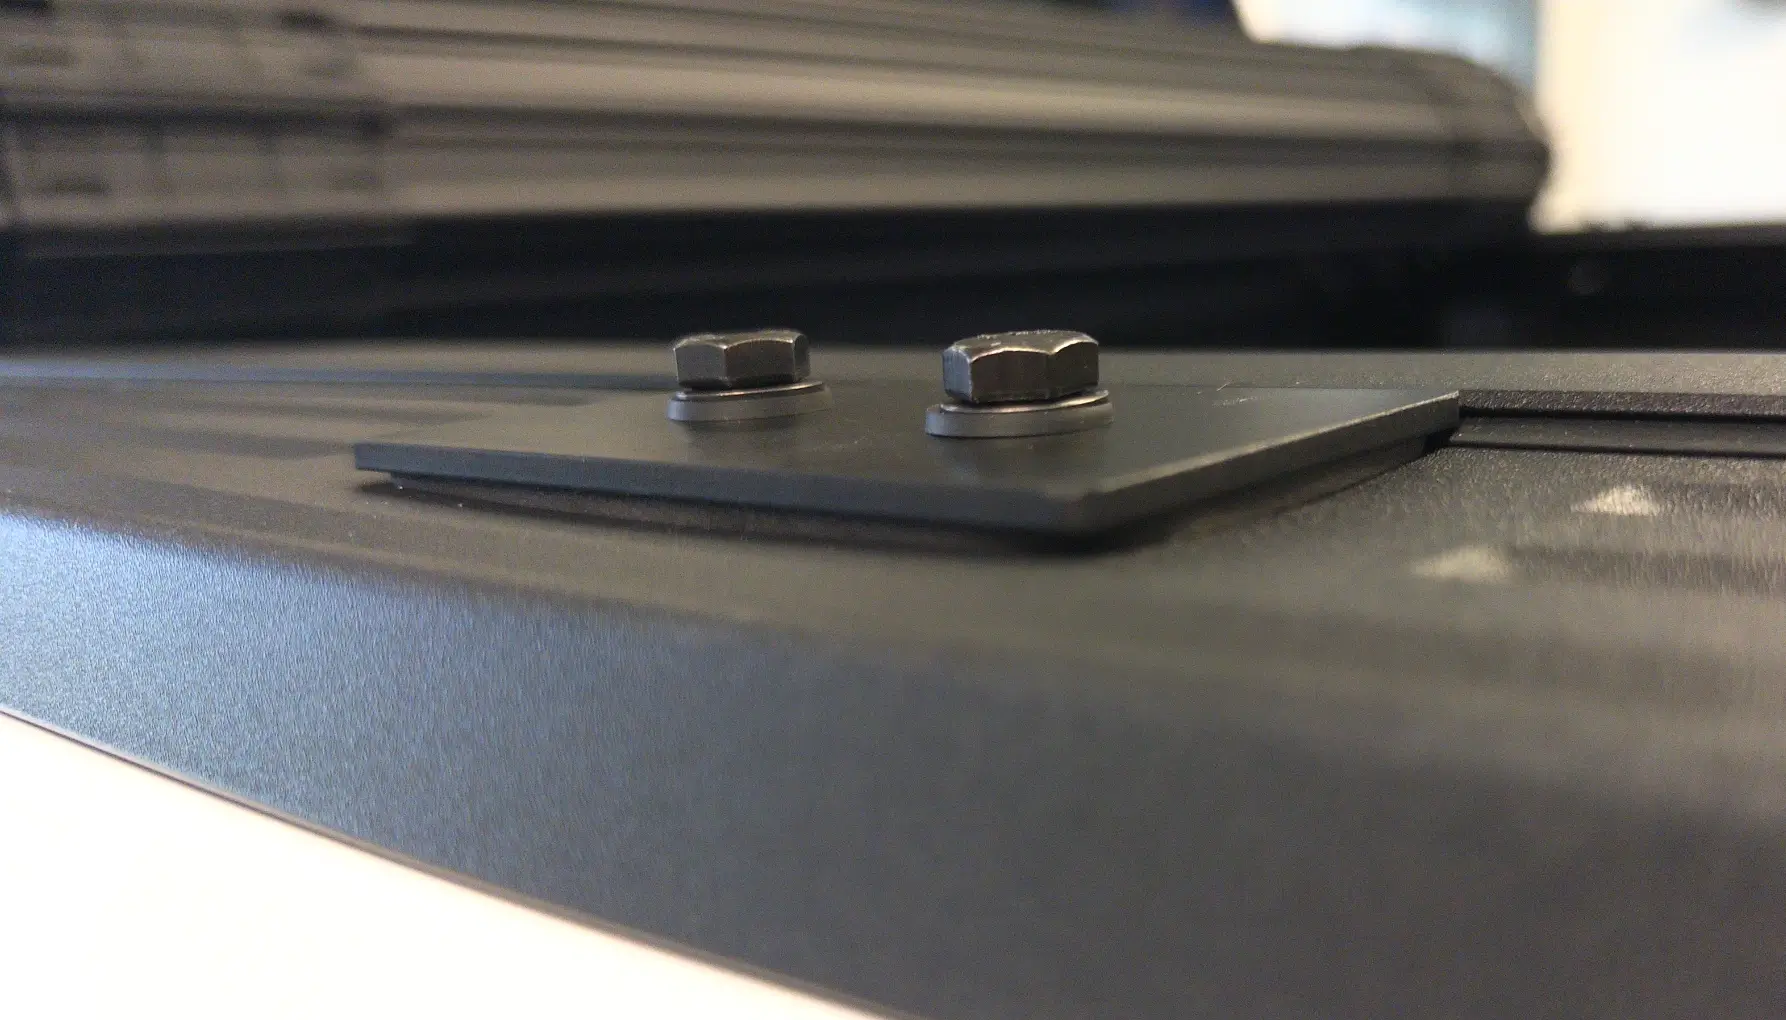
Finished product:


- 2026 models have less shitty less gappy caps
- Water leaks
- Tonneau that doesn't leak
- Stake pocket plugs
- More I've not left open in a tab I'm sure
Wasn't really happy with a lot of the options, especially considering the rails are not structural.
First step was finding a way to close the gap from the bed rail to the top of the cap so that things can mount well. I saw that there are various threads on making shims with nuts, bolts, washers etc as well as solutions from companies like Go Fast Campers (who apparently will not sell it alone). Then I found @AdventureLab spacer setup that comes with or apart from BRAPs. Getting a solid piece made by Xometry or the like was more of a hassle and I figured it would be cool to support them so I grabbed their spacer kit. It fits well except for one little quirk. I think it comes with 20mm long bolts that secure all the plates together in the spacer. This is great except that the rear 2 pockets are shorter by 2~3mm so you remove a plate there. The problem with that is now the bolt is too long and protrudes from the top and its not longer a flat surface. No big deal for the BRAPs but won't work for my setup. Lucky my hardware store had some 16mm that worked perfectly. I did re-thread a few of the spacer plates and do a bit of de-burring. After that they work perfectly.
I didn't want the BRAPs (though they're very cool). I do want a mounting surface and I want it water tight (within reason). This lead me to designing an aluminum plate in CAD and sending it off to Xometry. I ordered it in 6061 aluminum with black anodization. It was about $65 and I was able to get it American made! I'm sure there are way cheaper ways to make this happen but I don't have a machine shop and am not a machinist etc. The plates came out great. If I were to make them again I would adjust the fillet to be slightly more aggressive. It looks like the tight curve was maybe a bit tighter than the water jet or whatever does best.
I then needed to decide on the seal. The gap between this new plate and the top of the bed rail cap varies between 1~3mm. So I needed something that would be at least 3~3.5mm tall but able to compress to about 1mm without failing. I also wanted a nice clean line and a lot of weatherstripping can't make tight corners. I opted for EPDM foam strips. I think if I were to do it again I would opt for 8mm wide instead of 5mm for a bit of extra wiggle room. The good news is they're pretty secure, close the gap well, compress well, and seem stable-ish. It's pretty easy to remove this 'gasket' and clean it up with automotive googone if I end up wanting something stiffer or these fail.
The last step of the puzzle is OCD. I wanted this to look OEM the best I can. I also wanted all black. Not all black hardware is outdoor/weather/corrosion resistant so I spent a decent amount of time on McMaster figuring it all out. Ended up looking pretty great. Would have preferred button head bolts but 13mm is fine as I carry it anyway for other stuff on the Ranger. I've got the mounting order: bolt head -> metal washer -> santoprene washer -> plate. The santoprene is somewhere in the middle on hardness and does risk failing when over torqued. The real test will be when I get some rack parts and if the torque required for that stuff makes me change the EPDM weather seal and this washer for something harder. Using the metal washer on top seems to spread the load pretty well though so far.
I sprayed these with a hose to good effect and will maybe report back when I've taken it through a heavy rain.
If you want the CAD file let me know (.step). I'm not an engineer by trade so no warranty and I have no idea how well it work, last, handle load, etc. This was a fun experiment for me to try something new :]
Bead of silicon on top of Vinyl.
Spacer plates in place.
Test fit with hardware from local shop.
Finished product:
Sponsored
Last edited:

