ATestBishop
Well-Known Member
- First Name
- Alex
- Joined
- Apr 14, 2025
- Threads
- 21
- Messages
- 407
- Reaction score
- 480
- Location
- Walnut Creek, CA
- Vehicle(s)
- 2024 Ford Ranger XL
EGAD! You fought and you won there... Way to see it through
Sponsored

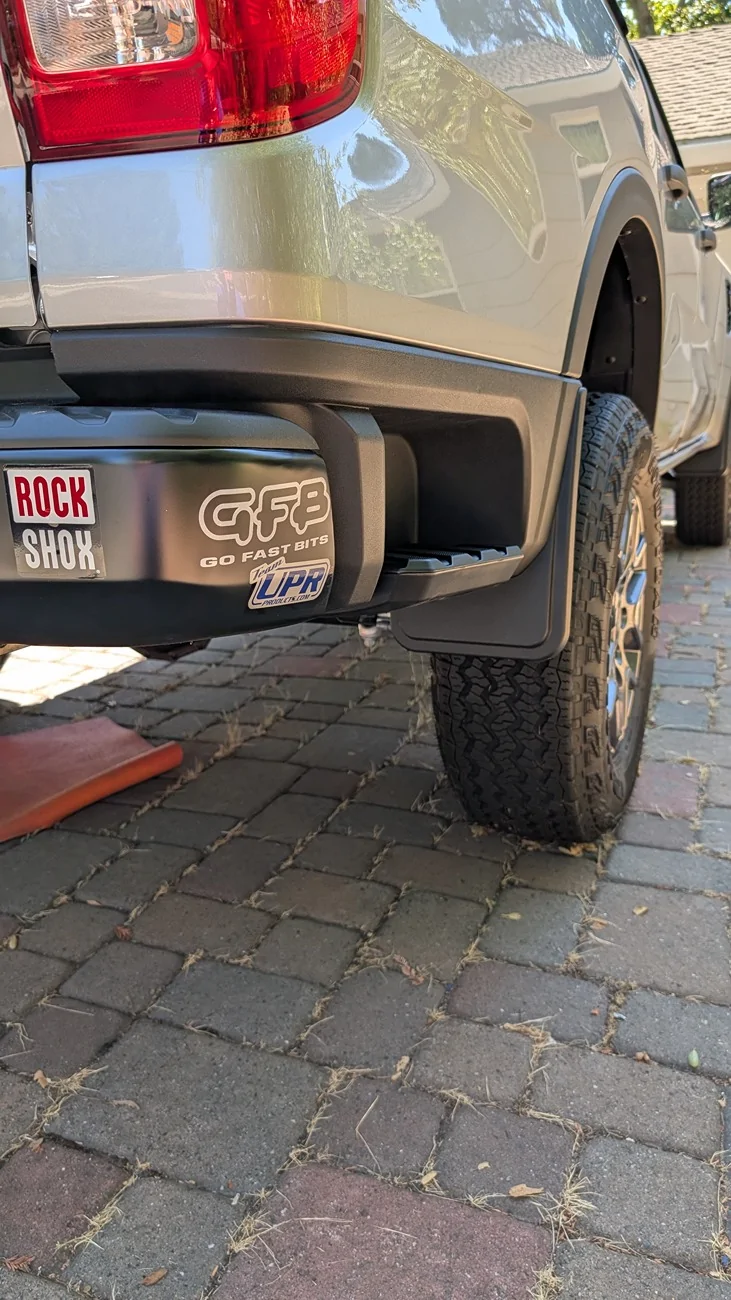
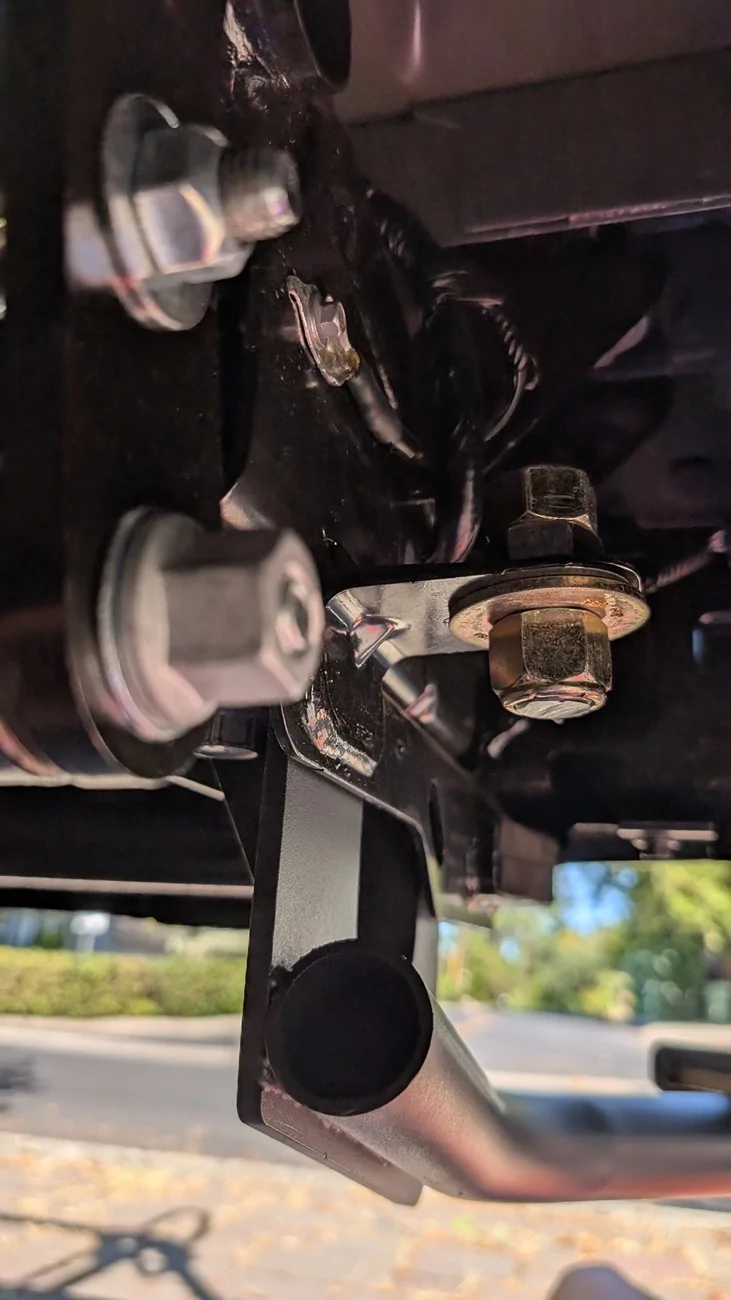
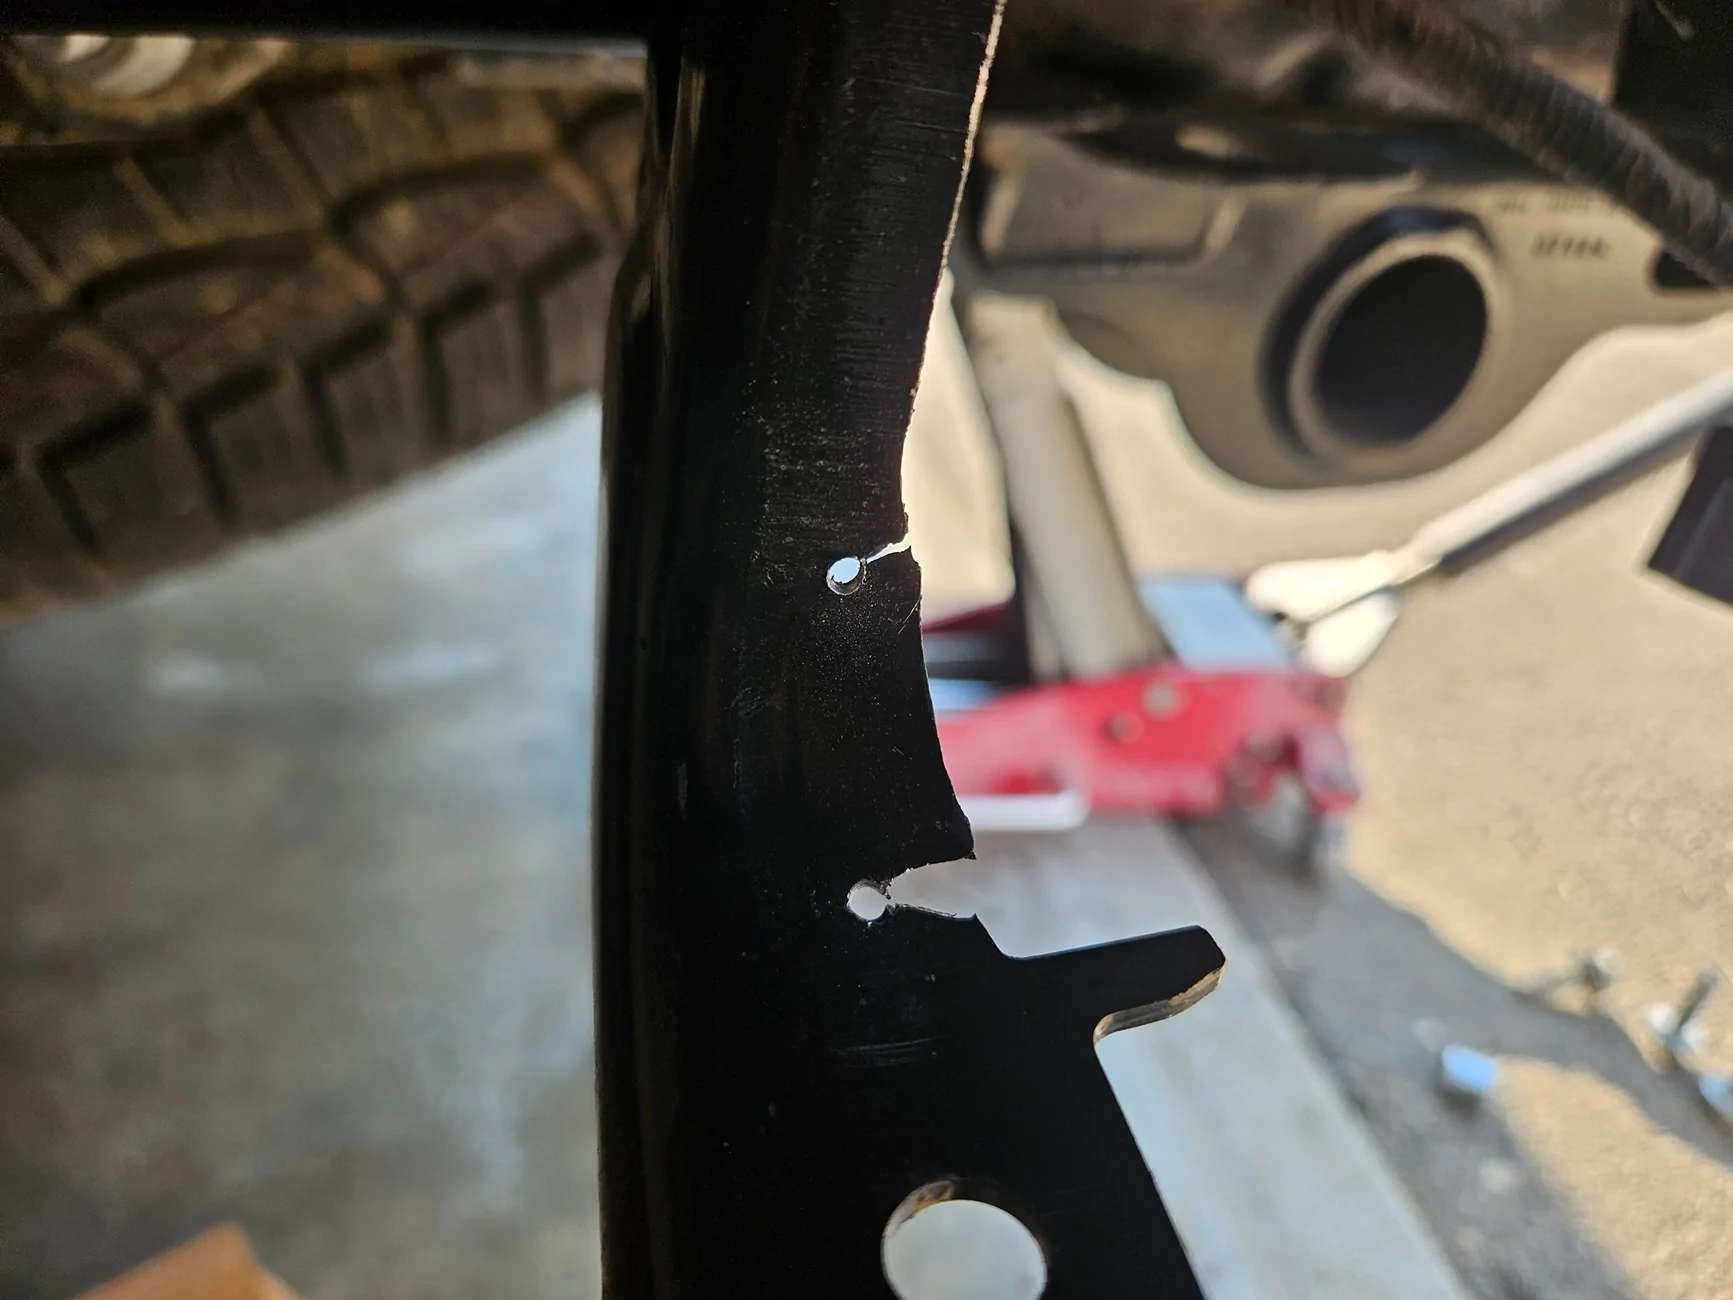
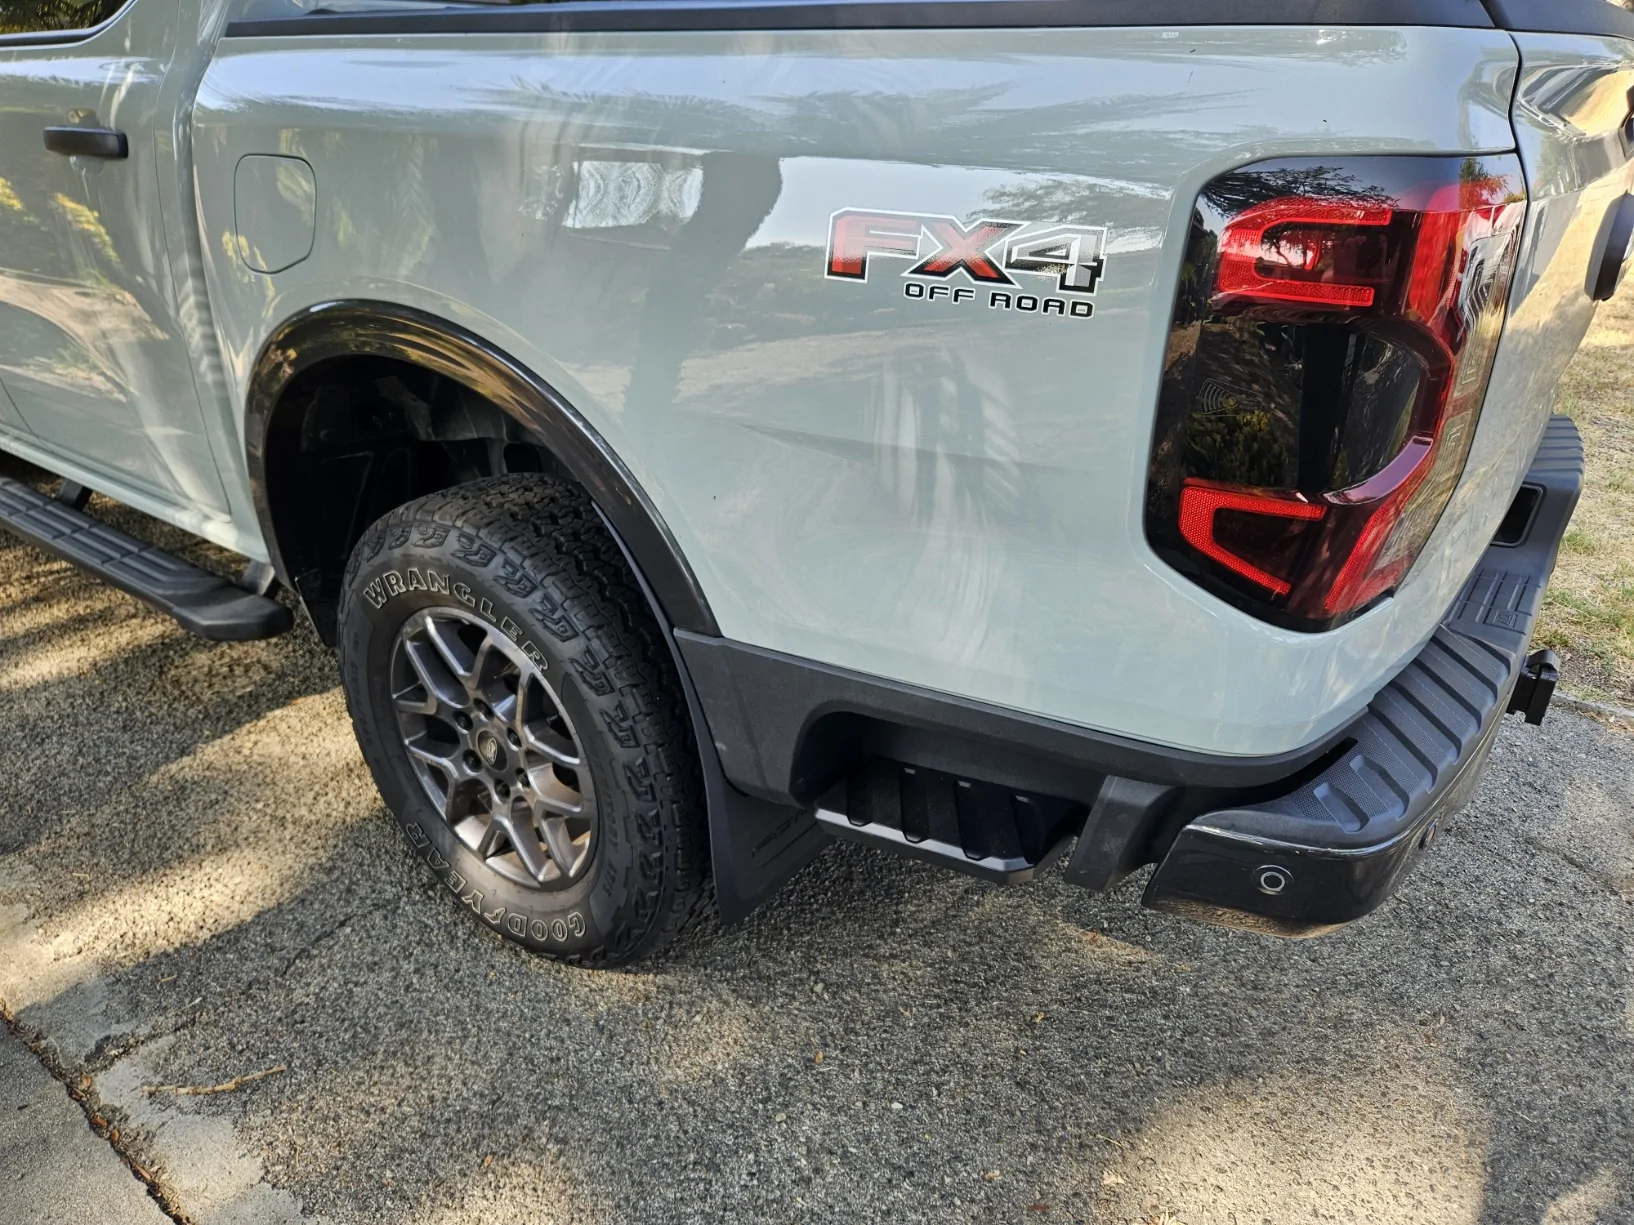
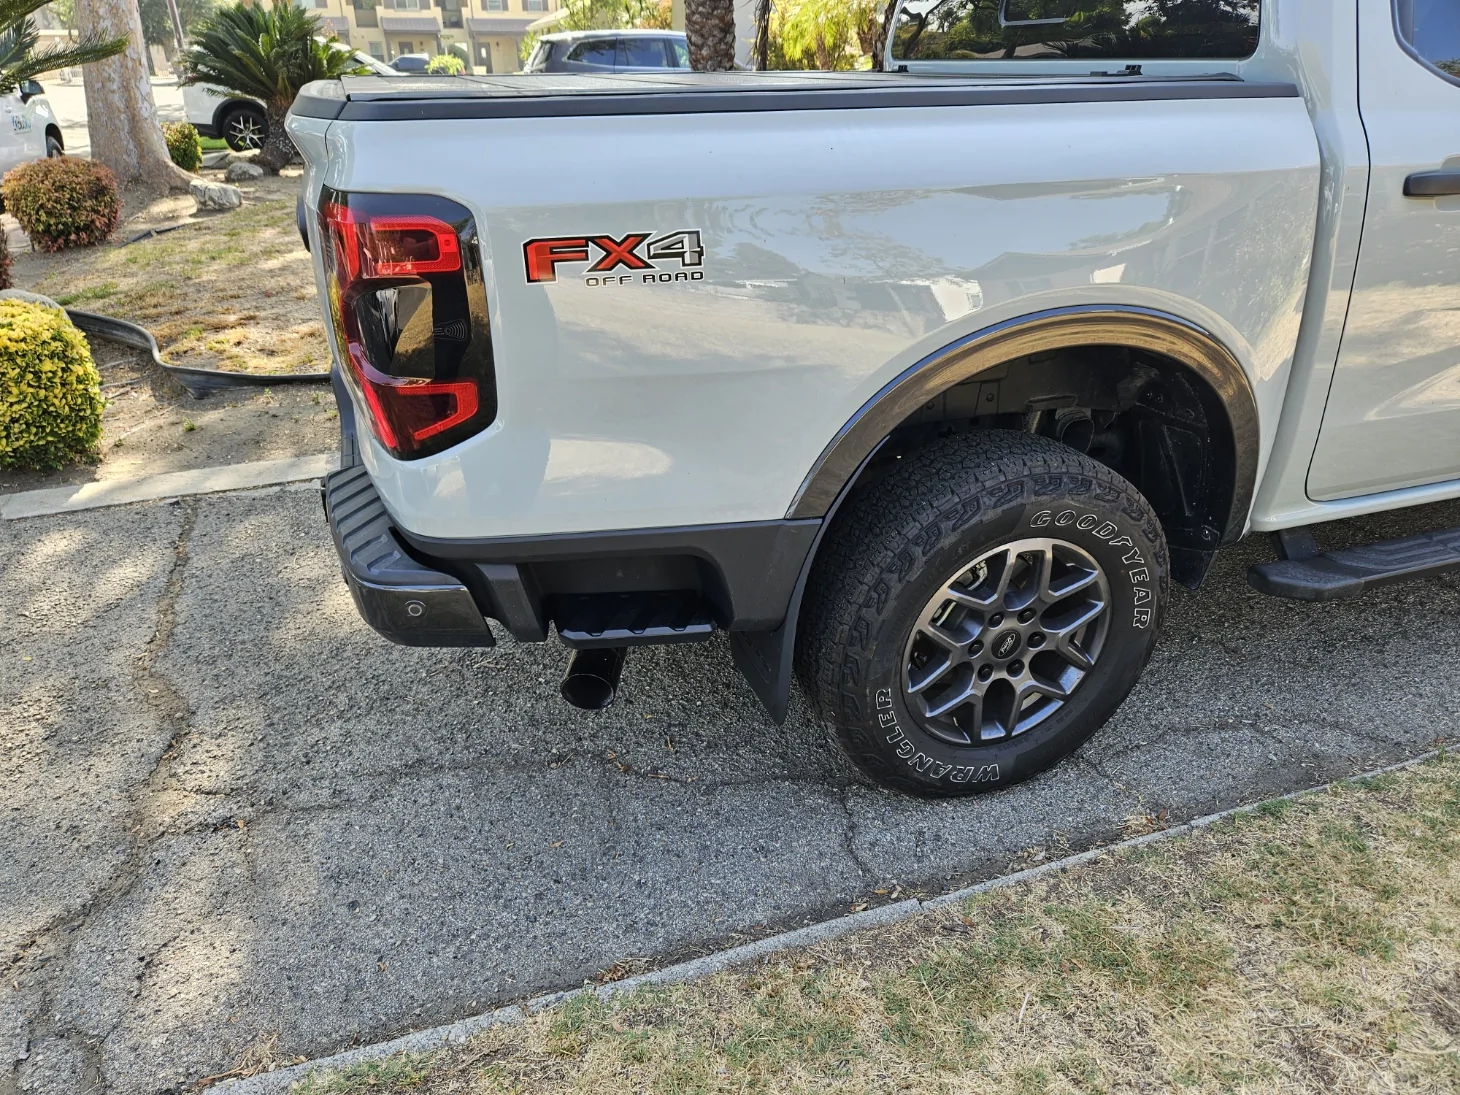
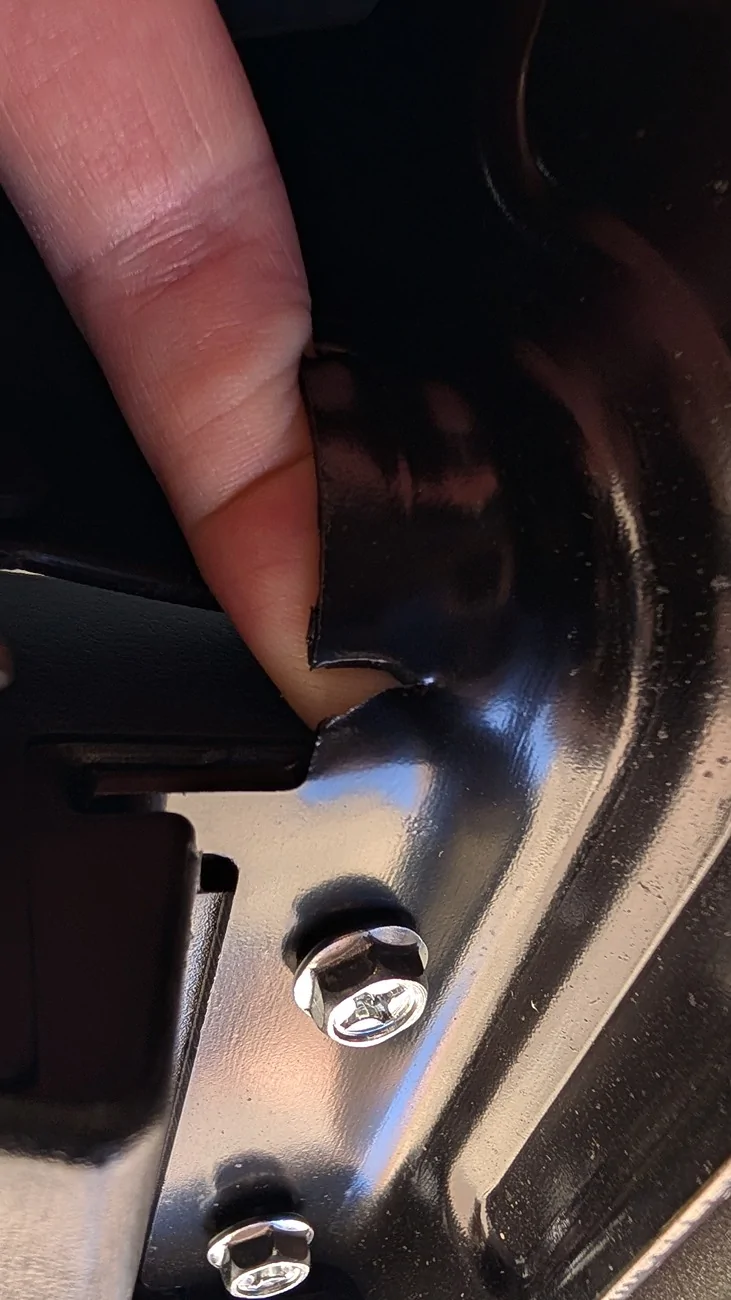
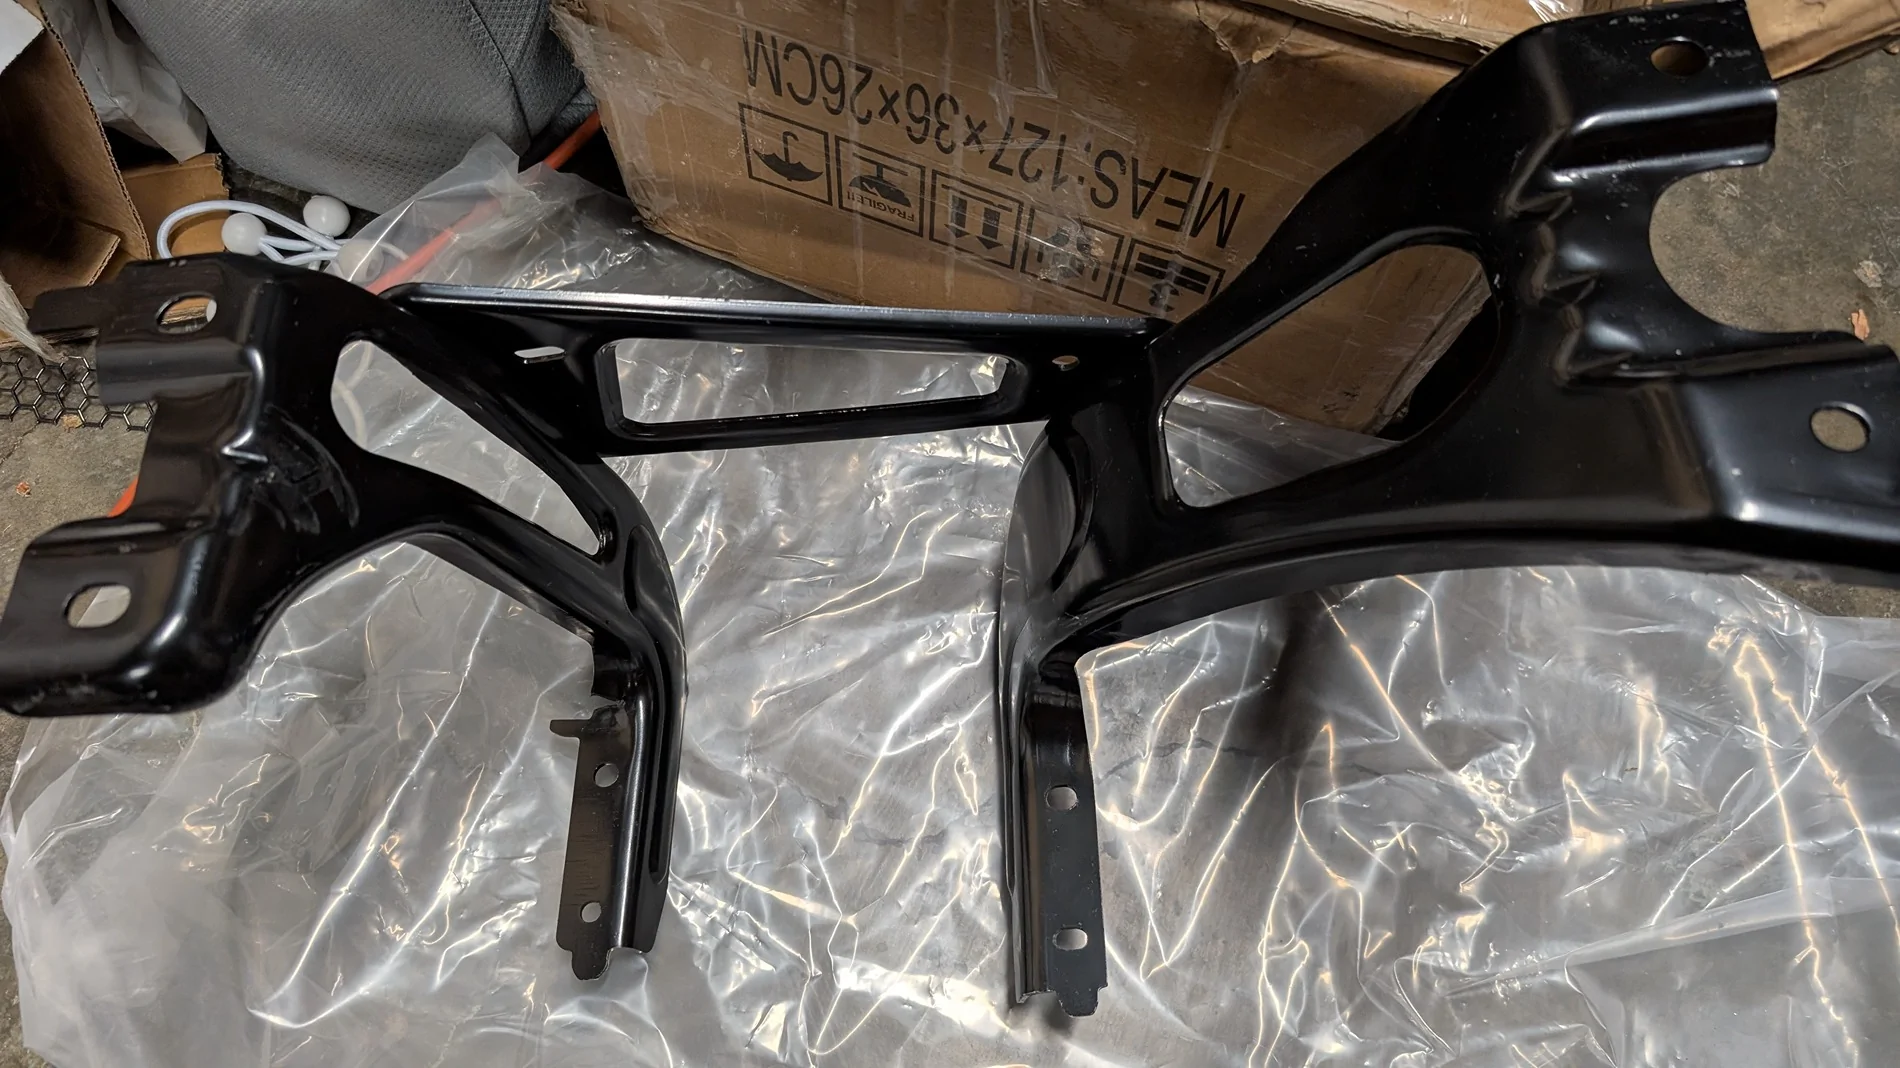
I did notice one bracket of mine was probably bent from shipping as it didn't totally line up with the step. I just pried it enough to line up. No biggie. I have a feeling those cracks are on the factory ones as well. I don't see them as a big deal and not worried about them cracking on the future. The clips didn't sit tight on about 70% of mine so i just dabbed them with some silicone to keep them from falling out during install.Welp, install is complete, but boy did it fight me. Passenger side was fine (which thankfully I did first), but the driver's side was cursed. Not only was it the side with the scratch (which is definitely noticeable) but then getting the original trim piece out was a bother. Not one of the scrivets wanted to come out without a fight, and then one of the 3 bolts was so rusted the metal clip embedded into the original trim had to be spun free of the plastic to get it off... (And then babied with PB Blaster). And then I discovered the Alibaba bracket was welded off kilter and one of the 4 bolt holes wouldn't line up no matter what I did.... After taking it in and out 5 times trying to make it fit I finally just had to send it with the bolt cross threaded, as I wasn't taking that mfer back out and ordering another. Took half an hour to get that one bolt in because it had to cut new threads the whole way. Then I realized there were two cracks in the bracket in the throat of the right side... (I was so focused on the scratch in the plastic I didn't even look at the metal parts closely I guess). Ended up drilling holes at the end of the cracks just to stop them from propagating and will maybe see if I can get a friend to touch them up with a welder sometime in the future (that'd mean needing to pull the plastic shroud again though, so it may just stay as-is unless it starts to rust out or something...) Then of course several of the plastic clips decided to slip and not line up during the final trim install which buggered them up, but thankfully the kit came with extras.
All in all I can't say I recommend the alibaba steps. You get what you pay for. Thankfully I'm only $175 into them or I'd be very pissed right now. Final fit and finish is at least good, that's all I can give them. The plastic clips don't snap nicely into the bosses on the trim pieces like the original, and the spots for the metal clips aren't quite molded properly to hold the metal clips positively, but I don't know that these matter all that much in the end.
Also some tips for install, the round pins on my brackets were both bent, and had to be straightened up to fit in the holes. I also found rather than shorten them it was easier to pop the two bolts and scrivet holding the forward wheel well divider partially (there's two permanent rivets which prevent it being removed entirely) and then you can squeeze the bracket back. Also highly recommend the loosening the bumper/trailer hitch method rather than drop it entirely. That worked a treat. Torquing the bumper bolts back to the specified 148 ft-lbs was fun, but you get stuck doing this no matter what.


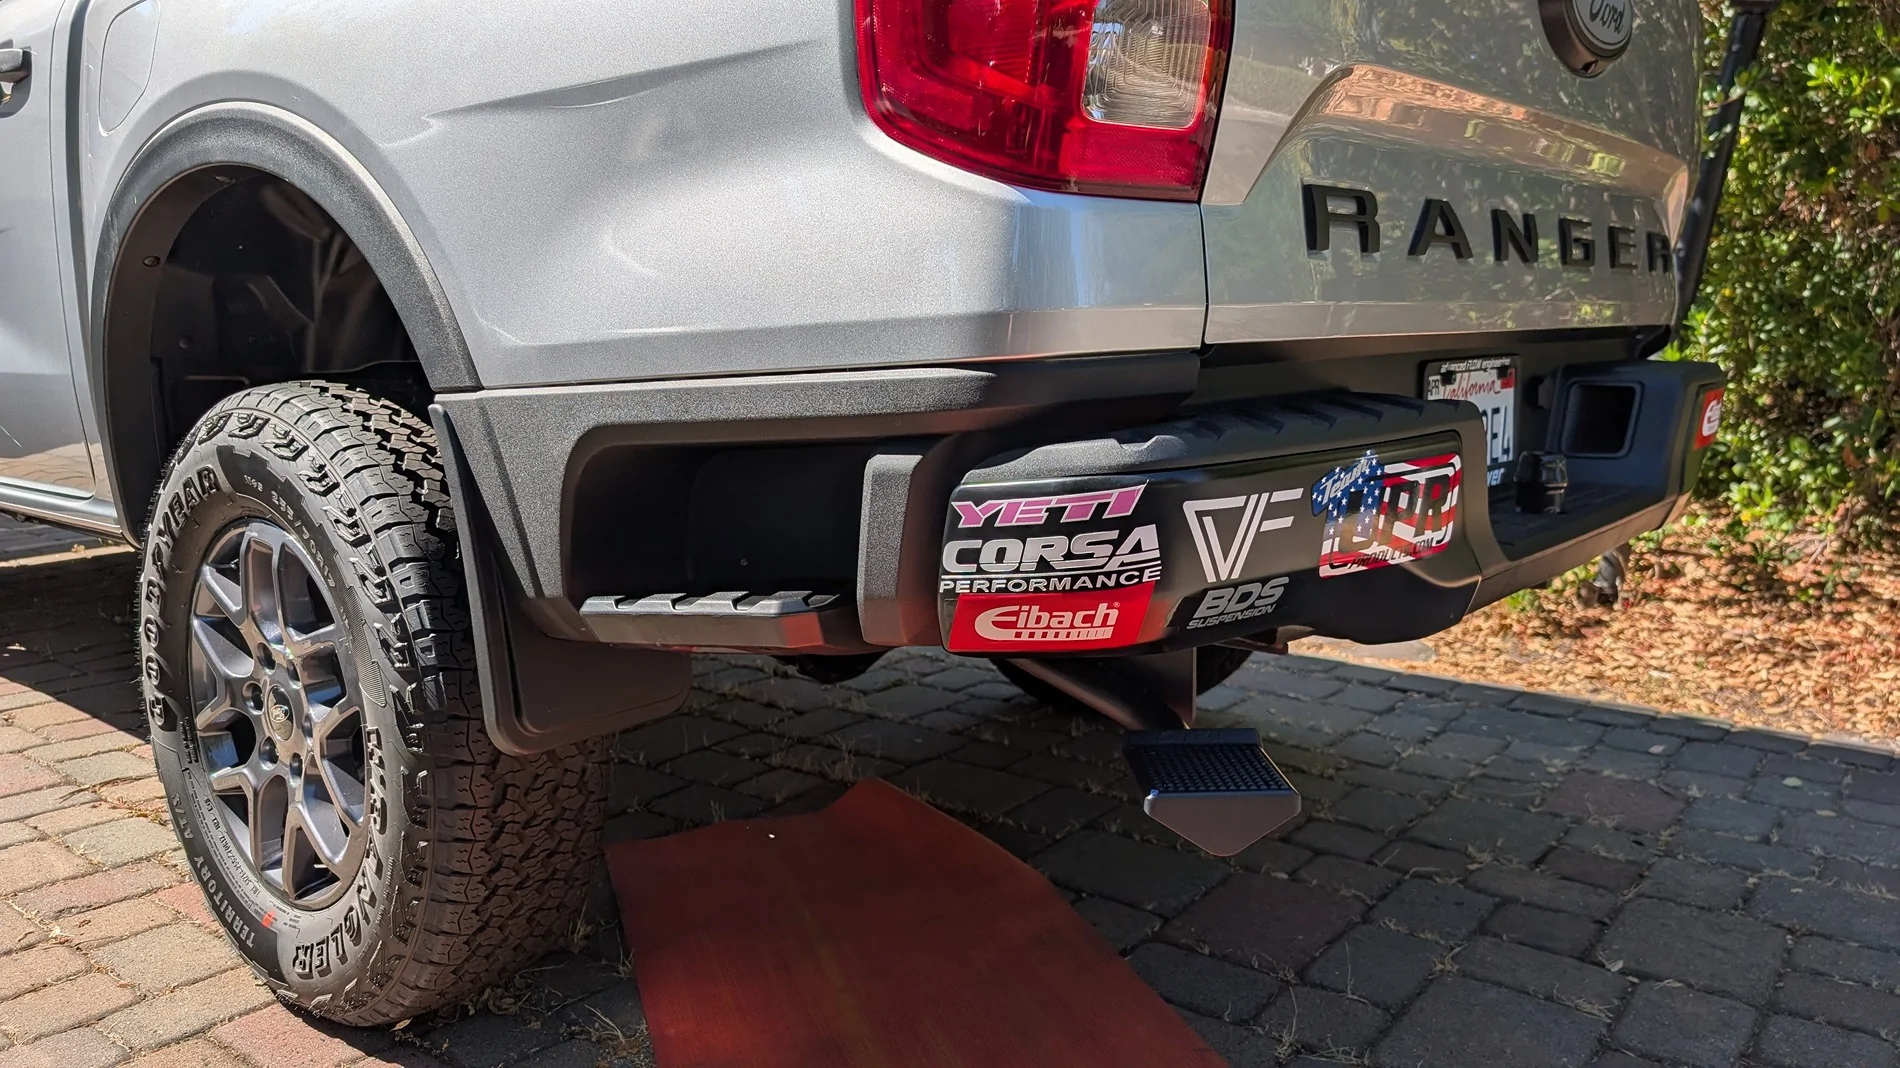
Due to these being Aliexpress parts, the low price and who knows what Chinese materials I'm pretty certain you're going to see that black plastic fade very quickly - I'd very quite surprised if the plastic components have much if any UV stabilizer in the polymer formula.Welp, install is complete, but boy did it fight me. Passenger side was fine (which thankfully I did first), but the driver's side was cursed. Not only was it the side with the scratch (which is definitely noticeable) but then getting the original trim piece out was a bother. Not one of the scrivets wanted to come out without a fight, and then one of the 3 bolts was so rusted the metal clip embedded into the original trim had to be spun free of the plastic to get it off... (And then babied with PB Blaster). And then I discovered the Alibaba bracket was welded off kilter and one of the 4 bolt holes wouldn't line up no matter what I did.... After taking it in and out 5 times trying to make it fit I finally just had to send it with the bolt cross threaded, as I wasn't taking that mfer back out and ordering another. Took half an hour to get that one bolt in because it had to cut new threads the whole way. Then I realized there were two cracks in the bracket in the throat of the right side... (I was so focused on the scratch in the plastic I didn't even look at the metal parts closely I guess). Ended up drilling holes at the end of the cracks just to stop them from propagating and will maybe see if I can get a friend to touch them up with a welder sometime in the future (that'd mean needing to pull the plastic shroud again though, so it may just stay as-is unless it starts to rust out or something...) Then of course several of the plastic clips decided to slip and not line up during the final trim install which buggered them up, but thankfully the kit came with extras.
All in all I can't say I recommend the alibaba steps. You get what you pay for. Thankfully I'm only $175 into them or I'd be very pissed right now. Final fit and finish is at least good, that's all I can give them. The plastic clips don't snap nicely into the bosses on the trim pieces like the original, and the spots for the metal clips aren't quite molded properly to hold the metal clips positively, but I don't know that these matter all that much in the end.
Also some tips for install, the round pins on my brackets were both bent, and had to be straightened up to fit in the holes. I also found rather than shorten them it was easier to pop the two bolts and scrivet holding the forward wheel well divider partially (there's two permanent rivets which prevent it being removed entirely) and then you can squeeze the bracket back. Also highly recommend the loosening the bumper/trailer hitch method rather than drop it entirely. That worked a treat. Torquing the bumper bolts back to the specified 148 ft-lbs was fun, but you get stuck doing this no matter what.
To be fair, the factory trim pieces I took off were already fading, and those have only been on there 14 months. They did feel noticeably heavier than these too though... We'll see how they hold up.Due to these being Aliexpress parts, the low price and who knows what Chinese materials I'm pretty certain you're going to see that black plastic fade very quickly - I'd very quite surprised if the plastic components have much if any UV stabilizer in the polymer formula.
As you said, you get what you pay for.
Yeah, mine was this way too, but it meant that the top bolt pattern was about 1/8th inch off too. I ground the one hole a little wider, but it still fought me. In the end I was limited by where they put the bend in the piece holding the round stud.I did notice one bracket of mine was probably bent from shipping as it didn't totally line up with the step. I just pried it enough to line up. No biggie. I have a feeling those cracks are on the factory ones as well. I don't see them as a big deal and not worried about them cracking on the future. The clips didn't sit tight on about 70% of mine so i just dabbed them with some silicone to keep them from falling out during install.

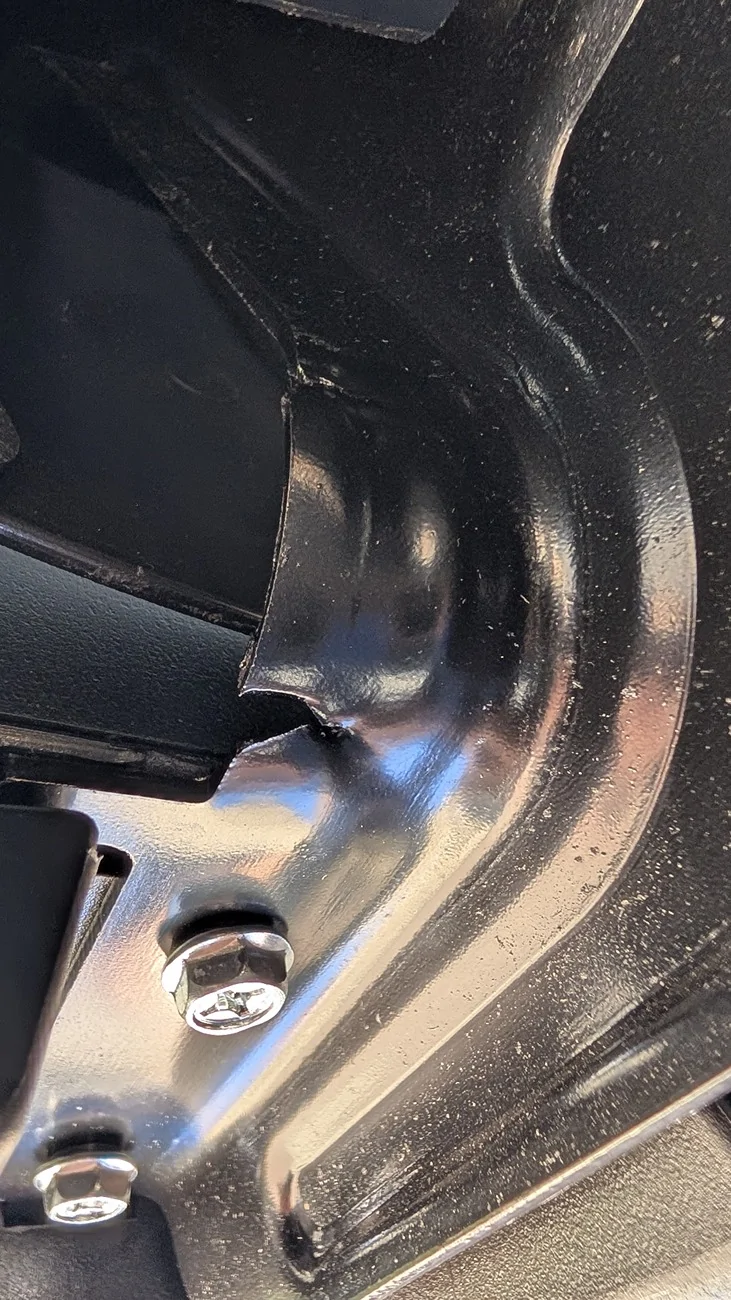
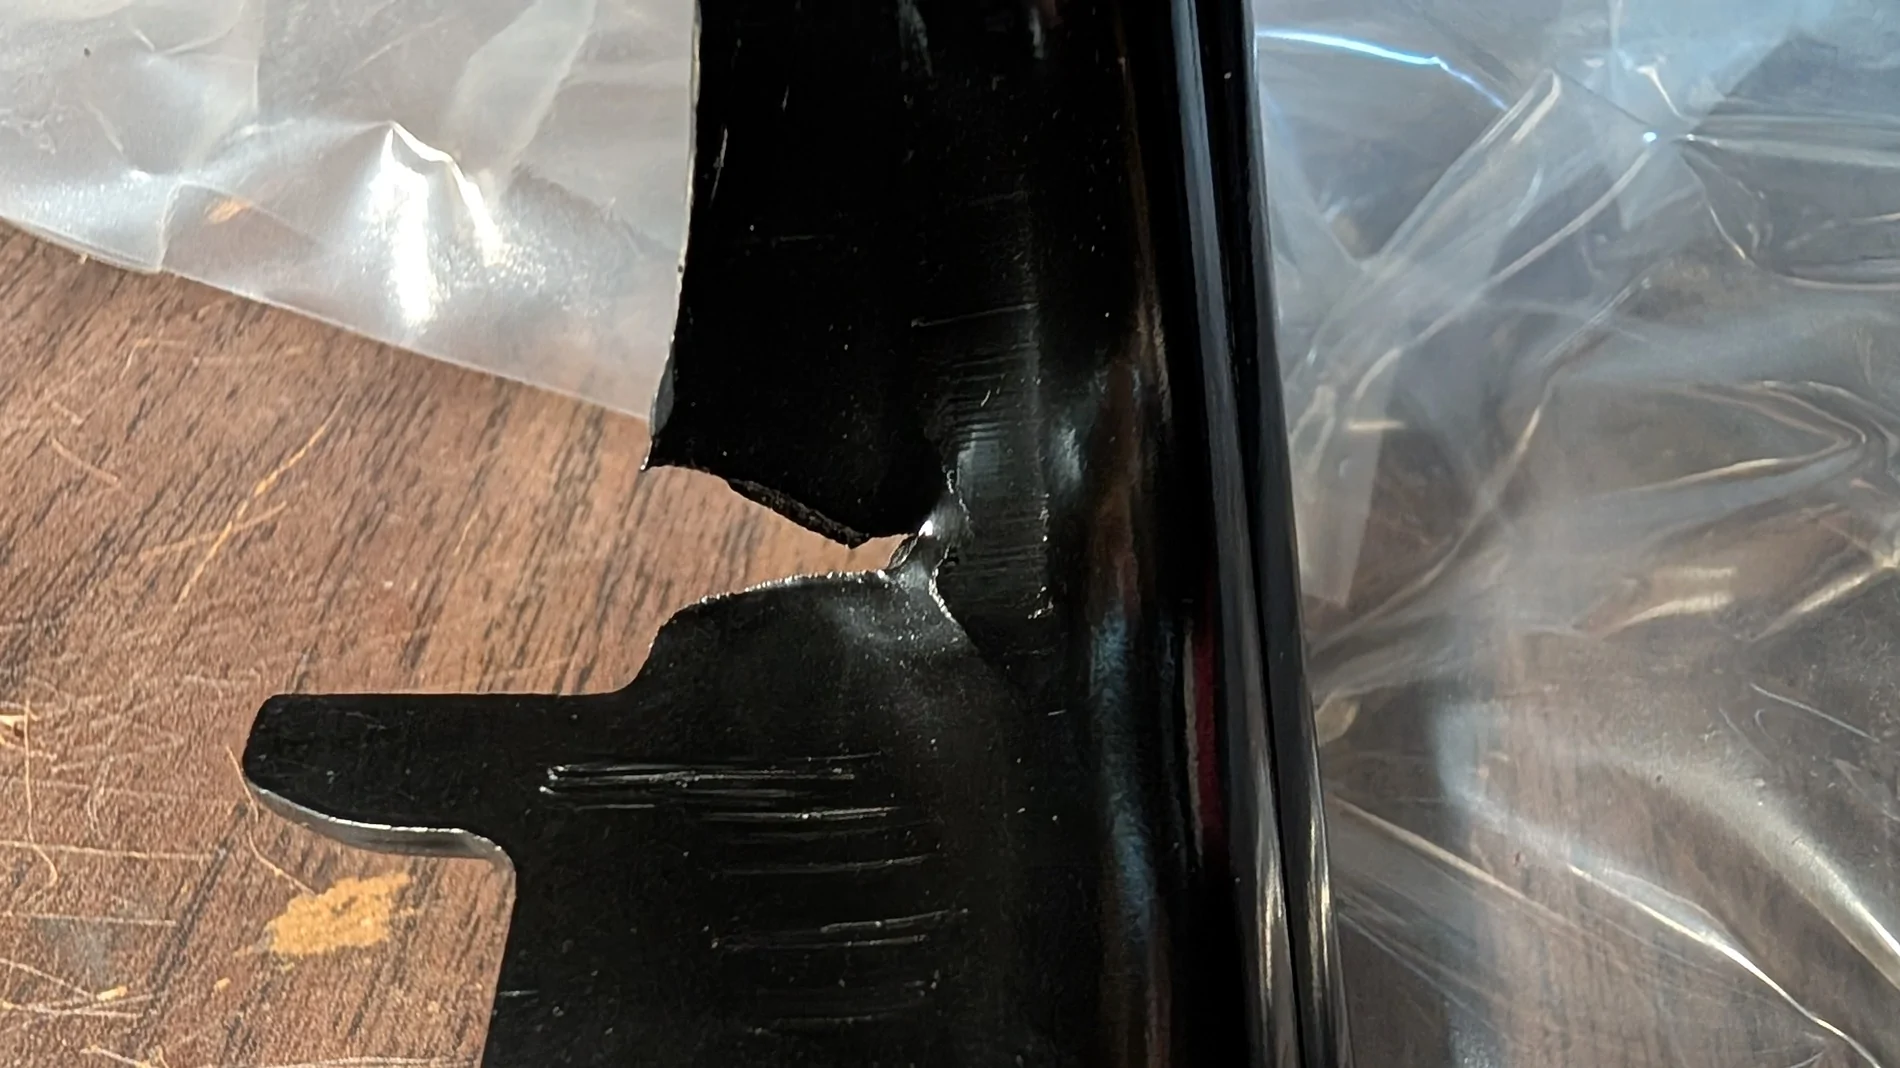
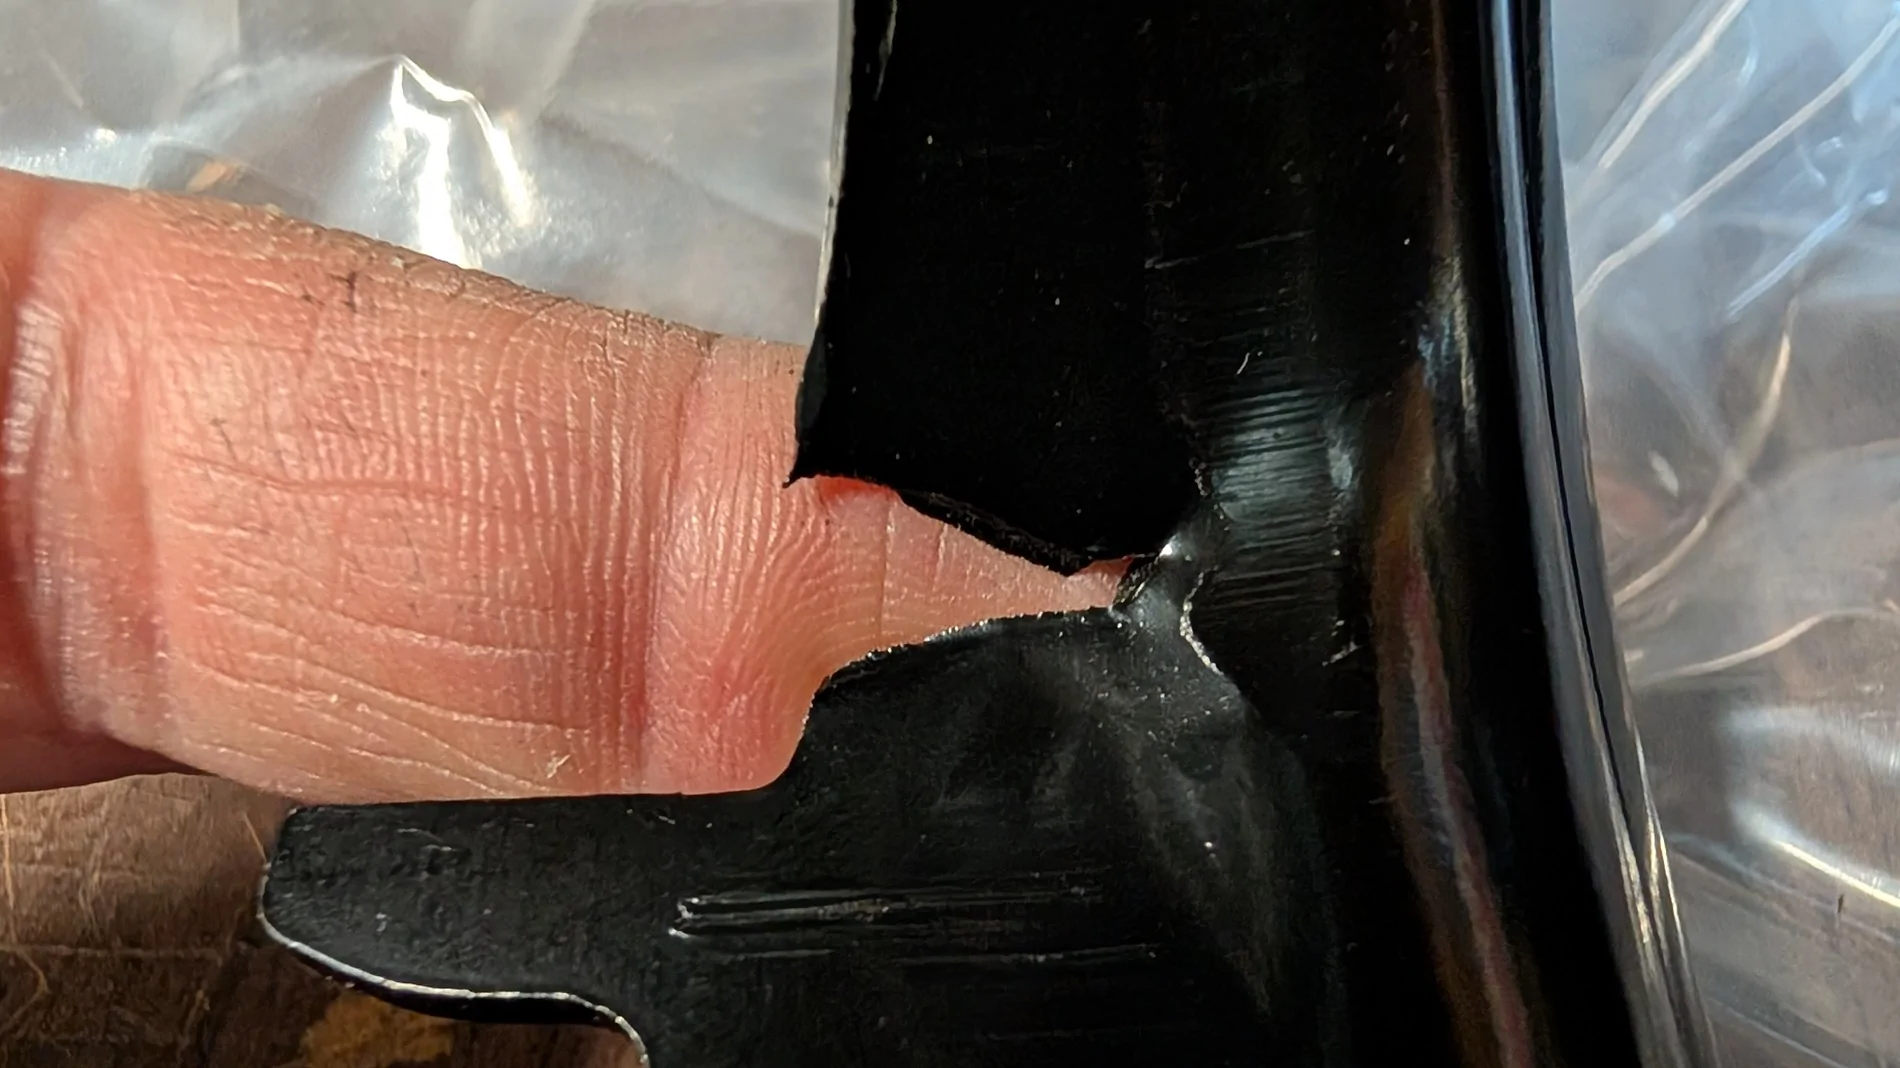
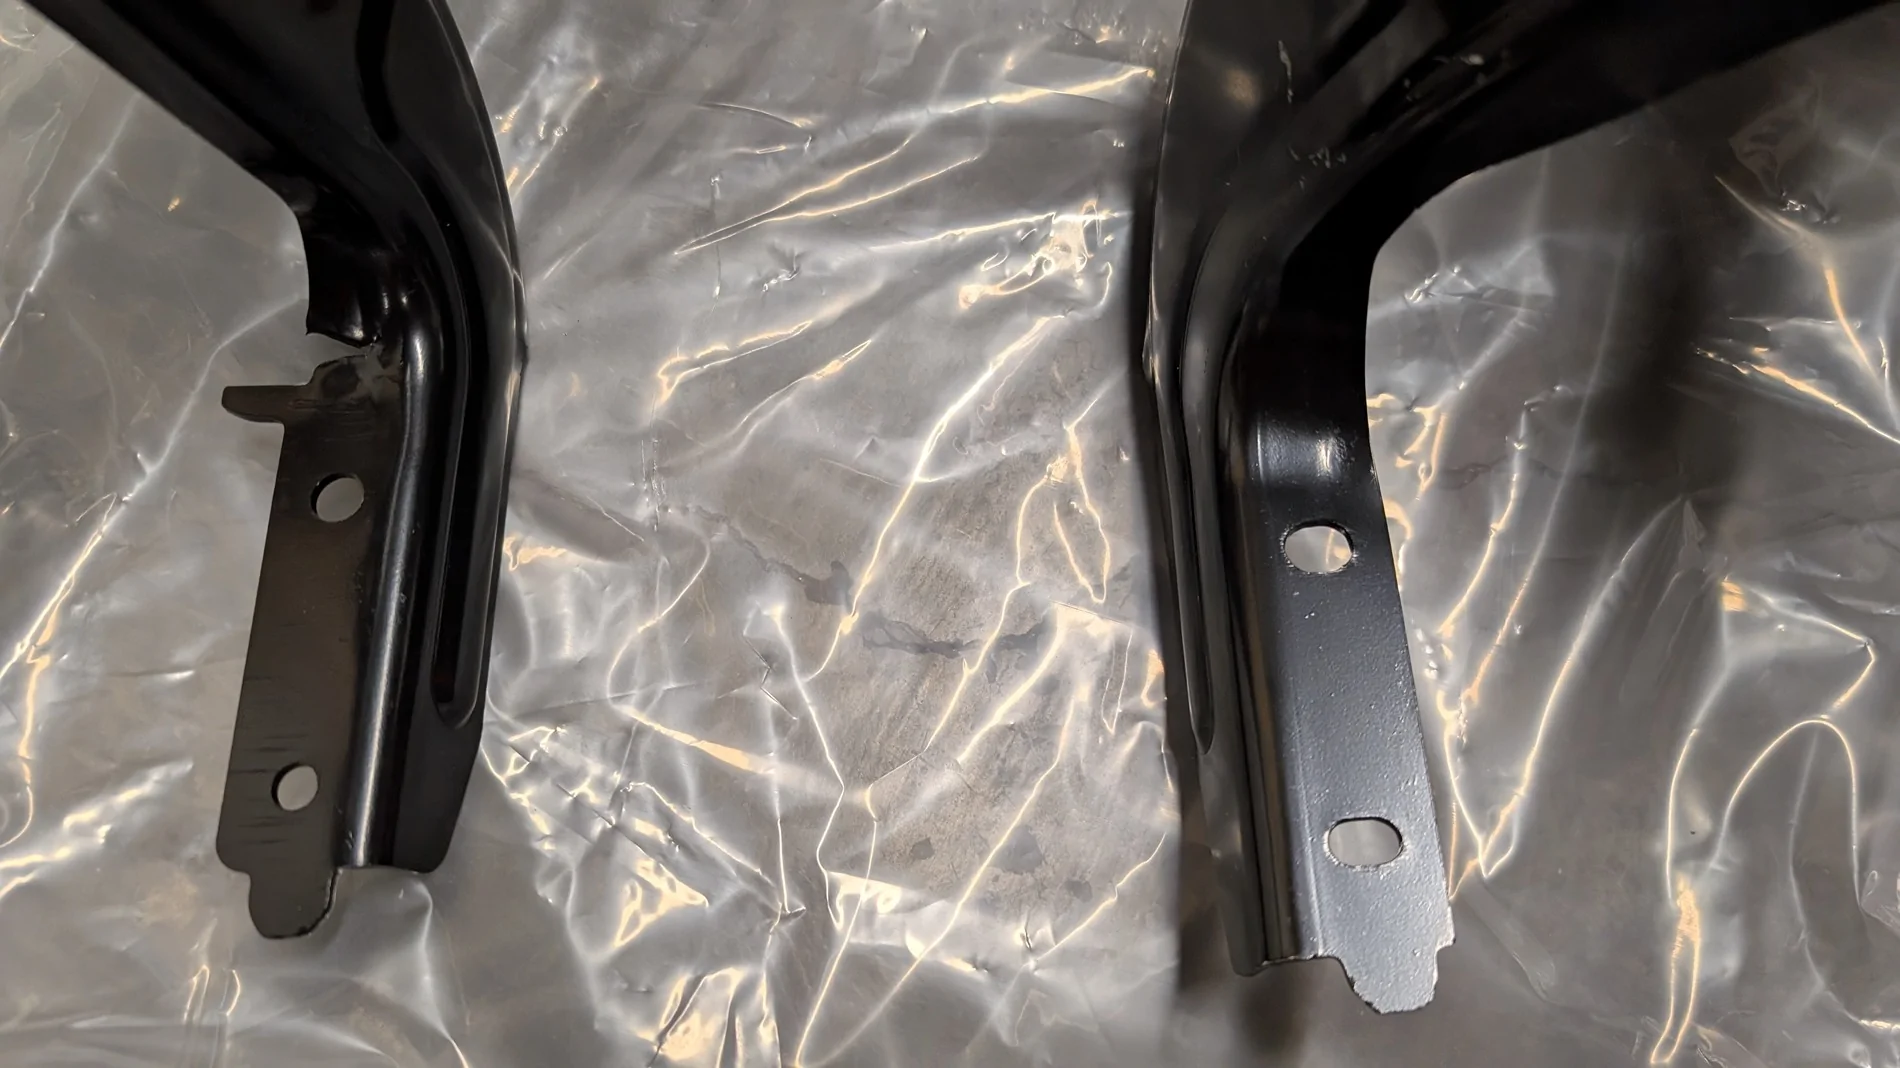
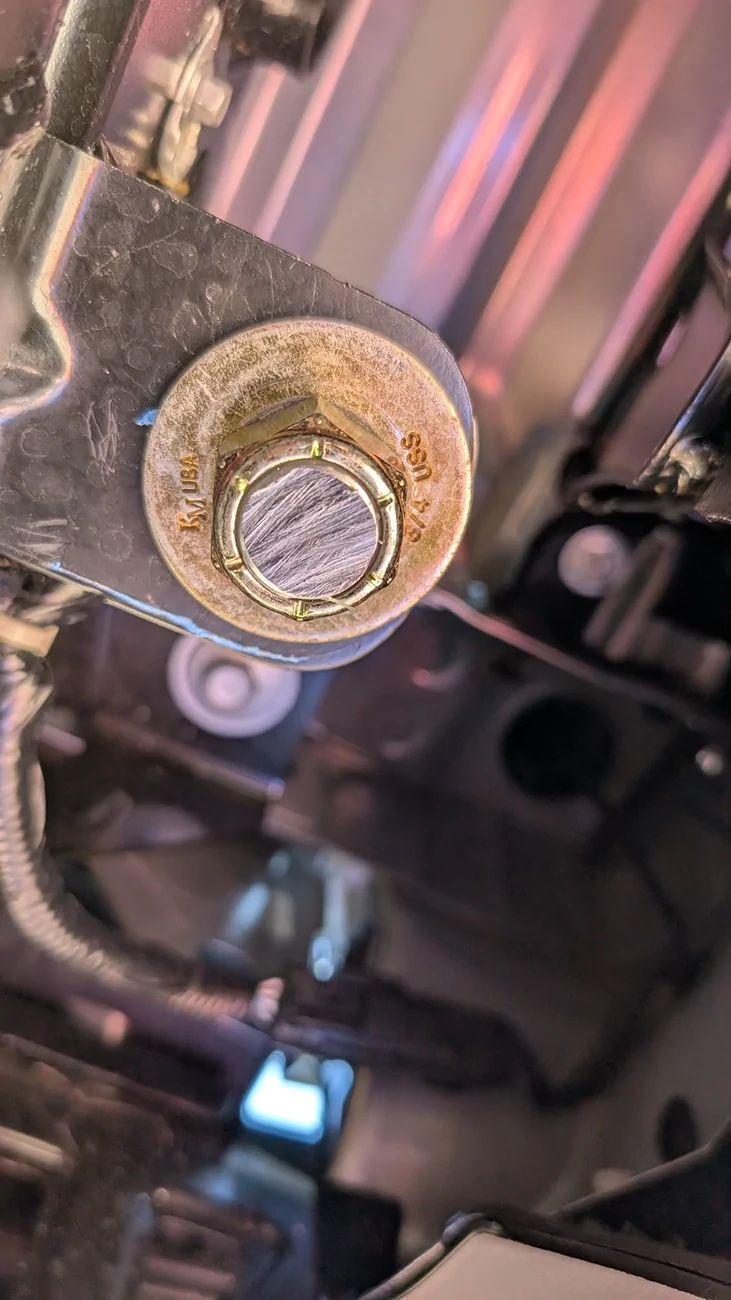
I don't understand why you're dismissing this kind of crap quality. You do truly get what you pay for.Be very aware again that quality control is really not a big concern at all for most of these sellers, the brackets arrived both torn in the exact same high street area/spot. This apparently is just very common and very well could be be metallurgy or equipment related. It's kinda funny in a way though because this is truly "cutting corners" ! I just wanted to share so people are more informed