nedmo
Gold Sponsor
- Thread starter
- #1
Hi all,
Ned here from G.O.A.T Offroad in Australia. We have had the Ranger Raptor since 2022 and we were pretty early on supporting them.
When we wanted to tackle the problem of lifting them without negatively affecting the fox shocks, we came in with no preconceptions and just wanted to test all 3 methods - springs, perch collars or strut spacers with the goal only to be to find the best option. We made our own perch collars, made our own strut spacers in varying thicknesses from 1in lift all the way up to 3in lift. 3in lift was too much for the CVs and ball joints, so we only sell up to a 2in/32mm thick spacer.
1in lift = 16mm thick
1.5in lift = 24mm thick
2in lift = 32mm thick
3in lift = 40mm thick
Our findings were that strut spacers were the clear winner across all of the different variables. Yesterday, we posted a mega blog article on our site detailing every single aspect of the Ranger Raptor suspensions, the platform specific features and or pitfalls to be aware of and our findings.
You can find the article here https://goatoffroad.com.au/blogs/tech-talk/the-ultimate-guide-to-lifting-your-ranger-raptor
But, here it is in all its glory as well. Enjoy!
And please, let me know if you have any questions.
And if your keen to grab yourself a set of G.O.A.T Ranger Raptor spacers, CLICK HERE
Lifting your Ranger Raptor isn’t just about looks or slapping on bigger tyres. Whether you drive the original 2018–2022 Raptor with Fox 2.0 Internal Bypass Shocks, or the Next Gen Raptor (2022–current) with Fox 2.5 Live Valve Internal Bypass, lifting it properly requires an understanding of how these shocks actually work.
Raptors don’t run basic struts. These things are engineered for high-speed off-road control and comfort, with bypass zones, bump compliance, and in the Next Gen, active valving.
We’re going to break down three core methods of lifting these trucks:
Conventional vs Ranger Raptor Internal Bypass Shocks
Conventional Shock: The Basic Setup
On a standard monotube shock:
PX3 Raptor: Fox 2.0 Internal Bypass
The 2018–2022 Raptor changed the game with Fox’s 2.0 Internal Bypass shocks:
Next Gen Raptor: Fox 2.5 Live Valve Internal Bypass
The 2022+ model steps up again. Same internal bypass concept—but with an added Live Valve compression adjuster, controlled by a central Vehicle Dynamics Module (VDM).
It adjusts compression damping on the fly using:
If you lift the vehicle without recalibrating the ride sensors, the VDM thinks you're mid-jump all the time—so it stiffens the ride when it shouldn’t. That’s why every lift on a Next Gen Raptor needs a FORScan calibration. No exceptions.
External Foam Bump Stop
Every Raptor shock (PX3 and Next Gen) includes a foam bump stop mounted externally on the shaft. It’s not hydraulic. It’s a dense foam ring that compresses just before the shock bottoms out.
Bigger Tyre Clearance: What Actually Changes?
This is the part most people overlook—and it’s one of the biggest reasons why some lifts work better than others.
If you're planning on running 315/70R17s ( or true 35s), you’re increasing your tyre diameter by ~50mm over stock. That’s 25mm more radius, which means:
Most suspension shops will sell you a spring lift or perch collar and say, “Yep, 35s will fit.” But unless they’ve physically tested compression travel with the bump stop engaged, they don’t know what they’re talking about.
Real experts know: the only way to increase bump clearance is to change the geometry of the strut, or lower the bump stop. And lowering the bump stop manually (e.g. adding spacers) means you lose usable stroke—trading travel for clearance.
Spacer lifts solve this without sacrificing stroke. That’s why we use them.
Spring lifts and perch collars increase preload and ride height—but they don’t stop the tyre from compressing into the guard. The shock still travels the same distance, and the bump stop still engages at the same depth. That means:

Why Rake Matters (And Why “Leveling” Can Ruin Your Ride)
We get it—everyone wants that tough, level stance. But before you throw a 2-inch lift in the front and call it a day, you need to understand what rake does, and why removing it can compromise both safety and performance.
What is Rake?
Rake is the factory difference in ride height between the front and rear of the vehicle—usually around 50mm higher in the rear.
On the Ranger Raptor:
If you lift the front 2 inches but leave the rear stock, you “level” the truck. Sounds nice in theory—but here’s what really happens:
Under Acceleration:
Our Recommendation: Keep Some Rake
We recommend lifting:
It looks right, it feels right, and it works the way Ford engineered the platform to handle.
Pros and Cons of Each Lift Method
Not all lift methods behave the same, and not all of them play nicely with the Raptor’s shock architecture. After testing each one extensively, we’ve seen what works—and what quietly compromises ride quality, tyre clearance, and suspension dynamics.
Here’s the breakdown of how each lift method stacks up across real-world metrics.
Spring Lift
How it works:
You replace the factory coil spring with one that’s either longer or has a higher spring rate. This increases preload and pushes the entire strut downward in the shock stroke, lifting the vehicle.
Effect on Internal Bypass:
By pushing the strut down into its stroke at rest, you’re forcing the piston to sit lower inside the shock body. That shifts the starting point away from the ideal bypass zone. You now have:
Up-travel remains the same in terms of shaft stroke, so the foam bump stop still engages properly. But your tyre travels the factory full bump arc—plus 25mm of extra radius if running 35s. That’s where you start seeing inner guard contact.
Effect on Live Valve (Next Gen):
The VDM thinks the truck is sitting lower in the stroke than it really is. It ramps up compression damping prematurely. Ride becomes overdamped—stiff, jittery, and inconsistent unless recalibrated in FORScan.
Tyre Clearance:
No improvement. You’ve raised the truck, but the tyre still compresses to the same point in the body. You’ll need to trim guards or space down the bump stop—sacrificing usable stroke.
Pros:
Perch Collar
How it works:
A machined billet ring clamps around the strut body and physically pushes the lower spring perch upward. This compresses the spring without changing it, raising ride height through preload.
Effect on Internal Bypass:
Identical to a spring lift—it lowers piston position in the body, reducing the usable bypass window. Ride becomes firmer, bypass zones kick in later, and comfort suffers on choppy terrain.
Effect on Foam Bump Stop:
Same total stroke, same bump stop engagement. But with 35s, you’re again pushing that extra radius up into the body—with no gain in bump clearance.
Effect on Live Valve (Next Gen):
Exactly the same issue. The arms sit lower at ride height, so the VDM sees a “loaded” posture and overcorrects with stiff damping. FORScan recalibration is required.
Tyre Clearance:
None. The tyre compresses to the same point as stock, but it's now 25mm larger in radius. Scrubbing is almost guaranteed unless bump stops are spaced down—again at the cost of travel.
Pros:
Strut Spacer
How it works:
A strut spacer is mounted on top of the strut hat, between the strut and the chassis. It pushes the entire assembly downward in the vehicle without changing spring preload or piston position.
Effect on Internal Bypass:
This is the only method that retains factory bypass tuning. The piston sits in the exact same position at ride height. That means:
The foam bump stop still engages at the same shaft depth. The shock uses its full travel. But because the strut sits lower in the chassis, the tyre stops 25–32mm lower than stock.
So you’re using the full stroke without hitting the body—the ideal scenario.
Effect on Live Valve (Next Gen):
The suspension arms now sit higher than expected at ride height. To the VDM, this looks like pre-compression or the start of a landing—so it stiffens compression damping. FORScan calibration brings it back to normal behaviour.
Tyre Clearance:
The only lift method that actually adds bump clearance.
A 32mm strut spacer offsets a 35” tyre’s 25mm radius increase almost perfectly. You gain guard clearance without touching spring preload or shortening stroke.
Pros:
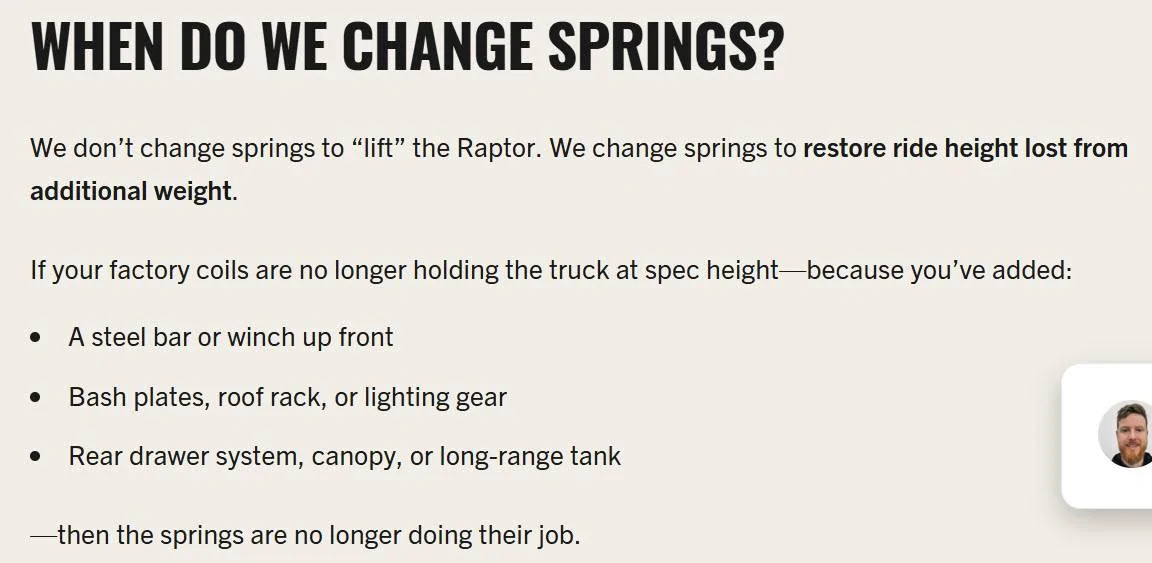
We don’t change springs to “lift” the Raptor. We change springs to restore ride height lost from additional weight.
If your factory coils are no longer holding the truck at spec height—because you’ve added:
That’s when we step in.
Our Rule of Thumb
If you’re lifting a Next Gen Ranger Raptor, this is non-negotiable.
The Next Gen runs ride height sensors on:
What Happens When You Lift Without Recalibrating
If you install a 2-inch lift—spring, perch, or spacer—the suspension arms now sit lower relative to the chassis. But the sensors still think this new position is “stock.”
So the VDM thinks:
Thankfully, the solution is simple—and permanent.
Using a FORScan tool and the correct laptop setup, we can:
It doesn’t matter how you lifted the truck—if you changed ride height, even by 10mm, this calibration is required.
When We Need to Change Upper Control Arms (UCAs)
Lifting your Ranger Raptor—whether by spring, perch collar, or strut spacer—can change the suspension geometry enough that upper control arm clearance and alignment capability become a problem, depending on the model and lift height.
Here’s when (and why) you need to consider changing out your UCAs.
PX3 Ranger Raptor (2018–2022)
This model has tight packaging between the factory UCA and the coil mount.
What happens with a 2 inch spaer lift:
Our recommendation:
Ford improved things here.
Reasons to upgrade anyway:
Frequently Asked Questions (FAQ)
Q: What about revalving the shocks to make a spring lift work?
A: We get this one a lot.
Here’s the deal: a revalve only changes the piston shim stack. It adjusts how much resistance the piston offers at different velocities—essentially tuning how the shock feels when compressing or rebounding. That’s it.
What it does not change is the internal bypass zones. Those are machined into the inner shock tube, and they dictate where in the stroke oil is allowed to bypass around the piston. That’s what gives the Raptor its plush mid-stroke and ramped-up bottom-out control.
To change that, you’d need:
So yes, a revalve can help compensate for stiffer springs. But it won’t restore bypass function, and it won’t help with tyre clearance issues caused by reduced up-travel.
If you’re running bigger tyres or trying to keep that Fox plushness, revalving alone isn’t the answer.
Q: Are strut spacers illegal?
A: No, they’re not.
All modifications to in-service vehicles in Australia are governed by the National Code of Practice (NCOP), specifically a document known as VSB14. This outlines what can and can’t be done legally when modifying suspension, steering, brakes, and other key systems.
Nowhere in VSB14 does it state that strut spacers are prohibited for lifting a vehicle. What it does require is that any modification must:
We’ve worked closely with engineers to validate our designs. Every one of our strut spacer kits stays well within the legal and functional limits defined in VSB14.
Q: I heard you have to cut the factory bolts to install strut spacers. Is that true?
A: Yes—if you're using the wrong gear.
There are a bunch of generic Ranger strut spacers floating around that people try to palm off to Raptor owners. These don’t match the Raptor's strut top design, and because of that, the only way to fit them is to cut down the factory studs. It’s a dodgy workaround at best—and flat-out dangerous at worst.
That’s why we engineered our GOAT Offroad strut spacers specifically for the Raptor platform. They don’t rely on the original studs at all. Instead, we include a full set of replacement 12.9-grade high-tensile bolts—stronger than OEM, and fully compatible with the thicker, wider strut top of the Raptor.
So no, there’s no need to chop or modify anything with a proper kit. If someone’s telling you to get the grinder out, they’ve already made the wrong call.
Q: Will a spacer lift cause premature CV or ball joint wear?
A: Only if you go too far, or use parts that weren’t designed for the platform.
Let’s be clear: CVs and ball joints have a safe operating range, and exceeding that range—whether through lift height or poor geometry—can absolutely lead to premature wear or failure. But a properly engineered strut spacer kit stays within that safe zone.
When we designed our GOAT Offroad spacer range, we tested:
What causes failures?
So yes, a spacer lift can cause wear—if it’s done wrong. But done right, it’s a safe and smart way to lift a Raptor.
Q: Can I combine aftermarket springs and strut spacers?
A: Yes—but only when it’s done strategically, not blindly.
We never combine springs and spacers just to get maximum lift height. That’s a fast track to poor ride quality, topping out suspension, or prematurely wearing steering and driveline components.
Here’s how we do it properly:
Once you lift the vehicle beyond 2” using springs, your piston moves out of the internal bypass zone. That means:
If you’re trying to stuff 37s on a trophy-style build, sure, go for it. But for 99% of Raptors on 35s or less, a dialled spring + 32mm spacer combo is the sweet spot.
Summary
Lifting a Ranger Raptor isn’t as simple as bolting on the biggest spring or trusting whatever your local suspension shop recommends. With Fox internal bypass shocks, foam bump stops, live valve compression control (on Next Gen), and tight packaging around UCAs, every lift method affects the vehicle differently—and some introduce real risks if done wrong.
We’ve broken down the three main methods: spring lift, perch collar, and strut spacer. Each has its place. Strut spacers preserve factory ride quality and shock stroke while improving tyre clearance and droop. Spring lifts are essential when you’ve added weight and sagged below factory ride height. Perch collars can work—but only if you understand how they reduce up-travel and can handle the compromises that come with them.
The key is to stay inside the safe zone for droop, compression, and articulation—and make sure your suspension setup doesn’t cause clearance issues or push parts beyond their designed operating angles. And most importantly, don’t trust any shop that can’t answer how their lift affects full compression tyre clearance or internal bypass stroke. If they can’t tell you where the bump stop engages or how much up-travel is left on your shock, they’re guessing.
We’ve tested every method in-house—on-road, off-road, and in the air. That’s how we know where the line is. And that’s how we keep your Raptor riding, flexing, and landing the way it was meant to.
There truly is no better way to lift your Ranger Raptor than with G.O.A.T Offroad strut spacers.
Raptors don’t run basic struts. These things are engineered for high-speed off-road control and comfort, with bypass zones, bump compliance, and in the Next Gen, active valving.
We’re going to break down three core methods of lifting these trucks:
- Spring Lift
- Perch Collar Lift
- Strut Spacer Lift
- Suspension stroke balance
- Internal bypass valving
- Down-travel vs bump clearance
- CV, UCA and tie-rod limits
- Ride calibration (for Next Gen Raptors)
Conventional vs Ranger Raptor Internal Bypass Shocks
Conventional Shock: The Basic Setup
On a standard monotube shock:
- The piston moves through shock oil
- Shim stacks control flow
- Damping is velocity-sensitive only—the faster the shaft moves, the more resistance is generated
PX3 Raptor: Fox 2.0 Internal Bypass
The 2018–2022 Raptor changed the game with Fox’s 2.0 Internal Bypass shocks:
- Two concentric tubes: inner and outer
- Ports in the inner tube allow oil to bypass the piston when in the mid-stroke
- As the piston compresses or rebounds past those ports, they close off, forcing oil through the piston valving
Next Gen Raptor: Fox 2.5 Live Valve Internal Bypass
The 2022+ model steps up again. Same internal bypass concept—but with an added Live Valve compression adjuster, controlled by a central Vehicle Dynamics Module (VDM).
It adjusts compression damping on the fly using:
- Ride height sensors (front and rear)
- Brake and throttle data
- Wheel speed and steering input
If you lift the vehicle without recalibrating the ride sensors, the VDM thinks you're mid-jump all the time—so it stiffens the ride when it shouldn’t. That’s why every lift on a Next Gen Raptor needs a FORScan calibration. No exceptions.
External Foam Bump Stop
Every Raptor shock (PX3 and Next Gen) includes a foam bump stop mounted externally on the shaft. It’s not hydraulic. It’s a dense foam ring that compresses just before the shock bottoms out.
- It engages in the last 20-30mm of stroke
- Helps soften big hits
- Prevents harsh metal-on-metal bottoming
Bigger Tyre Clearance: What Actually Changes?
This is the part most people overlook—and it’s one of the biggest reasons why some lifts work better than others.
If you're planning on running 315/70R17s ( or true 35s), you’re increasing your tyre diameter by ~50mm over stock. That’s 25mm more radius, which means:
- At full bump, your tyre now travels 25mm further into the body
- The factory tyre already goes inside the guard at full compression
- So with 35s, your tyre is now guaranteed to hit something unless you've changed the bump stop
Most suspension shops will sell you a spring lift or perch collar and say, “Yep, 35s will fit.” But unless they’ve physically tested compression travel with the bump stop engaged, they don’t know what they’re talking about.
Real experts know: the only way to increase bump clearance is to change the geometry of the strut, or lower the bump stop. And lowering the bump stop manually (e.g. adding spacers) means you lose usable stroke—trading travel for clearance.
Spacer lifts solve this without sacrificing stroke. That’s why we use them.
Spring lifts and perch collars increase preload and ride height—but they don’t stop the tyre from compressing into the guard. The shock still travels the same distance, and the bump stop still engages at the same depth. That means:
- 25mm of added tyre radius = 25mm of extra intrusion into the body
- You get no benefit to tyre clearance from ride height alone
Why Rake Matters (And Why “Leveling” Can Ruin Your Ride)
We get it—everyone wants that tough, level stance. But before you throw a 2-inch lift in the front and call it a day, you need to understand what rake does, and why removing it can compromise both safety and performance.
What is Rake?
Rake is the factory difference in ride height between the front and rear of the vehicle—usually around 50mm higher in the rear.
On the Ranger Raptor:
- This isn’t just for looks
- It plays a functional role in how the vehicle handles acceleration, braking, and load shifts
- It’s especially important because the springs are soft by design—built to soak up off-road terrain, not carry excess static preload
If you lift the front 2 inches but leave the rear stock, you “level” the truck. Sounds nice in theory—but here’s what really happens:
Under Acceleration:
- The rear squats, the front rises
- With no rake, the front end lifts higher than the rear, exaggerating weight transfer
- Steering becomes light and vague, especially at speed or on loose surfaces
- It can even feel unstable or “floaty” coming out of corners or over crests
- Normally, rake helps push weight forward during braking—increasing grip on the front tyres
- With no rake, you lose that force
- The front end stays too high, and braking distances increase, especially under load or emergency stop conditions
Our Recommendation: Keep Some Rake
We recommend lifting:
- 2 inches at the front
- 1 inch at the rear
- A subtle 25mm rake
- Visually level stance to the eye
- Proper dynamic balance under throttle and braking
- Enough rear lift to maintain approach/departure clearance while still preserving front-end grip
It looks right, it feels right, and it works the way Ford engineered the platform to handle.
Pros and Cons of Each Lift Method
Not all lift methods behave the same, and not all of them play nicely with the Raptor’s shock architecture. After testing each one extensively, we’ve seen what works—and what quietly compromises ride quality, tyre clearance, and suspension dynamics.
Here’s the breakdown of how each lift method stacks up across real-world metrics.
Spring Lift
How it works:
You replace the factory coil spring with one that’s either longer or has a higher spring rate. This increases preload and pushes the entire strut downward in the shock stroke, lifting the vehicle.
Effect on Internal Bypass:
By pushing the strut down into its stroke at rest, you’re forcing the piston to sit lower inside the shock body. That shifts the starting point away from the ideal bypass zone. You now have:
- Less bleed through the bypass ports at ride height
- More reliance on piston valving in normal driving
- A firmer, less compliant ride—especially on low-speed hits
Up-travel remains the same in terms of shaft stroke, so the foam bump stop still engages properly. But your tyre travels the factory full bump arc—plus 25mm of extra radius if running 35s. That’s where you start seeing inner guard contact.
Effect on Live Valve (Next Gen):
The VDM thinks the truck is sitting lower in the stroke than it really is. It ramps up compression damping prematurely. Ride becomes overdamped—stiff, jittery, and inconsistent unless recalibrated in FORScan.
Tyre Clearance:
No improvement. You’ve raised the truck, but the tyre still compresses to the same point in the body. You’ll need to trim guards or space down the bump stop—sacrificing usable stroke.
Pros:
- Conventional lift method
- Can be tailored to carry additional weight if needed
- Still uses full shock stroke
- Reduces down-travel
- Disrupts bypass behaviour
- Does nothing for bump clearance
- Harsh ride if spring rate is mismatched
Perch Collar
How it works:
A machined billet ring clamps around the strut body and physically pushes the lower spring perch upward. This compresses the spring without changing it, raising ride height through preload.
Effect on Internal Bypass:
Identical to a spring lift—it lowers piston position in the body, reducing the usable bypass window. Ride becomes firmer, bypass zones kick in later, and comfort suffers on choppy terrain.
Effect on Foam Bump Stop:
Same total stroke, same bump stop engagement. But with 35s, you’re again pushing that extra radius up into the body—with no gain in bump clearance.
Effect on Live Valve (Next Gen):
Exactly the same issue. The arms sit lower at ride height, so the VDM sees a “loaded” posture and overcorrects with stiff damping. FORScan recalibration is required.
Tyre Clearance:
None. The tyre compresses to the same point as stock, but it's now 25mm larger in radius. Scrubbing is almost guaranteed unless bump stops are spaced down—again at the cost of travel.
Pros:
- Cheap lift option
- Easy install if struts are out
- Doesn’t require new springs
- Same loss of down-travel and bypass tuning
- Same tyre clearance issue
- Zero improvement in stroke or damping behavior
- Adds preload with no change in spring rate
Strut Spacer
How it works:
A strut spacer is mounted on top of the strut hat, between the strut and the chassis. It pushes the entire assembly downward in the vehicle without changing spring preload or piston position.
Effect on Internal Bypass:
This is the only method that retains factory bypass tuning. The piston sits in the exact same position at ride height. That means:
- Same soft-to-firm progression
- Same damping zones
- Same ride feel
- No disruption to Fox’s original stroke behaviour
The foam bump stop still engages at the same shaft depth. The shock uses its full travel. But because the strut sits lower in the chassis, the tyre stops 25–32mm lower than stock.
So you’re using the full stroke without hitting the body—the ideal scenario.
Effect on Live Valve (Next Gen):
The suspension arms now sit higher than expected at ride height. To the VDM, this looks like pre-compression or the start of a landing—so it stiffens compression damping. FORScan calibration brings it back to normal behaviour.
Tyre Clearance:
The only lift method that actually adds bump clearance.
A 32mm strut spacer offsets a 35” tyre’s 25mm radius increase almost perfectly. You gain guard clearance without touching spring preload or shortening stroke.
Pros:
- Keeps piston in bypass zone
- Maintains full shock stroke
- Retains factory ride quality
- Increases droop = better articulation
- Adds true bump clearance for 35s
- Doesn’t overload UCAs or CVs if kept under 40mm
- None
We don’t change springs to “lift” the Raptor. We change springs to restore ride height lost from additional weight.
If your factory coils are no longer holding the truck at spec height—because you’ve added:
- A steel bar or winch up front
- Bash plates, roof rack, or lighting gear
- Rear drawer system, canopy, or long-range tank
That’s when we step in.
Our Rule of Thumb
- If the truck is still at factory ride height, we keep the factory springs.
- If it’s sagged below 570mm front or 620mm rear (hub to flare), we replace the spring with one that brings it back to spec.
- Then, if you still want lift, we add a strut spacer—to achieve ride height increase without disrupting the shock’s internal dynamics.
- The piston in the right part of the stroke
- Your bypass ports in the right part of the stroke
- Your Live Valve (Next Gen) functioning properly
- Tyre clearance predictable
- And travel balance preserved
If you’re lifting a Next Gen Ranger Raptor, this is non-negotiable.
The Next Gen runs ride height sensors on:
- The front upper control arms
- The rear lower trailing arms
- Adjust Live Valve compression damping in real-time
- Control headlight leveling
- Inform traction and stability systems
What Happens When You Lift Without Recalibrating
If you install a 2-inch lift—spring, perch, or spacer—the suspension arms now sit lower relative to the chassis. But the sensors still think this new position is “stock.”
So the VDM thinks:
- You're mid-compression, even while cruising
- You're about to land a jump (so it stiffens compression preemptively)
- Your headlights are aiming too high (so it angles them downward)
- A harsh, overdamped ride
- Inconsistent Live Valve behavior—especially over bumps or while cornering
- Incorrect headlight behavior
- And in some cases, fault codes or ride control alerts
Thankfully, the solution is simple—and permanent.
Using a FORScan tool and the correct laptop setup, we can:
- Access the ride height calibration menu in the VDM
- Manually update the “neutral” arm angle to match your new lifted height
- Store that as the new reference point
- Live Valve functions as intended
- Damping adjusts normally again
- Headlight leveling is corrected
- No weird overcorrection from the computer
It doesn’t matter how you lifted the truck—if you changed ride height, even by 10mm, this calibration is required.
- Spring lift? You’ve changed arm angle.
- Perch collar? Same story.
- Strut spacer? Definitely—it moves the entire strut down, changing static geometry.
When We Need to Change Upper Control Arms (UCAs)
Lifting your Ranger Raptor—whether by spring, perch collar, or strut spacer—can change the suspension geometry enough that upper control arm clearance and alignment capability become a problem, depending on the model and lift height.
Here’s when (and why) you need to consider changing out your UCAs.
PX3 Ranger Raptor (2018–2022)
This model has tight packaging between the factory UCA and the coil mount.
What happens with a 2 inch spaer lift:
- At full droop, the UCA makes contact with the stamped steel coil bucket
- This isn’t just a rub—it gouges the arm
- That gouging introduces a stress riser—a sharp indentation in an area of high load
- Over time, this becomes a potential failure point, especially under repeated compression or articulation
Our recommendation:
- Any spacer lift of 40mm or more (especially with larger tyres) should be paired with our aftermarket UCA
- We run our billet UCAs, which offer:
- Improved clearance to the coil mount
- More ball joint articulation
- Corrected geometry for caster and camber after lift
Ford improved things here.
- The factory UCAs have better coil clearance
- Ball joint angles are a bit more forgiving
- You can generally get away with up to a 2-inch strut spacer lift without any interference or alignment issues
Reasons to upgrade anyway:
- You want more droop travel (aftermarket UCAs give more range)
- You’re running aggressive offsets or large tyres (where precise alignment is critical)
- You want to future-proof for long-travel kits or coilover conversions
- Or you simply want durability and rebuildability that factory UCA don’t offer
- Your upper arm contacts the coil spring at full droop
- Your alignment shop says they can’t get enough caster
- You’re seeing ball joint boot wear or extreme angles
- You’re lifting more than 2 inches and/or running 35s or wider with low offset wheels
- You’re hearing a clunk or bind at full extension
Frequently Asked Questions (FAQ)
Q: What about revalving the shocks to make a spring lift work?
A: We get this one a lot.
Here’s the deal: a revalve only changes the piston shim stack. It adjusts how much resistance the piston offers at different velocities—essentially tuning how the shock feels when compressing or rebounding. That’s it.
What it does not change is the internal bypass zones. Those are machined into the inner shock tube, and they dictate where in the stroke oil is allowed to bypass around the piston. That’s what gives the Raptor its plush mid-stroke and ramped-up bottom-out control.
To change that, you’d need:
- A completely new inner tube
- Custom bypass port geometry
- Full micro-polishing and coating for long-term seal life
So yes, a revalve can help compensate for stiffer springs. But it won’t restore bypass function, and it won’t help with tyre clearance issues caused by reduced up-travel.
If you’re running bigger tyres or trying to keep that Fox plushness, revalving alone isn’t the answer.
Q: Are strut spacers illegal?
A: No, they’re not.
All modifications to in-service vehicles in Australia are governed by the National Code of Practice (NCOP), specifically a document known as VSB14. This outlines what can and can’t be done legally when modifying suspension, steering, brakes, and other key systems.
Nowhere in VSB14 does it state that strut spacers are prohibited for lifting a vehicle. What it does require is that any modification must:
- Be structurally sound
- Not compromise braking, handling, or steering
- Maintain sufficient droop and bump clearance
- Be installed properly with safe engineering practices
We’ve worked closely with engineers to validate our designs. Every one of our strut spacer kits stays well within the legal and functional limits defined in VSB14.
Q: I heard you have to cut the factory bolts to install strut spacers. Is that true?
A: Yes—if you're using the wrong gear.
There are a bunch of generic Ranger strut spacers floating around that people try to palm off to Raptor owners. These don’t match the Raptor's strut top design, and because of that, the only way to fit them is to cut down the factory studs. It’s a dodgy workaround at best—and flat-out dangerous at worst.
That’s why we engineered our GOAT Offroad strut spacers specifically for the Raptor platform. They don’t rely on the original studs at all. Instead, we include a full set of replacement 12.9-grade high-tensile bolts—stronger than OEM, and fully compatible with the thicker, wider strut top of the Raptor.
So no, there’s no need to chop or modify anything with a proper kit. If someone’s telling you to get the grinder out, they’ve already made the wrong call.
Q: Will a spacer lift cause premature CV or ball joint wear?
A: Only if you go too far, or use parts that weren’t designed for the platform.
Let’s be clear: CVs and ball joints have a safe operating range, and exceeding that range—whether through lift height or poor geometry—can absolutely lead to premature wear or failure. But a properly engineered strut spacer kit stays within that safe zone.
When we designed our GOAT Offroad spacer range, we tested:
- CV angle at full droop and full lock
- UCA and tie rod clearance at full extension
- Ball joint articulation throughout suspension travel
What causes failures?
- Generic spacers not designed for the Raptor platform
- Lifts over 40mm with no control arm or steering upgrades
- Improper install or misaligned geometry after the lift
So yes, a spacer lift can cause wear—if it’s done wrong. But done right, it’s a safe and smart way to lift a Raptor.
Q: Can I combine aftermarket springs and strut spacers?
A: Yes—but only when it’s done strategically, not blindly.
We never combine springs and spacers just to get maximum lift height. That’s a fast track to poor ride quality, topping out suspension, or prematurely wearing steering and driveline components.
Here’s how we do it properly:
- If your vehicle has sagged from extra front-end weight (bar, winch, underbody protection, etc.), you’ll need a heavier-rate spring to bring ride height back to factory baseline
- Factory spec: 570mm hub-to-guard front, 620mm rear
- Once you’ve corrected that sag, you can still use a spacer lift on top to gain extra ride height—without stacking springs unnecessarily or compromising geometry
- Add a longer spring on top of a 32mm spacer lift
- But—and this is crucial—you must have already solved tyre clearance at full compression
- If the tyre clears the guard at bump, you’ve eliminated the main con of a spring lift
Once you lift the vehicle beyond 2” using springs, your piston moves out of the internal bypass zone. That means:
- Less plushness in the mid-stroke
- More harshness over chop and small hits
- Less control during fast articulation or off-camber compression
If you’re trying to stuff 37s on a trophy-style build, sure, go for it. But for 99% of Raptors on 35s or less, a dialled spring + 32mm spacer combo is the sweet spot.
Summary
Lifting a Ranger Raptor isn’t as simple as bolting on the biggest spring or trusting whatever your local suspension shop recommends. With Fox internal bypass shocks, foam bump stops, live valve compression control (on Next Gen), and tight packaging around UCAs, every lift method affects the vehicle differently—and some introduce real risks if done wrong.
We’ve broken down the three main methods: spring lift, perch collar, and strut spacer. Each has its place. Strut spacers preserve factory ride quality and shock stroke while improving tyre clearance and droop. Spring lifts are essential when you’ve added weight and sagged below factory ride height. Perch collars can work—but only if you understand how they reduce up-travel and can handle the compromises that come with them.
The key is to stay inside the safe zone for droop, compression, and articulation—and make sure your suspension setup doesn’t cause clearance issues or push parts beyond their designed operating angles. And most importantly, don’t trust any shop that can’t answer how their lift affects full compression tyre clearance or internal bypass stroke. If they can’t tell you where the bump stop engages or how much up-travel is left on your shock, they’re guessing.
We’ve tested every method in-house—on-road, off-road, and in the air. That’s how we know where the line is. And that’s how we keep your Raptor riding, flexing, and landing the way it was meant to.
There truly is no better way to lift your Ranger Raptor than with G.O.A.T Offroad strut spacers.
Sponsored