el_sabio
Well-Known Member
- Thread starter
- #1
Knee jerk answer: $*!! NO! Truth: Time will tell...
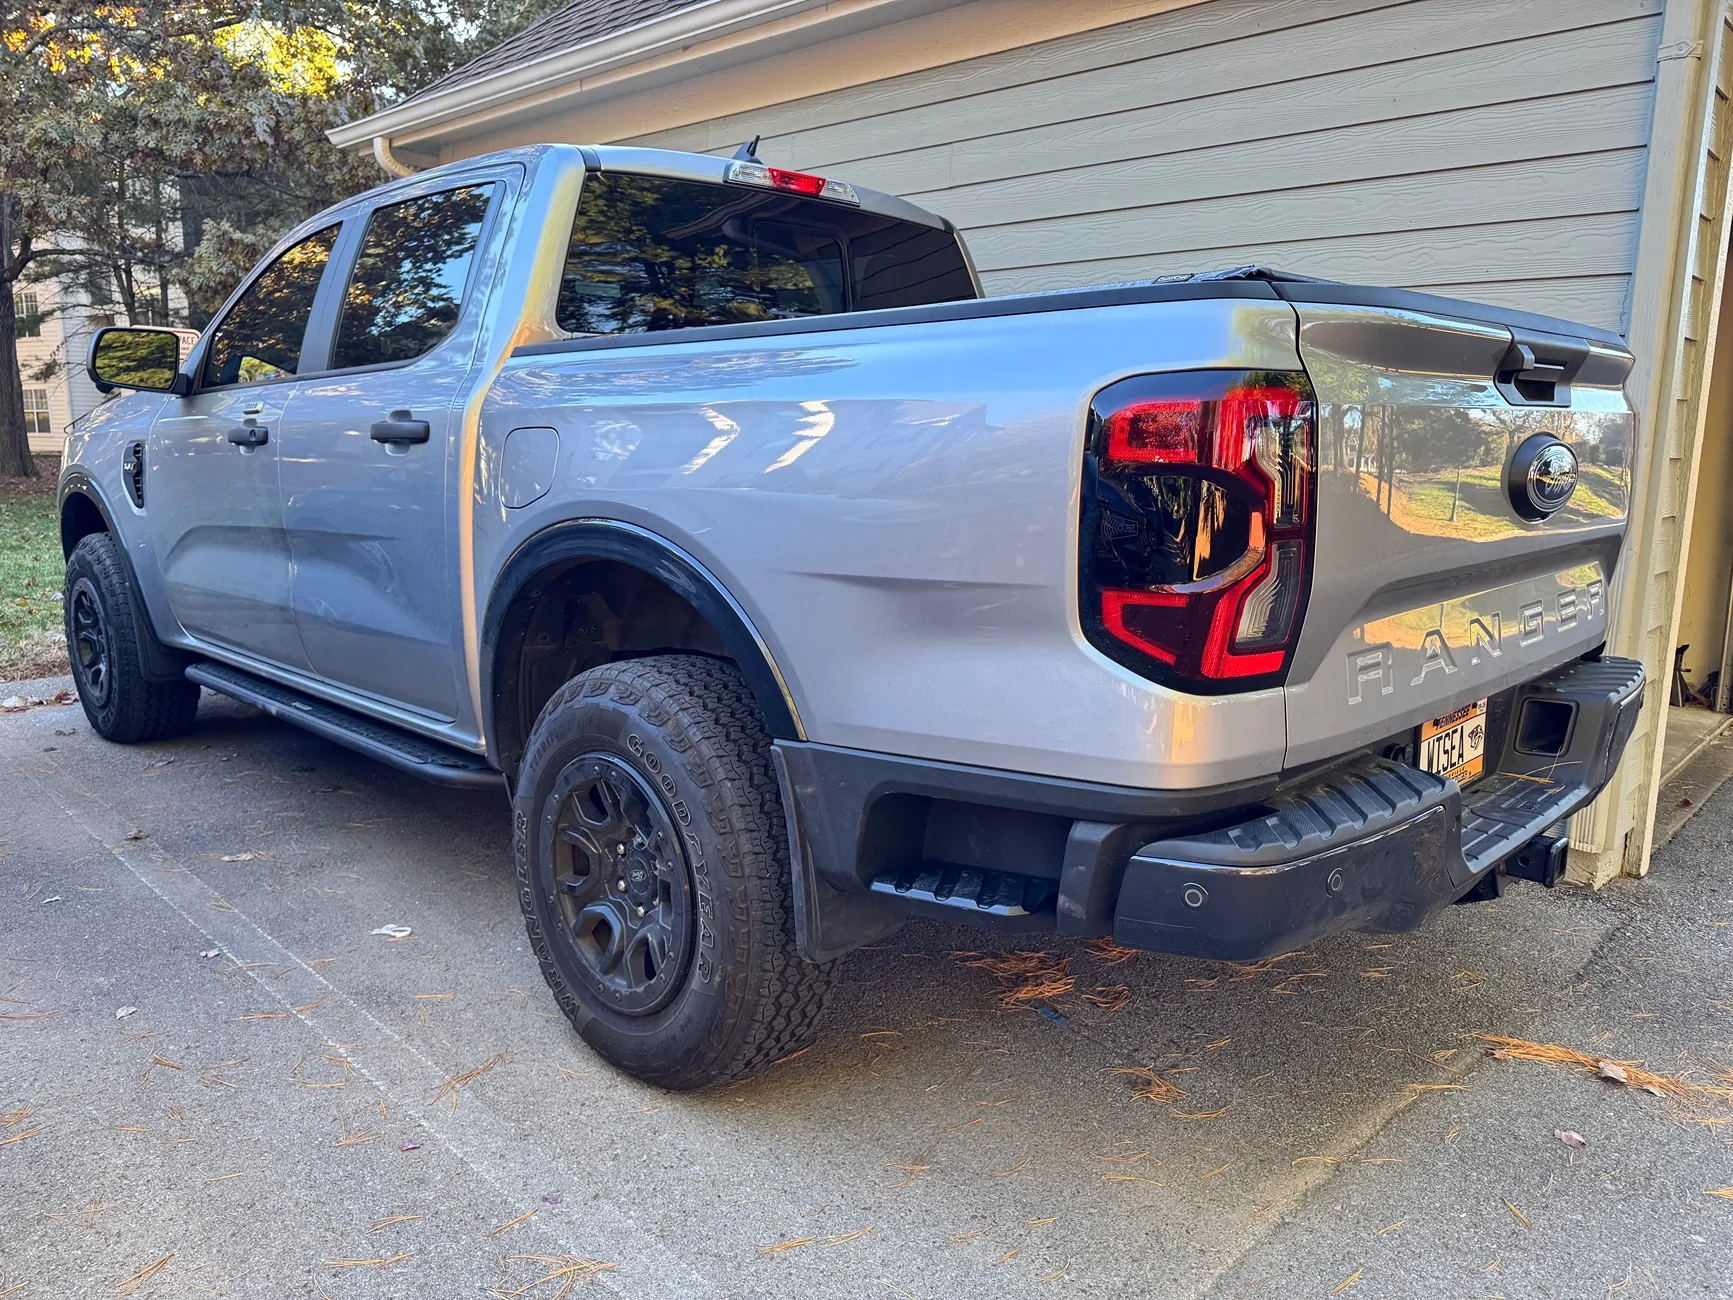
2024 XLT FX4 with Advanced Tow and Tech See my mod list here.
I started a new post about this because the others I've found were limited in information, started to get off topic, and no clear instructions on installation. Hear me out here, my full intent when starting the install yesterday was to develop a full, step-by-step guide with images because of the aforementioned. But after getting into it, I DO NOT recommend you do this on your own unless you have space (shop), a full suite of tools (including power tools), extra clips AND help. This took two of us and my somewhat useful teenager about 5 hours, plus a trip to Ford dealer for the bolts.
Quality out of box: I had no problems as others described. My delivery was prompt, reasonable, and included clips and hardware except four body bolts (more below).
Installation
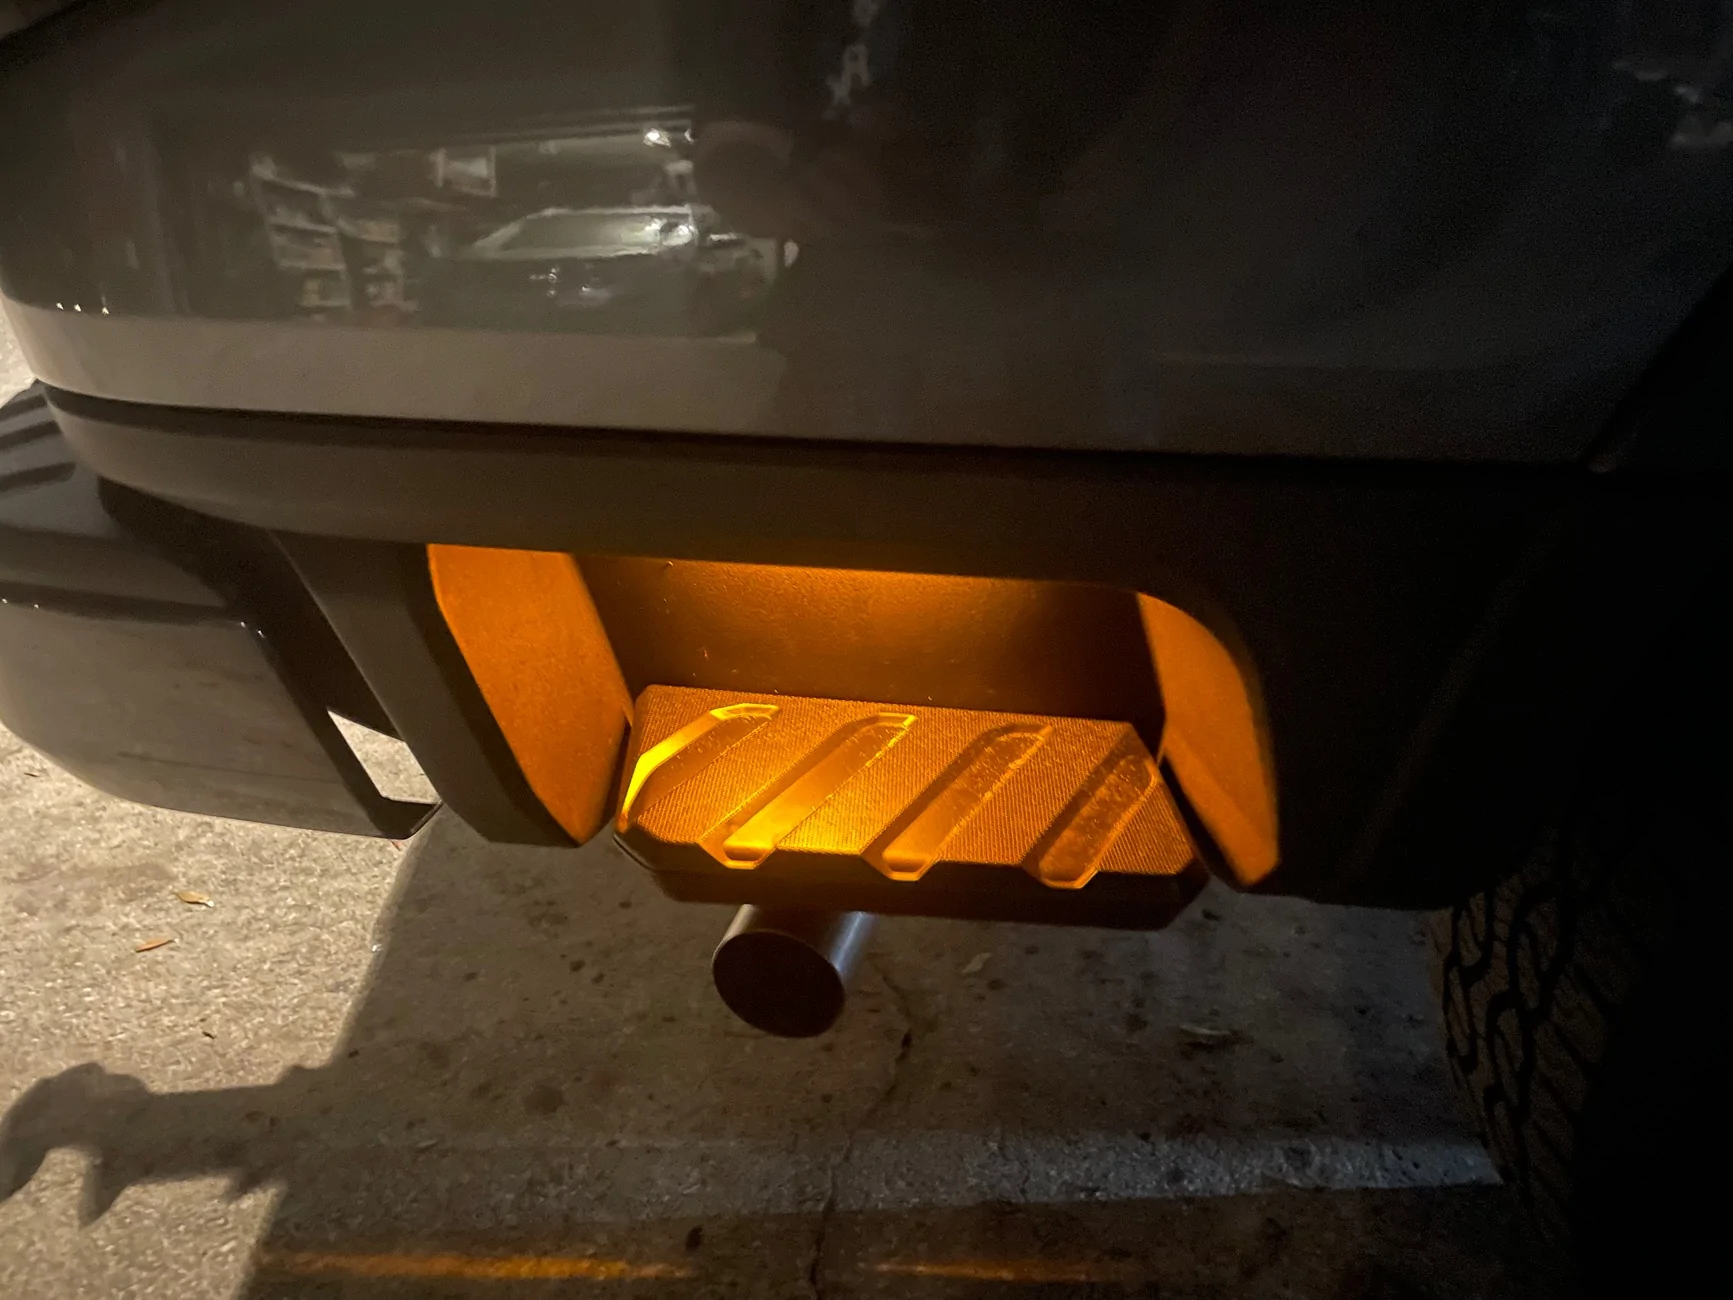
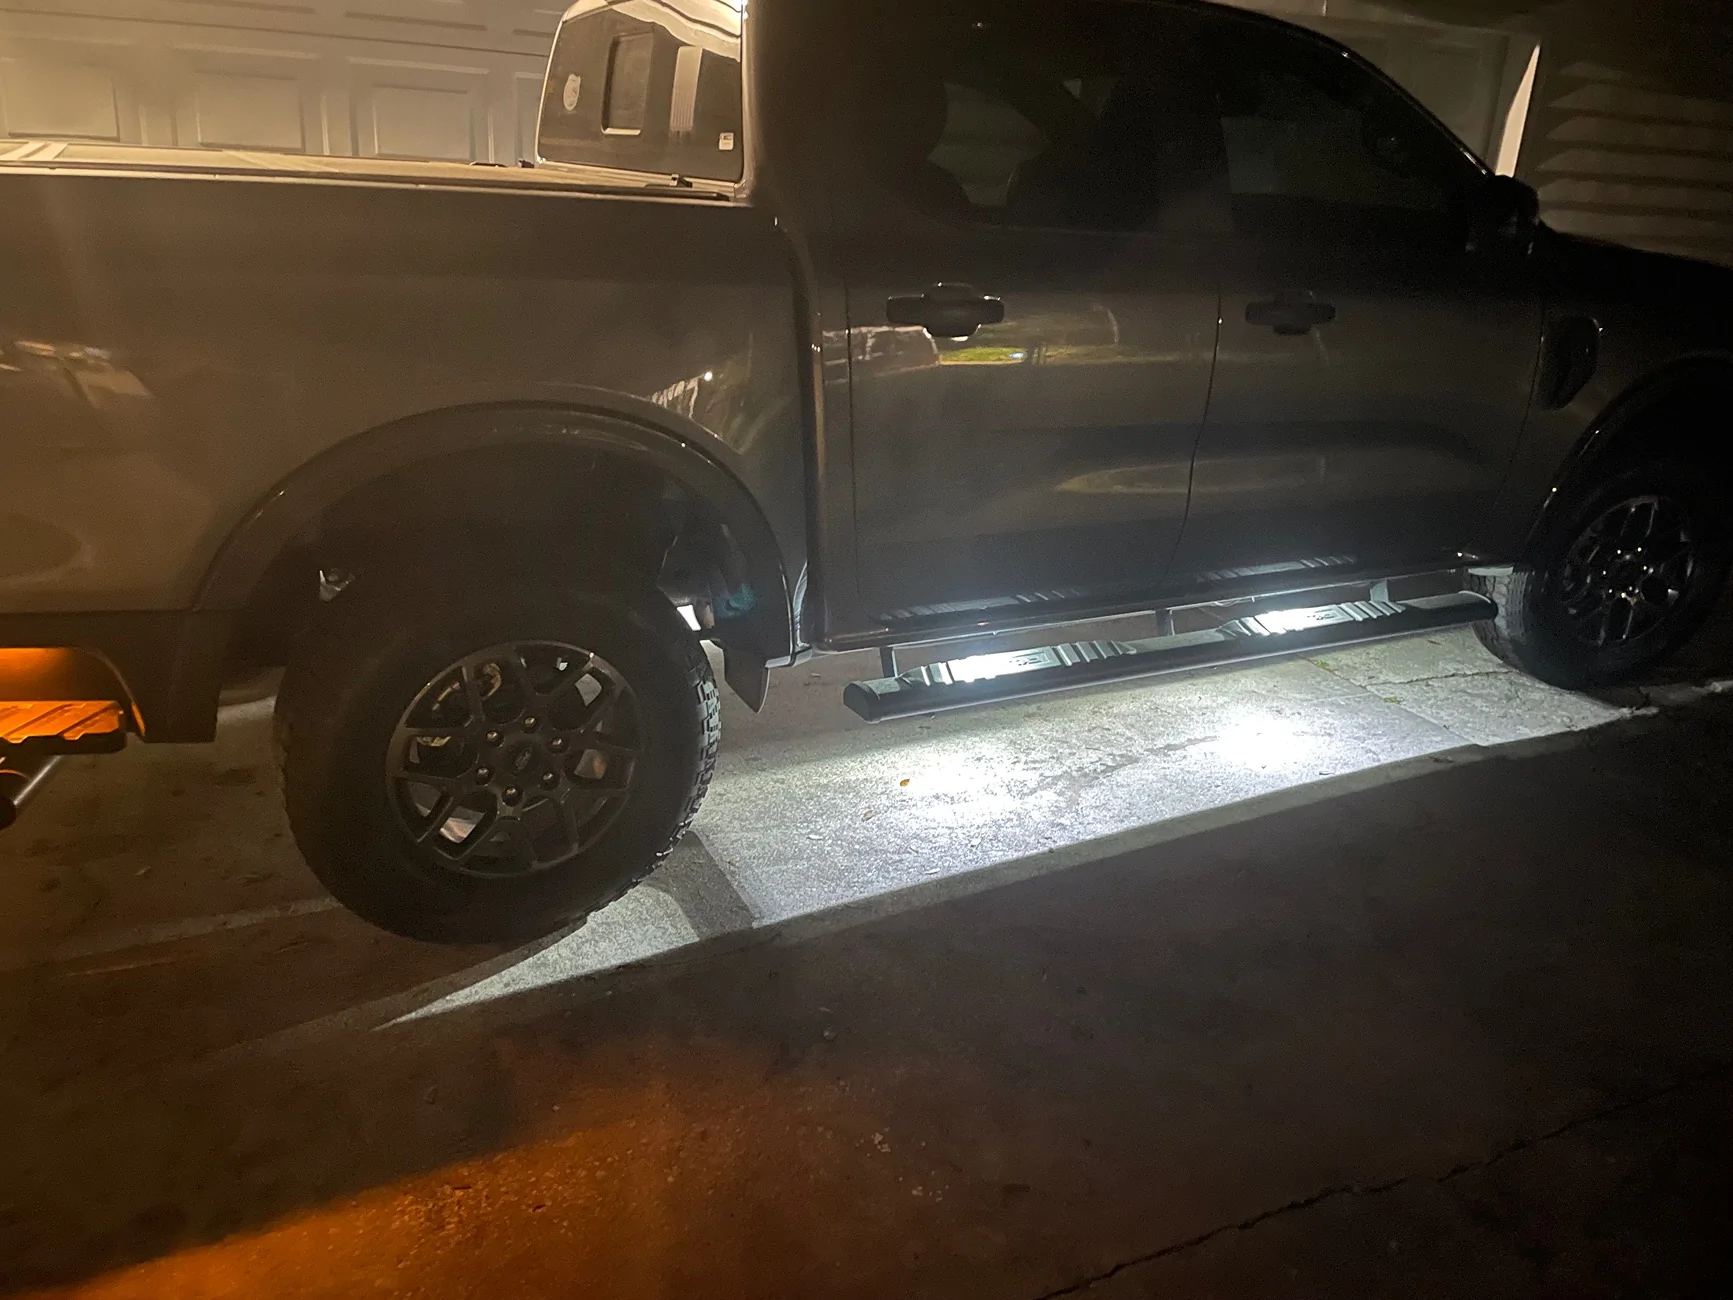
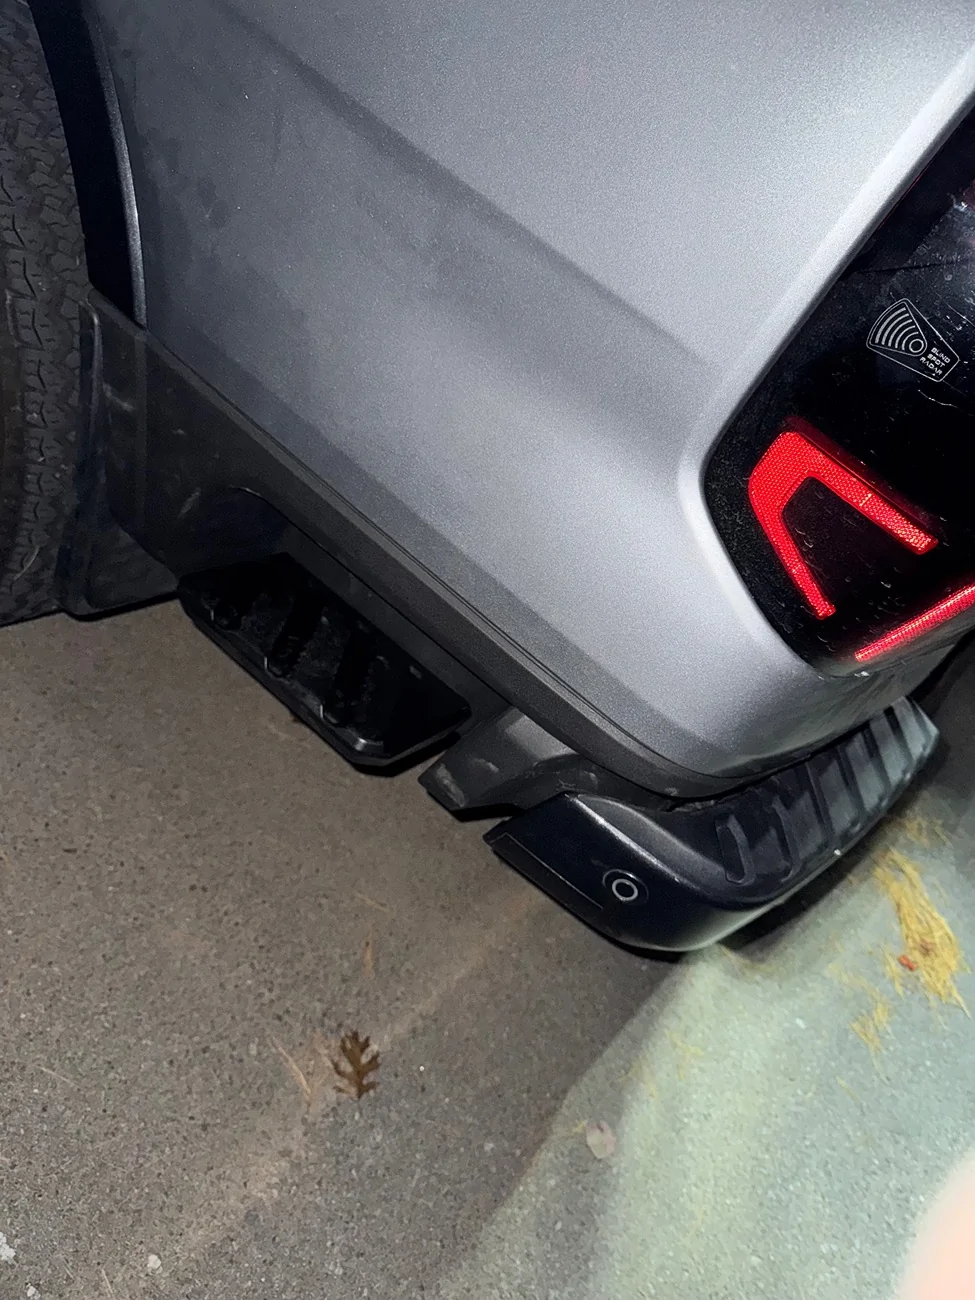
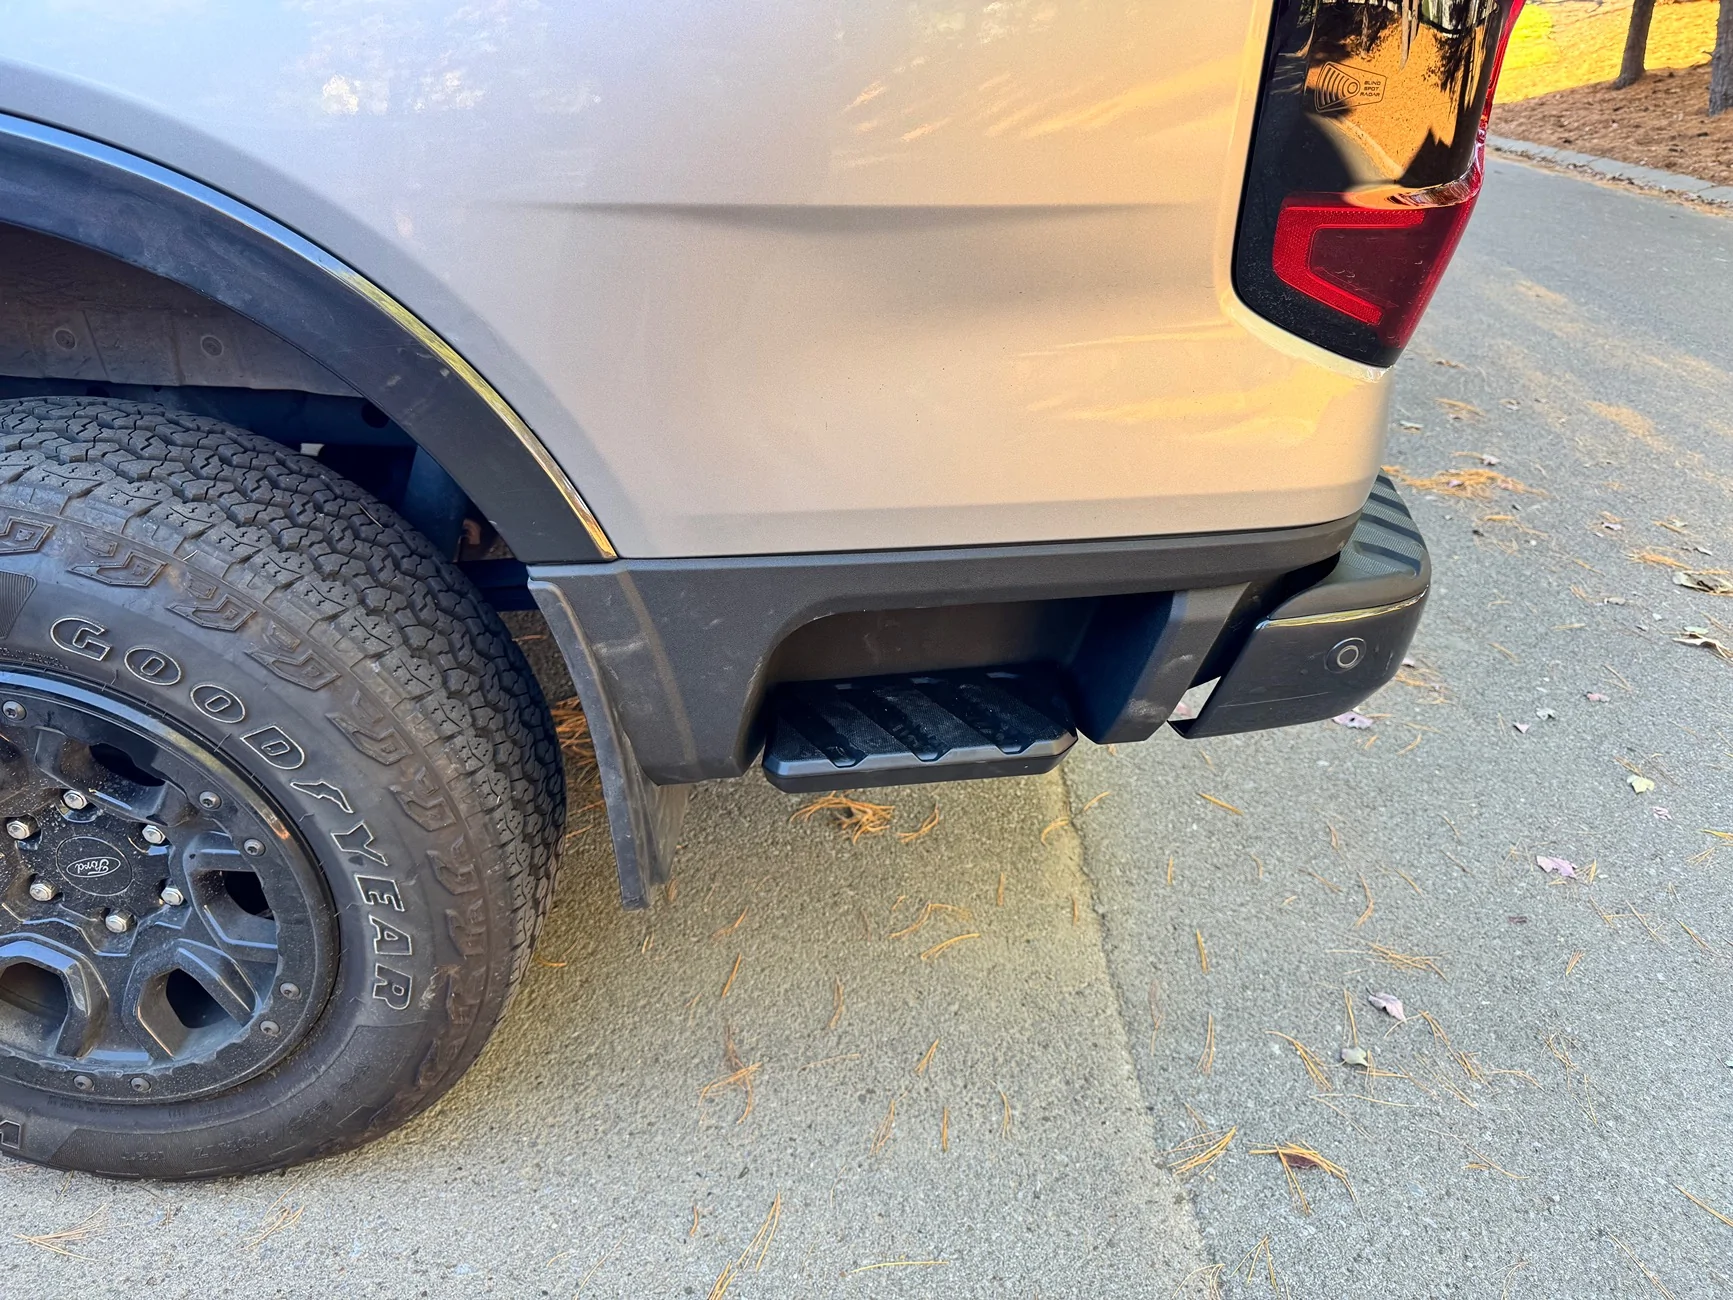
Even after having them installed, everything buttoned up, and the job done, I kept saying over and over, "this wasn't worth it, it wasn't worth it". But testing them and getting access up into the bed, it's actually a game changer. Honestly, these should be a STANDARD on all rangers. They really make a world of difference!
There is a little play in the step as you use it, but they are solid. I'm 6'2" and 240lbs, they hold my fat ass just fine and I can get up and reach deep into the bed.
Was it worth it? For the price I got and having a friend with tools and a shop, YES! These were $328 shipped, a complete bargain. For that low price, I would not do it myself again and just pay shop rates, knowing what I know now.
Long term? Like stated above, time will tell. Need to see if they'll hold up to usage and daily driving. the steps are just plastic, after all. I may have them lined with bed liner (Line-X) to keep them protected from wear and tear.
PARTS:


2024 XLT FX4 with Advanced Tow and Tech See my mod list here.
I started a new post about this because the others I've found were limited in information, started to get off topic, and no clear instructions on installation. Hear me out here, my full intent when starting the install yesterday was to develop a full, step-by-step guide with images because of the aforementioned. But after getting into it, I DO NOT recommend you do this on your own unless you have space (shop), a full suite of tools (including power tools), extra clips AND help. This took two of us and my somewhat useful teenager about 5 hours, plus a trip to Ford dealer for the bolts.
Quality out of box: I had no problems as others described. My delivery was prompt, reasonable, and included clips and hardware except four body bolts (more below).
- PROS: The build is just as good as the OEM plastic panels we removed. Packaging was very well done and all pieces well padded and protected. In fact, the included clips were genuine Ford OEM parts, in the Ford bag.
- CONS: No instructions and no body bolts to secure the brackets to the underbody.
Installation
- PANEL REMOVAL: An absolute PIA!! Other posts and those on the FB groups have quotes saying, "pretty straightforward", "not difficult", etc. Bull caca!! It is a complete pain in the ass, even with the right tools. Do yourself a favor and REMOVE the bumper FIRST, before anything else. We learned the hard way.
- You must remove any mud flaps and remove the fender liner and the first few clips of the plastic fender. Plan on most of them breaking even with careful extrusion and clip panel tools (which I had on hand). The black pop fasteners stripped easily and wouldn't separate. Luckily, I had a kit on hand with extra.
- the 8mm tip was ok, but more helpful is panel clip tools to get into odd reach areas. You WILL break the white clips, but the Alibaba kit had them included and I ordered some just in case.
- You MUST remove the bumper and it is NOT simply "drop the bumper" as others have mentioned in previous posts. You must remove all the plastic fascia, unclip the parking sensors, license plate lights, and tow harness, if equipped.
- there are a number of clips you must pinch from the under side while someone else pulls from above. It can be done solo, but would be extremely difficult. We had to refer to the you tubes to figure it out.
- STEPS INSTALLATION: It actually goes fairly quickly, the panels, bumper removal is the slow and tedious part.
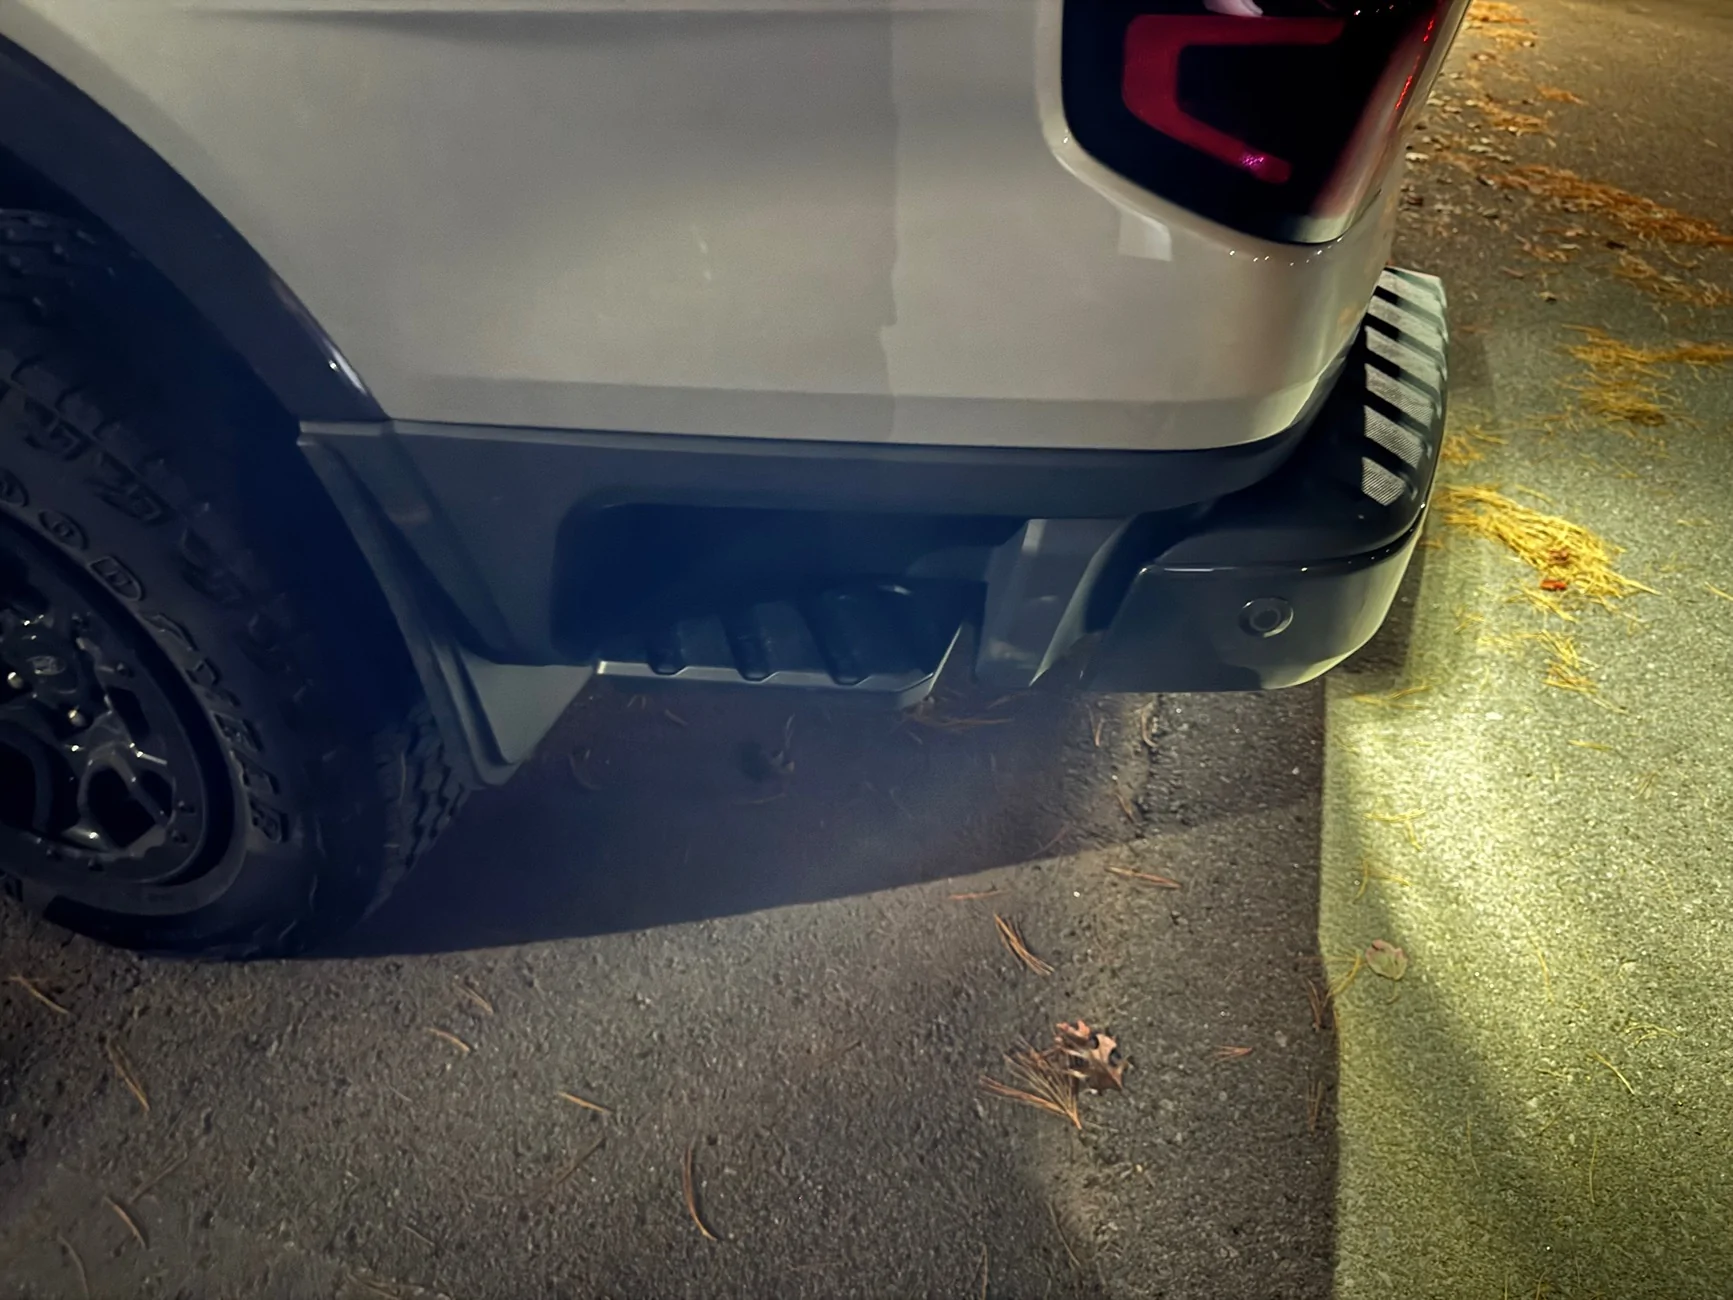
- Install the plastic fascia plates first. Re-use the clips you took out of the old fascia, and/or use new ones to replace the broken clips.
- Slip the fascia under the body panel, then press and bump the clips in.
- There are three bolts to tighten to the body panel and the fender liner.
- The rest are plastic clips (side note, isn't it crazy the amount of money we pay for vehicles these days and they're all plastic?).
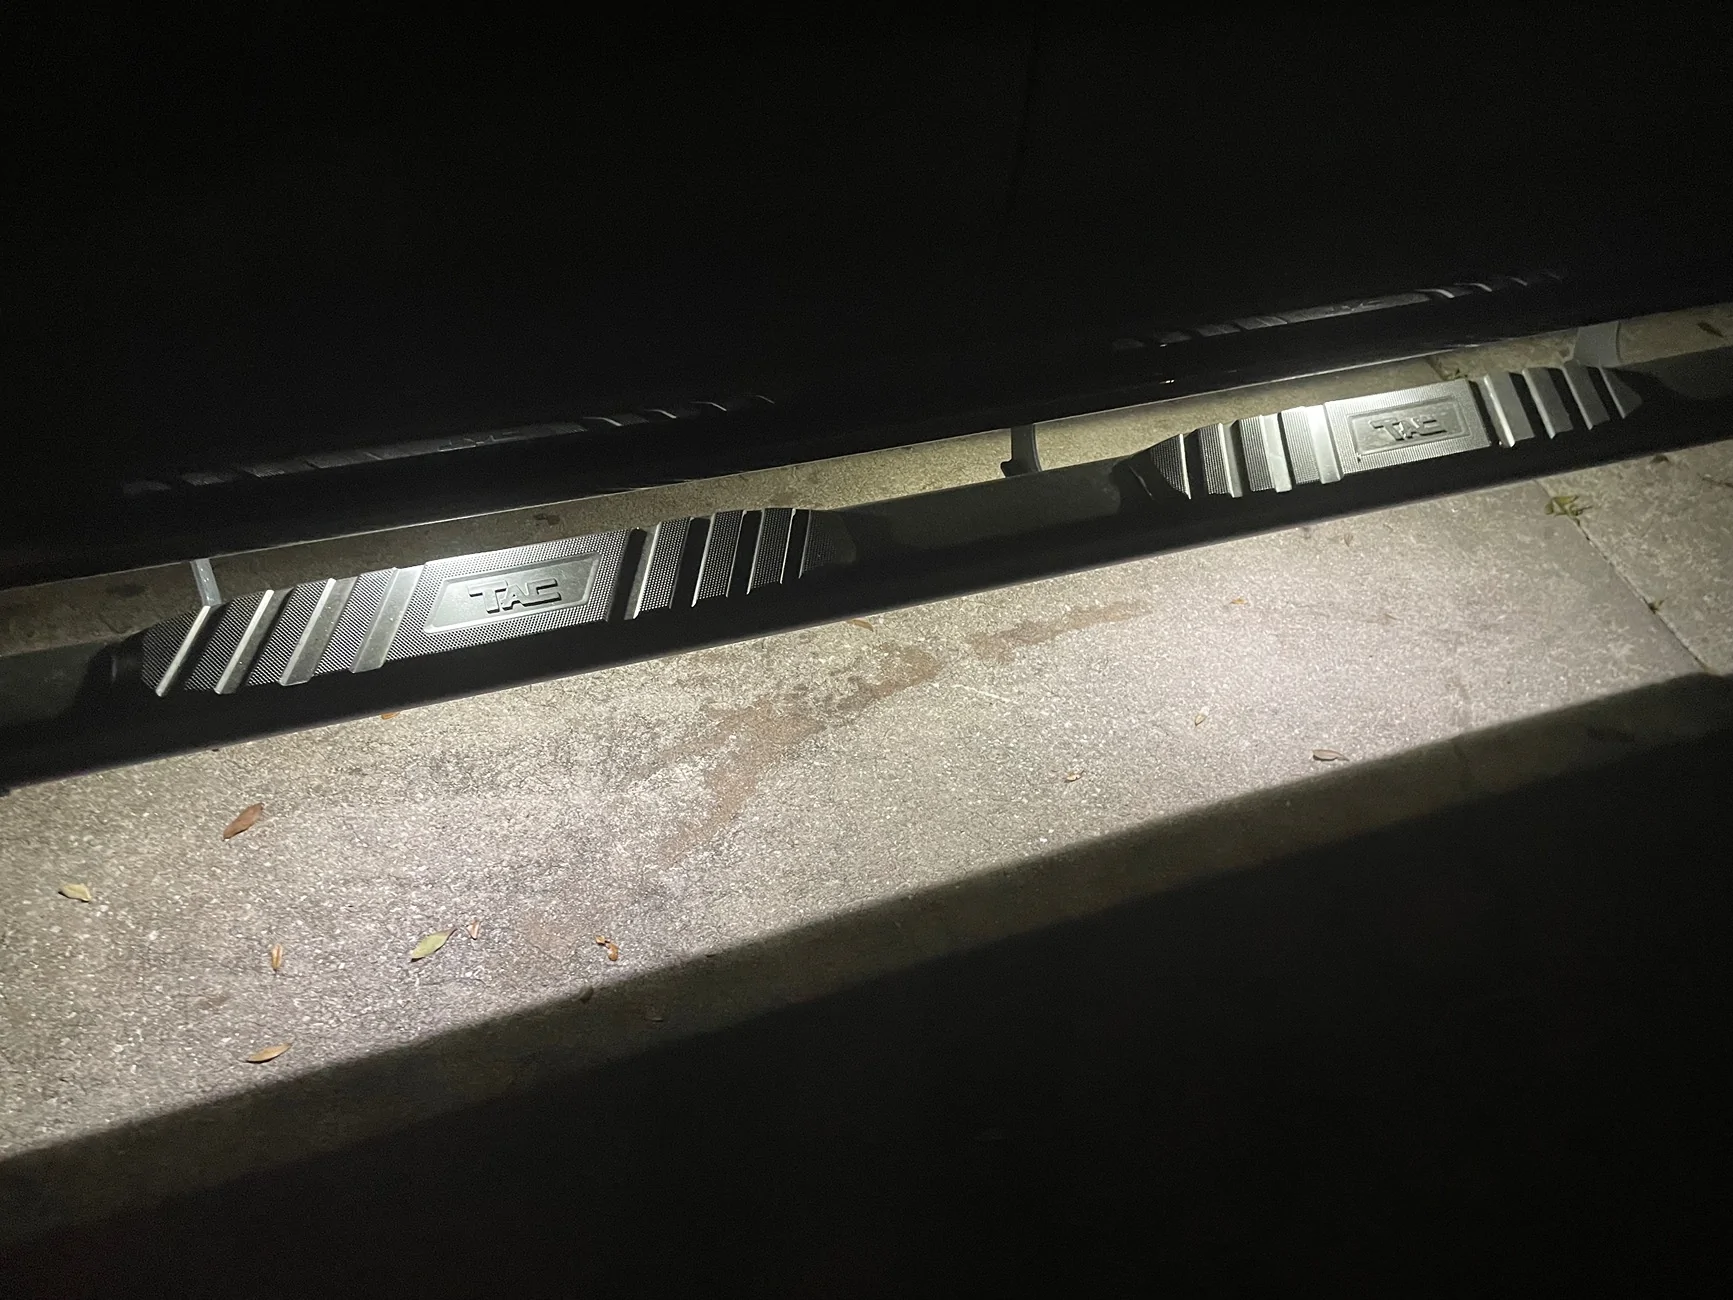
- Bolt the bracket to the underbody. there are two existing 15mm bolts on the underside of the bed which you can reuse. You will need to order or purchase four additional for the front side of the brackets which bolt directly to existing threaded mounting points.
- Install the steps using 10mm socket to the bracket.
- Re-install bumper and replace all the fender clips and mud flaps (if you have them).
- Install the plastic fascia plates first. Re-use the clips you took out of the old fascia, and/or use new ones to replace the broken clips.
Even after having them installed, everything buttoned up, and the job done, I kept saying over and over, "this wasn't worth it, it wasn't worth it". But testing them and getting access up into the bed, it's actually a game changer. Honestly, these should be a STANDARD on all rangers. They really make a world of difference!
There is a little play in the step as you use it, but they are solid. I'm 6'2" and 240lbs, they hold my fat ass just fine and I can get up and reach deep into the bed.
Was it worth it? For the price I got and having a friend with tools and a shop, YES! These were $328 shipped, a complete bargain. For that low price, I would not do it myself again and just pay shop rates, knowing what I know now.
Long term? Like stated above, time will tell. Need to see if they'll hold up to usage and daily driving. the steps are just plastic, after all. I may have them lined with bed liner (Line-X) to keep them protected from wear and tear.
PARTS:
- Alibaba Steps here. Again, I didn't experience any of the packaging issues that are so hotly mentioned in endless rants from others. Packaging was solid, padded, and strong, thick walled cardboard boxes.
- Body bolts, no idea the part number, I lost it. That said, they can look it up at the counter OR you can use the same bolts for the running boards. They are threaded the same, but have 13mm head.
- Assembly pins: W716352S300

Sponsored