Sponsored
OP
OP

a77cj7

Well-Known Member
First Name
Chris
Joined
Jul 25, 2023
Threads
4
Messages
146
Reaction score
258
Location
Sturgis, SD
Vehicle(s)
98 Ranger
Appreciate the info. I haven’t gone this route yet but it’s in the works for the near future.

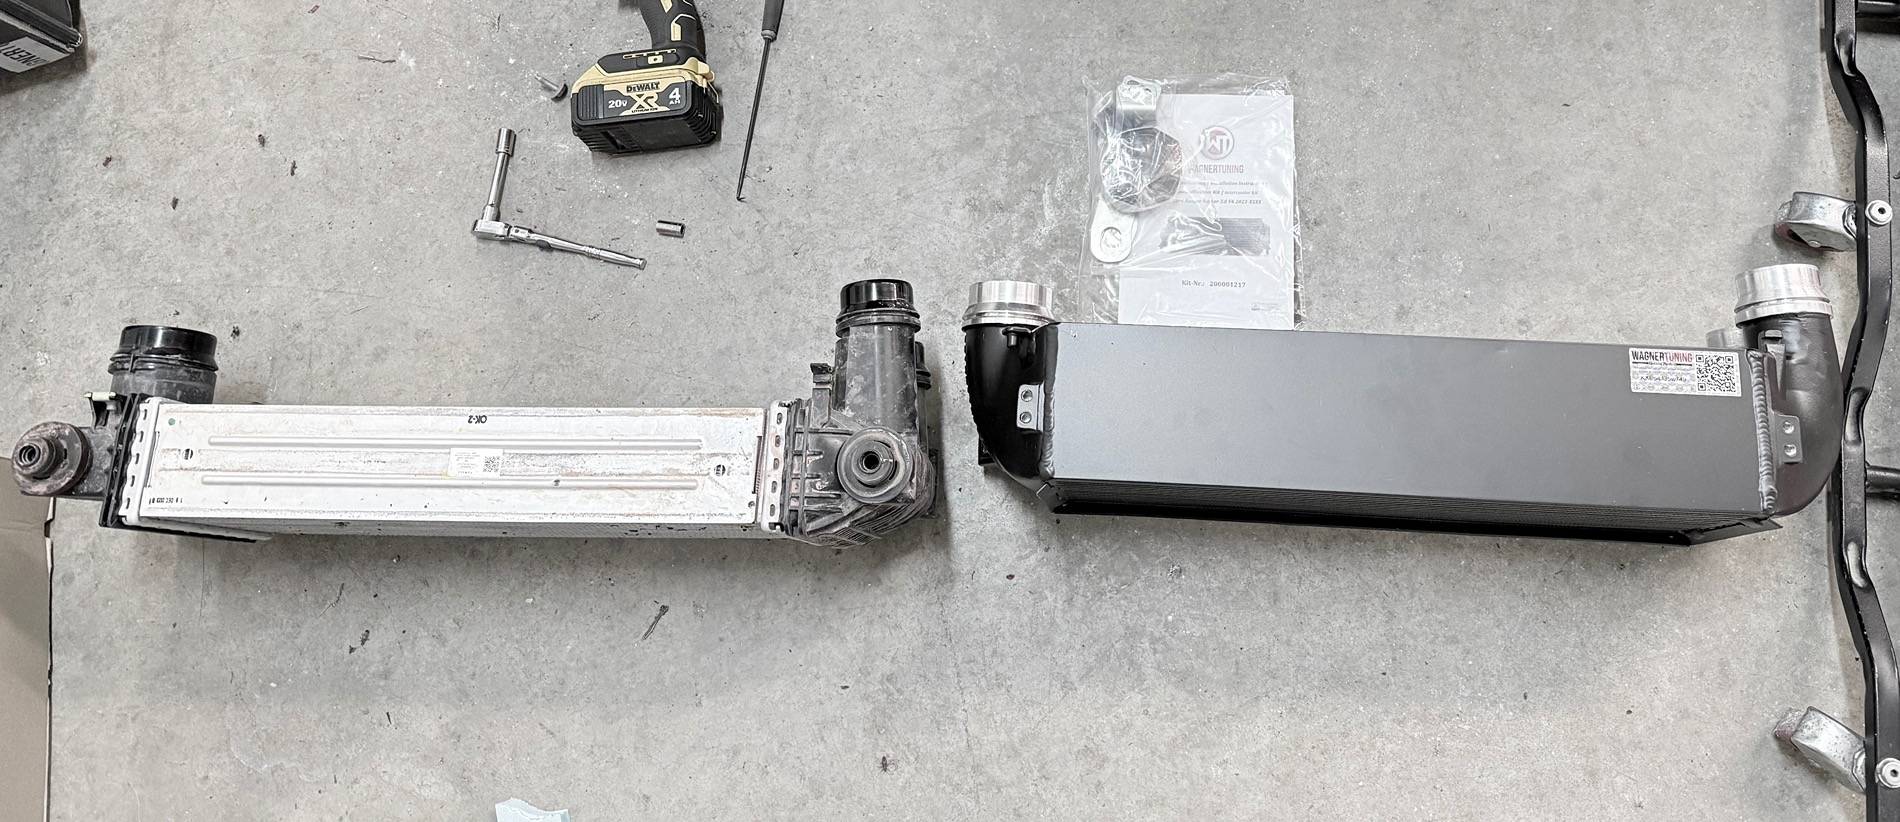
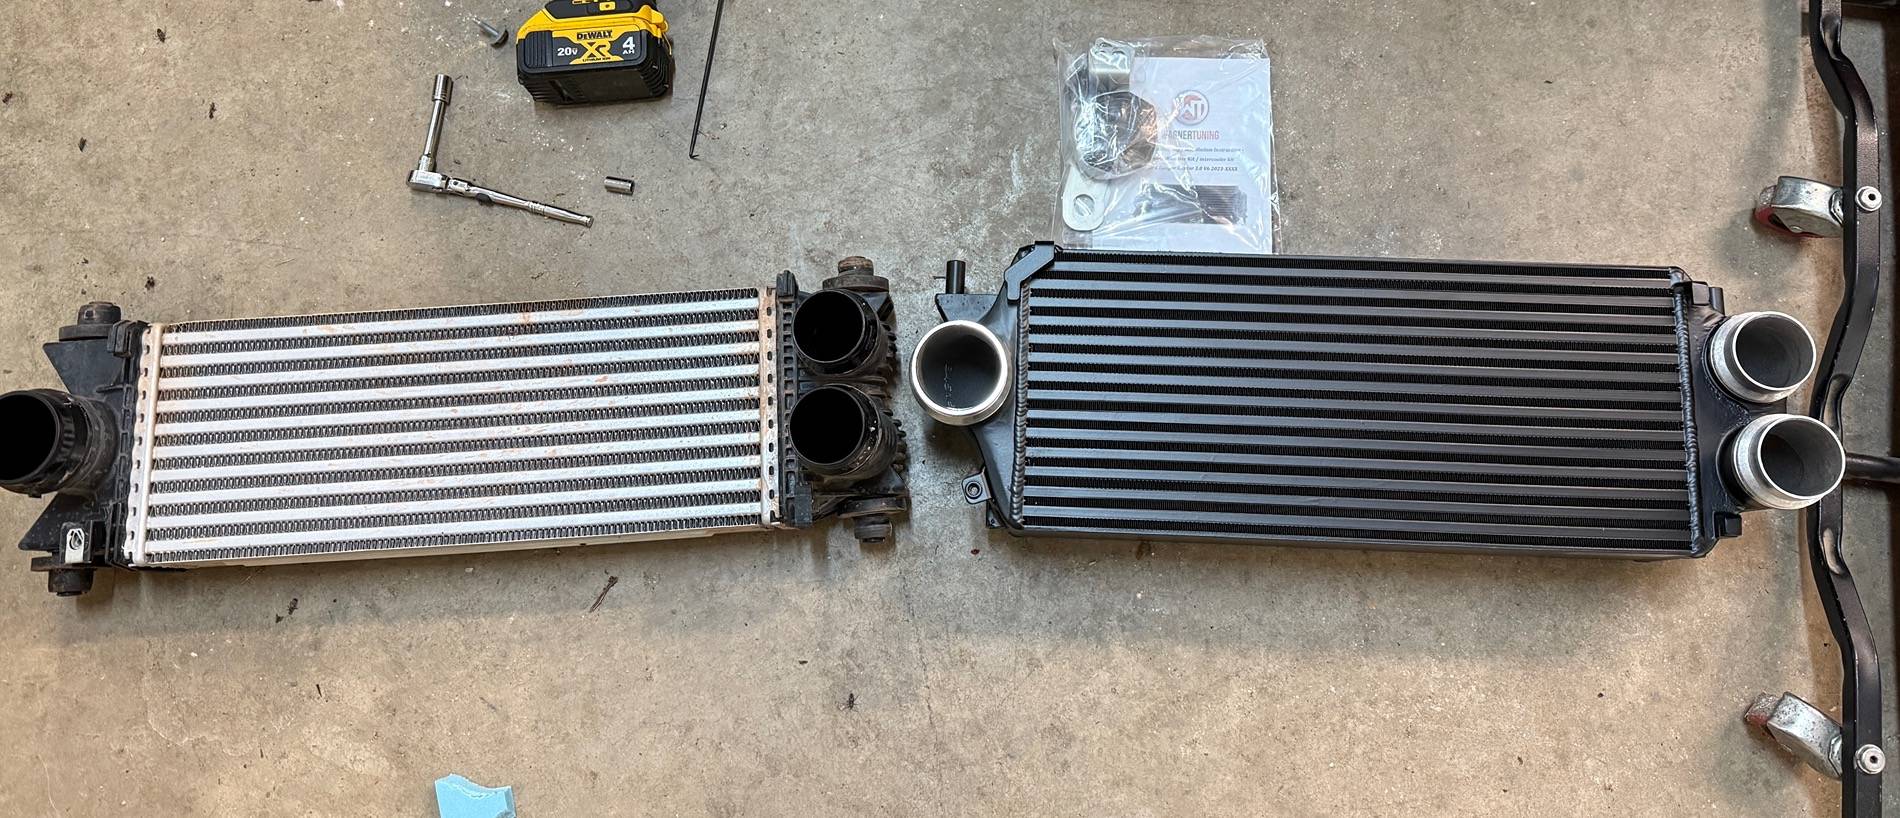
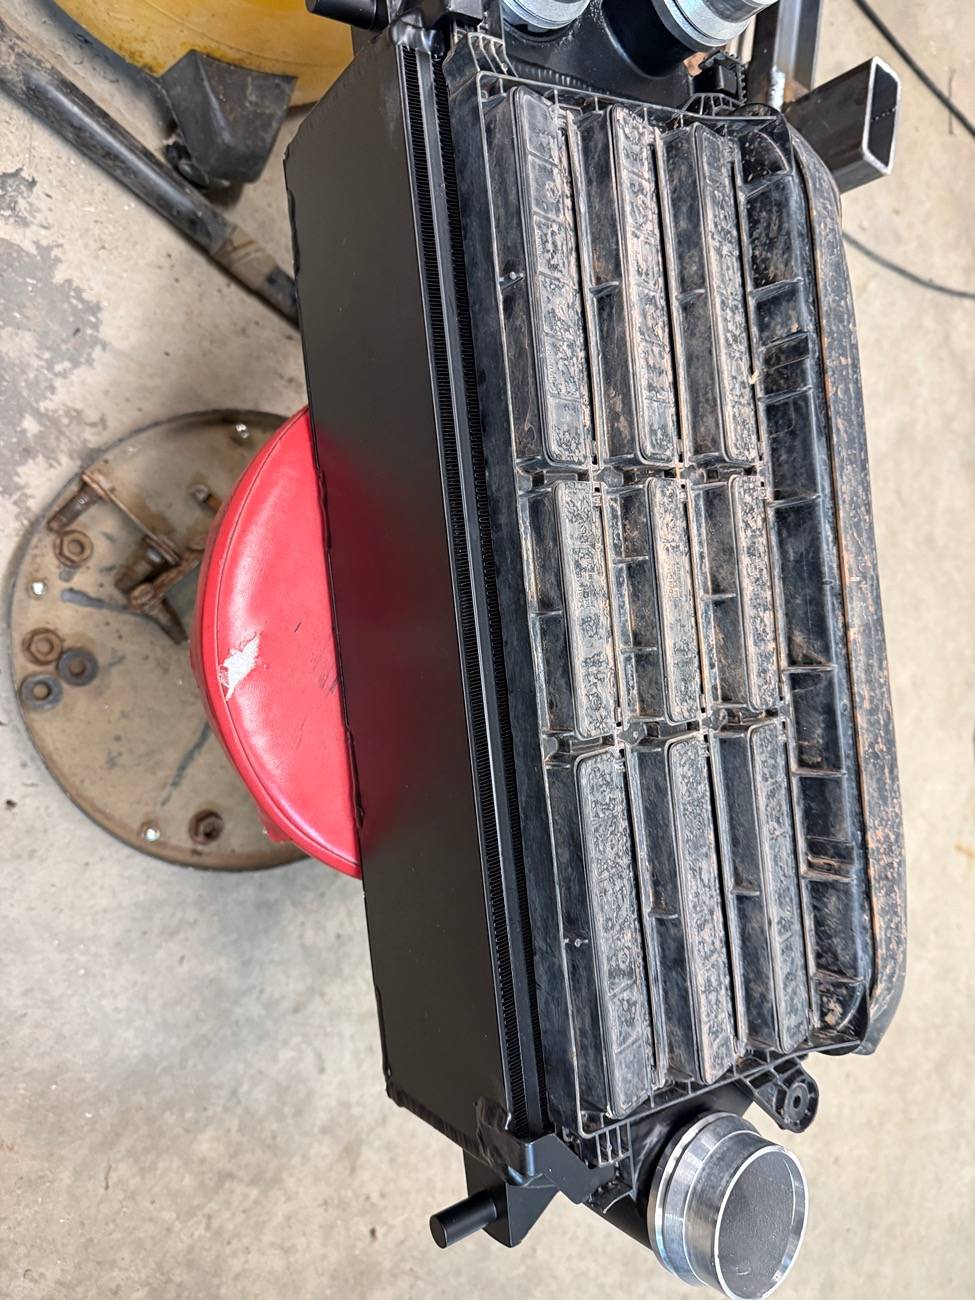
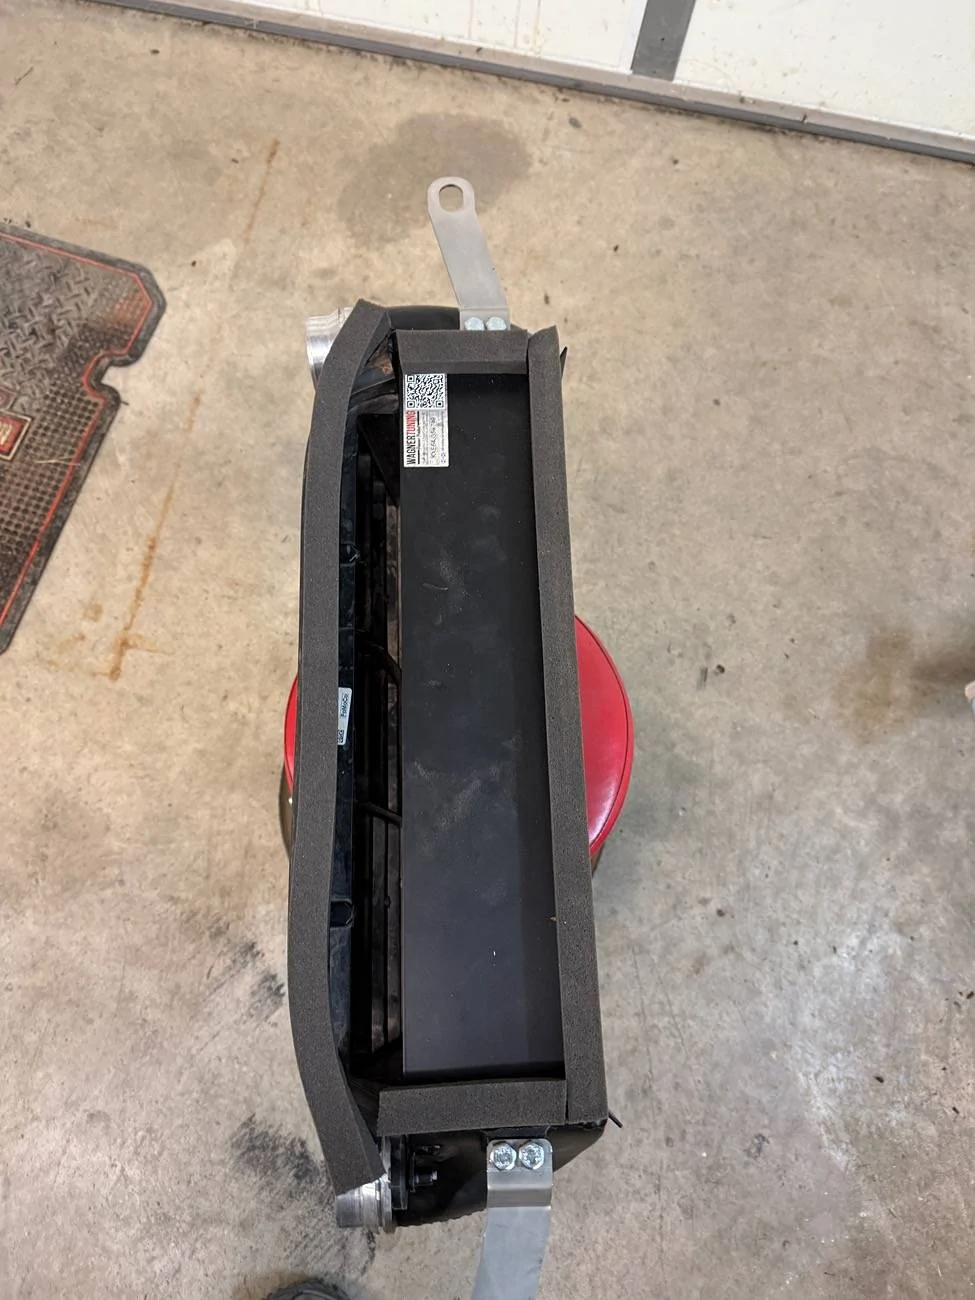
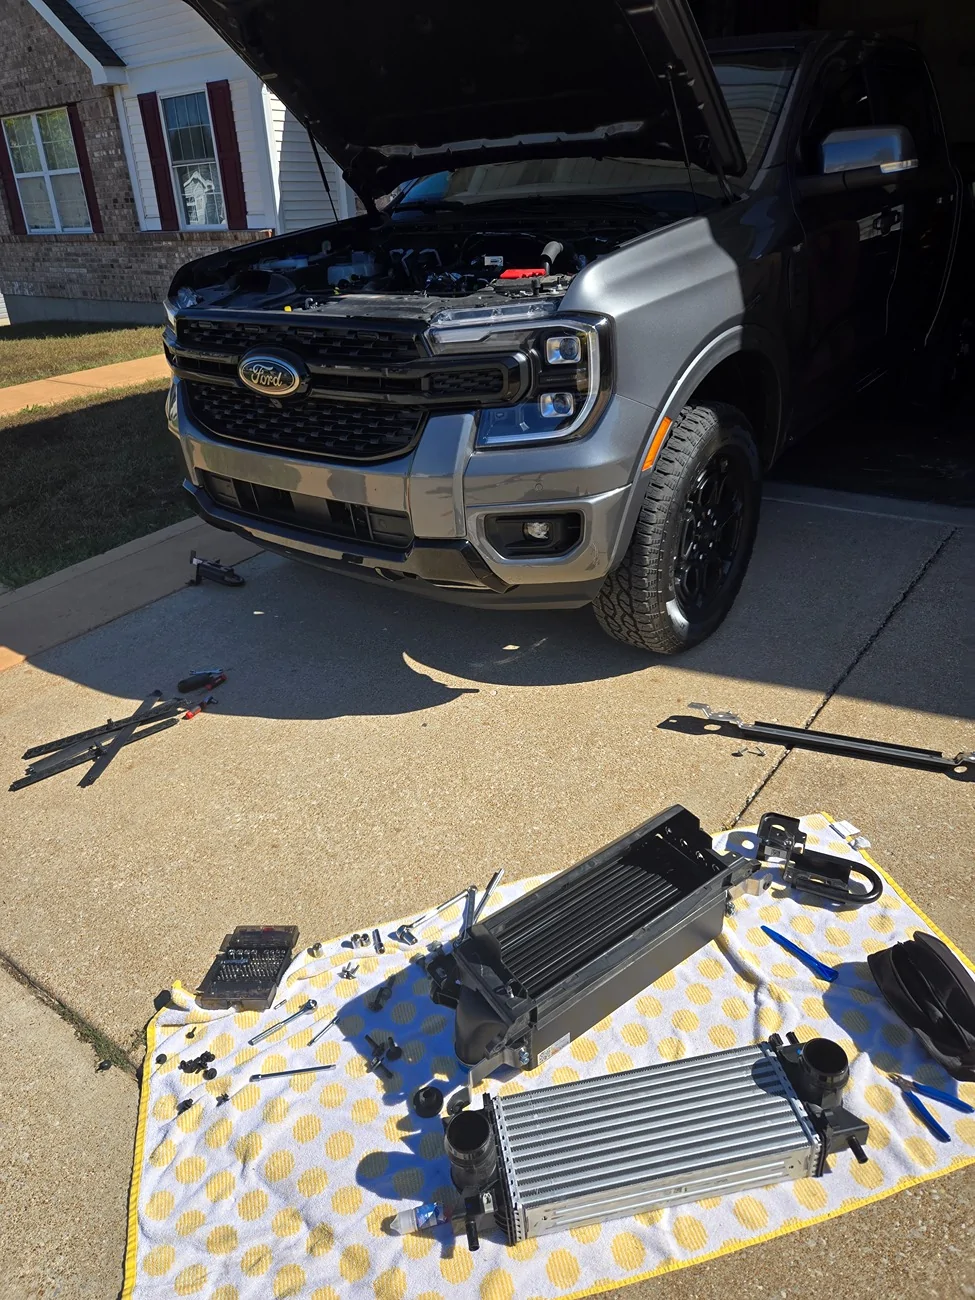
Traditionally, with higher boost pressures and the same diameter charge piping, pressure increases with additional boost and CFM air flow. This causes higher then normal pressure increases the FMIC.

As this setup utilizes the stock diameter piping, there will be higher air pressure in the increased volume of the aftermarket FMIC and charge piping.

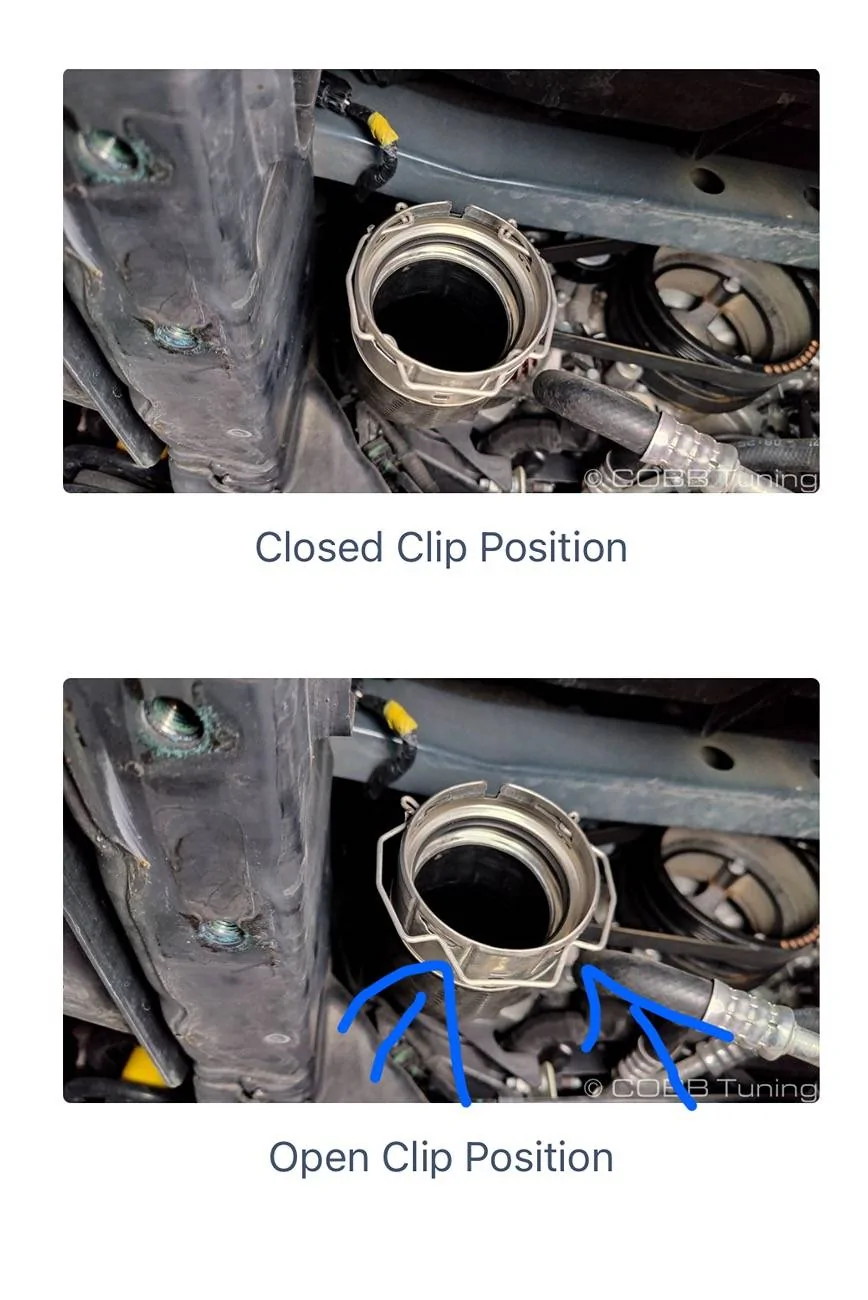
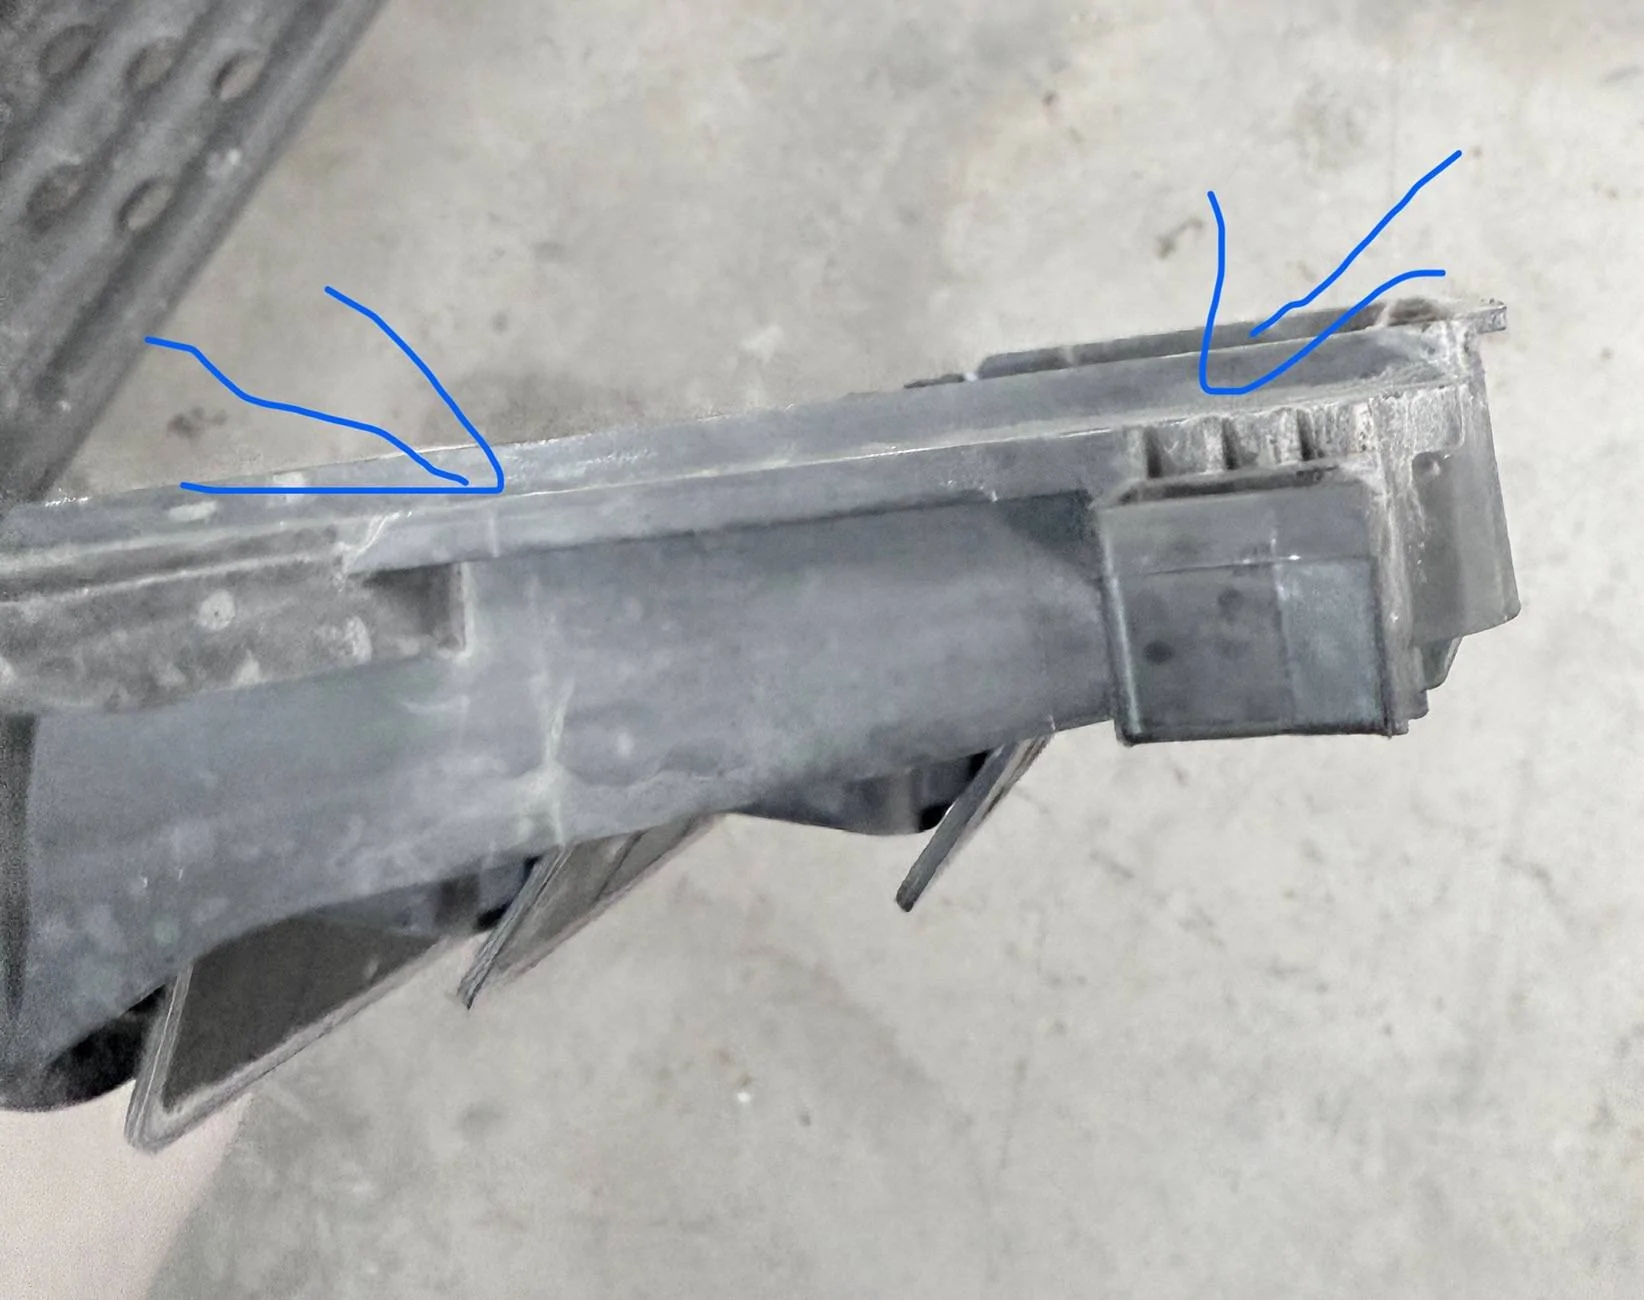
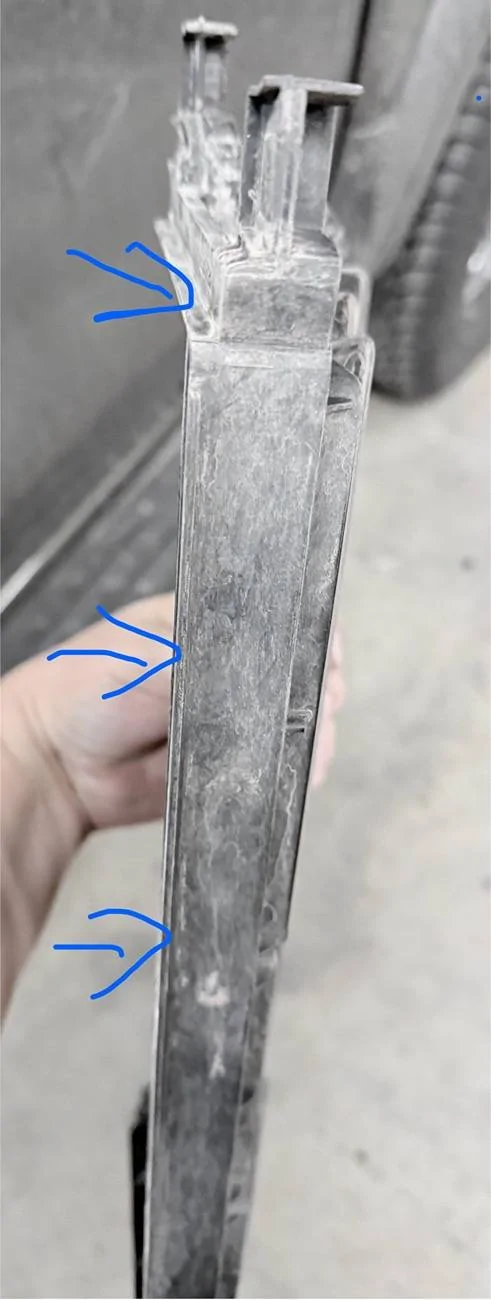
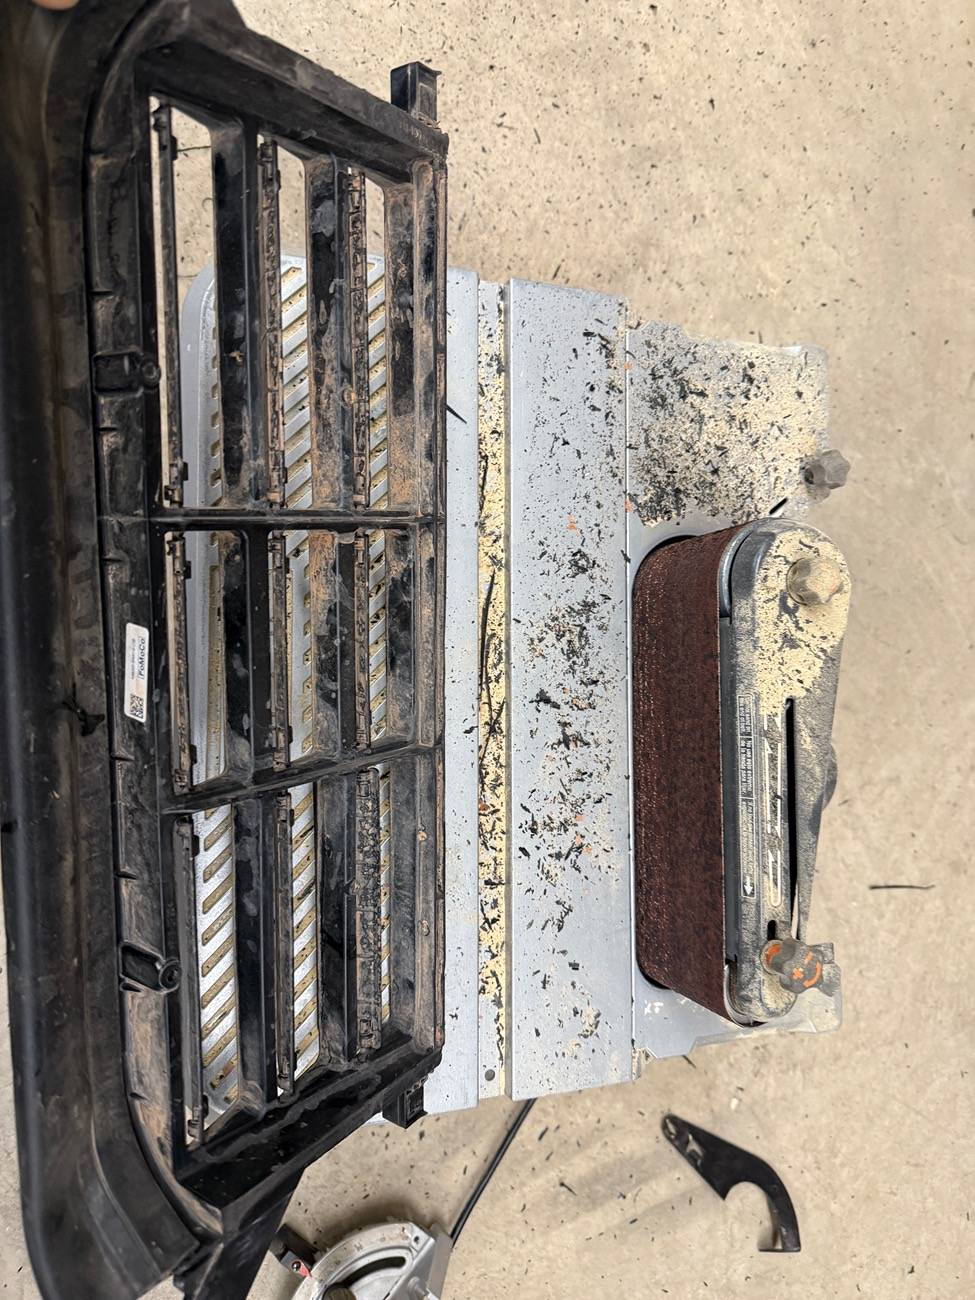
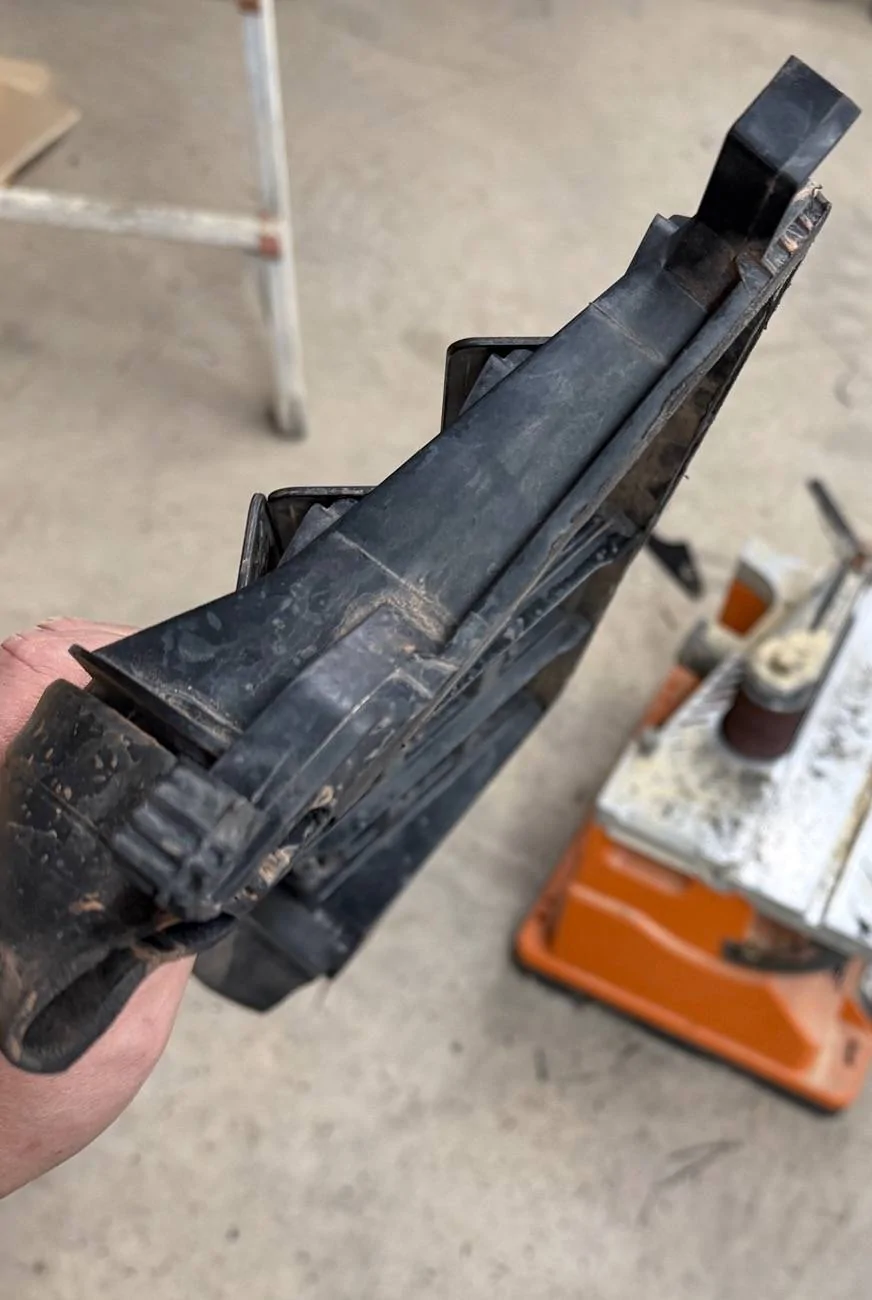
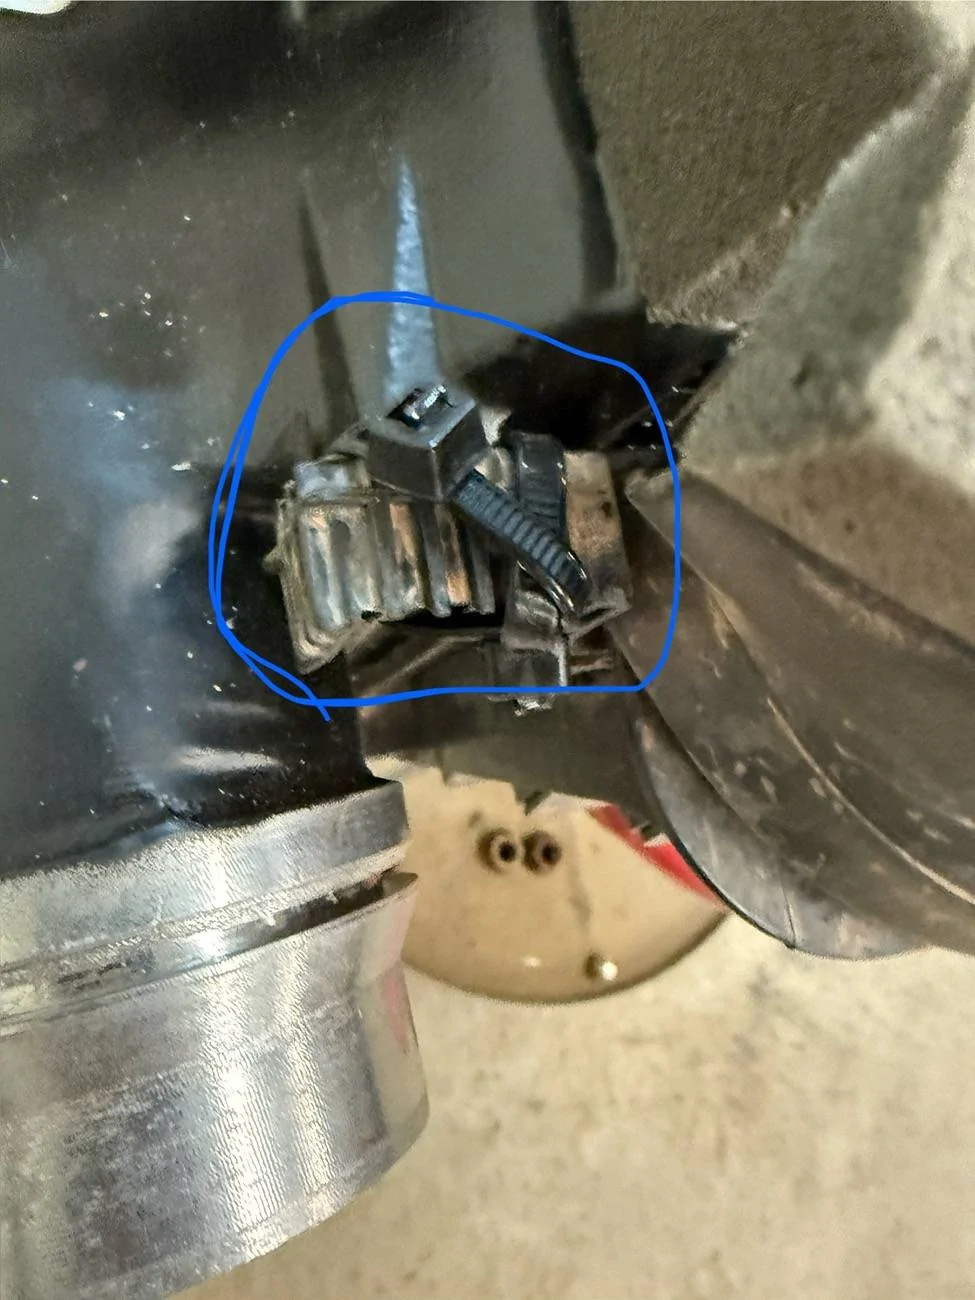
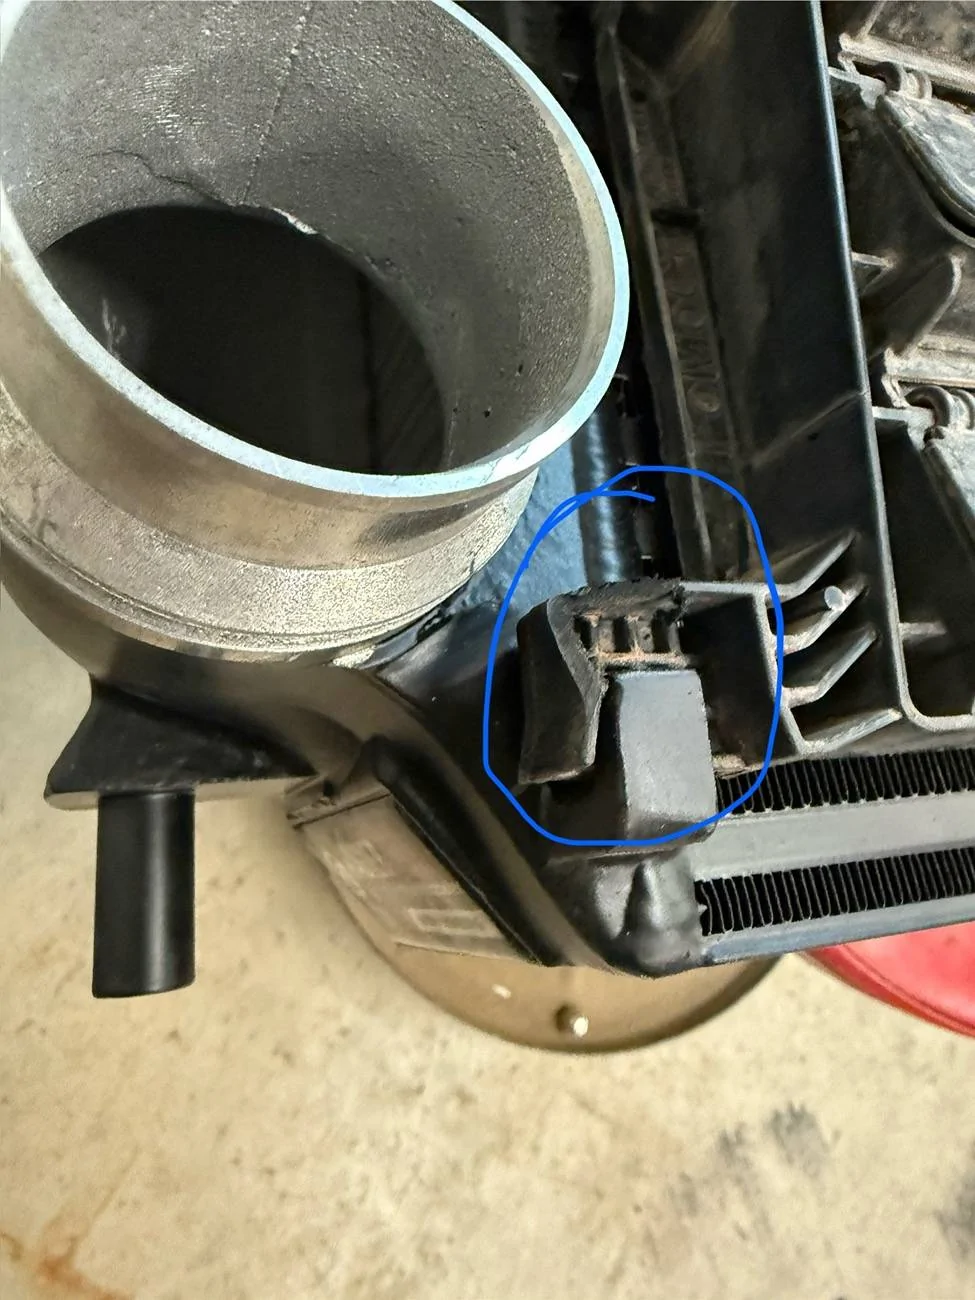
Are the metal clamps molded or clamped to the actual rubber tubing???
The tune with higher commanded boost will result in higher pressure on the charge pipes. The larger ic volume will result in no change other than a minuscule reduction in the delta pressure due to more air to compress.

If all else remains equal, the cooler charge temperature from the upgraded intercooler will result in lower pressures on the system. But this depends on where the truck measures boost for the system control. If it measures before the ic, lower resultant pressure on the post intercooler piping. If it measures post intercooler, higher resultant pressure on the intercooler inlet piping.

All this is a pointless discussion, as the difference in pressure due to the intercooler upgrade is not a significant difference to the charge piping.

The tune is a significant change, 5 or 6 psi IIRC, but again, ford wouldn’t make more warranty work by releasing a tune that pops charge pipes.

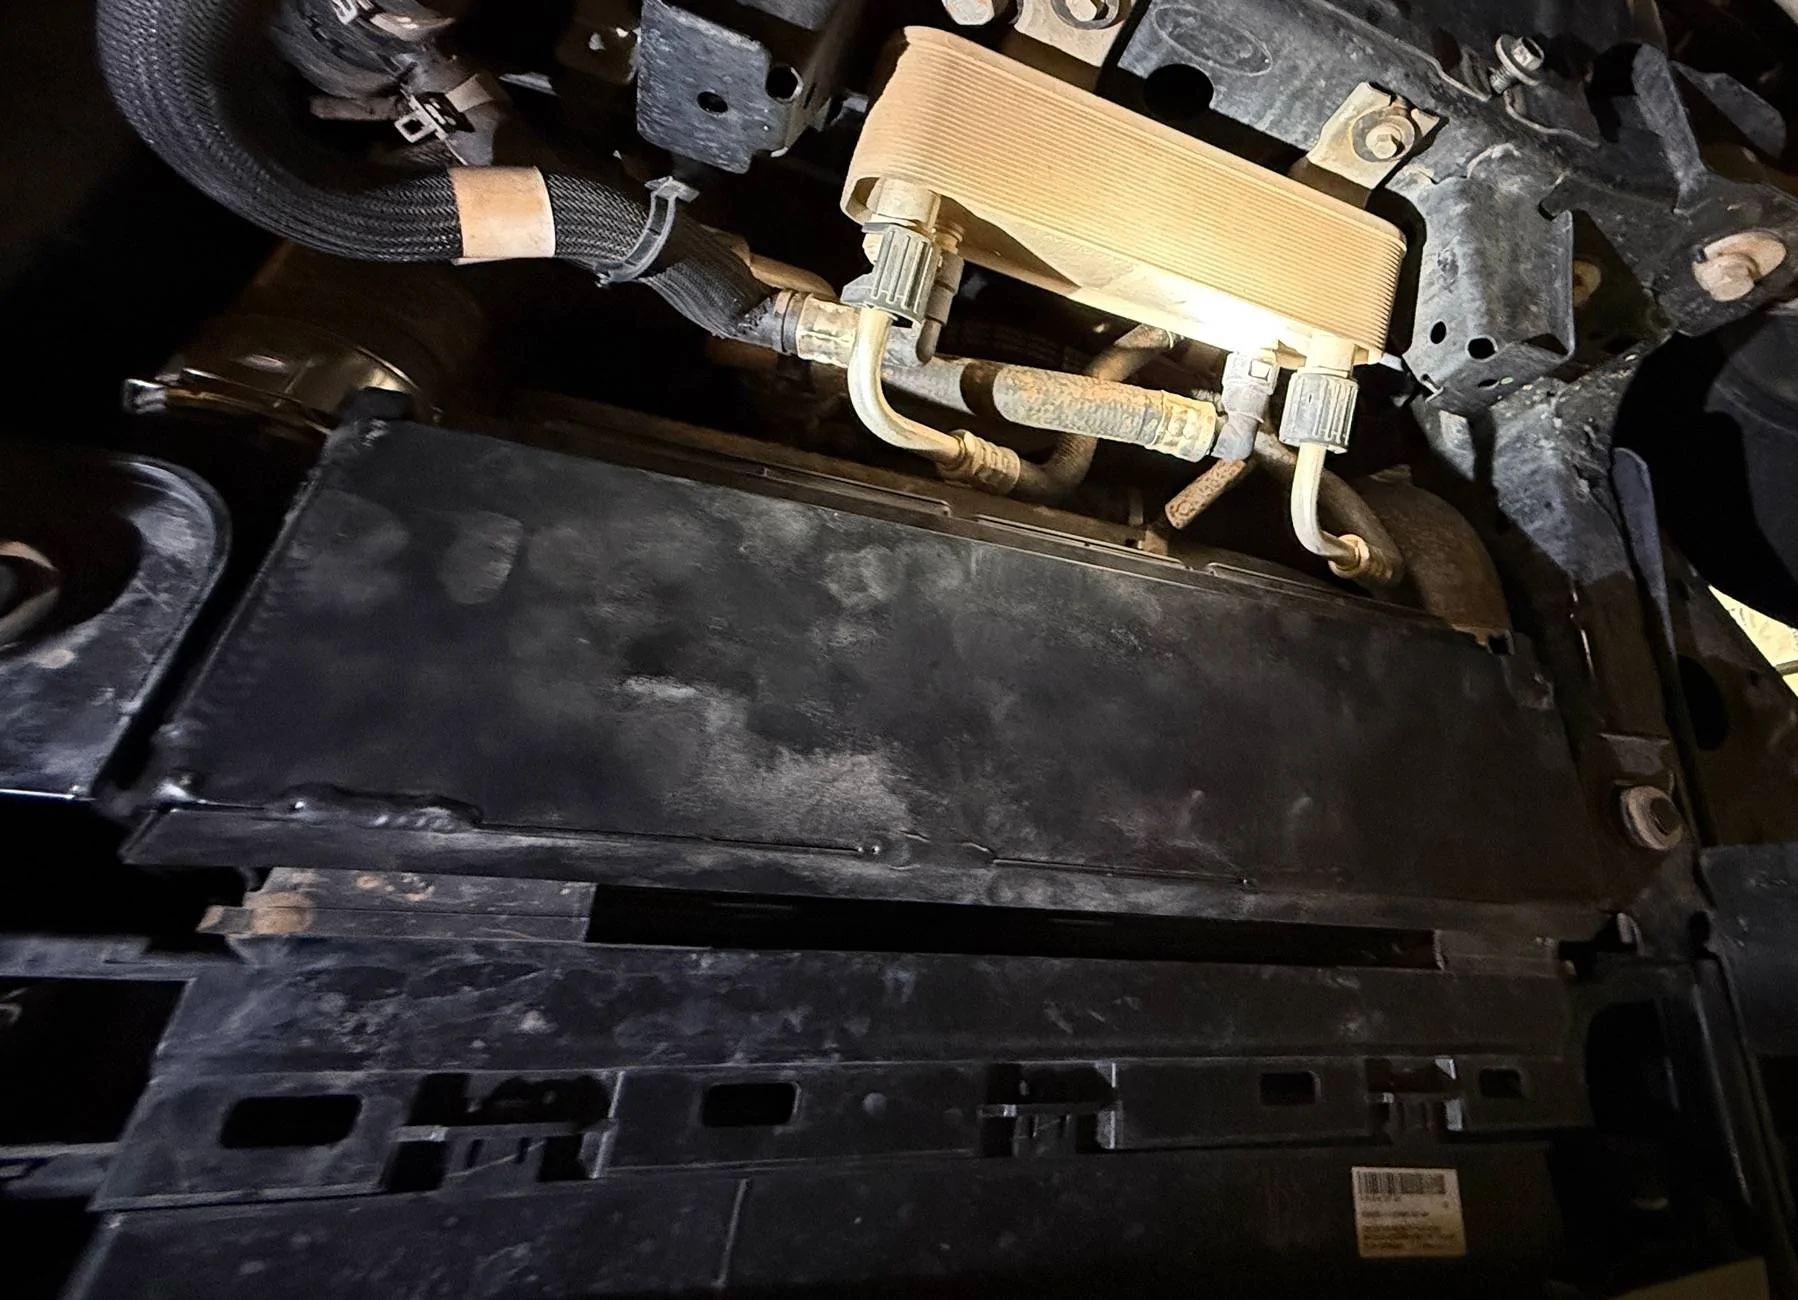
I have not destroyed a factory charge pipe to analyze the fitting, but they appear to be molded in. The aftermarket charge pipes (eg. process west) include replacement fittings, so that also points to this conclusion.
Sponsored


BigOleOgre

Well-Known Member
First Name
Nate
Joined
Aug 9, 2025
Threads
14
Messages
125
Reaction score
217
Location
STL MO
Vehicle(s)
2025 Ranger Lariat 2.7
Occupation
Field Service Engineer
I chose the Wagner intercooler for two main reasons.
First, its core volume and surface area is a major upgrade over stock, and larger than the cobb unit.
Second, it cost around $600 shipped on black friday, making it much cheaper than the other aftermarket ic’s available.

When I received my intercooler, others had already confirmed in the below thread that it could be installed without removing the bumper. This is the route I took as well.
https://www.ranger6g.com/forum/thre...led-a-new-intercooler-on-their-own-yet.14375/
I suggest reading linked thread as well, good information.

The wagner instructions are somewhat poor, and involve removing bumper. I will point out the changes I ran across during the procedure.

Ok, now for the installation. My apologies for not taking more pictures of every step, I was in a hurry to get it finished for a road trip.

EDIT: Install should take around two hours for someone with decent wrenching experience.

Step Zero: (Forgot this during writeup, so zero) Loosen two rear bolts on front skid plate a few turns. Support skid plate and remove two front bolts. (15mm socket for all) Lower skid plate and slide forward off rear bolts. Set aside.

Step One: Disconnect the charge pipes (3) from the intercooler. Pull the wire retaining clips with a pick or screwdriver to disengage them, then slide the hose off the connector. There is plenty of flex in the stock hoses to remove with intercooler in place.

EDIT: I was annoyed I didn’t take good pictures of the charge pipe retaining clips. While reading the Cobb intercooler instructions, i discovered they had excellent pictures. I have attached them below.
IMG_2291.webp

Note the blue arrows indicating the dimples in the clip opposite the open side. These dimples can be pushed out of their grooves and onto the surface of the charge pipe retaining clips connector, holding the clip open. Both must be pushed at the same time or it will snap back closed.


Step Two: Begin removing the tow hooks. Start by removing the one horizontal bolt per side holding the front louvers to the tow hooks. These bolts use an 8mm socket.

Step Three: Remove the two vertical bolts holding the tow hooks to the frame with a 15mm socket. Support the intercooler before removing the second tow hook, as it will be completely unsupported with the tow hooks removed.

Step Four: Lower the intercooler and rear louvers out of the truck. It may take some force initially to dislodge the upper rubber mounts. The front louver assembly remains in the truck at this point.

Step Five: Remove the rear louver assembly from the intercooler by removing the single bolt (10mm socket) at top passenger side corner. Release the clip at the top driver side corner and slide the louver assembly up.

Side by side comparison of factory and wagner intercooler:
IMG_2195.jpeg

IMG_2194.jpeg


Step Six: Trim the rear louver assembly to fit the wagner intercooler. The lip that extends on the intercooler side of the mounting tabs needs to be cut off flush. It extends across the bottom of the louvers and up both sides. Arrows point to removal area.
IMG_2196.jpeg

IMG_2197.jpeg


I intended to use a dremel with plastic cutoff wheel for the removal, but after looking at the bottom thickness, chose to use an oscillating belt sander.
IMG_2198.jpeg
IMG_2199.jpeg
IMG_2200.jpeg


Step Seven: Attack the trimmed rear louver assembly to the wagner intercooler by slotting the tabs into the three clips and reinstalling the factory bolt removed in step five (10mm socket)
IMG_2201.jpeg


Note: The louver does not clip onto the top driver side corner like the stock intercooler. I used two zipties to secure it as it was easily dislodged.
IMG_2205.jpeg


Note 2: The driver side lower louver mount interferes with the lower charge pipe clip making installation more challenging. I trimmed the corner as shown solving this issue.
IMG_2206.jpeg


Step Eight: Apply the gasket tape to the Wagner intercooler and rear louver assembly shown. Bolt on the supplied upper mounts with the supplied bolts. (13mm wrench)
IMG_2204.jpeg


Note: Make sure brackets are installed in orientation shown above. The manual shows them backward.

Note 2: You will need to use an open end wrench to tighten the bolts, they are too close together to allow a socket or box end to be used.

Step Nine: Insert the supplied rubber gromets into the wagner bracket mount holes.

Step Ten: Return to the truck. Unplug the front louver plug from the driver side bottom, and free the christmas tree clip holding the wires.

Step Eleven: Unbolt the factory upper intercooler mount from the top of the frame rails. One bolt per side. (13mm wrench) I used a ratcheting wrench for this due to limited space.

Step Twelve: Slide the factory upper mount and front louver assembly to give better access to front louver top bolts. Remove two bolts securing front louvers to mount. (8mm socket). Lower front louvers from truck.

Step Thirteen: Angle factory top mount and remove from truck.

Step Fourteen: Unclip and remove louvers from front louver assembly.
IMG_2209.jpeg

Note: Louvers can be left in place and will function. However, wagner suggests removing for best performance.

Step Fifteen: Install wagner intercooler assembly into truck. Place drivers side upper mount on top of frame. Position drivers side of intercooler as close to frame and as far back as possible. Angle passenger side toward front. Passenger side upper mount will have just enough clearance to slide above frame at this angle. DO NOT install bolts yet. Intercooler will hang from upper mounts.

Step Sixteen: Install factory charge pipes onto Wagner intercooler, and engage factory wire retaining clips.

Step Seventeen: Slide intercooler as far toward rear as possible. Reinstall front louver assembly. You will have to fold the front rubber ducting to get it in place. Straighten and position the ducting through the front bumper opening.

Step Eighteen: Reattach christmas tree wire retainer on front louvers assembly. Plug in louver motor and engage plug retainer.

Step Nineteen: Slide intercooler forward into position and install factory upper mount bolts (13mm wrench). As during removal, I used a ratcheting wrench due to tight confines.

Note: Front louver assembly no longer secures with top bolts. It is plenty secure wedged in place between bumper and intercooler, plus the two lower bolts.

Step Twenty: Remove factory lower rubber mounts from factory intercooler, and install onto Wagner intercooler bottom pegs. Reinstall factory tow hooks with two factory bolts per side. (15mm socket)

Step Twenty One: Reinstall lower front louvers bolts, one per side. (8mm socket)
IMG_2207.jpeg


Step Twenty Two: Slide skid plate onto rear bolts, then install front factory bolts. (15mm socket) Tighten rear bolts.

Congratulations, your intercooler install is complete. Go enjoy your reduced charge temps.

IMG_2208.jpeg
Thank you for this, was supremely helpful when I got stuck putting a Wagner in my 2.7 the past couple hours, bout to finish up, fun fact no rear louvers.
Ford Ranger Wagner Intercooler Installation DIY How-To for 2024 Ranger Raptor 20251009_121630
 

Emanon

Member
Joined
Jan 5, 2026
Threads
1
Messages
11
Reaction score
5
Location
USA
Vehicle(s)
RR
Occupation
Analyst
Nice write-up. Seems a solid deal for the coin, if you don't mind a bit a fab work.

Wonder if for Step 8, you could hit up Ace for 4 allen head bolts to make life easier.


Step Eight: Apply the gasket tape to the Wagner intercooler and rear louver assembly shown. Bolt on the supplied upper mounts with the supplied bolts. (13mm wrench)
 

TommyWasabi

Member
First Name
Thomas
Joined
Apr 1, 2026
Threads
2
Messages
15
Reaction score
32
Location
North Alabama
Vehicle(s)
2026 Ford Ranger Raptor, 2004 Toyota 4Runner 2UZ-FE
Occupation
EH&S
This is a wonderful write up and it helped me with my installation. I'll say that during my install the things that took the longest were: first in step 6 the mod to removing the plastic trim around the rear louver housing (20min) and second, I dropped one of the threaded clips in the tube frame that the upper intercooler brackets mount to (dropped it twice, total 45min lost) and it was a pain in the ass to retrieve.

I will say that in step 6 I used a pair of Knipex end cutting nippers from Northern Tool to remove the plastic trim edges along with a razor blade to smooth out and finish any high spots, it made the process easy and minimal mess to clean up.

Then in step 7 where the drivers side bracket was cut to accommodate for the lower ring clip on the drivers side, I ended up not having to trim that bracket tab, but instead just twisted the charge pipe a little bit to allow the clip to snap into place and it ended up clearing the bracket tab just fine.

Again, great write up and it helped me a lot since the Wagner instructions were terrible.
 

Lion77

Well-Known Member
Joined
Feb 27, 2025
Threads
28
Messages
786
Reaction score
1,150
Location
United States
Vehicle(s)
2024 Ranger Raptor
Occupation
Electrical Engineer
Pressure is measured post IC. Also the ECU will vary boost to achieve a target air density. So as the stock IC heats up, theres more commanded pressure from the turbos. Aka hotter air at higher pressure = same density as colder air at lower pressure.

The ECU cal is after a target air density regardless of temp. The catch is however turbo compressor efficiency and back pressure. As your drive the turbos harder to generate higher boost pressure, you create more back pressure on the exhaust side and move the turbos more outside their efficiency island which adds heat and the back pressure, so theres a limit to how much boost the ECU can get out of the turbos without pushing other parts beyond their thermal limits (or losing more power to heat and pressure loss on exhaust side than gained by hitting the target air density).

This, the intercooler upgrade. Most of the ICs like the Wagner have similar or slightly less pressure drop than a stock unit, but slightly higher volume which could add a bit of lag, but given that the pipe likely account for the bulk of the volume, its likely negligible. But by taking more heat out of the air with similar pressure drop, the target air density is achieved without commanding as much boost in hot weather. I doubt theres any benefit in cooler weather, but in hot weather? Yes.
Sponsored


Top