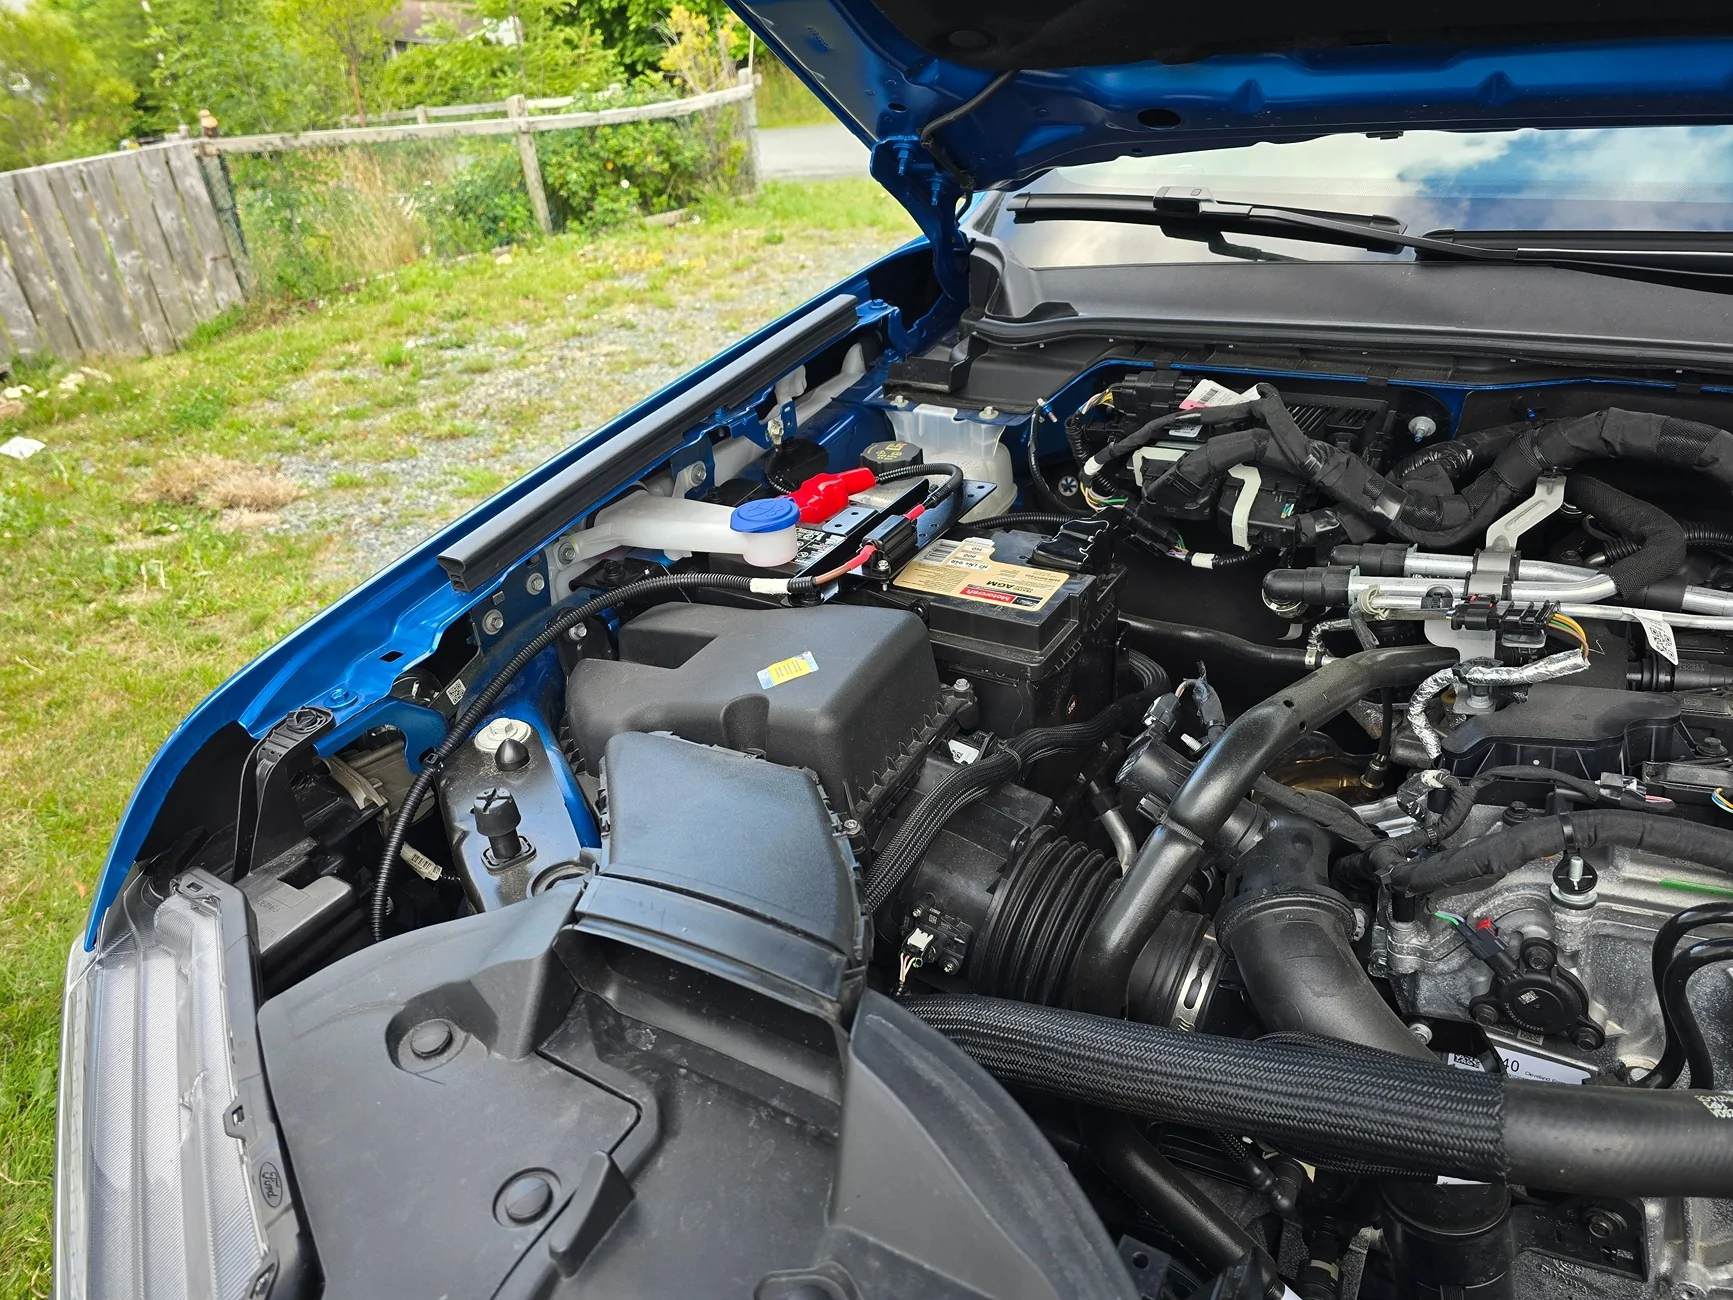
I have a single ARB air compressor I am trying to fit under the hood. I might try and make a mounting bracket to go over the fuse panel on the driver side near the brake reservoir.
I have a single ARB air compressor I am trying to fit under the hood. I might try and make a mounting bracket to go over the fuse panel on the driver side near the brake reservoir.
I think you can fit a single behind the backseat and I think there are brackets for that location. Under the hood makes wiring really easy though. Just make sure you can still get to the fuse box.
I think you can fit a single behind the backseat and I think there are brackets for that location. Under the hood makes wiring really easy though. Just make sure you can still get to the fuse box.
Yeah I'm thinking a single bolt to hold a bracket that can rest on the fuse panel. I rarely use the compressor but when I need it I want it haha. I could have used it the other day when I got a nail in my tire.
I had the single installed in my Maverick and it was definitely convenient to have. Sucks there isn't a good spot under the hood to mount this.
Yeah I'm thinking a single bolt to hold a bracket that can rest on the fuse panel. I rarely use the compressor but when I need it I want it haha. I could have used it the other day when I got a nail in my tire.
I had the single installed in my Maverick and it was definitely convenient to have. Sucks there isn't a good spot under the hood to mount this.
There are brackets out there for the single to mount where ARB has there Aux battery tray too. granted you wont be abke to use both, but that is an option for ya aswell.
There are brackets out there for the single to mount where ARB has there Aux battery tray too. granted you wont be abke to use both, but that is an option for ya aswell.
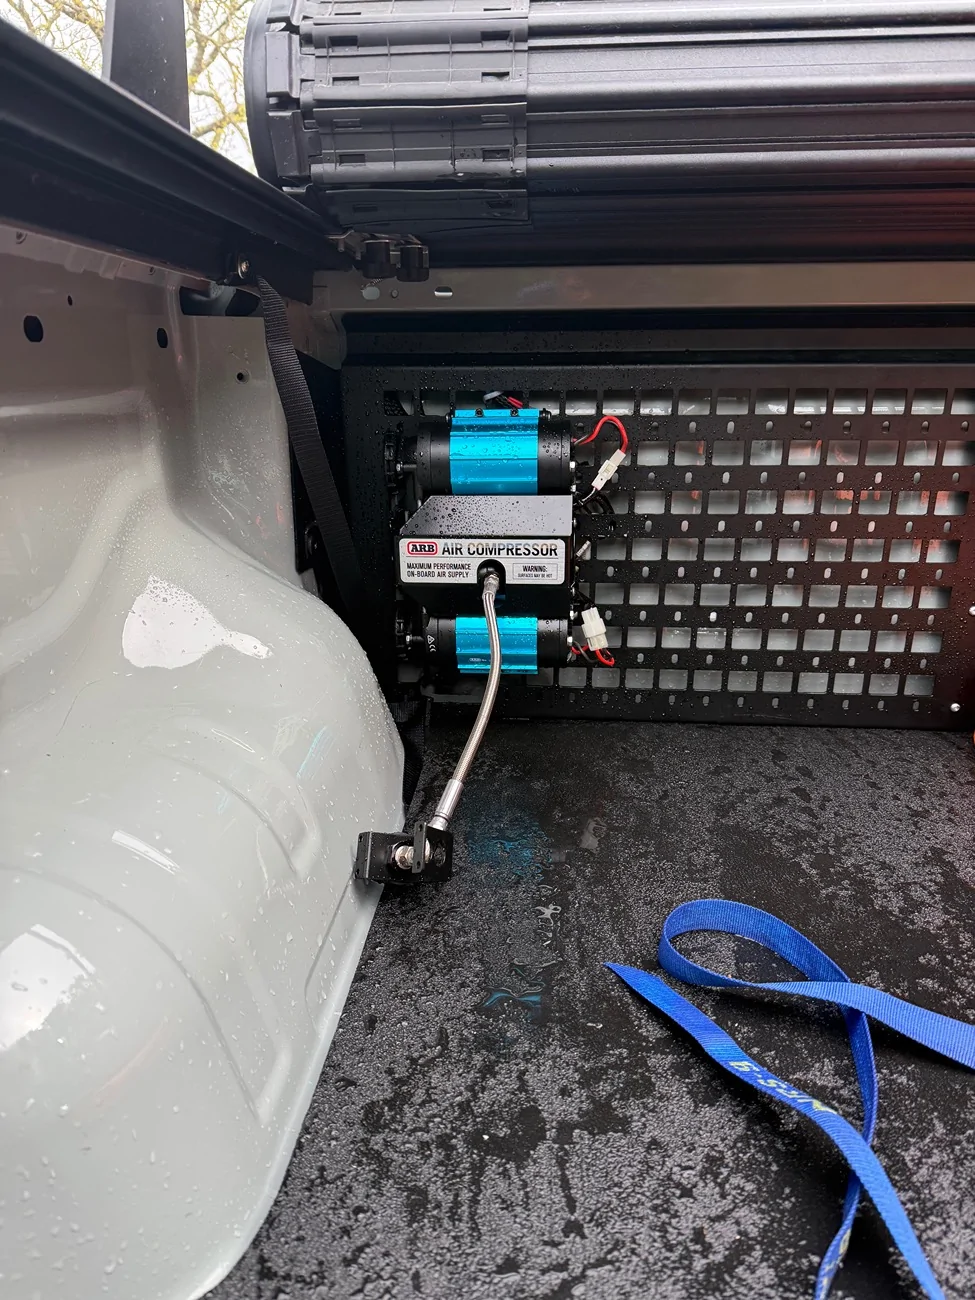
I finally got around to installing my ARB twin compressor onboard air setup this weekend. Wound up mounting it to my @American Adventure LAb bulkhead molle panel in the bed, towards the drivers side, which kept the wiring run relatively straightforward and avoided unnecessary length and complexity. Had to drill some new holes in the molle panel, and used a metal backing plate from Glue Factory Offroad. If AAL comes up with a purpose built mount I'd buy it in a sec, but I think its harder than expected since the holes don't align with the panel (probably needs to be a stand off type mount).
The ARB harness is not long enough so I got a 9’ extension harness from SDHQ. The run goes from the oem arb harness (fused) in the engine bay then connects with the extension harness somewhere under the truck in the drivers seat area. The SDHQ harness runs from there, and then between the cab and bed, and out through the oval bulkhead passthrough in the bed corner near where the compressor is mounted. The SDHQ harness includes wiring for the switch trigger, but I only used the power wires. It also includes a secondary body ground, but I didn’t use it because there wasn’t a good ground anywhere near my install location (I grounded to the battery and just taped up the secondary ground). Running the wiring was the worst part of the install by far - made particularly painful because the underbody of my truck is coated in rust prevention oil. The harnesses are really chunky and fishing them through to the bed was a real pain. The oval hole that I ran them through has some sort of felt sound deadening material behind it and it kept catching on everything. I followed the oem harness for the most part but there are also some body mounts that I couldn’t get around and had to get a little creative with my run. I ran the sdhq harness without the terminating plug to make it easier to get through the tight spots and then terminated it when the run was finished in the bed. While I used the 9’ extension harness from sdhq I could have gotten away with about 7’. Note that there is an opening in the upper corner of the bed that might have made the run a bit easier, so if you undertake this install you might consider that option instead of the oval hole.
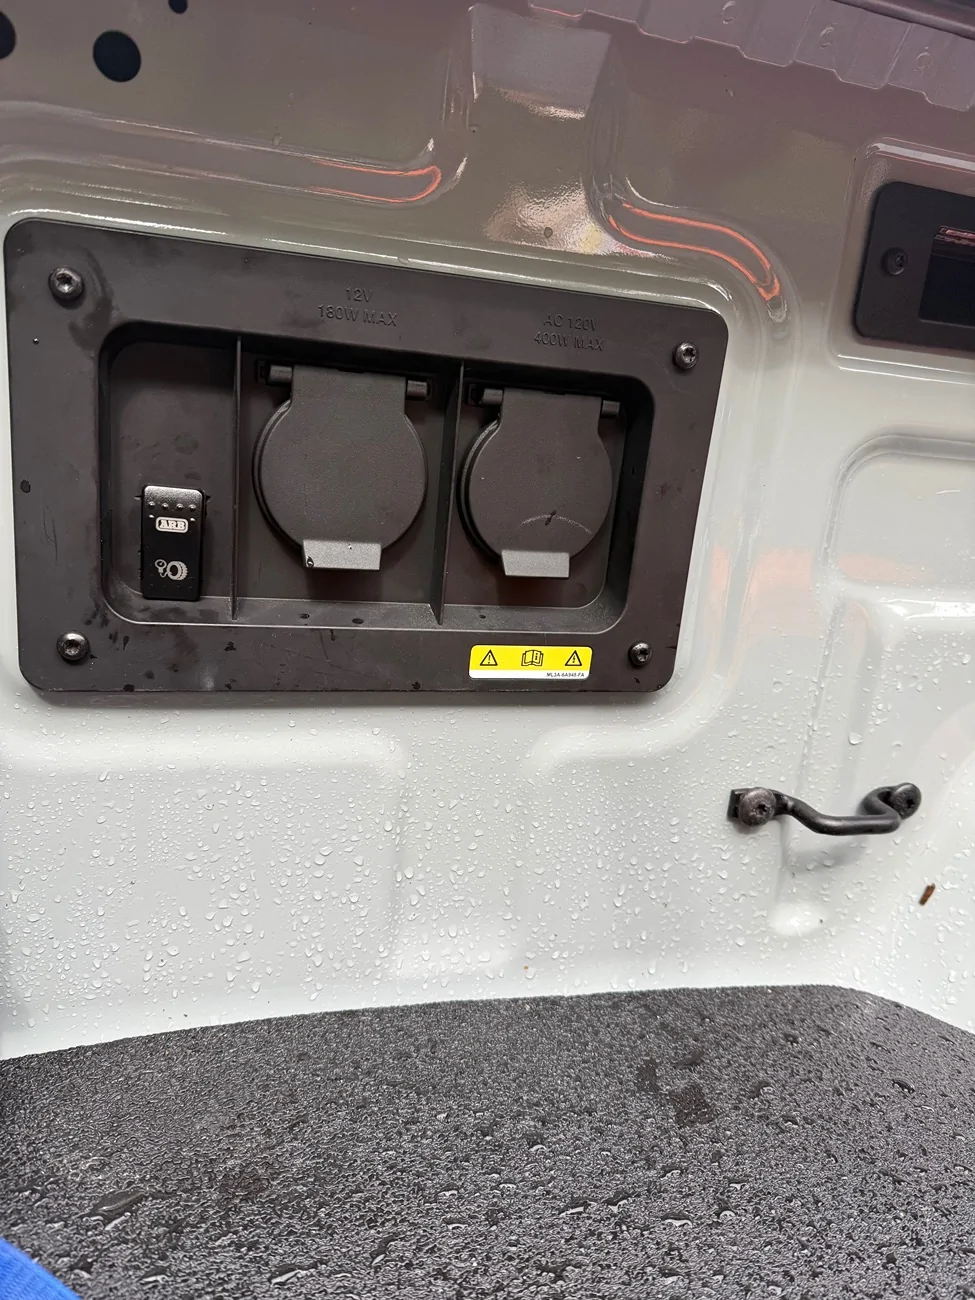
I considered using the same sdhq harness for the switch and running the switch wire to my Garmin Powerswitch under the hood, and while this would have been easier (single power and switch run), I ruled this option out because the power wouldn’t be ignition triggered and I didn’t want to accidentally power the compressor while the truck was off and drain my battery. Instead I bought the sdhq switchpros trigger wire (I don’t have a switch pro setup but this harness is simple and works) and ran that from the compressor, out the same oval hole in the bulkhead, through the bed wall and to the power plug on the rear drivers side of the bed. I installed a rocker switch onto that plastic panel and powered it from the outlet power wires (which are ignition triggered) using positaps. The switch draws almost no power, so this setup should be fine.
Everything works perfectly. The install could have been a little cleaner, but I’m happy with it. I might tweak positioning a little bit, but it’s good to go.
For now the air chuck is temporary. I’m going to run the air in a hose behind bedside molle panels to a hard mounted chuck but I don’t have them yet.
The air part was a deeeep rabbit hole for me. The compressor outlet is 1/4 npt but most of the ARB elbows, hoses and fittings are JIC. Then there’s the question of running 1/4 ID vs 3/8 ID hose and whether to use push connect or threaded fittings. Ultimately I’m going to do 1/4 NPT to JIC adapter at the compressor then run a short braided ARB leader hose to bleed some heat off the compressor and connect that to a custom 1/4 ID rubber hose with 1/4 JIC fittings. The ARB chuck will thread directly onto that hose at my outlet. I decided against 3/8 ID hose because I already had a 1/4 braided leader line which would create a bottleneck and the 3/8 hose wouldn’t be as supple for the run. Seems like for tire inflation it should do great but the 3/8 ID setup would work better for any air tools or air gun (which isn’t the purpose of this setup and would probably require an air tank anyways). I tried an air gun with my setup and it works great for 10-15 seconds and then needs to “recharge”. None of the air stuff is shown in the photos since I’m still putting all of this together, but the hard part is out of the way.
I’m a total novice with this stuff (and it shows) but i learned a lot with this install.
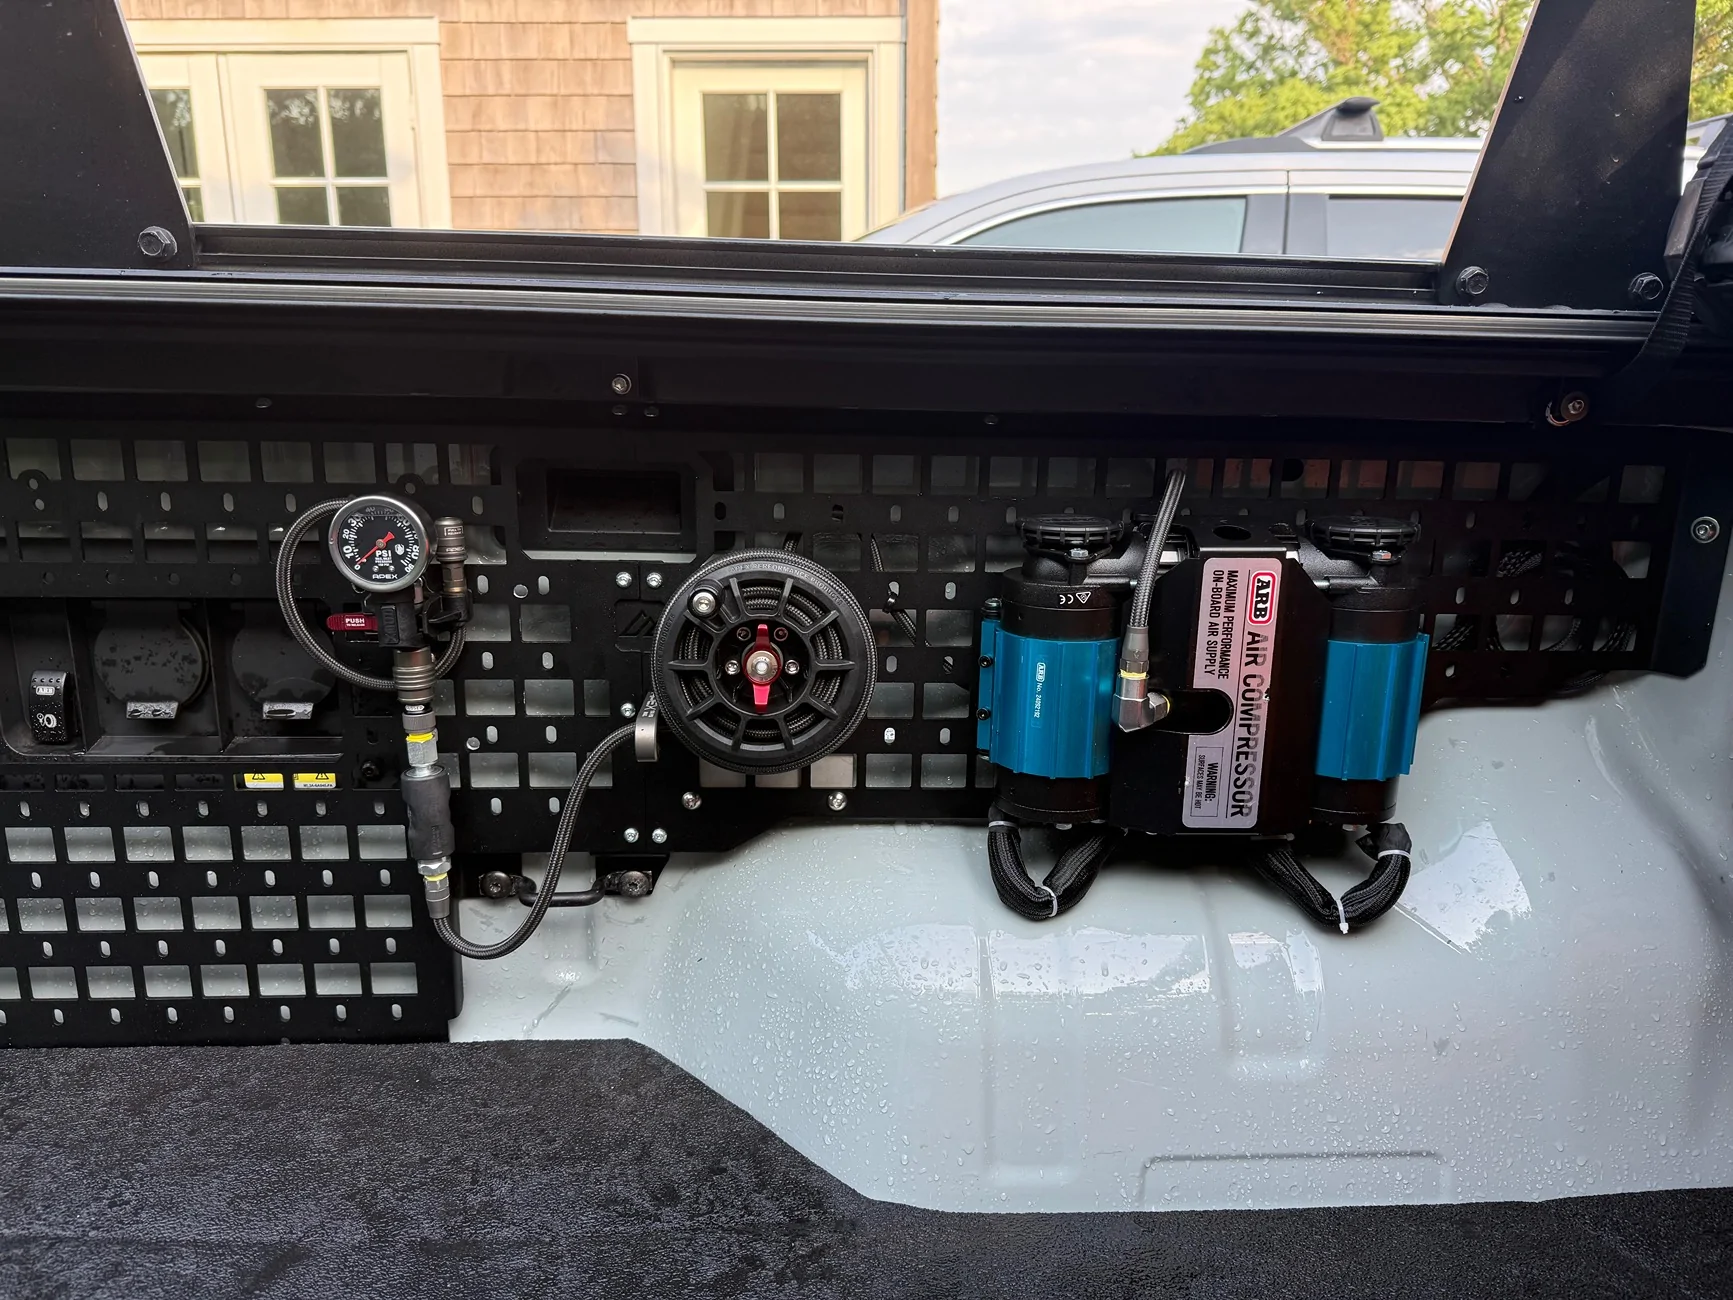
I remounted the compressor on a side panel and added the Apex Design hose reel. Really happy with how it all turned out. Lots of headaches not pictured.
I remounted the compressor on a side panel and added the Apex Design hose reel. Really happy with how it all turned out. Lots of headaches not pictured.
That is beautiful, the reel is a stunning piece of workmanship, however I don’t understand how you can possibly access the reel from the tailgate when the bed has a bunch of stuff in it. Do you reach in from the top, and if so, why isn’t the guide pointed up? Is it hard to get the hose neatly stowed after using it? That is a two handed operation, correct?
Have you considered mounting it up high on your rack?
It seems as if you would have to clean a really dirty or muddy hose before winding it back, to prevent the reel from getting clogged. Am I overthinking that issue?
That is beautiful, the reel is a stunning piece of workmanship, however I don’t understand how you can possibly access the reel from the tailgate when the bed has a bunch of stuff in it. Do you reach in from the top, and if so, why isn’t the guide pointed up? Is it hard to get the hose neatly stowed after using it? That is a two handed operation, correct?
Have you considered mounting it up high on your rack?
It seems as if you would have to clean a really dirty or muddy hose before winding it back, to prevent the reel from getting clogged. Am I overthinking that issue?
It can be accessed from the top or out the back of the tailgate. My use case is pretty unique and the bed (and bed rack) is usually just filled with light surfing and kitesurfing gear. It’s never really loaded up with heavy stuff.
The hose is easy to reel back in. That reel has a
Crank that I can access reaching over the side of the bed. Also no mud in my situation - just sand.
Maybe not the ideal spot for everyone but works perfectly for my use case and keeps most of it above the wheel cutout which is otherwise not very useful space in the bed.