Sponsored

Race / Aircraft Style L-Track Install

Lion77

Well-Known Member
Joined
Feb 27, 2025
Threads
34
Messages
925
Reaction score
1,343
Location
United States
Vehicle(s)
2024 Ranger Raptor
Occupation
Electrical Engineer
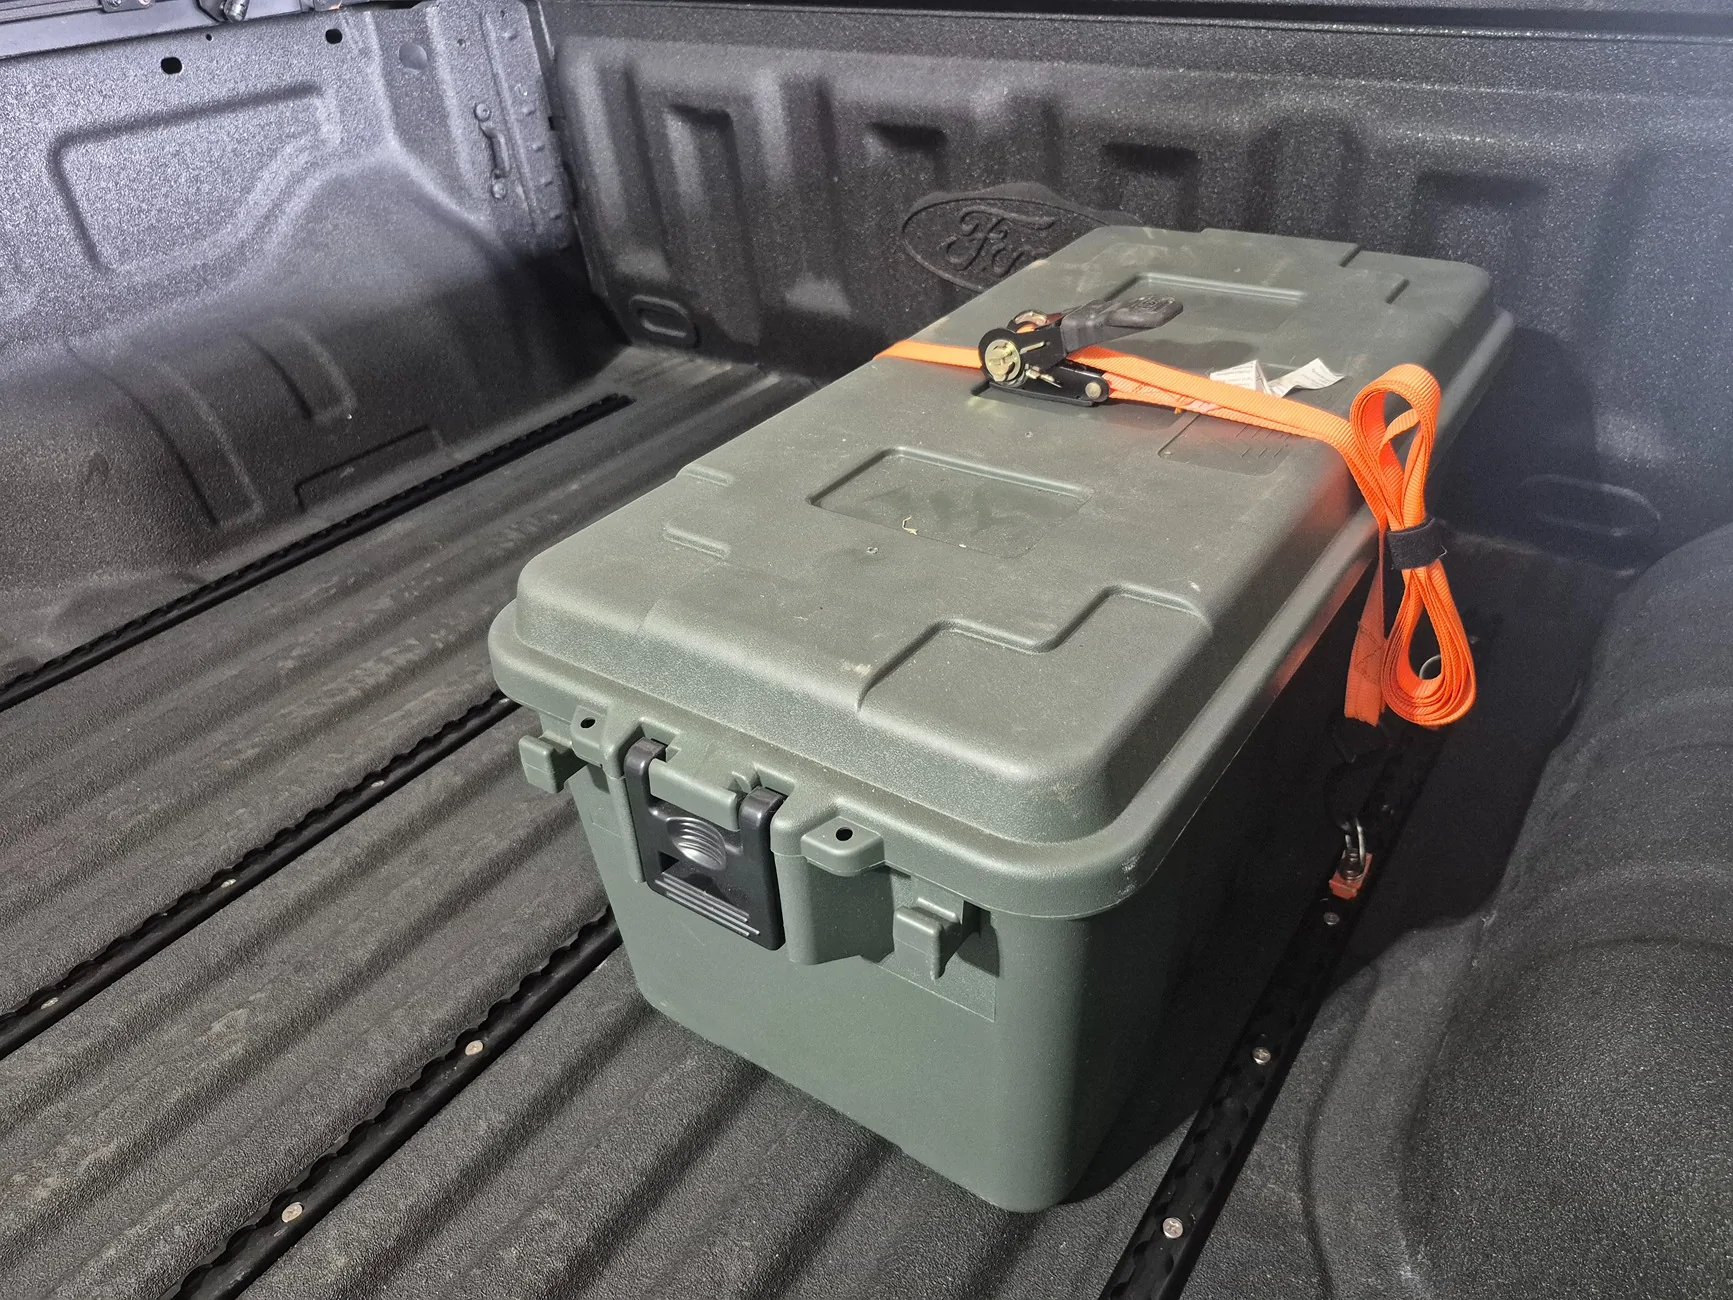
Goal: enhancing bed utility with minimal amount of weight for off-roading to secure smaller items (i.e., cargo totes, traction mats, shovels etc.) and for practical uses (i.e., secure a stack of 8 or 10 foot 2x4s so they dont slide out of the bed when hauling items longer than the bed).

Each track strip is only 2.5lbs. Mounting hardware is ~2-3 additional lbs. Total is weight gain is only 12-13lbs.

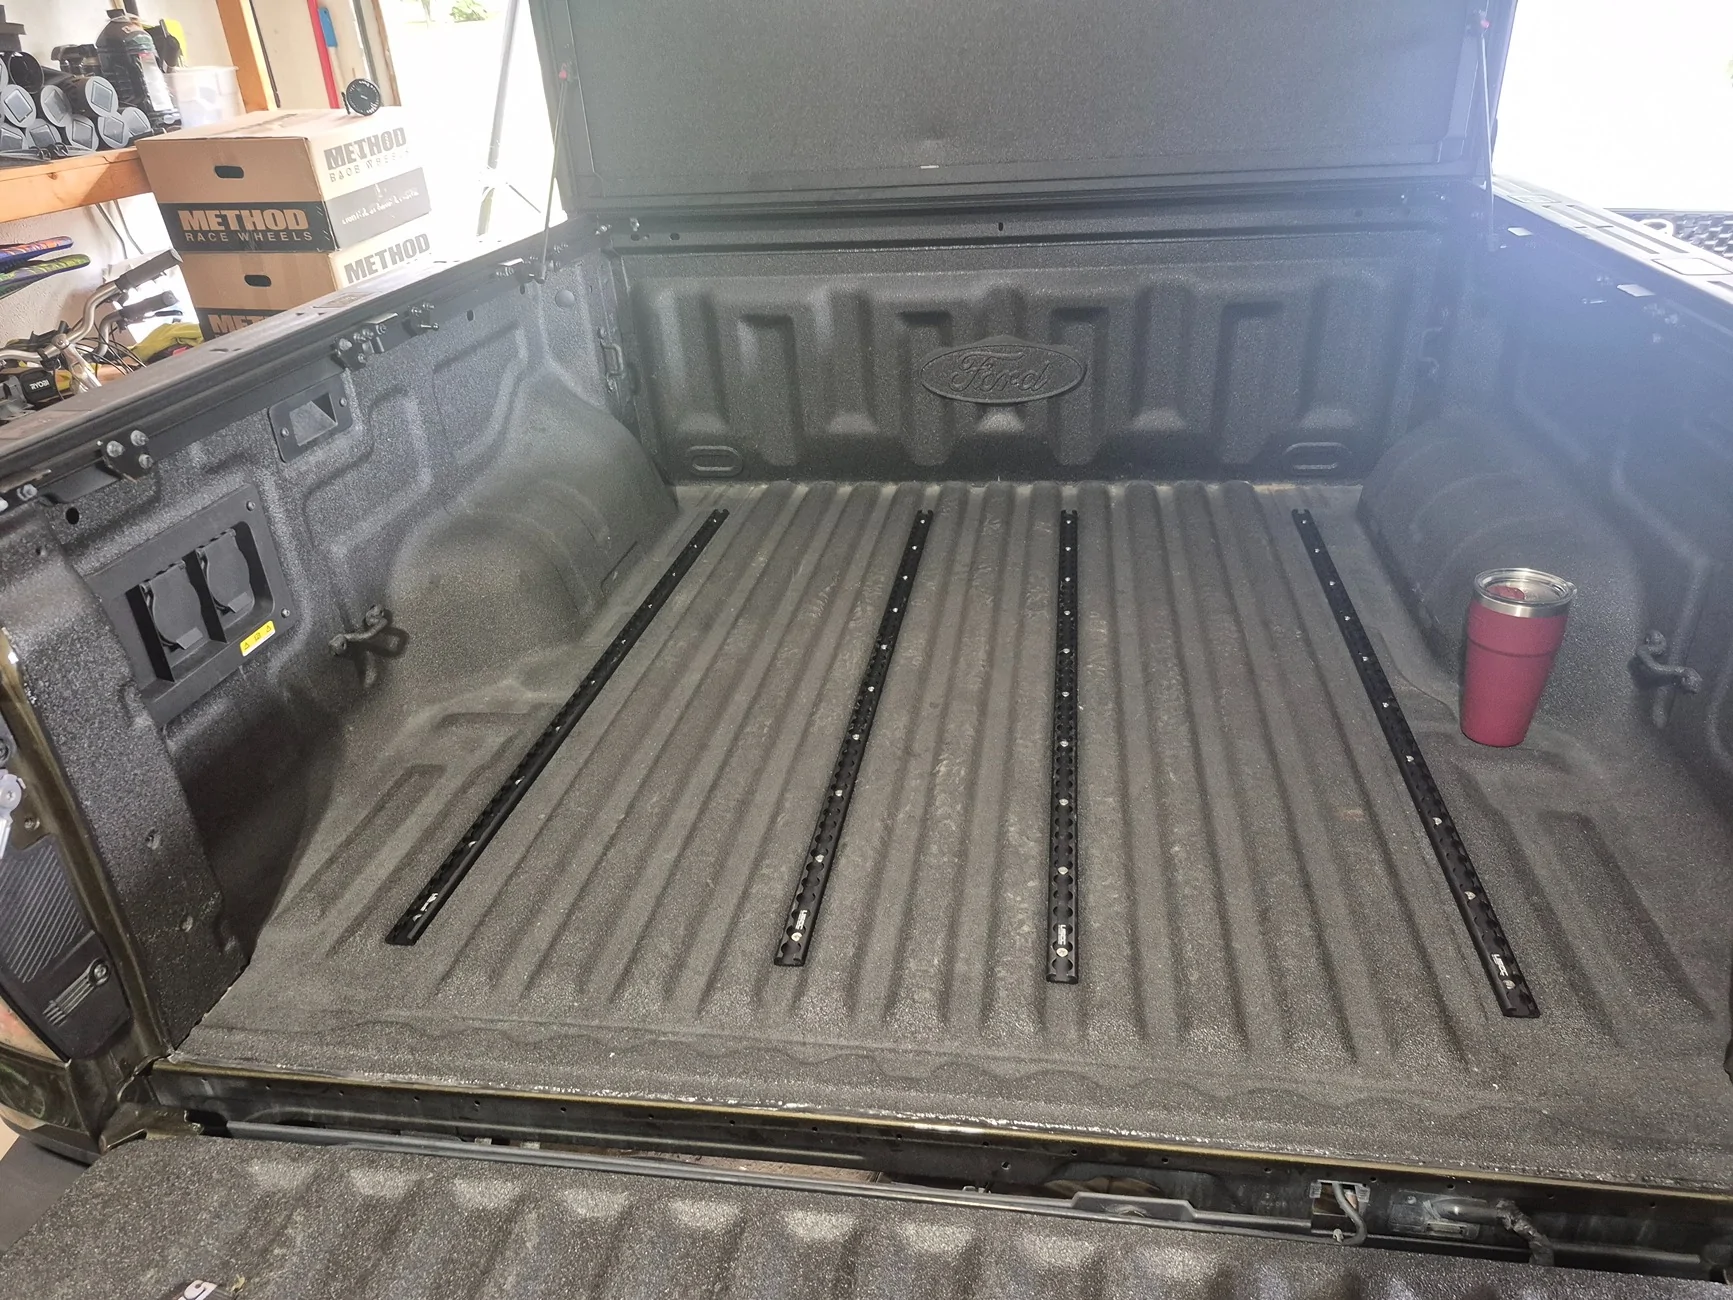
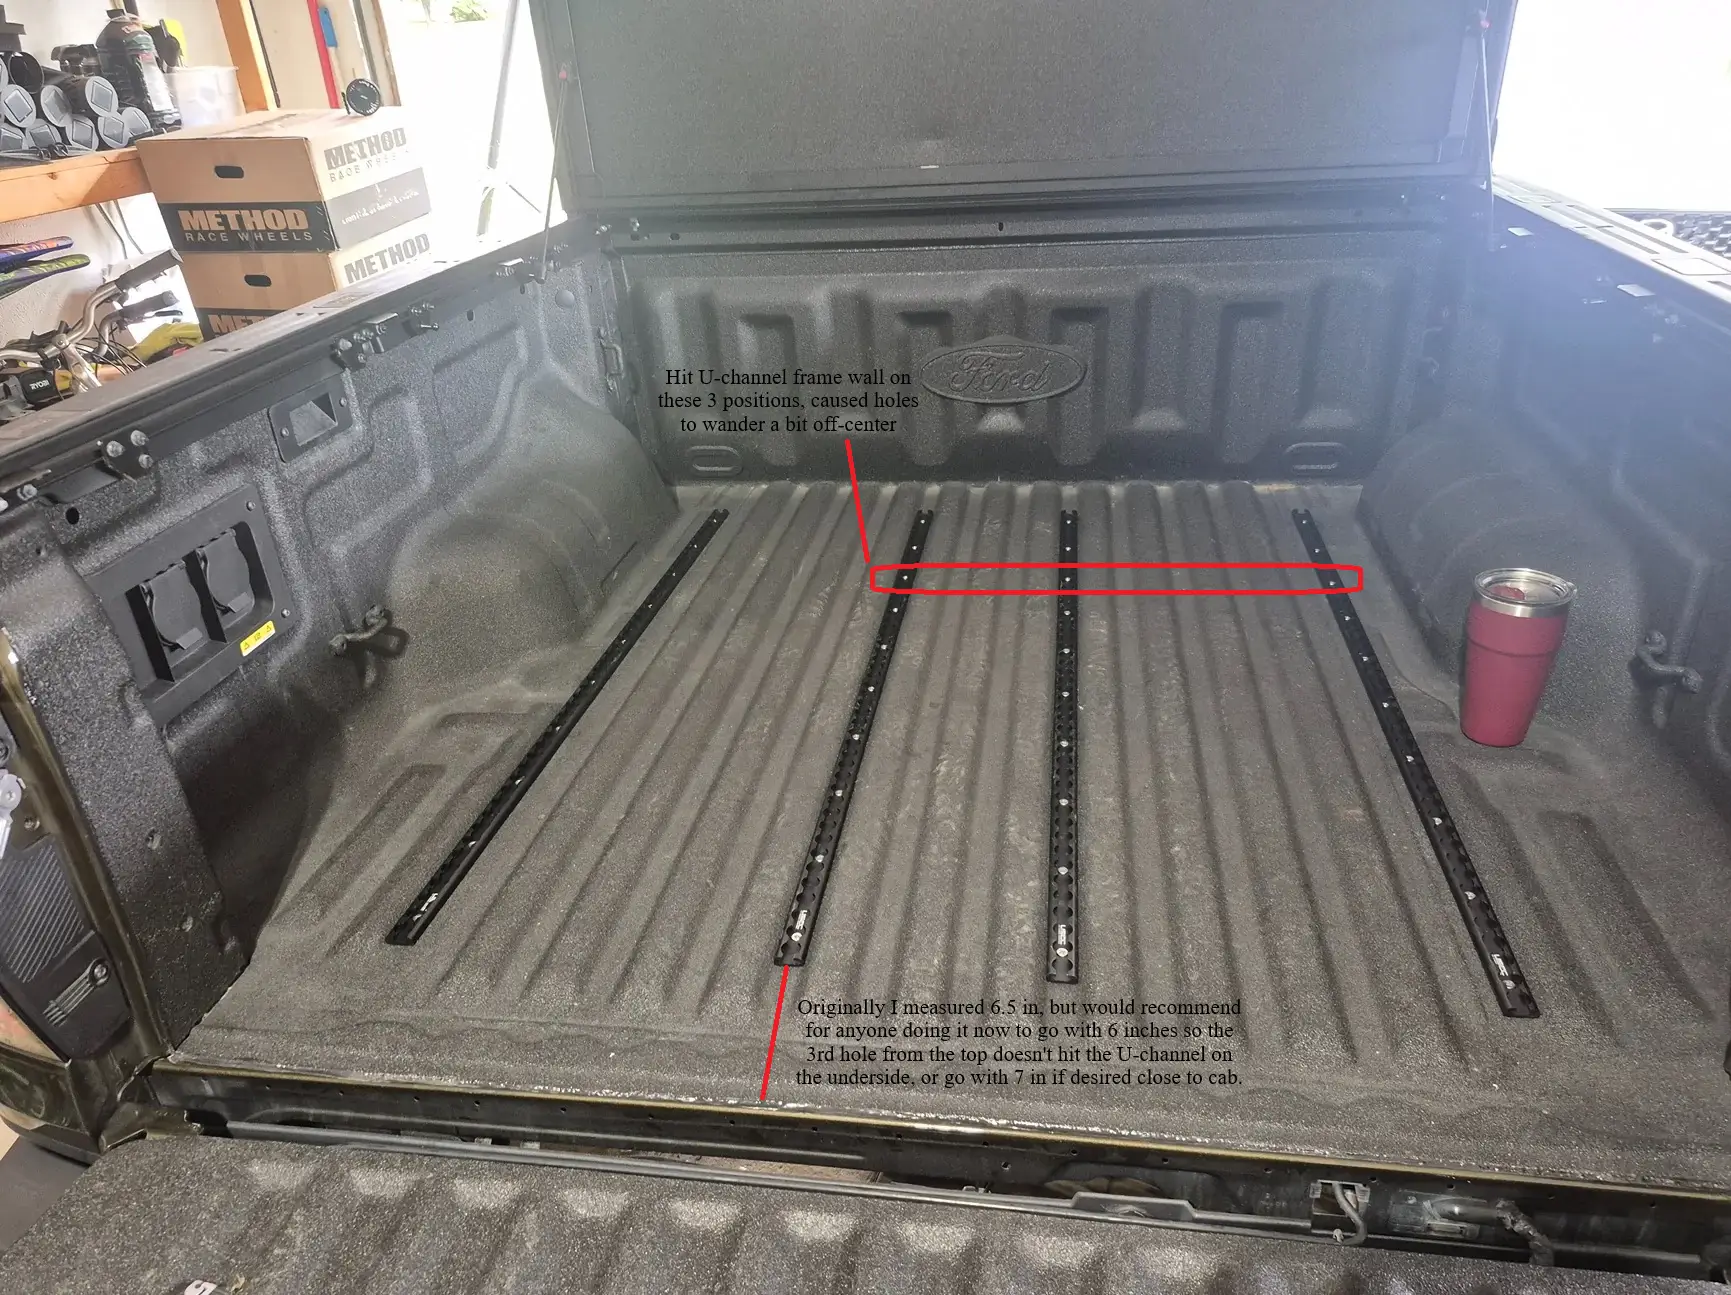
Strips were placed in a slightly staggered grid. So almost evenly spaced, with the two center strips being just slightly closer together than the outer. This allows me to secure long and narrow items using just two adjacent strips or larger wider items using every other or two most outer strips.

Straps can go across or in an x-pattern depending on the cargo.

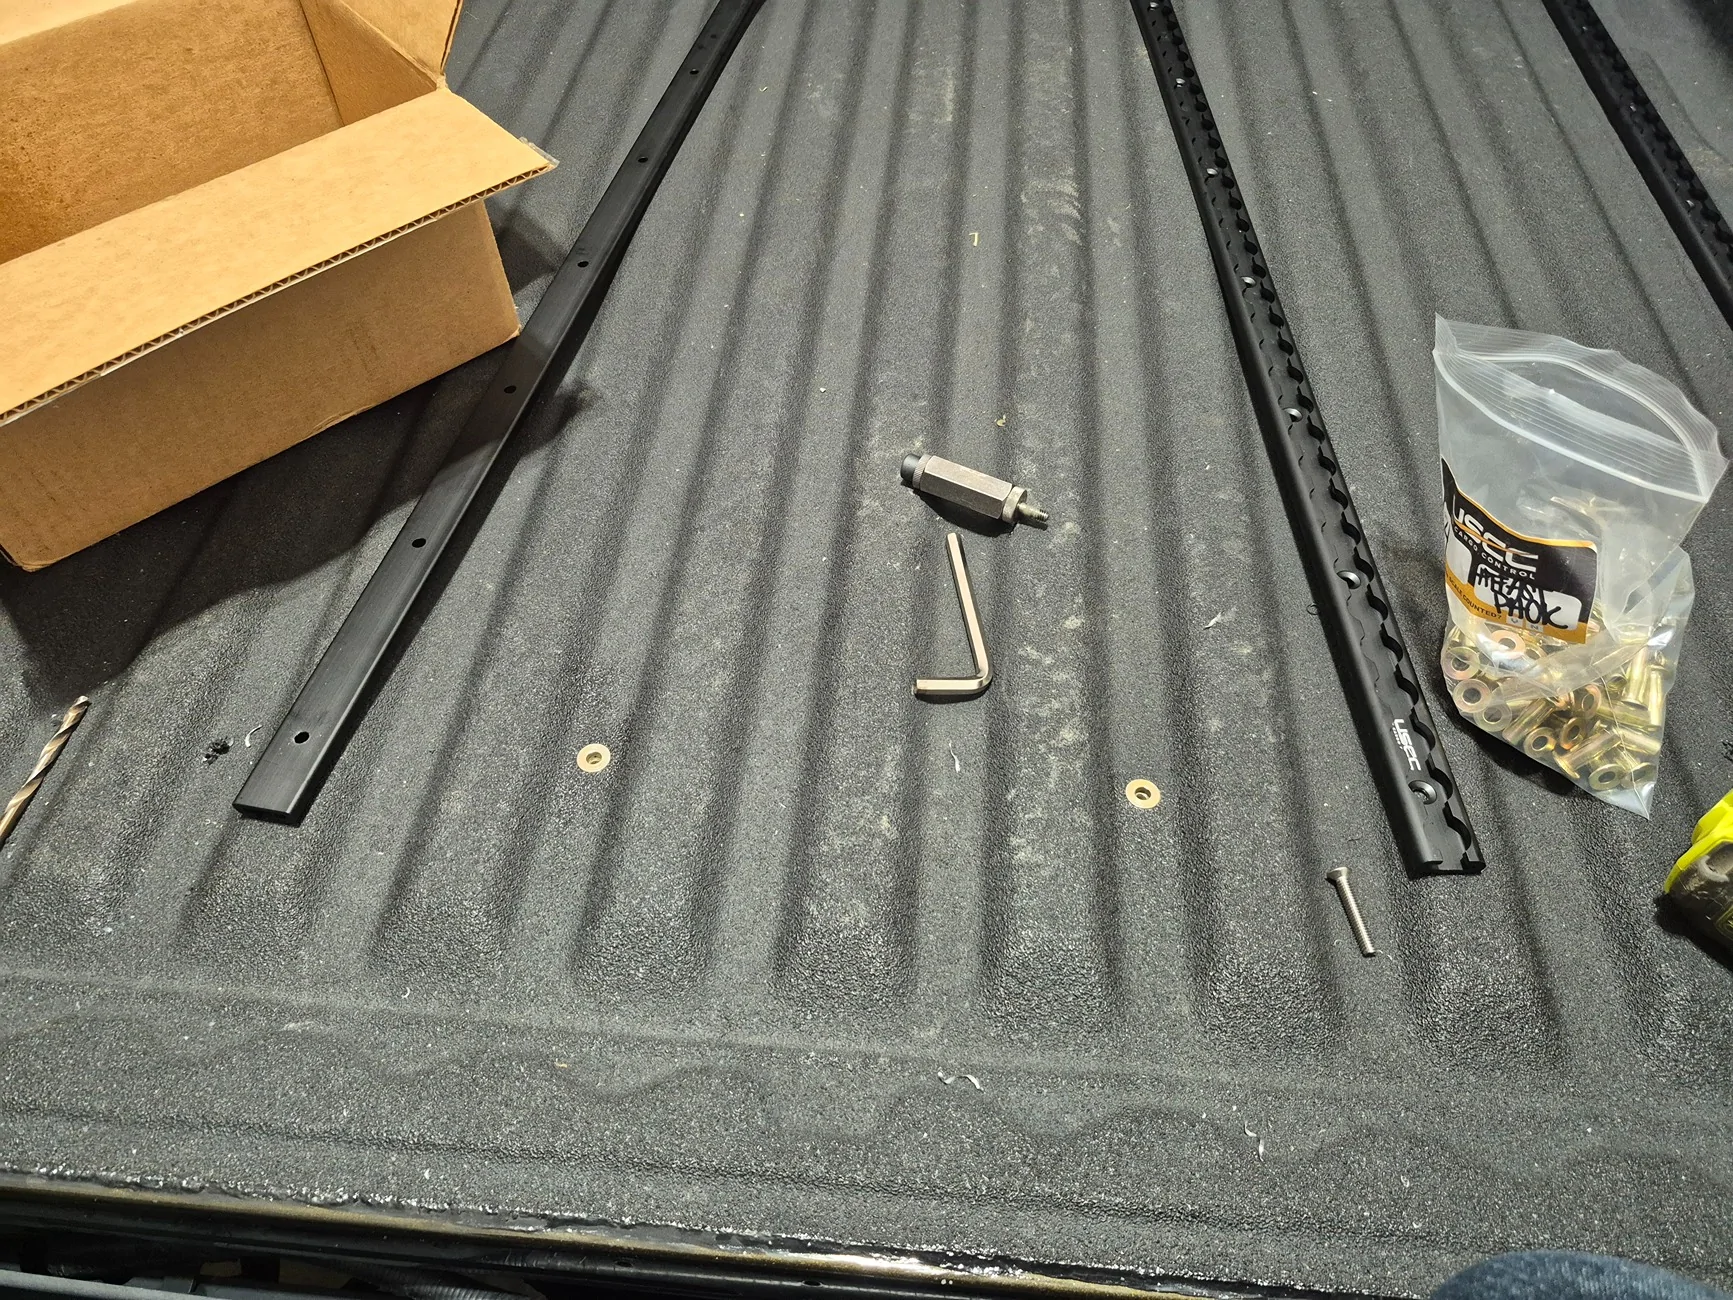
4x strips of 4 foot long US Cargo Control standard L-Track. Each strip has 10x 1/4in stainless screws I also got from US Cargo Control in their mounting hardware kit, but I opted to not use the nuts / washers due to the difficulty and in some cases impossibility of getting them on from underneath.

I instead paired them with zinc plated carbon steel plus nuts i got from a separate vendor, also 1/4in obviously. Why buy the screw kits and waste a few extra bucks instead of buying screws separately elsewhere? US Cargo Control used milspec 100 degree countersunk taper, not 90 degree taper of most counter sunk screws. 100 degree are harder to find and more expensive, so buying the screws separately was a pain and I didnt mind wasting $20 for the convenience of buying them with nuts and washers I didn't use.

Ford Ranger Race / Aircraft Style L-Track Install 1000021506


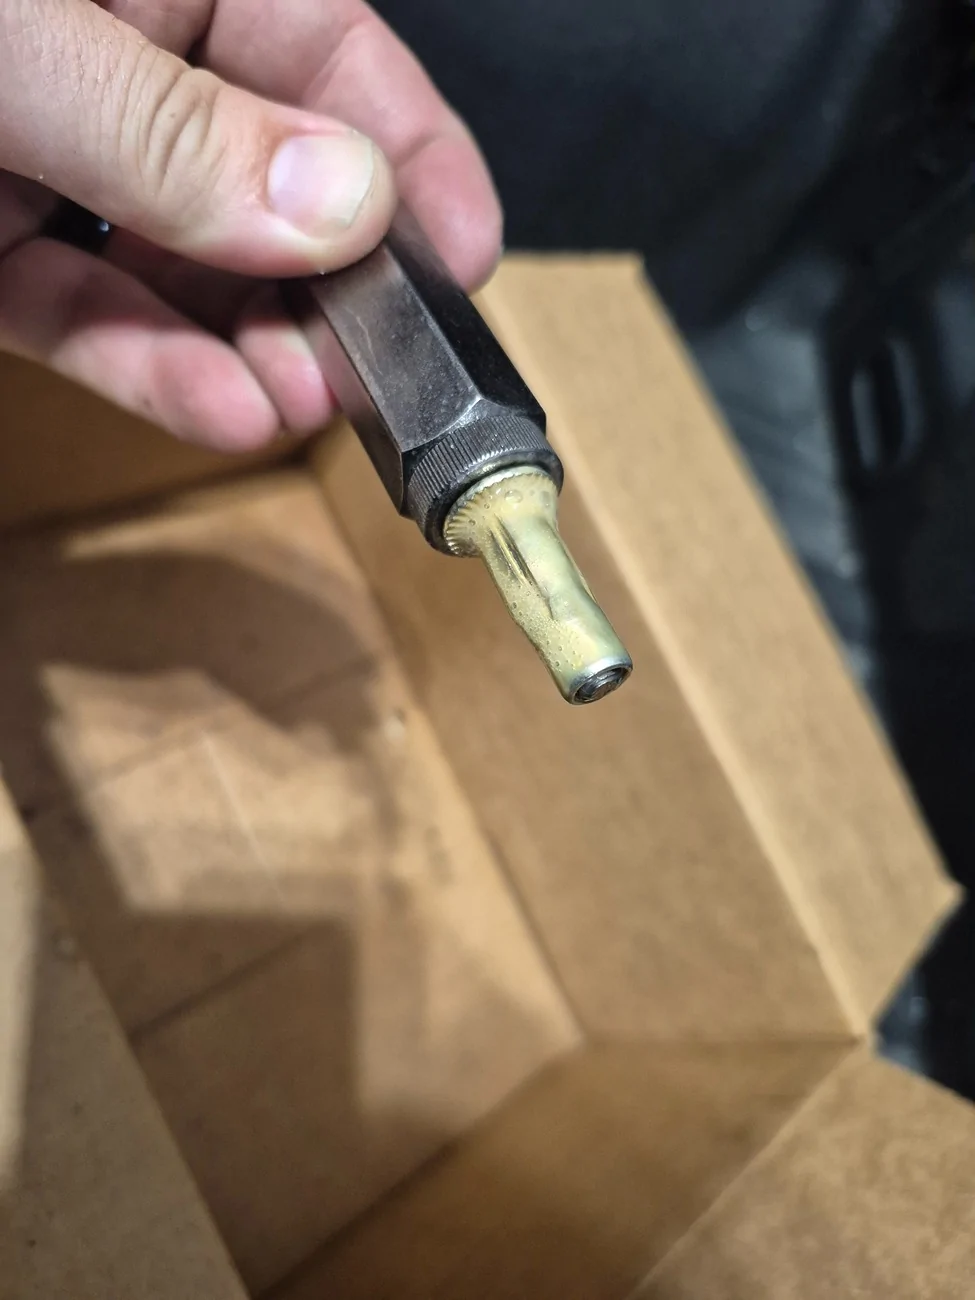
Ford Ranger Race / Aircraft Style L-Track Install 1000021507


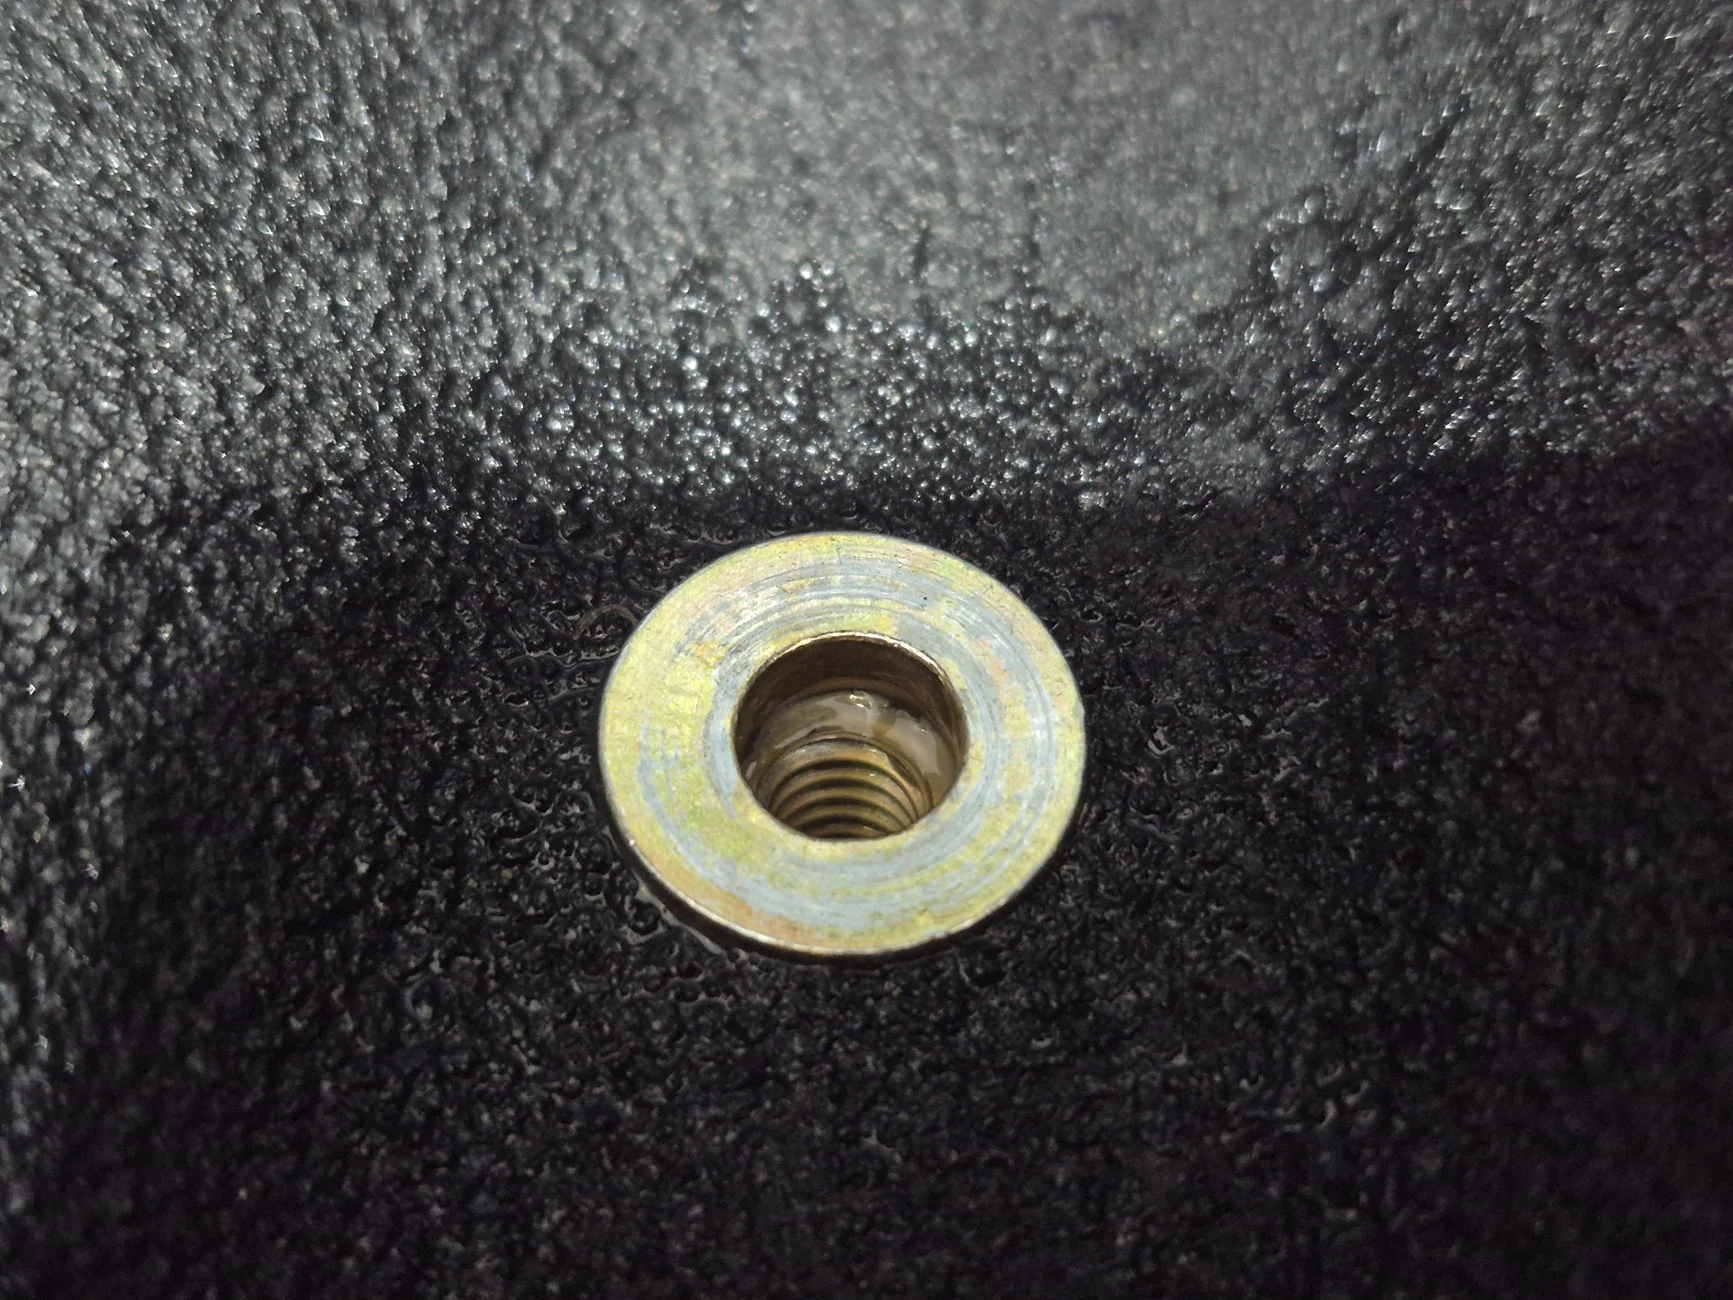
Ford Ranger Race / Aircraft Style L-Track Install 1000021508


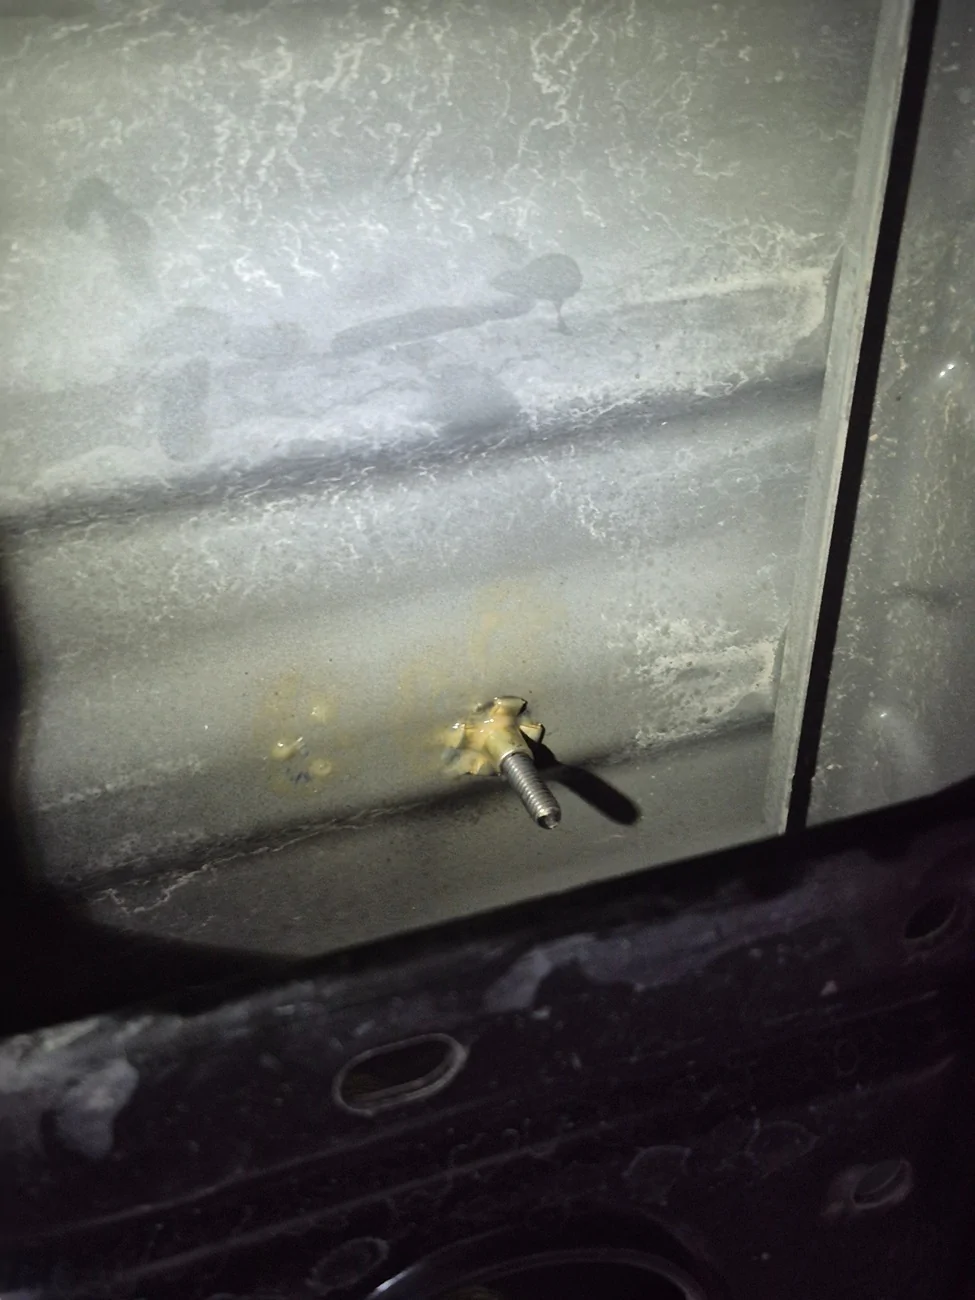
Ford Ranger Race / Aircraft Style L-Track Install 1000021512
Sponsored

 
Last edited:
OP
OP
Lion77

Lion77

Well-Known Member
Joined
Feb 27, 2025
Threads
34
Messages
925
Reaction score
1,343
Location
United States
Vehicle(s)
2024 Ranger Raptor
Occupation
Electrical Engineer
Ford Ranger Race / Aircraft Style L-Track Install 1000021509


Ford Ranger Race / Aircraft Style L-Track Install 1000021513


I opted for zinc plated carbon steel plus nuts for strength over stainless steel plus nuts. I then soaked them in cavity wax I had left over from spraying the inside of my rockers.

The zinc plating is corrosion resistant but its not as good as stainless so the cavity wax adds another layer of corrosion resistance, so i get both strength and anti-corrosion vs just either / or.

I roughly centeed them in the bed length wise, with the ends of the track closest to the tail gate 6.5 in from the edge of where the bed liner was spayed. I did run into one minor issue I worked around, though i had them clearing the U-Channel under the bed but the 3rd hole closes to the cab on each strip hit the edge of the U-channel, so the holes were pushed about 1/8 further down than intended. I solved that by elongating the mounting holes in the L-track, but the screws stick up higher for just those locations, making 1 position on each L-track strip unusable due to height of the screw.

Given that there are almost 50 positions per strip you can insert the studs for tie downs, it doesnt really matter and its still fully secured to the end. Visually you cant tell unless your up close just looking for screws that dont perfectly align with their holes.

Wasn't planning on that since I thought I had them placed to miss everything under the bed but I was off by 1/4in., in the end it didnt matter functionally.

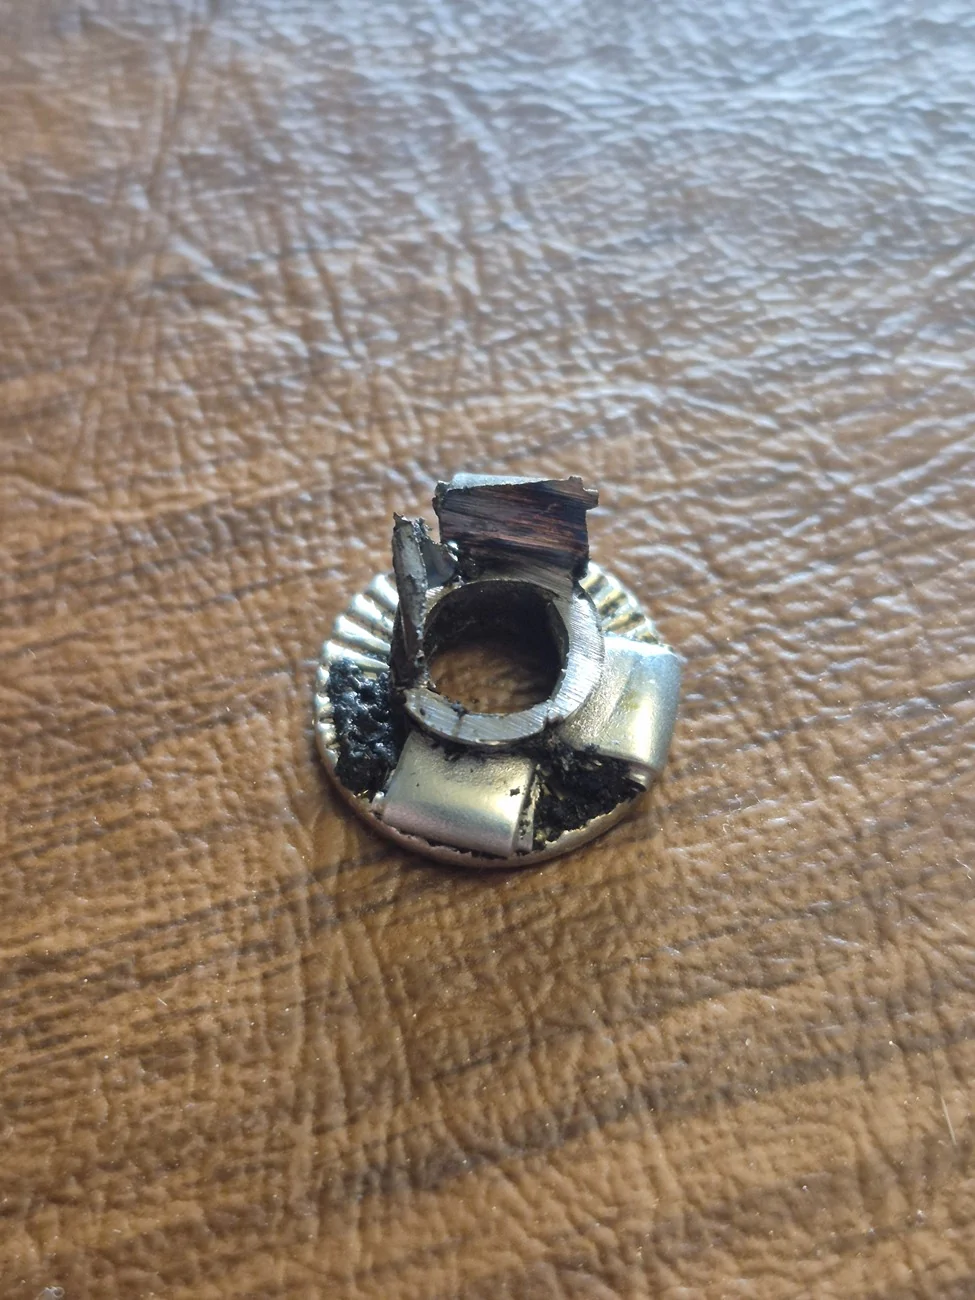
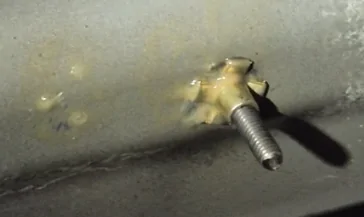
Also had one plus nut that didnt mushroom properly and two of the four petals expanded on the top side of the bed instead of under neath, so I had to cut that one with an angle grinder and cutting disk from underneath and install a new one that went in fine. The other 39x plus nitd went in without issue, even the ones that were butted up against the structural U-channel.
 
Last edited:
OP
OP
Lion77

Lion77

Well-Known Member
Joined
Feb 27, 2025
Threads
34
Messages
925
Reaction score
1,343
Location
United States
Vehicle(s)
2024 Ranger Raptor
Occupation
Electrical Engineer
Here's the one that went awry:
Ford Ranger Race / Aircraft Style L-Track Install 1000021515
 
OP
OP
Lion77

Lion77

Well-Known Member
Joined
Feb 27, 2025
Threads
34
Messages
925
Reaction score
1,343
Location
United States
Vehicle(s)
2024 Ranger Raptor
Occupation
Electrical Engineer
Upfit Supply:

Zinc Plated Carbon Steel 1/4" Plus Nuts

Plus Nut Install Tool (for both steel and stainless plus nuts)

US Cargo Control

4 Foot Strips of Black Anodized Standard L-Track

1/4" Fasteners

Single Studs (hint, orange ones are cheaper!)

There are a ton of different stud types including double position ones for heavier cargo, but even the standard ones have a breaking strength that exceeds all the common 1" and 2" straps you can find, so I dont see a need for the dual position except for maybe one really heavy object you might wish to secure.

Install process:

1. Place the strips where you desire. Then drill a 1/4" pilot hole using the strip as a template. Just do the first hole on the end of each strip.

2. Move the strips so you can enlarge the 1/4" pilot hole to the 3/8" final diameter to fit the plus nut.

3. Thread the plus nut onto the tool making sure the threaded puller shaft is fully extended to engage all the plus nut threads.

4. Spray the plus nut with cavity wax or something similar to additional anti corrosion. This will also coat the bare steel in the bed on the inside of edge of the hole when you insert the plus nut.

5. Using a drill with a slip clutch and a 21mm box end wrench to hold the tool, pushing straight down, run the drill on slower speed to collapse the plus nut, thus expanding it on the back side. Finish tightening by hand using the supplied Allen key.

6. Place the L-track back over the plus nut and install the first screw, making sure its snug, but so you can still unscrew it.

7. Drill the 9x remaining 1/4" pilot holes, repeating this process for reach L-track strip. First hole serves as your reference and the strip can be used as a template / pilot bit guide vs. trying to measure, mark and drill the holes free hand.

8. Unscrew the first screw from the strip and drill out each 1/4" pilot hole to its final 3/8" diameter.

9. Repeat steps 3-5 for installing each plus nut.

10. Now that all the plus nuts are installed, line up your L-track and start each screw a few turns by hand with a screw driver so you dont start any cross threaded. Once they are all started a few turns by hand, use intermediate torque setting on the a drill with a slipper clutch to snug them down. I used a Ryobi brushless ive had for years on setting #14 (goes from 1-24).

You dont want too high of torque setting and risk overtightening screws. The worst would be to spin the plus nut in the hole. While they do have anti-rotation teeth and fit pretty tight when expanded, its still possible and you might not be able to get that screw back out ever. Also these are Philips, so over torqing might strip the stainless head. Lastly, there is substantial friction in the threads and countersunk head, so these wont come loose even with moderate torque and if you ever damage an L-track strip, you can simply unscrew the damaged one and replace it!

Remember, there are 10, 1/4" screws per strip, thats 2.5 in thick of total steel holding in each strip! Its not going anywhere. And those carbon steel plus nuts have pretty large double thick pedals on the underside that is about as wide as a fender washer, so when installed properly, they are very secure and theres 10x of them for every strip. You cant put more than 1,000 to 1,200 lbs in the bed either (depending on weather you got a Raptor or XLT / Lariat with higher payload), so those strips are penty strong.
Sponsored

 
Last edited:


Top