
nate.co
Well-Known Member
- First Name
- Nate
- Joined
- Sep 1, 2023
- Threads
- 9
- Messages
- 151
- Reaction score
- 313
- Location
- Lafayette, Colorado, USA
- Vehicle(s)
- 2024 Ranger Raptor, Polestar 2
- Thread starter
- #1
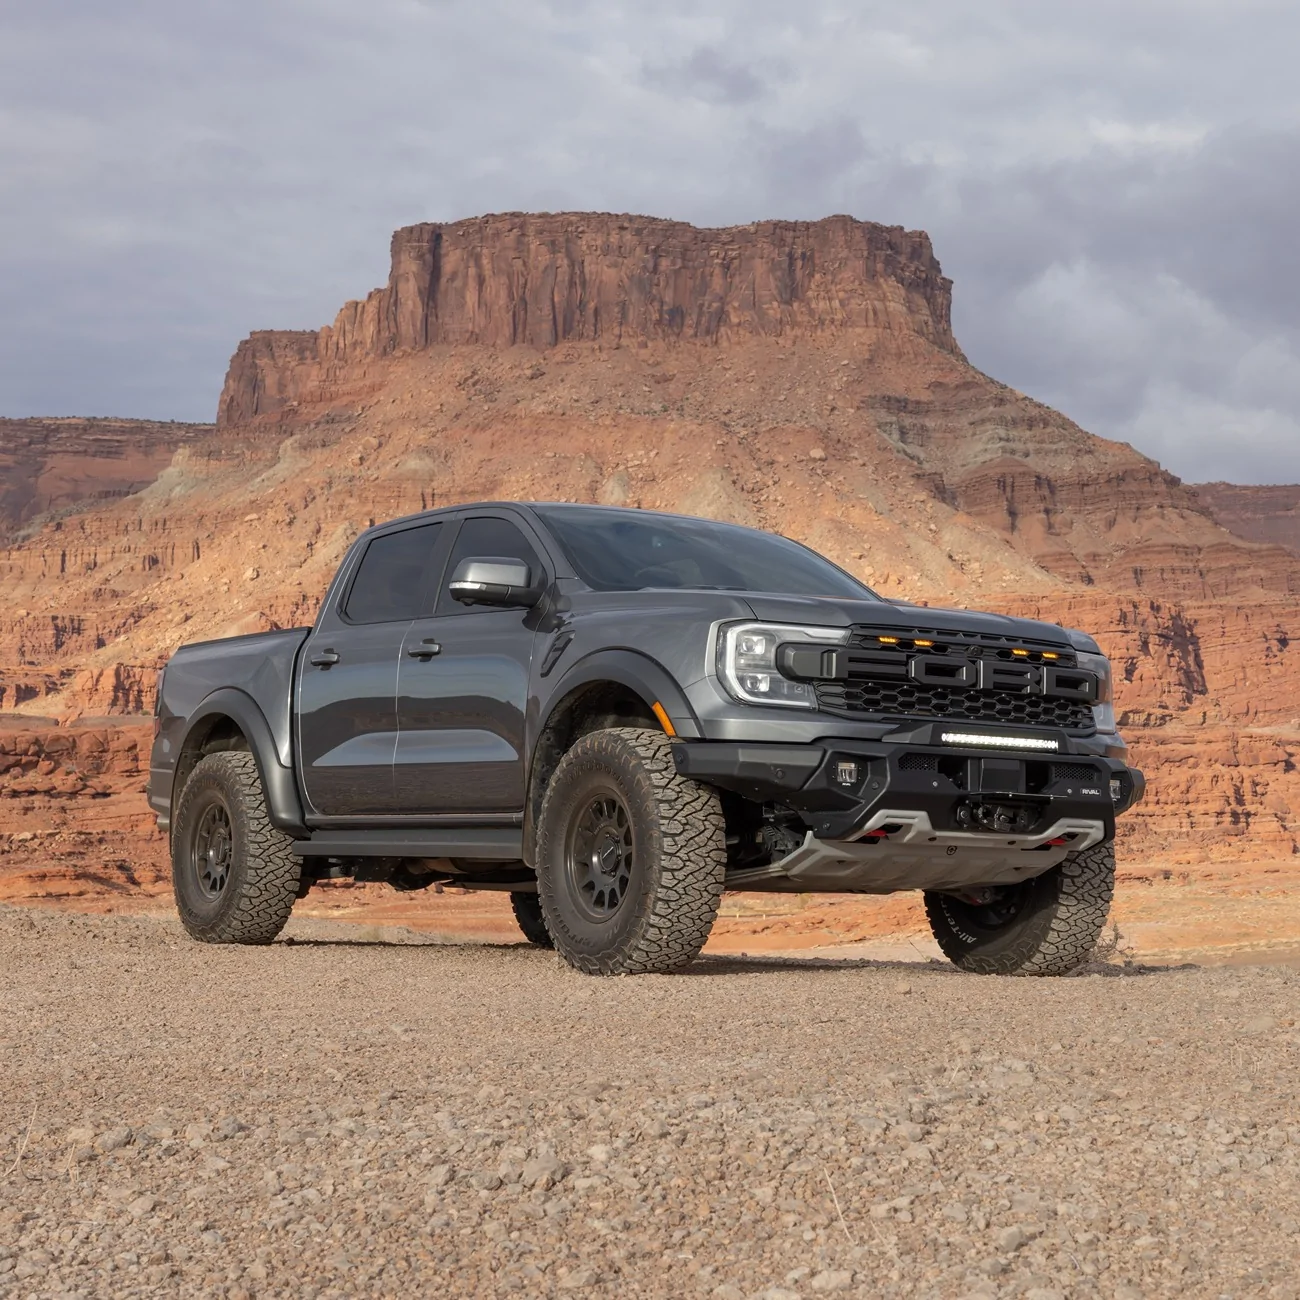
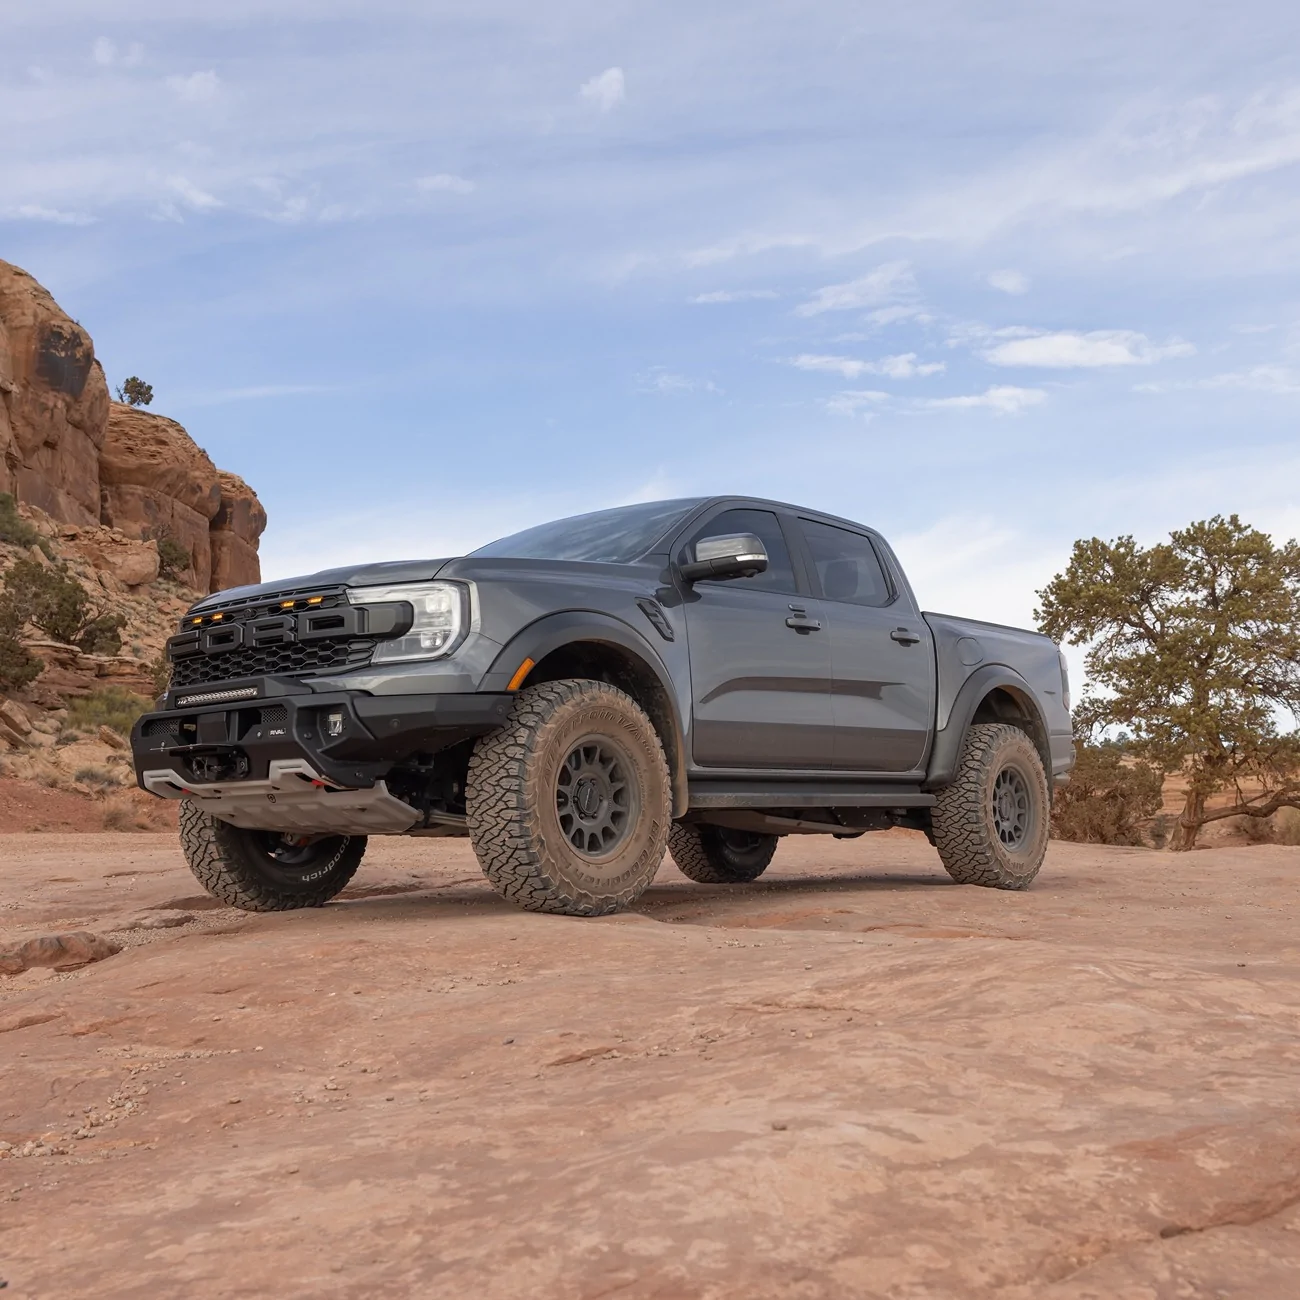
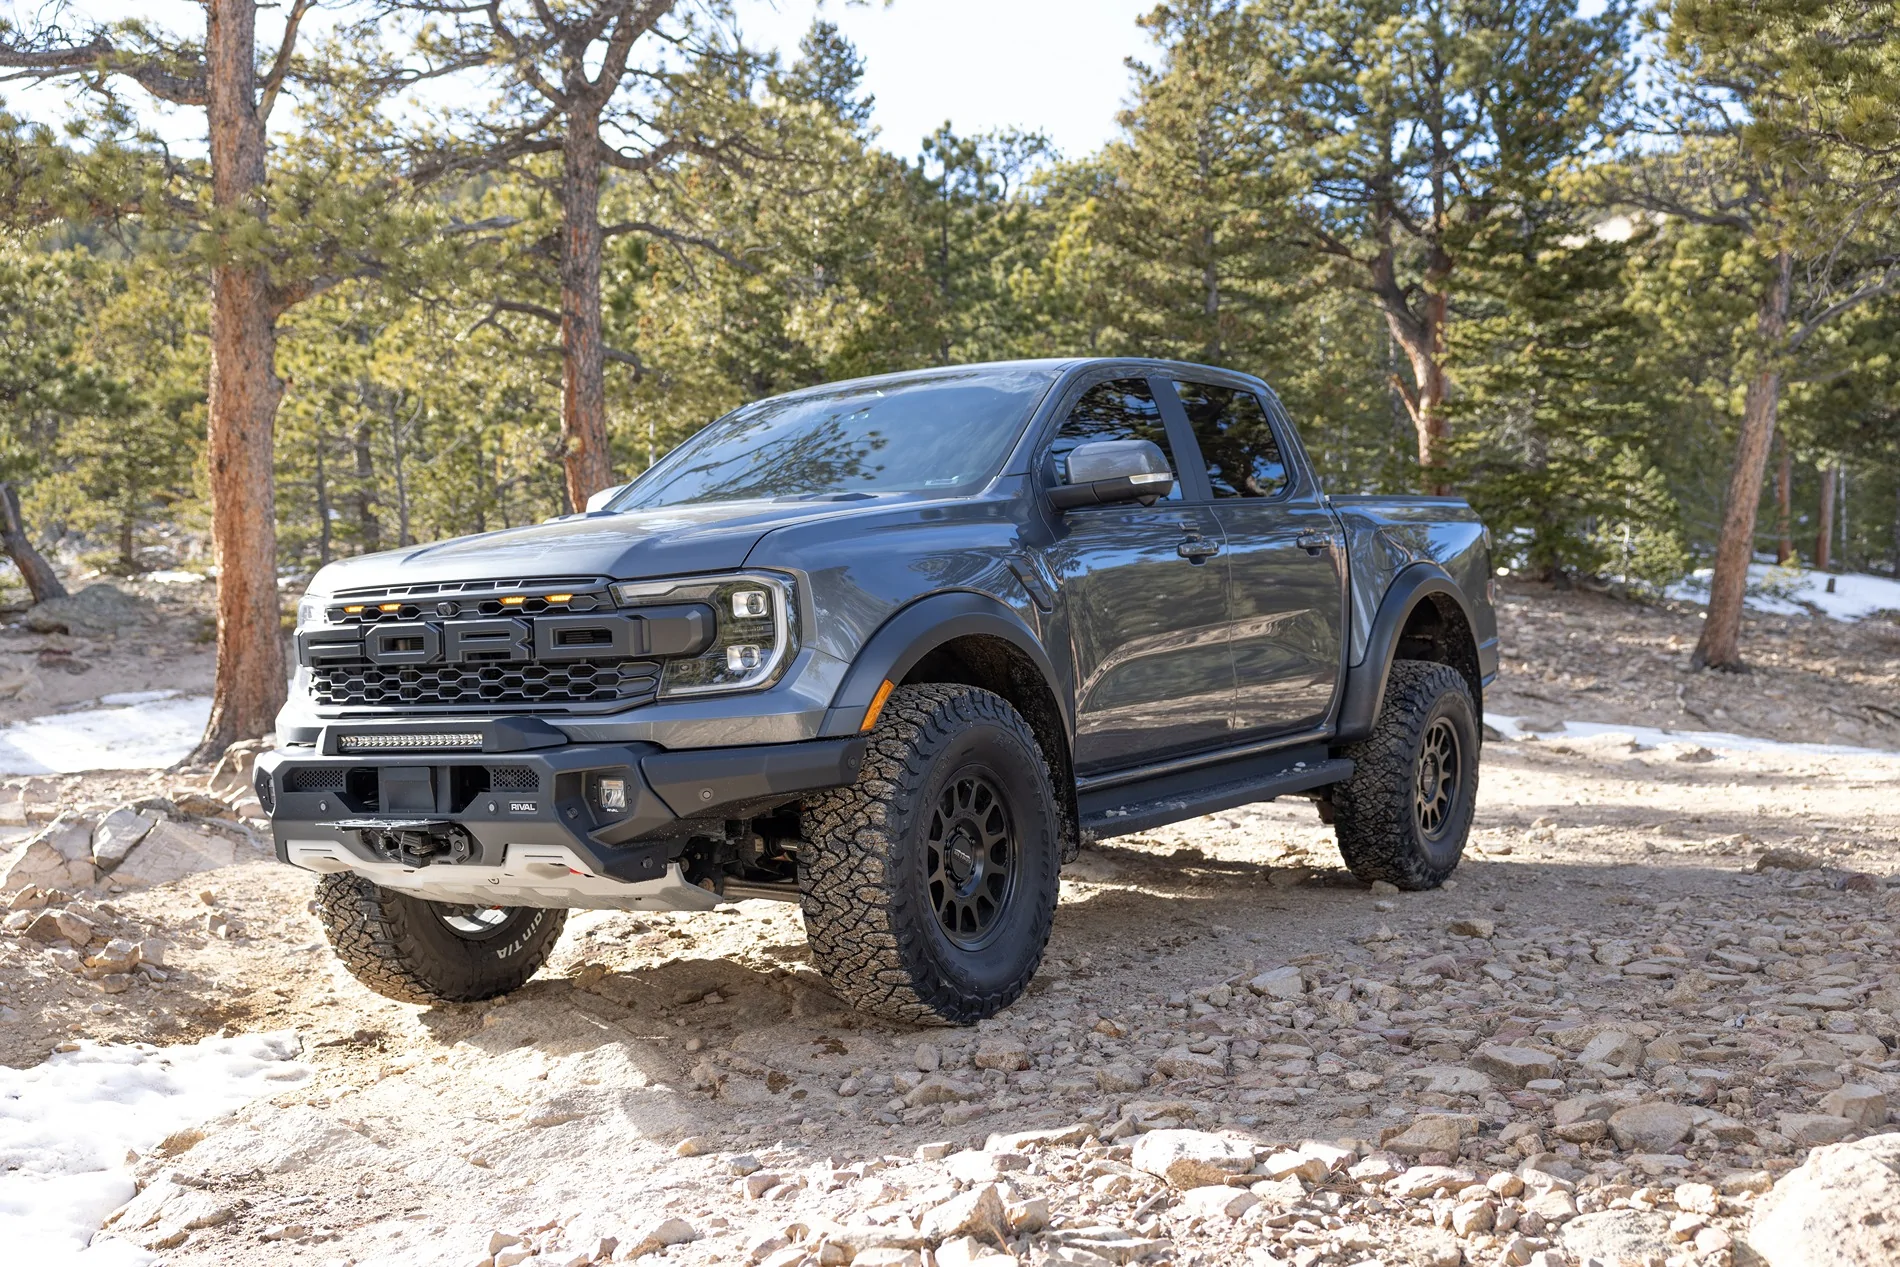
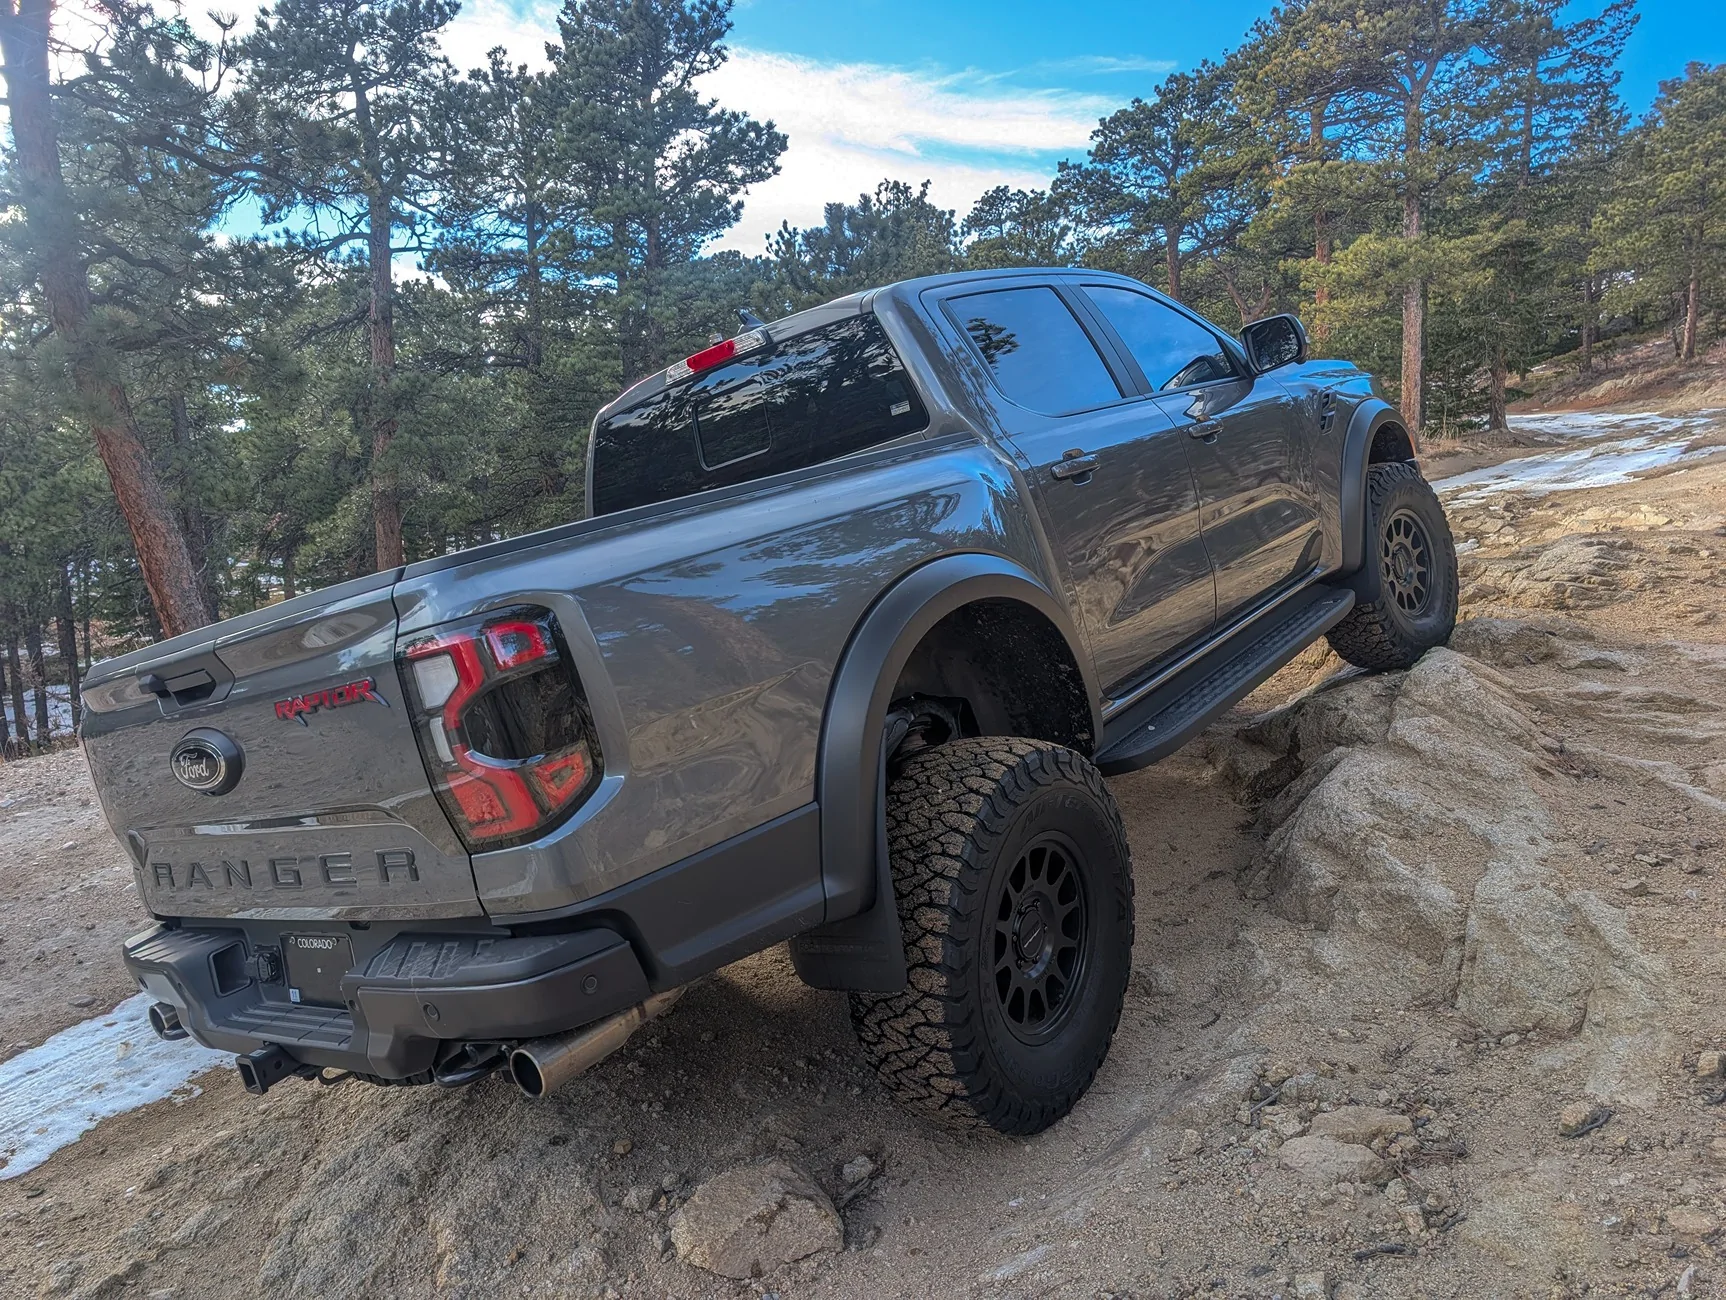
I wasn't sure if this was a "wheels and tires" post or a "bumpers and armor" post, but I'm finally done with all the suspension shenanigans! Bumper, winch, skidplates, suspension tweaks plus new tires and wheels. A lot going on, but I'm very happy with the results -- the truck looks better IMO with tire/spacing/body ratios that are more pleasing to my eye and more importantly it's more capable. I may go smaller on the tires when these are done, first time I've had 35" tires, we'll see how it goes.
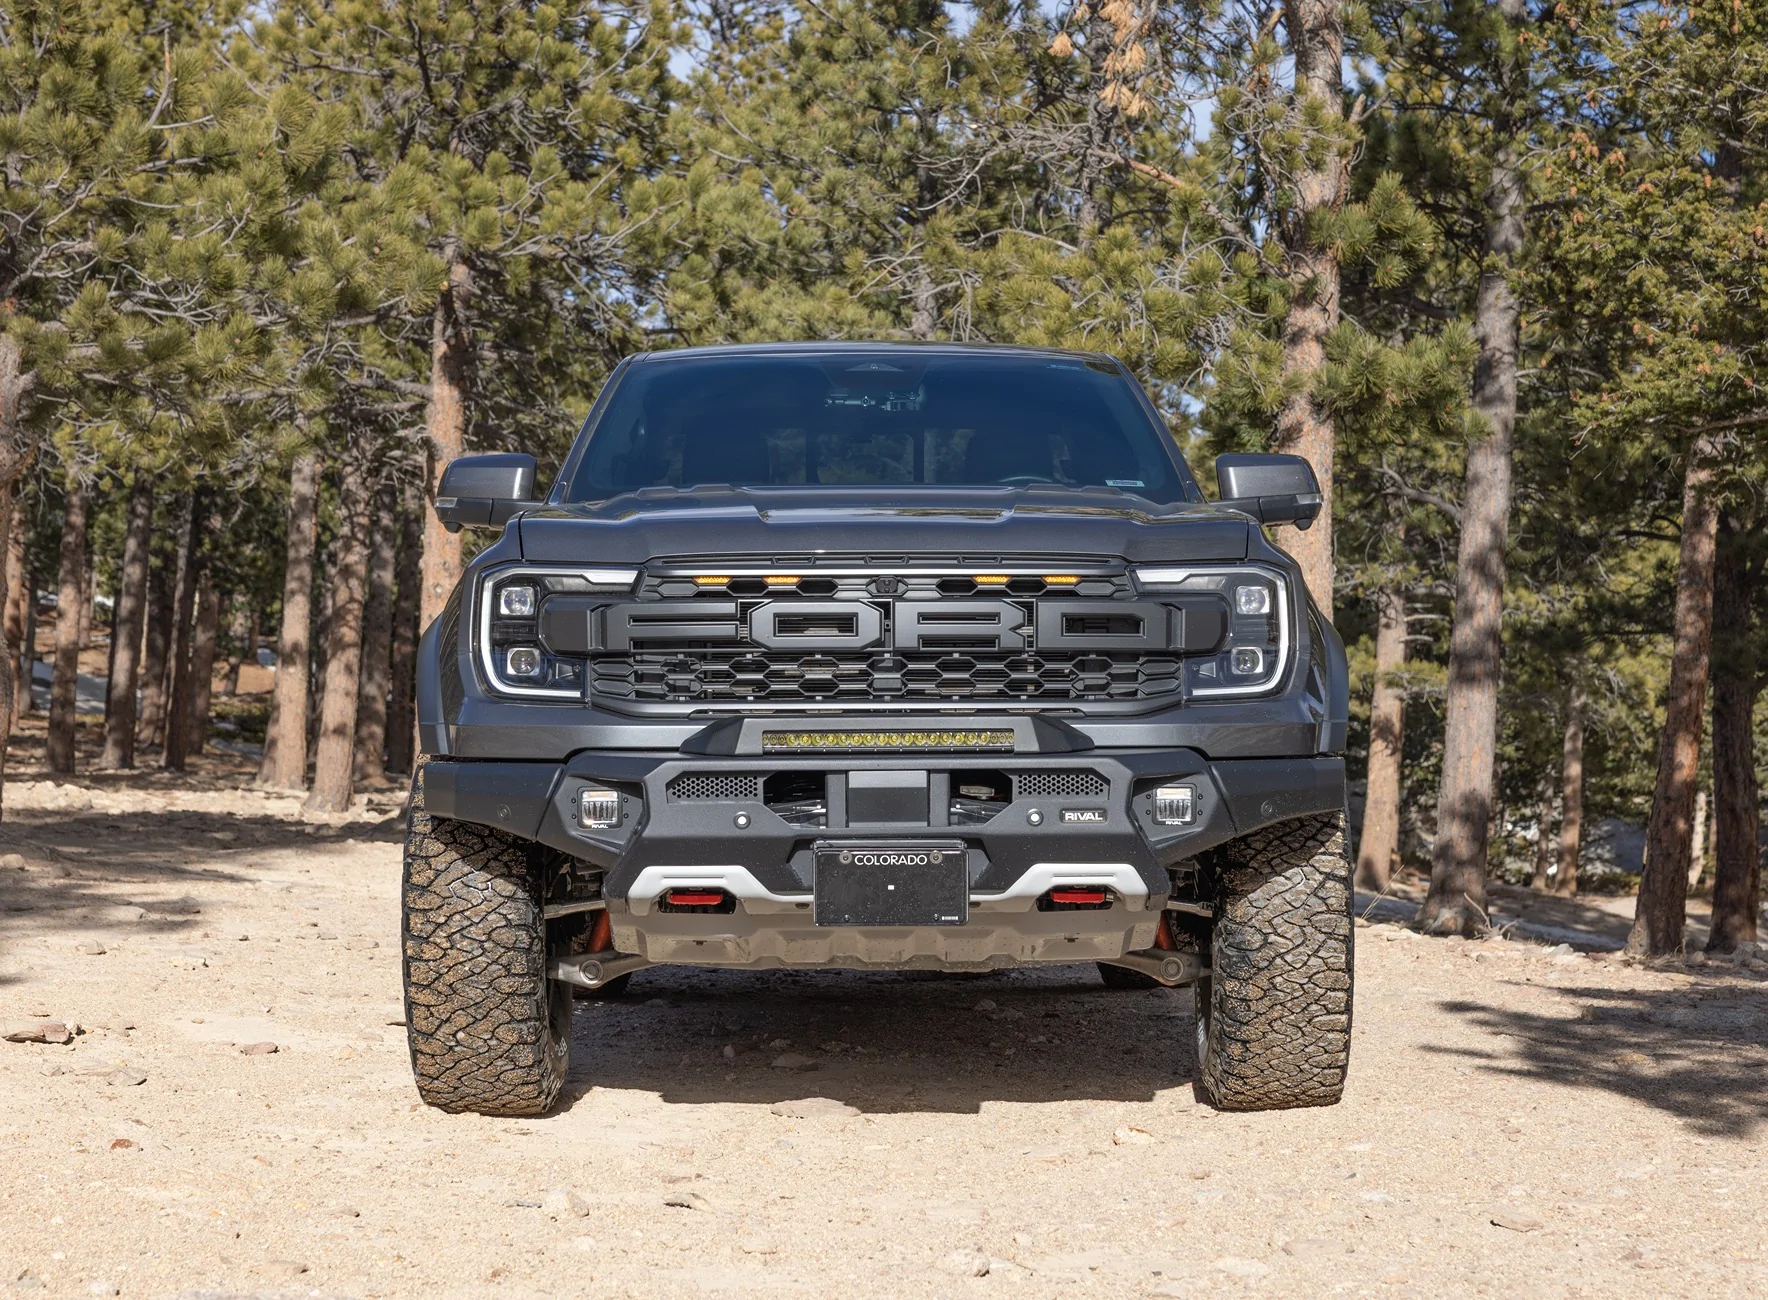
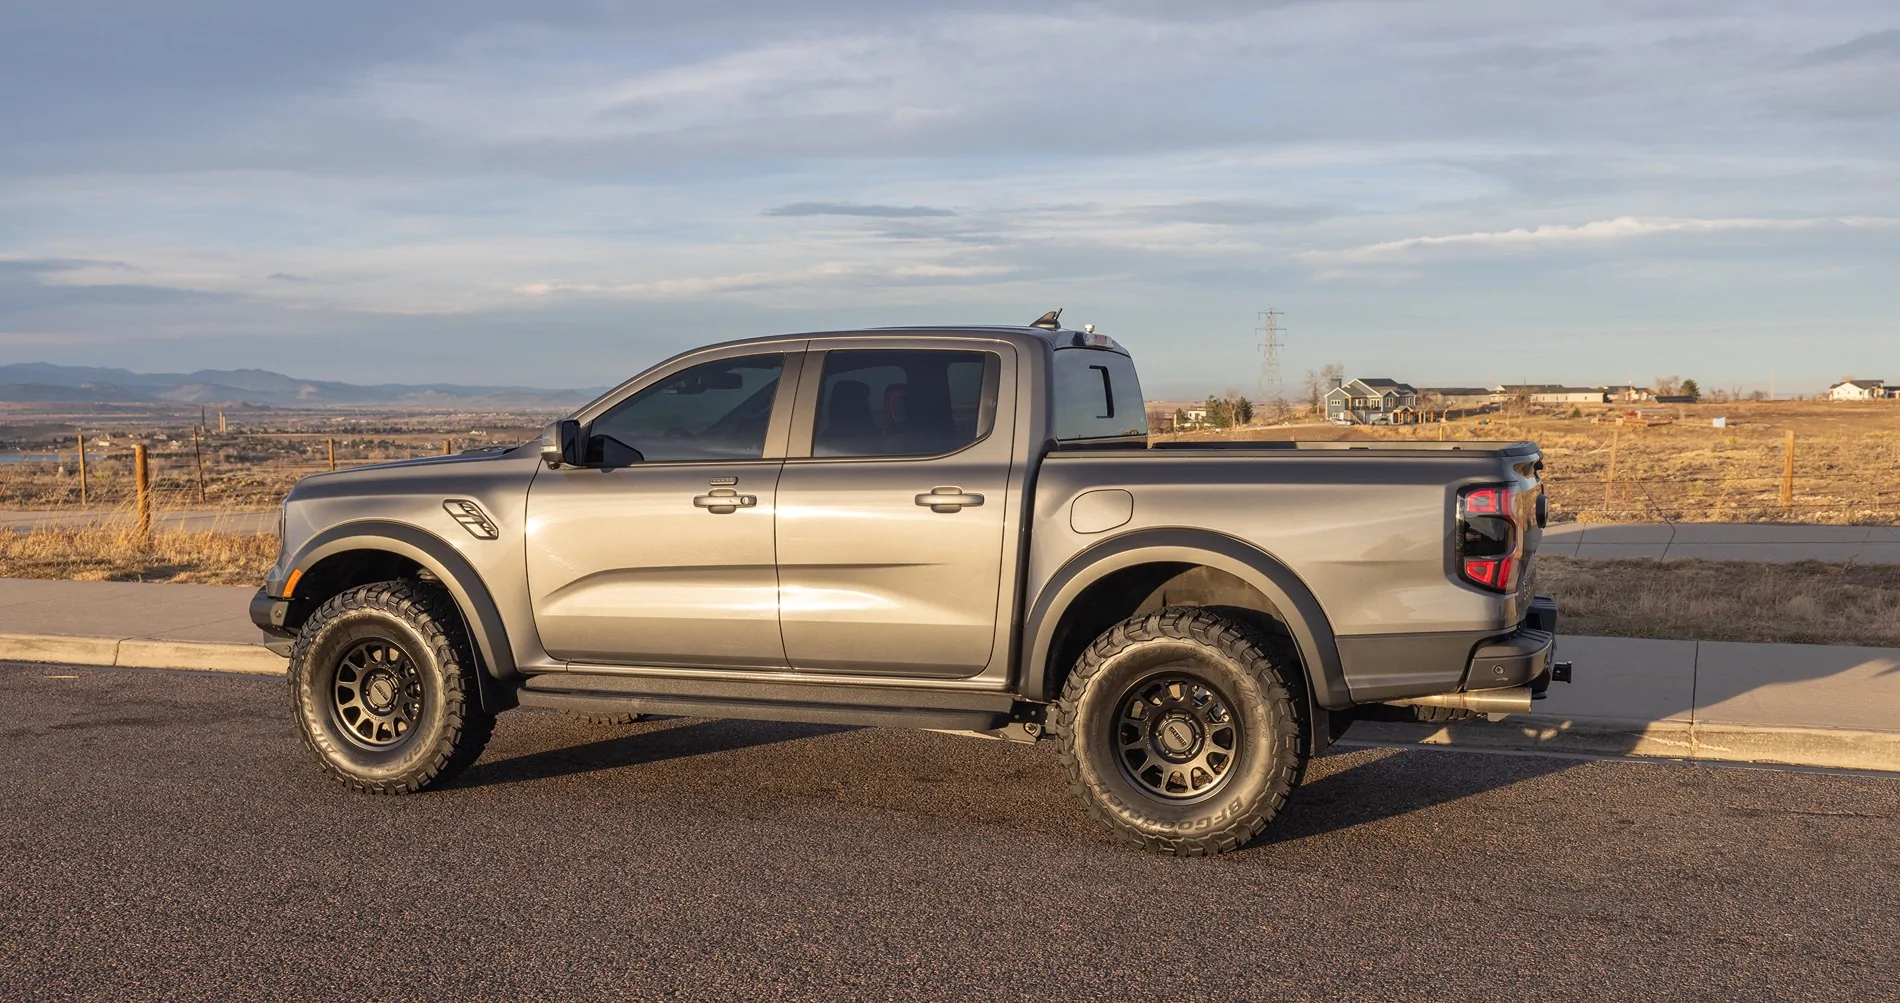
First some glamor shots


Parts List
Bumper, winch and lights
Suspension
Wheels and Tires
Skid Plates
Misc & Tools
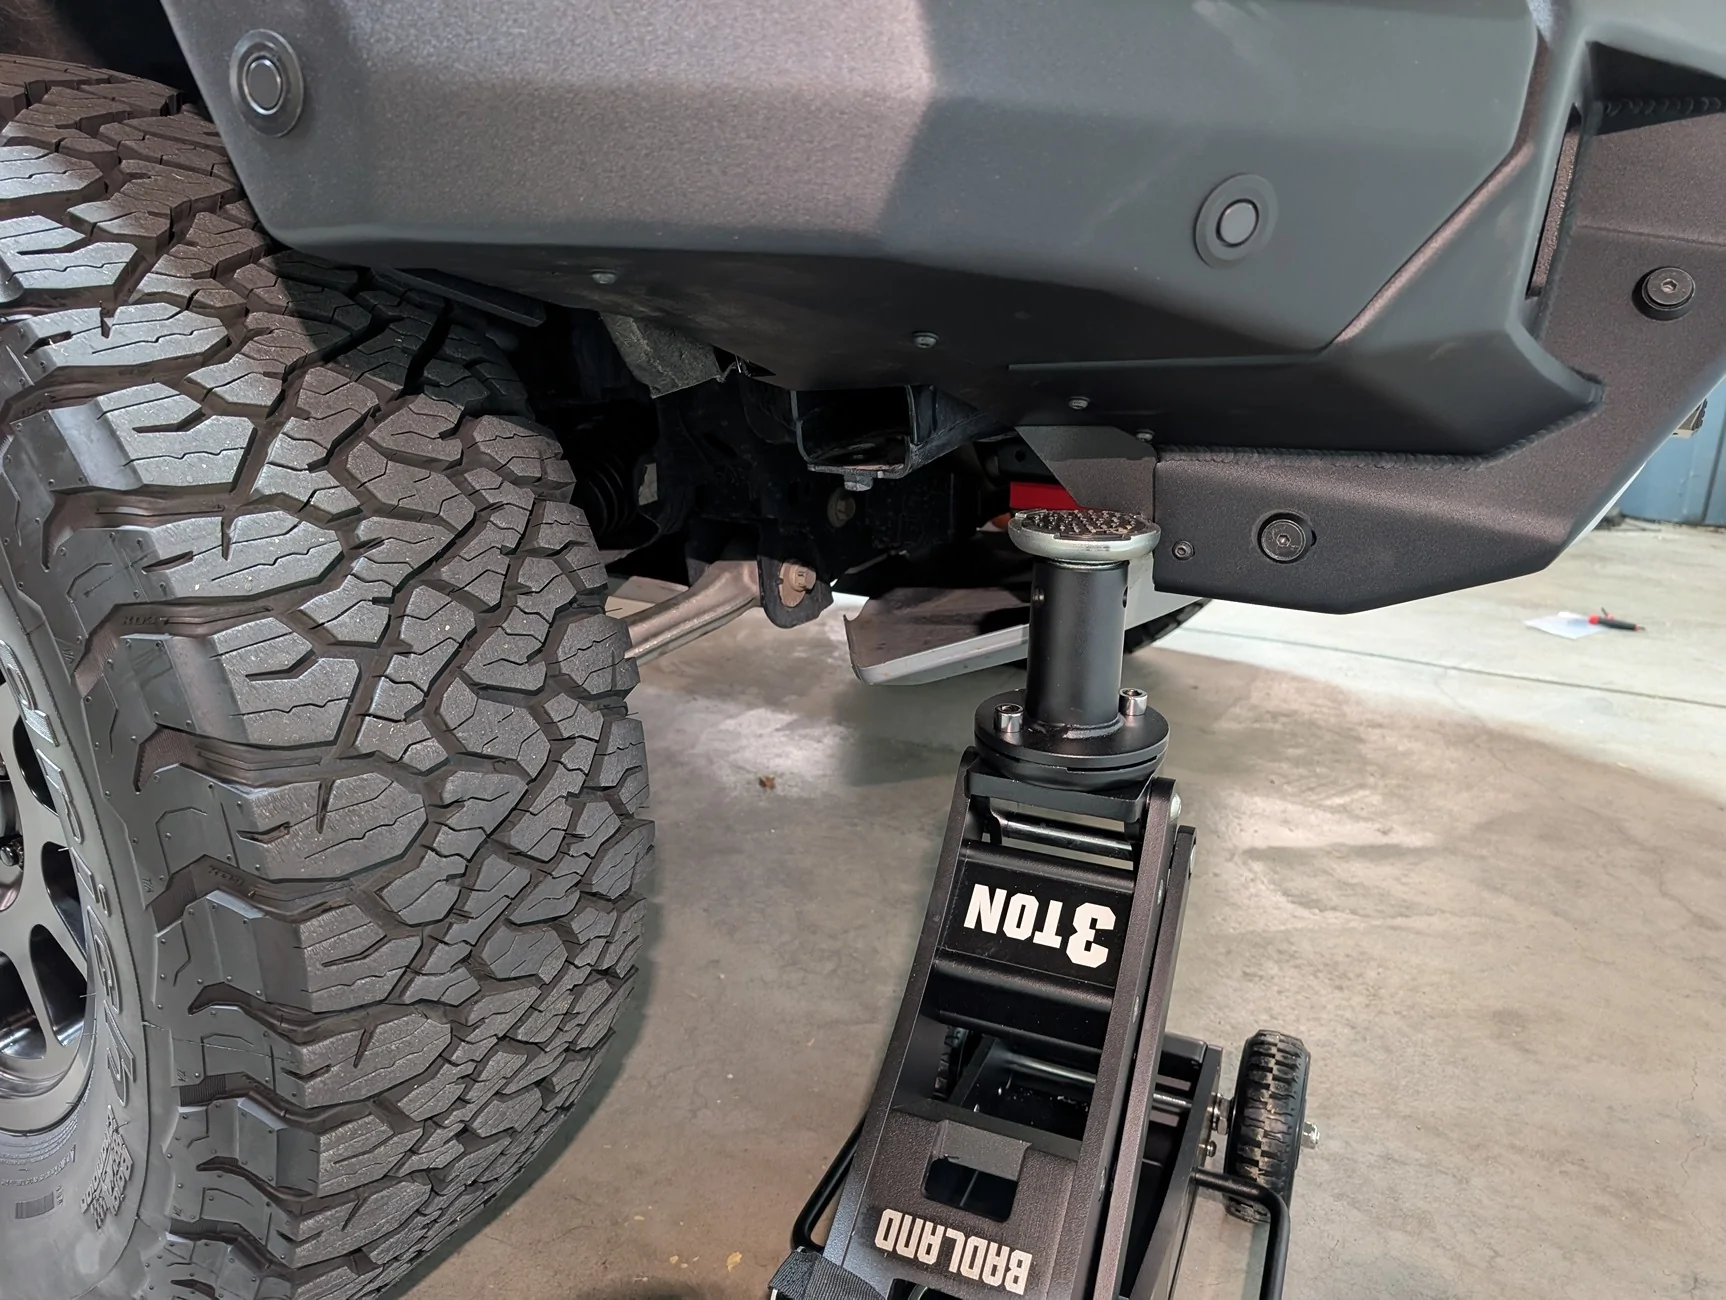
Bumper Install
Pretty straight forward but takes at least a full day as there are a lot of steps. I think I did this over the course of like 3 or 4 days taking breaks and getting other things done. Get a couple folding tables to do the prep work on and make sure you take the time to go over all the bolts and nuts with the tap & die set to clear out powder coating.
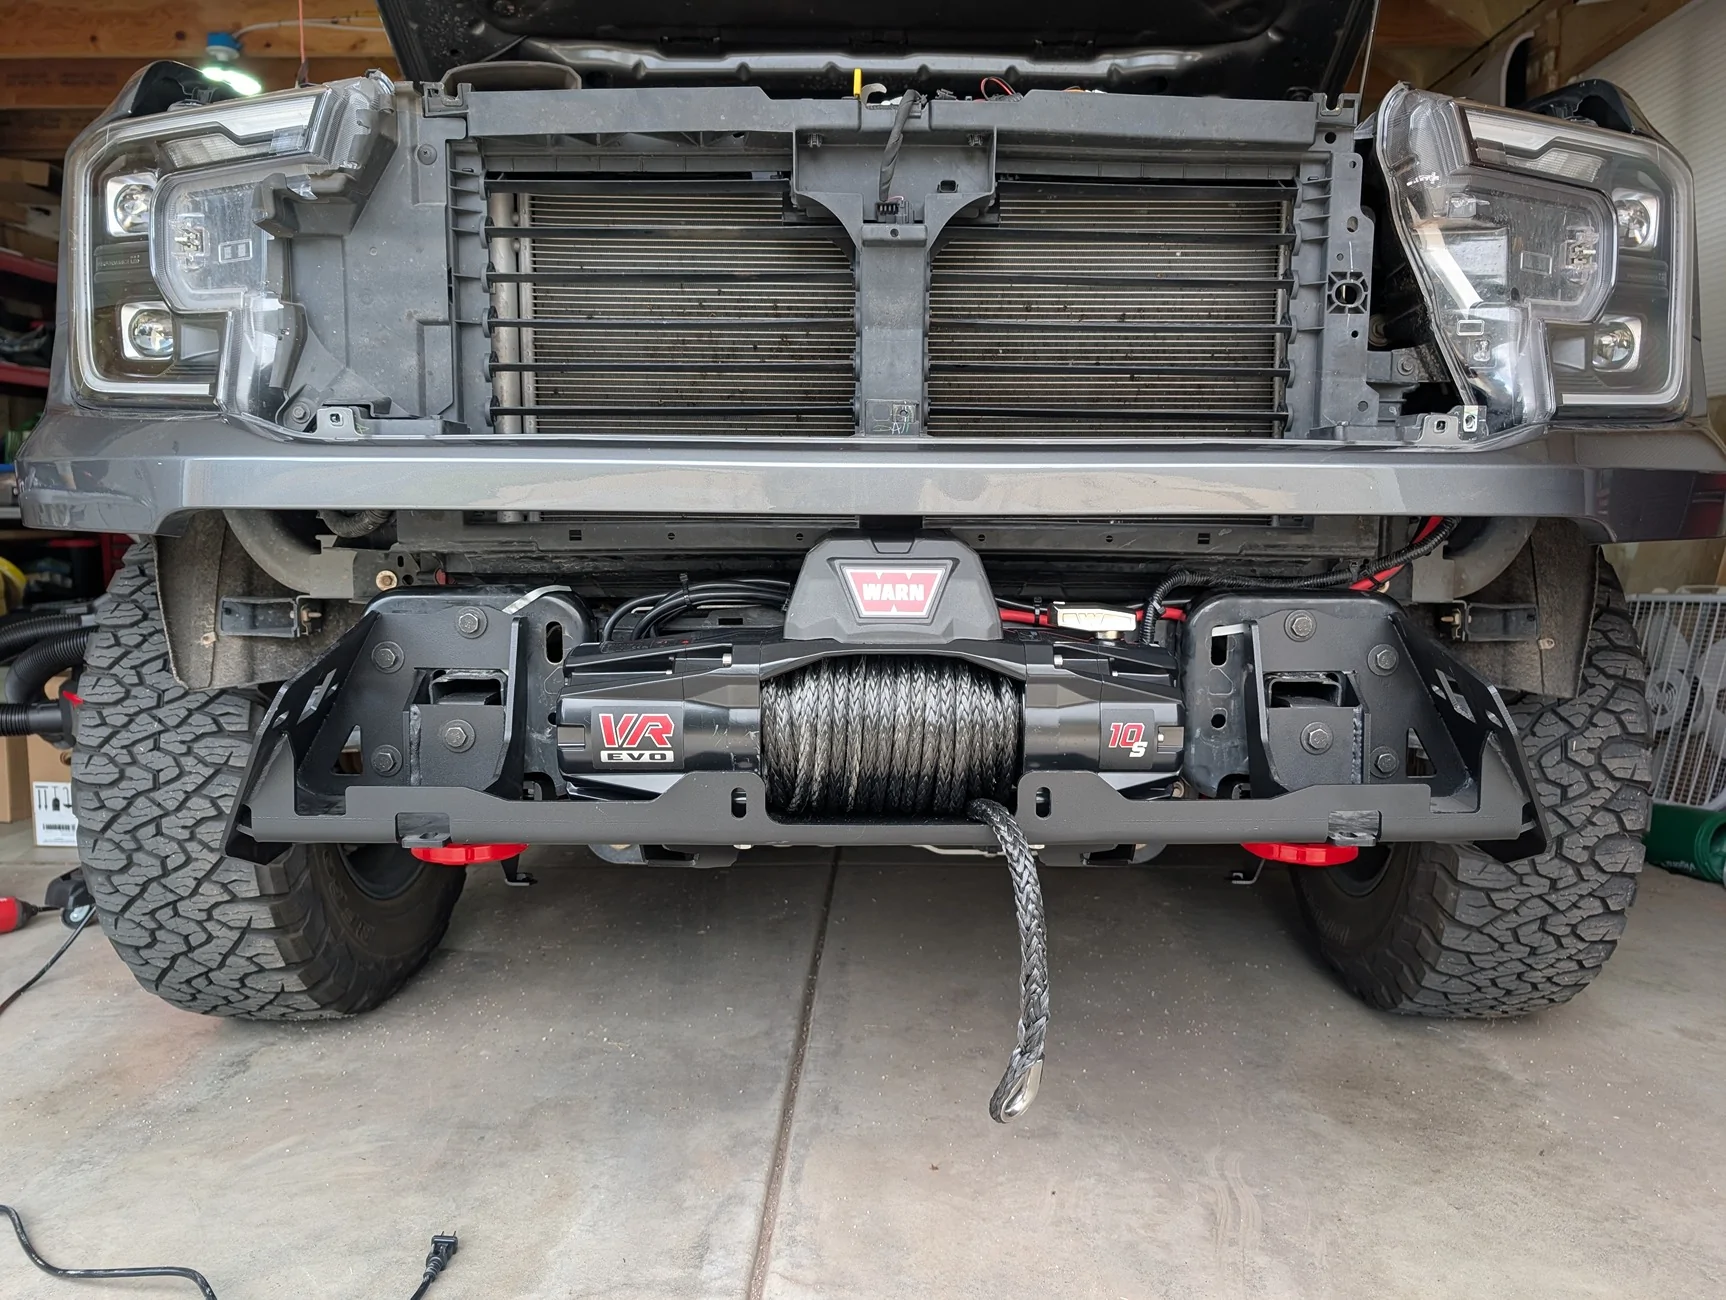
It's a very tight fit to get the winch in place and the bumper shell aligned. The winch plate goes in first, then the winch, then the rest of the bumper shell. Super happy with the result but this was a process for sure. The Rival install video is excellent, just plan on watching it a bunch of times.
Here's the winch plate installed with the winch, ready to bolt the bumper shell to the winch plate.
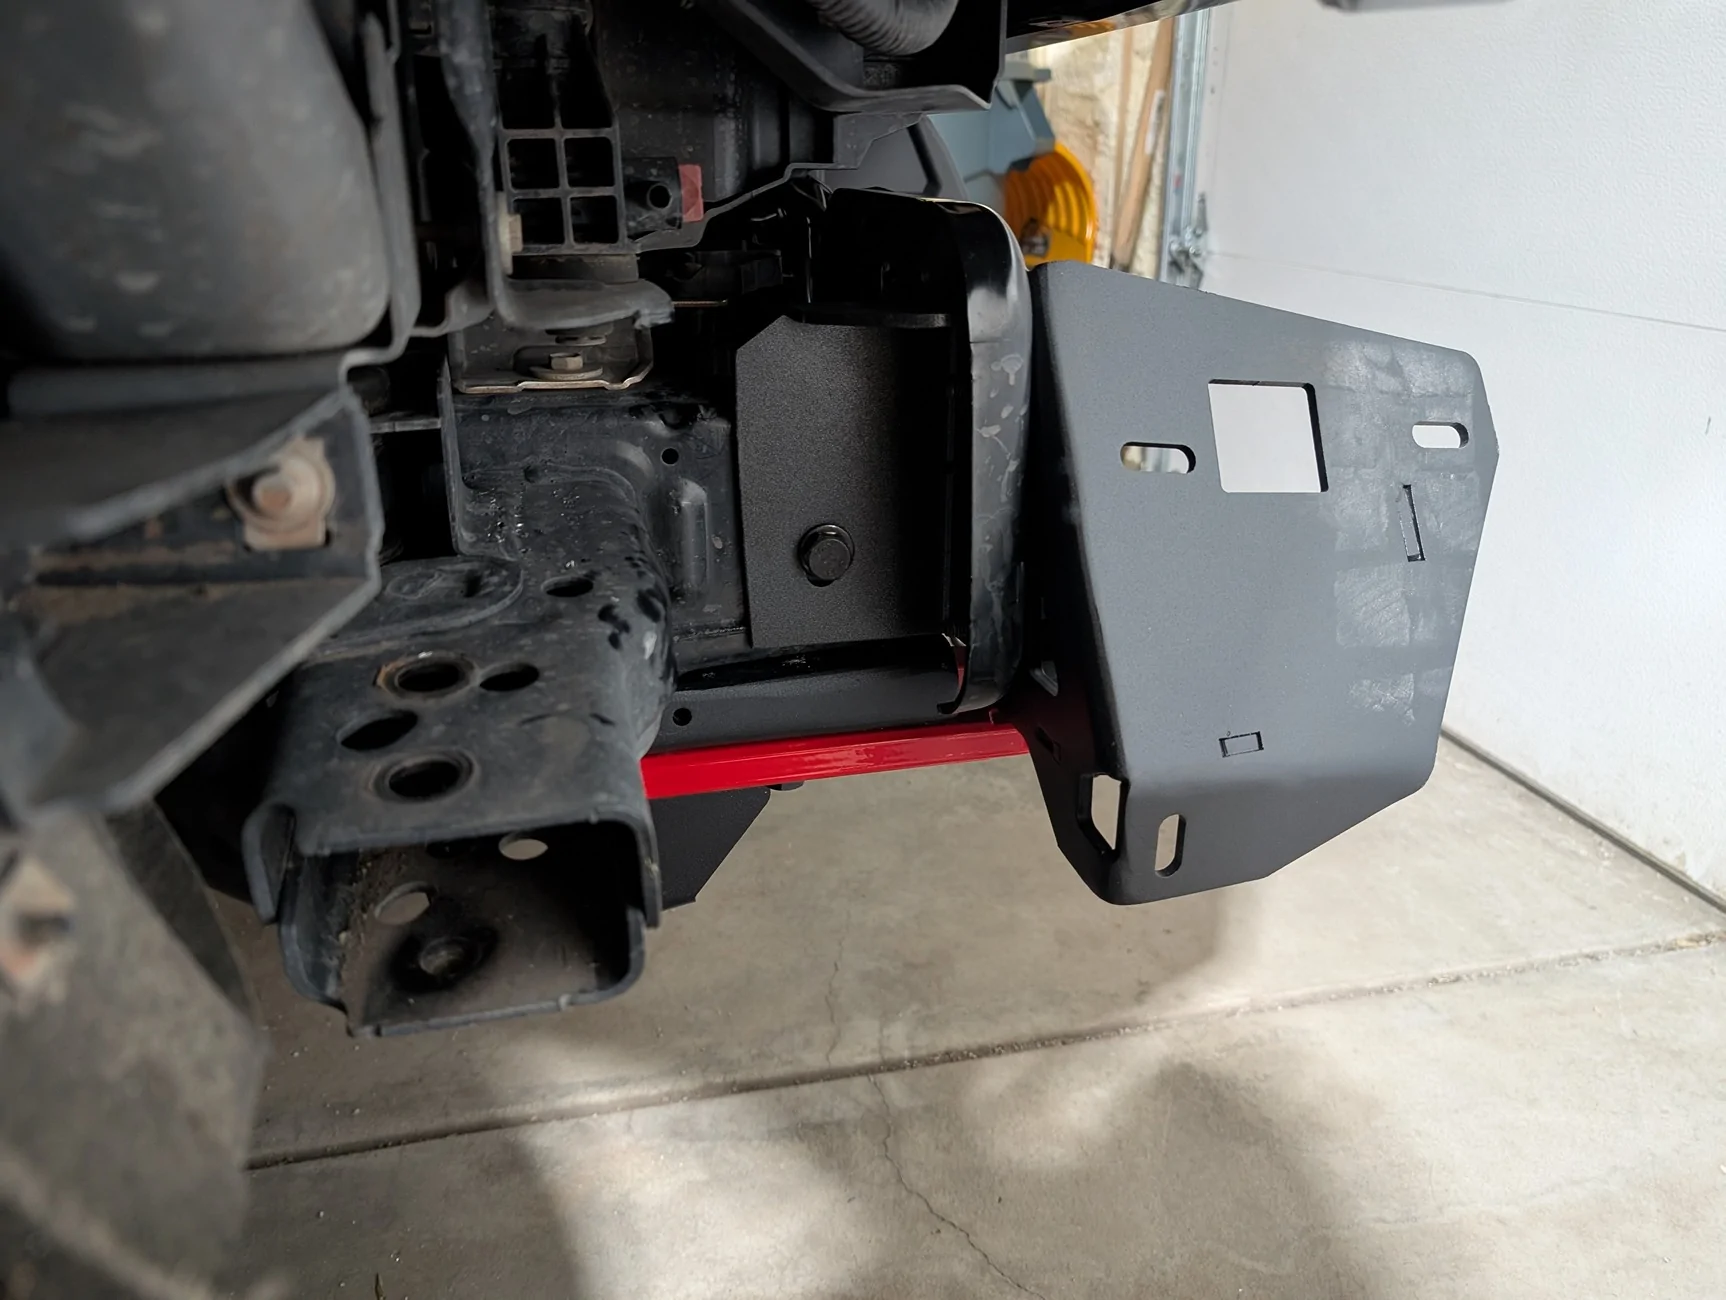
Here's s side view of the bumper shell. The front crash bar gets removed but the shell is very sturdy. Also you can see the recovery points, these are bolted right to the frame.
Once I got the shell loosely bolted in place, I was able to use my floor jack in one specific spot on each side to rotate the shell forward and get it all aligned and bolted together. In my case the bumper really wanted to rotate "back" around that bottom bolt you see and it had a big gap on the driver's side and a bigger one on the passenger side.
I was able to put the lip of my floor jack on this section of the bumper shell and push it up to rotate the shell "forward" away from the grille, etc. Had to do this on both sides to get it to where I was happy with it. Definitely would have benefitted from another few sets of hands, but I was able to do this solo with the jack.
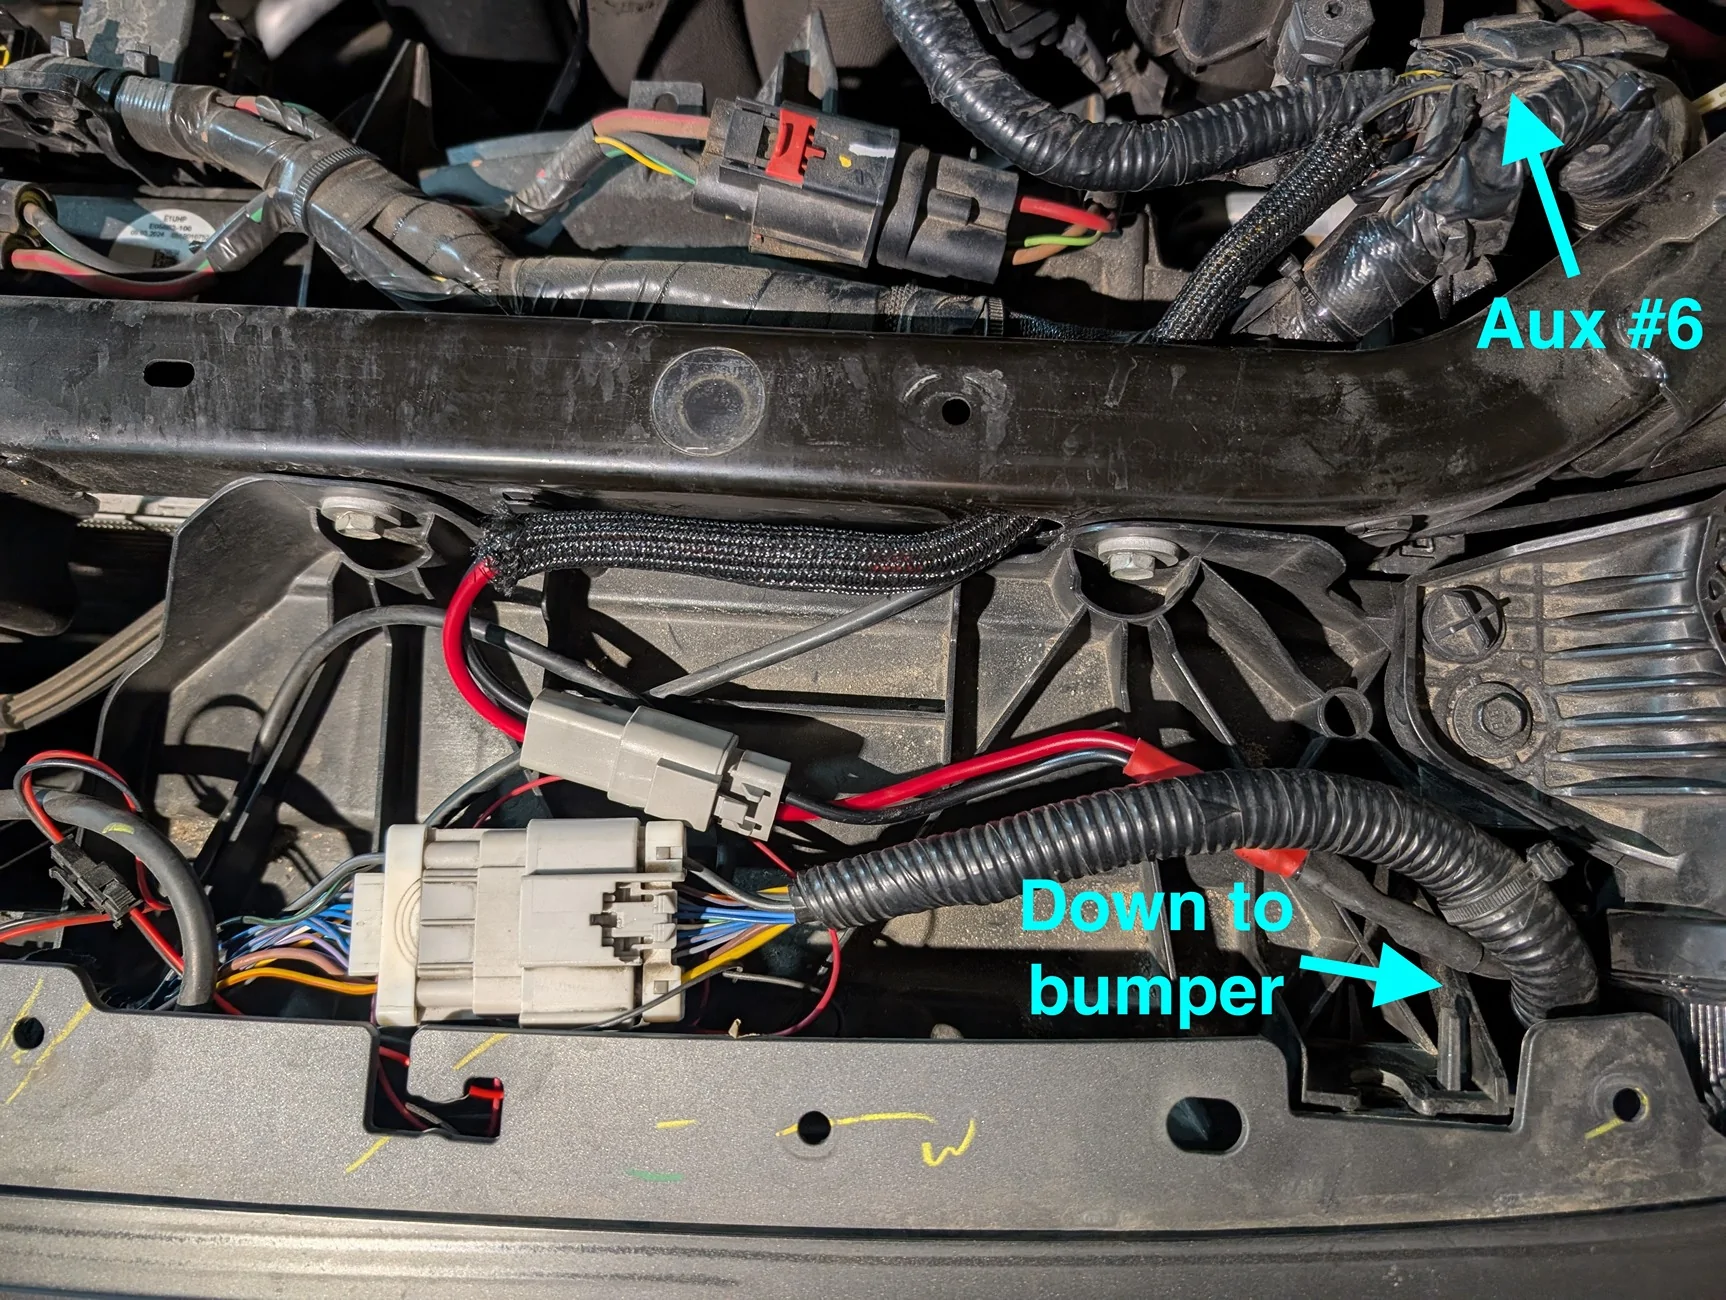
Light Bar Wiring
The 20" SR-series Pro bar is extremely bright -- 17,400 lumens or something, it's pretty amazing.
I wired up the 20" light bar to aux switch #6, which is up front and has its own ground nearby. The connector I got off Amazon just barely reaches when I ran it through the front frame by the radiator. The rest of the power runs down with the bumper wiring harness, turned out very clean. This pic is looking down on the driver's side front of the engine bay with the plastic covers removed. Small connector on the bottom half is for the light, the larger connector is the bumper wiring harness.
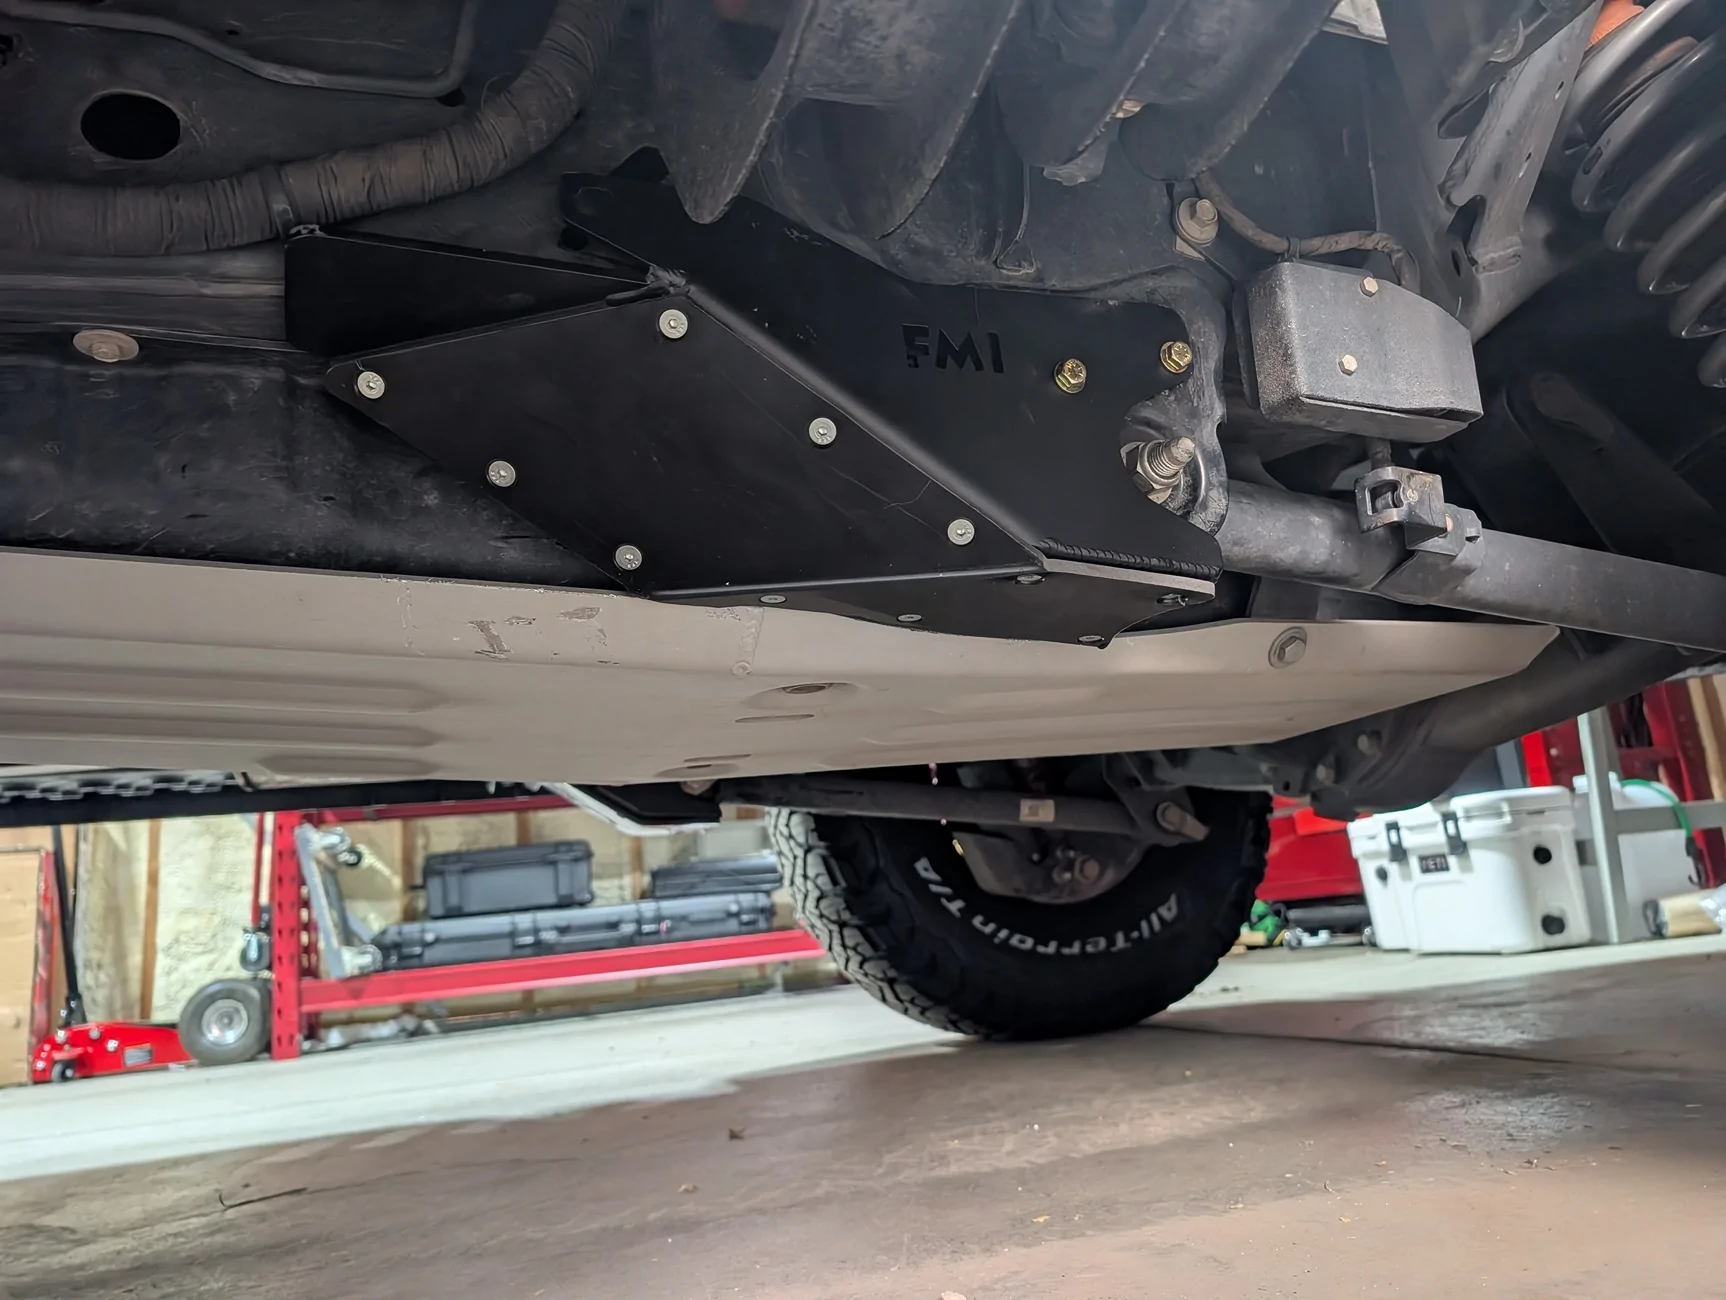
Skid Plates Install
Pretty easy really. The instructions are good and there's some YouTube videos that go through it. The gas tank skid is a bit of a pain to get in, but not too terrible, the rest are very easy.
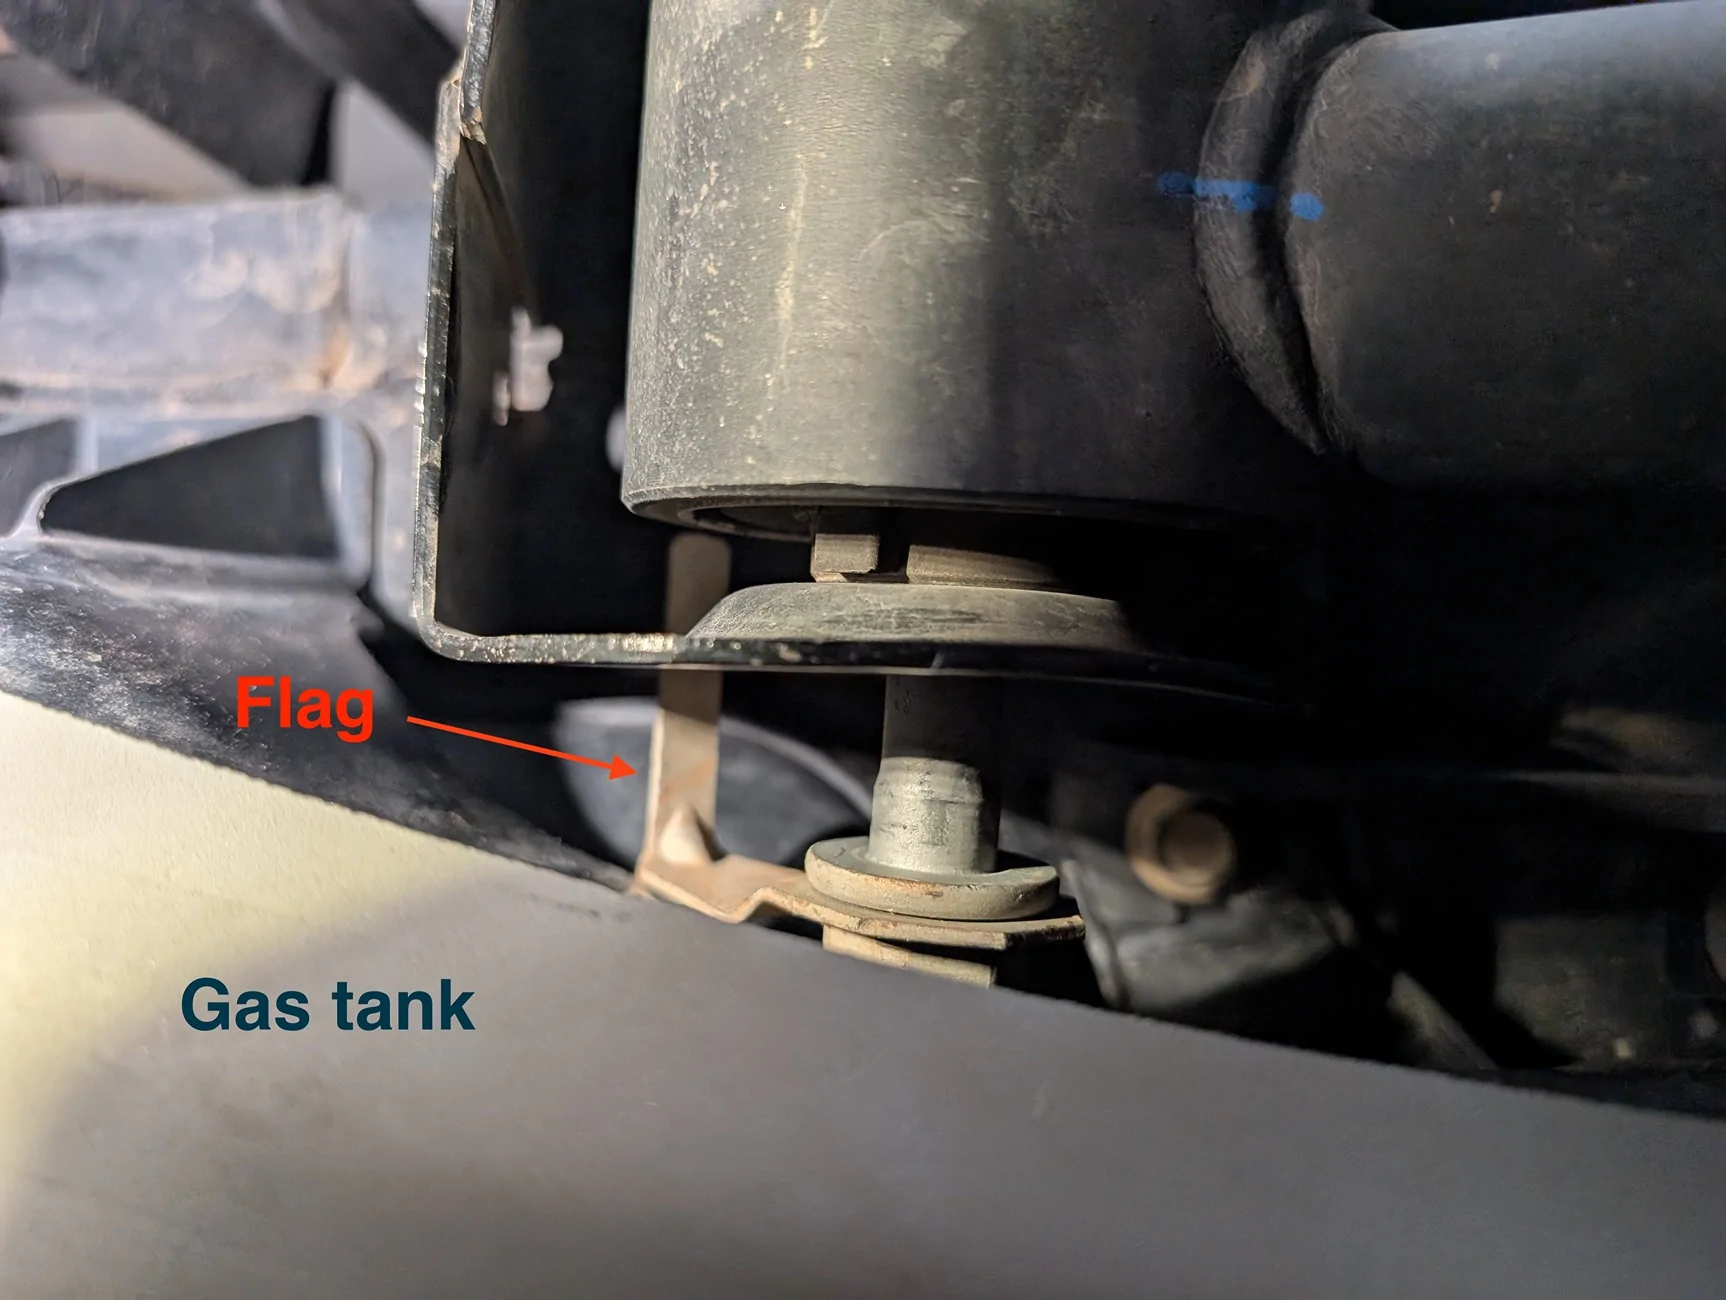
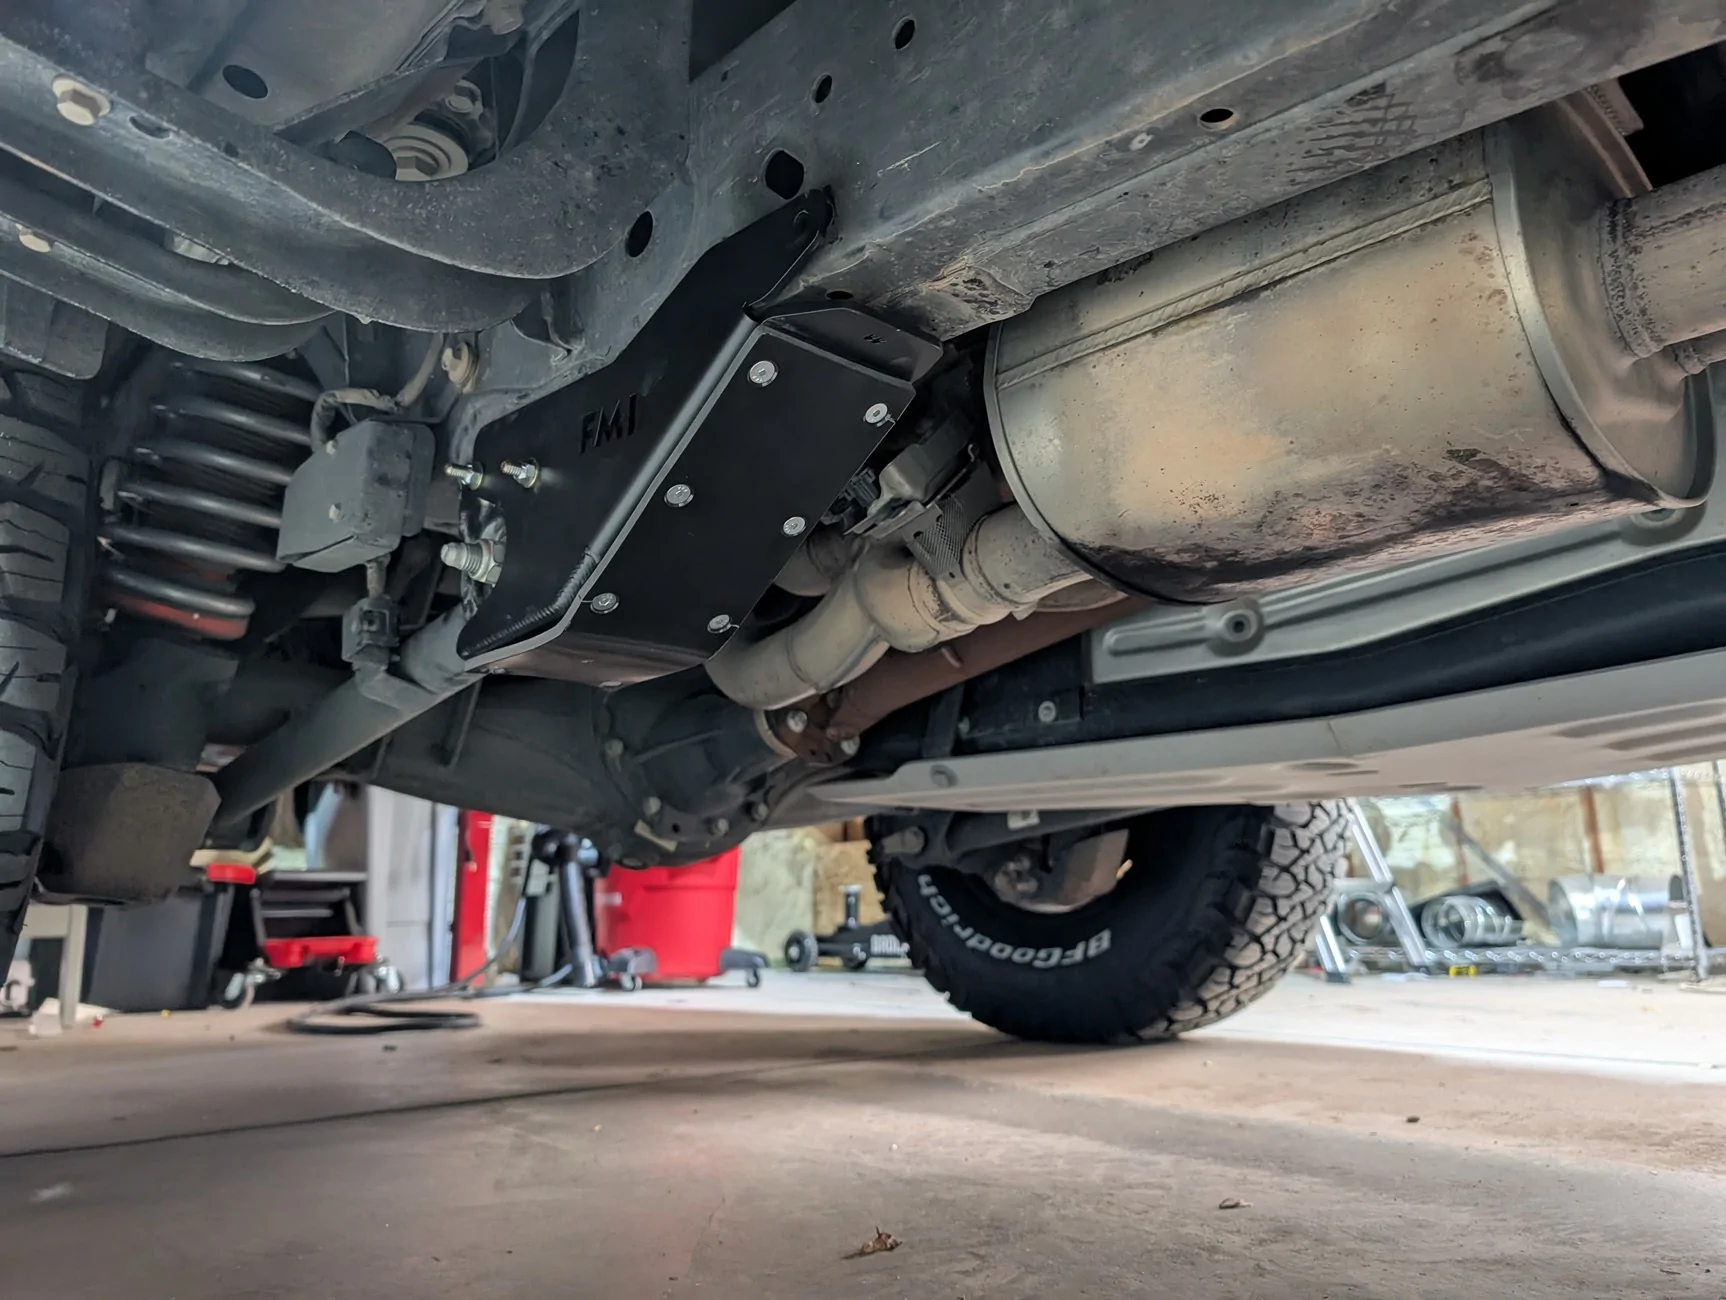
Rear Arm Skids
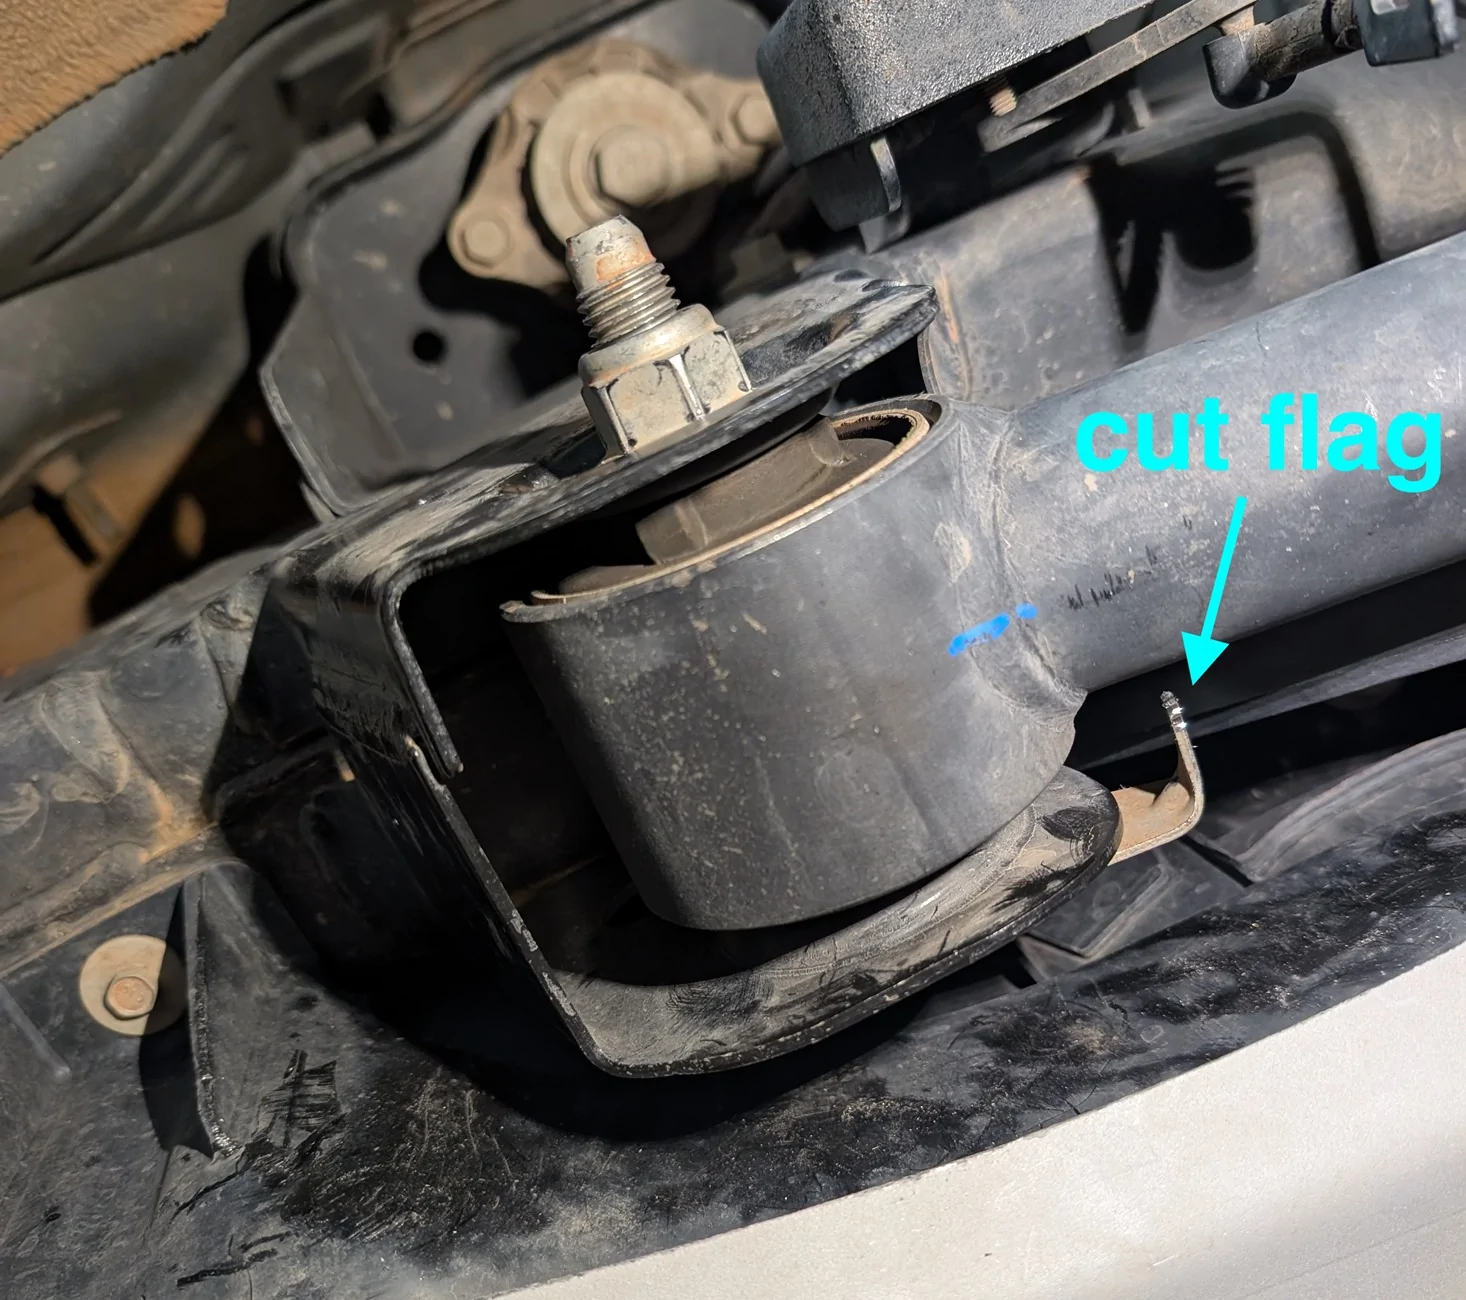
The Foutz rear arm skids are nice but I had to cut off the flags on the bolts to get them out far enough to rotate. I can't imagine this compromises the flags. I had to use the rotary tool and the "flex shaft adapter" to be able to get the cutting bit angled into the place to cut the flags. On the driver's side, the flag prevents the bolt from coming out since it hits the gas tank. On the passenger side it was probably fine, but I didn't like how close the flag was to crimping the suspension arm. Yes the flags still keep the bolts from moving.
Here's the driver's side, you have to get these bolts out far enough to rotate the flags around because the hole the flag is in gets used to mount the skids.
Driver's side after cutting

Passenger side after cutting
Here's the finished product on the driver and passenger side. Really nice protection for the bulbous lever point of the rear arms. The driver's side takes a little finagling to get into place with the bumper skid, but it all came together nicely. You can also see the position sensor guards.
Misadventure With Springs
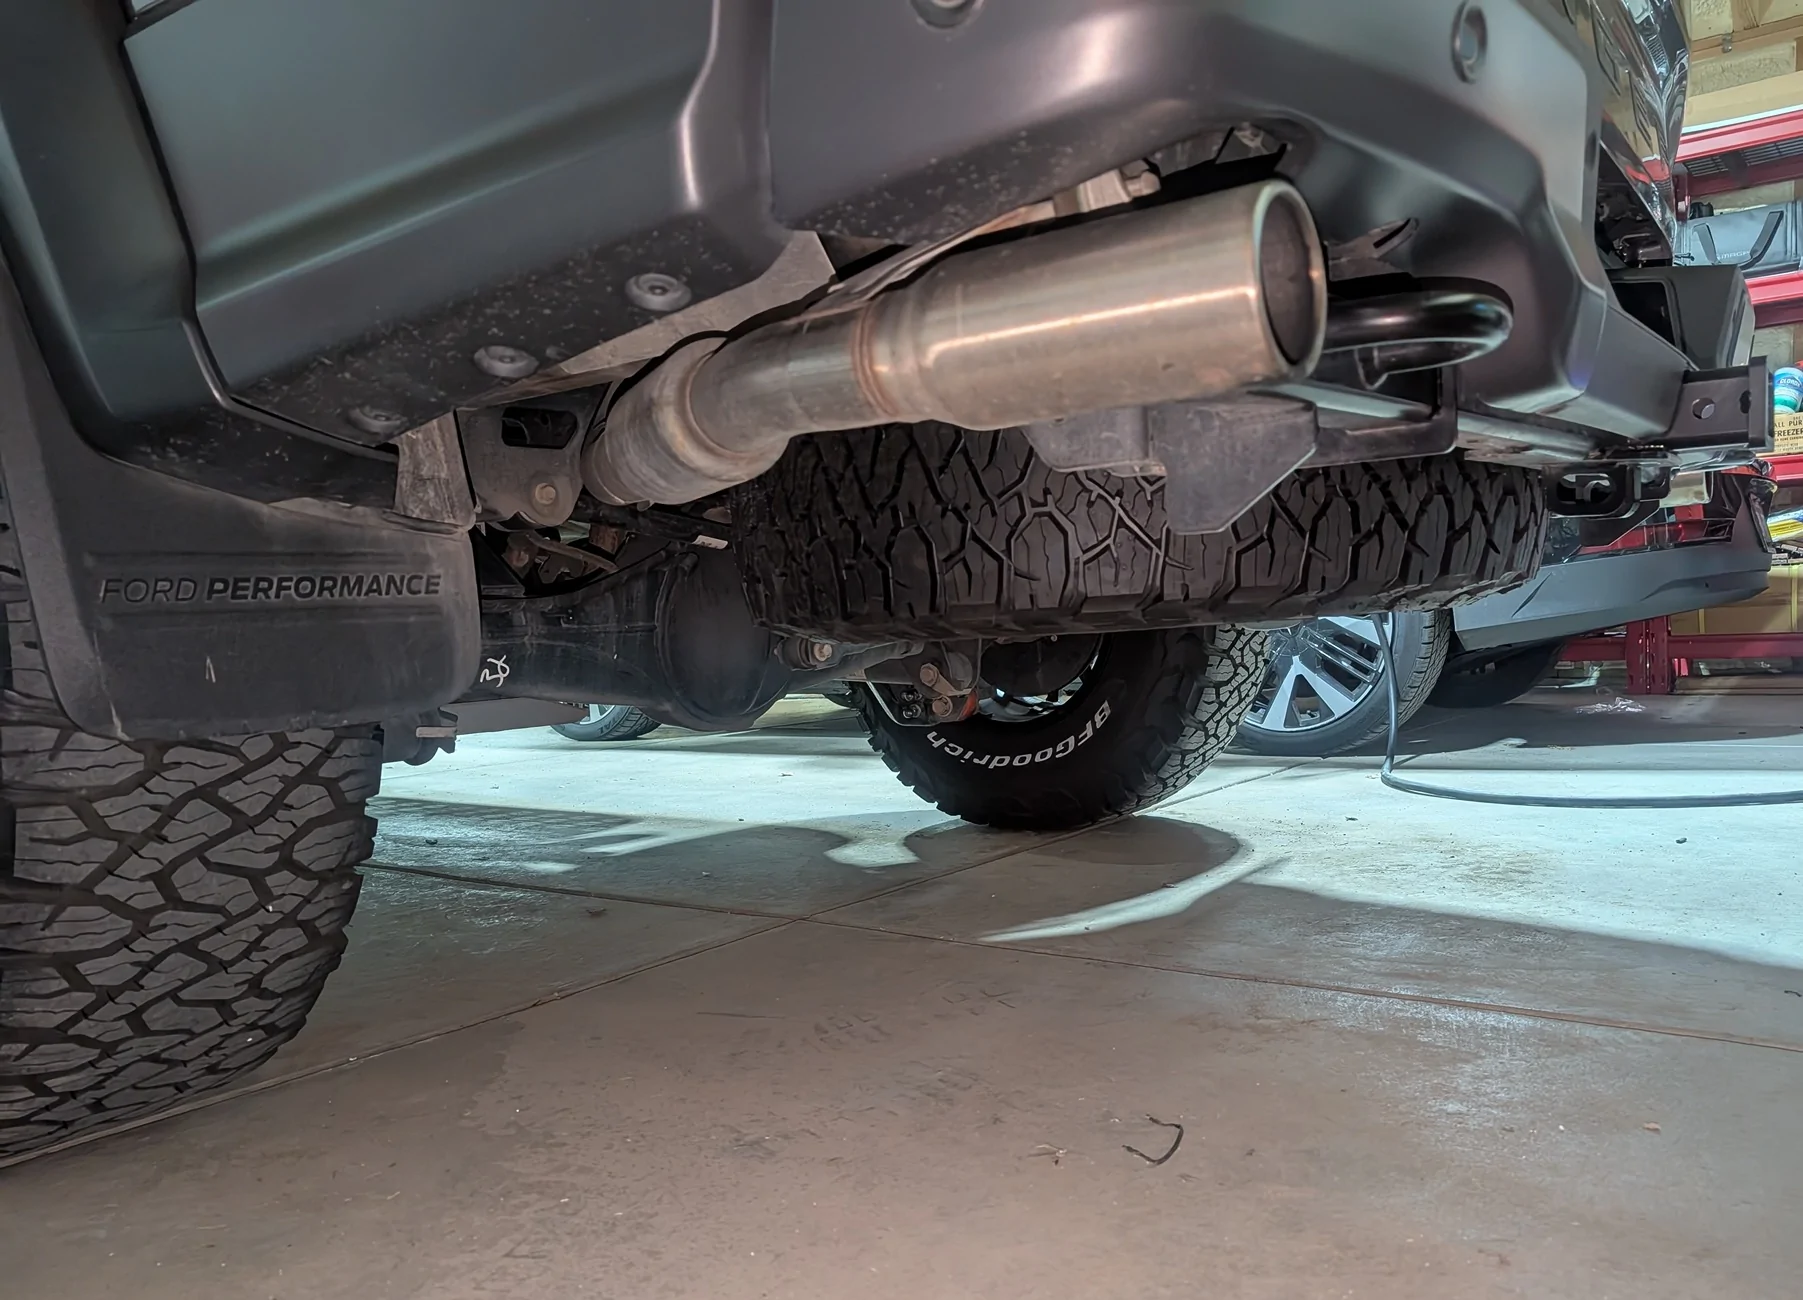
Some of these pics have silver springs -- I initially had the GOAT 2" front and 1" rear spacers and also replaced the springs front and rear with Eibachs (the +1.5" front and +1.6" rear springs). It turned out that I didn't have enough weight in the truck to compress the new springs, so the front driveline was at too steep an angle, and accelerating in 4A or 4H I had a lot of vibration on the front end. Way too much vibration for comfort so I ended up going back to just the stock springs and the spacers. I thought about maybe keeping the springs and removing the spacers or trying to drop the front diff or slicing the front spacers in half, etc, but didn't want to keep digging the hole deeper and it seemed like a lot of other people had just the spacers. Simple is better. Pretty annoyed at having gone down this route but all good now.
I did the bumper and skid plates installs myself, but I had a shop do the suspension work (spacers, springs, UCA, tie rods). I am not at all saying the springs were bad, etc, they are in fact very nice, it's just that in this case the truck isn't heavy enough to need them plus the spacers.
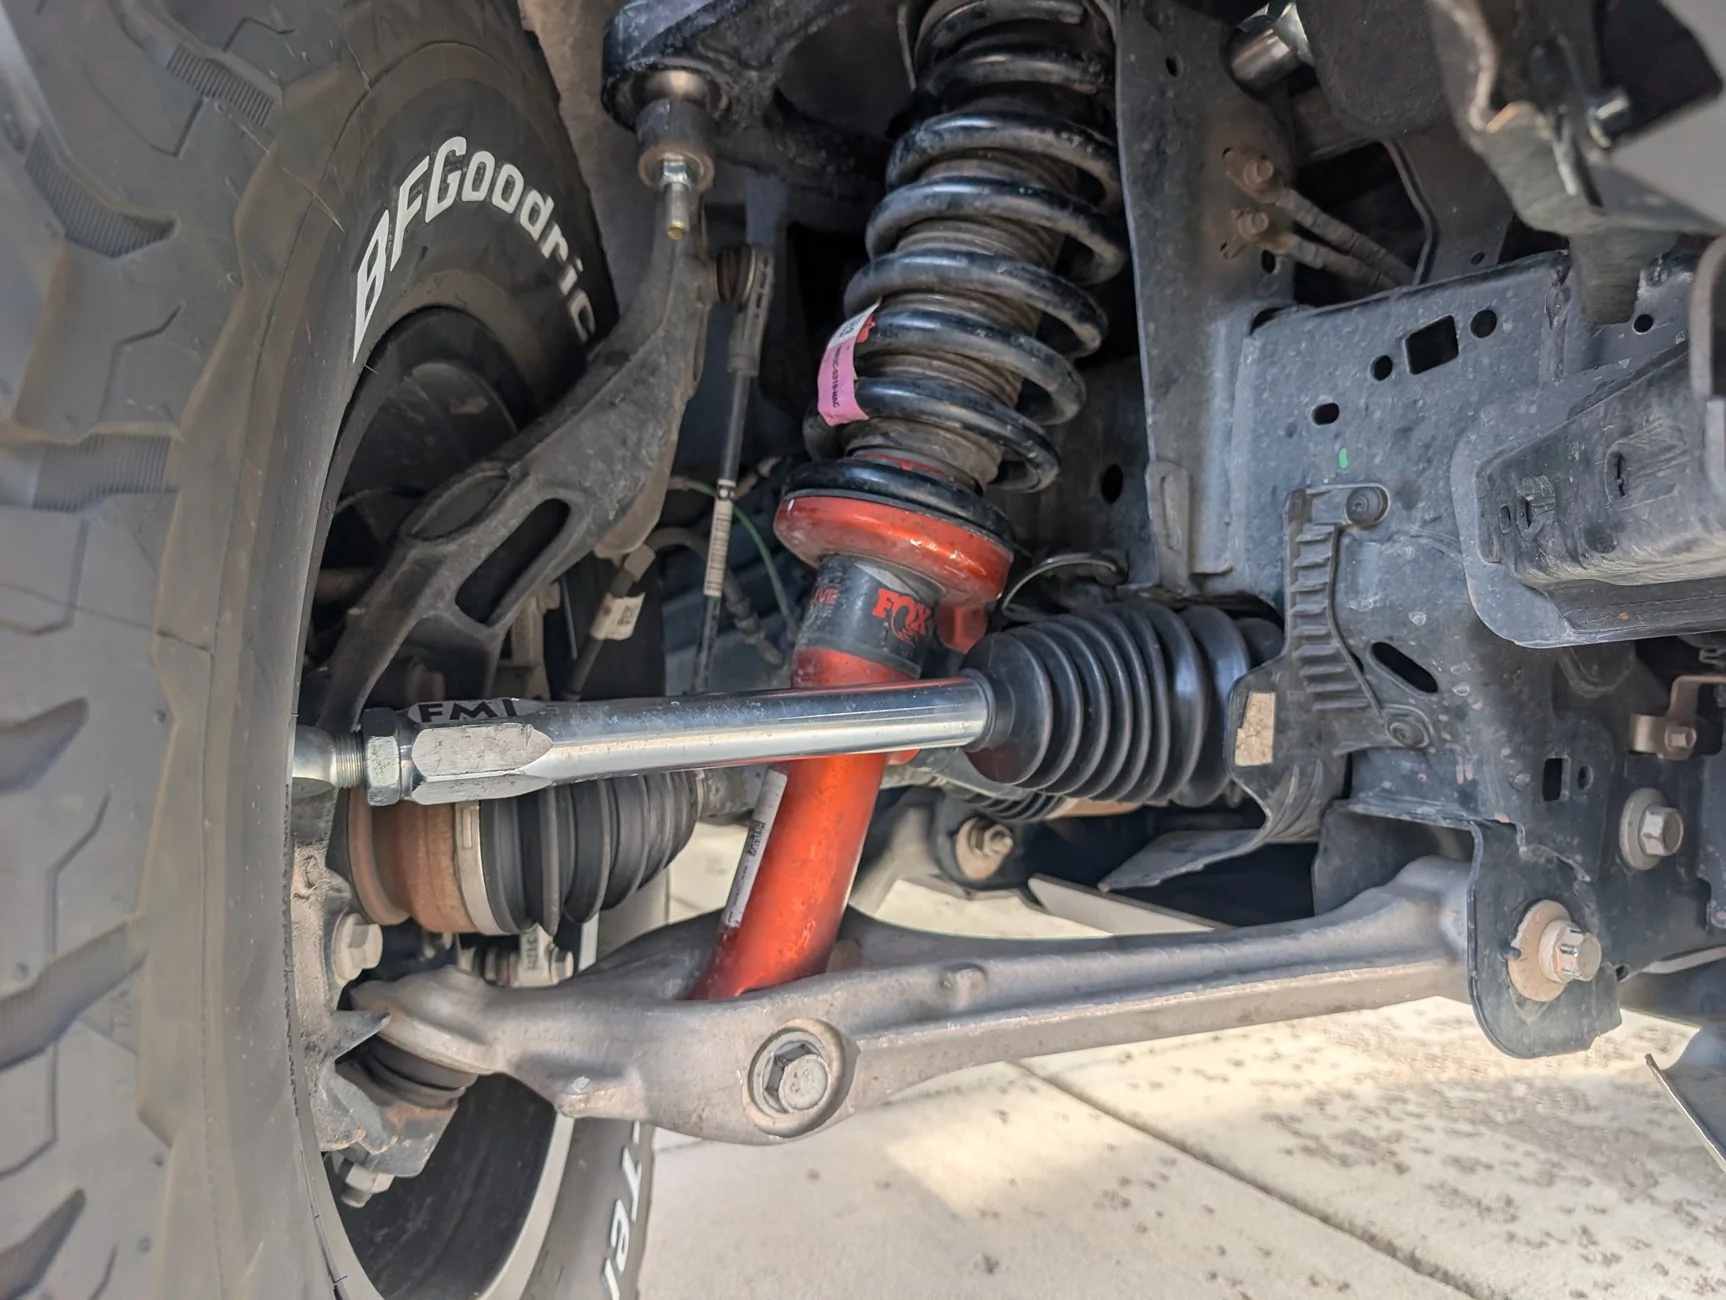
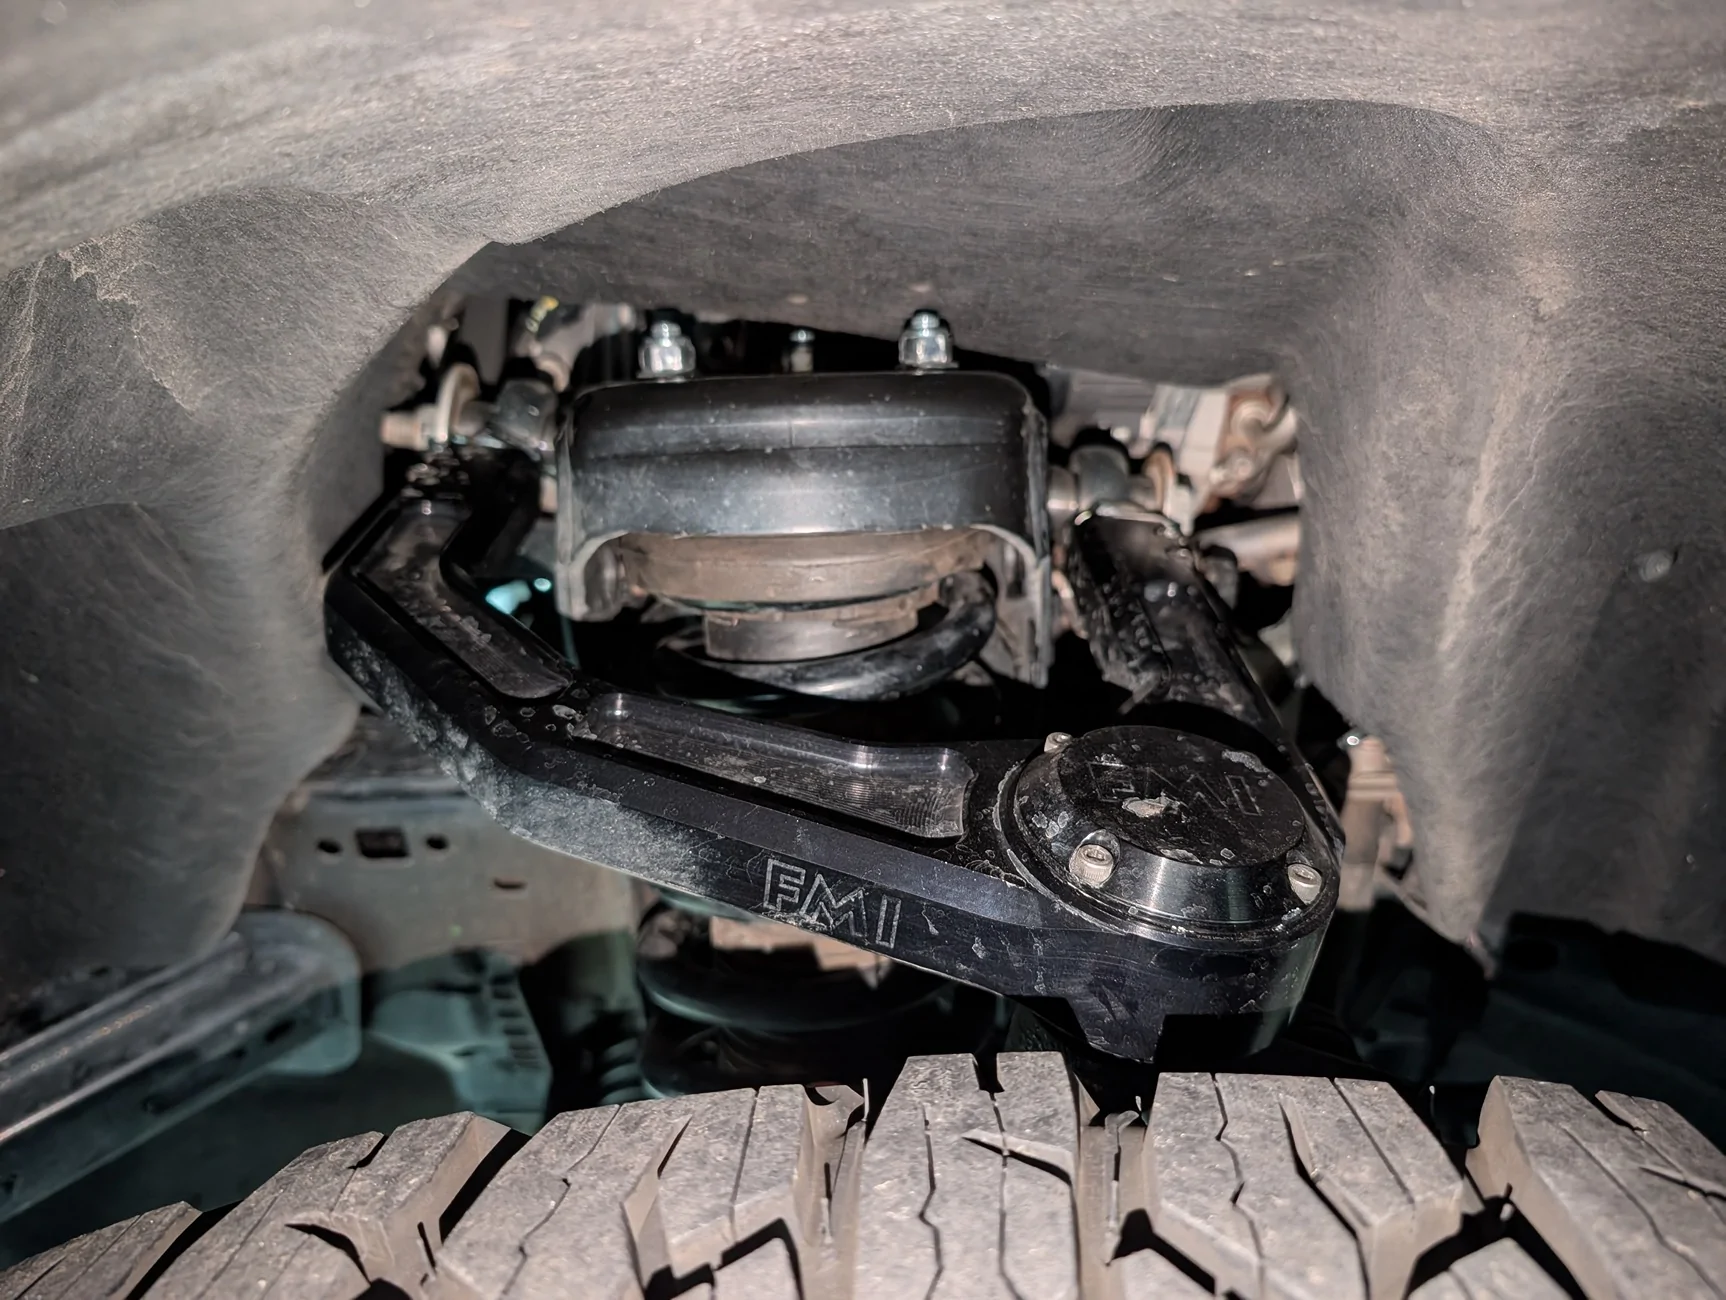
Tie Rods and Upper Control Arms
The Foutz tie rods and UCA are super nice, they seem to make a bunch of great parts. I got the "raw aluminum" tie rods and the black UCA. Tie rods are gigantic compared to stock.
Wheels and Tires
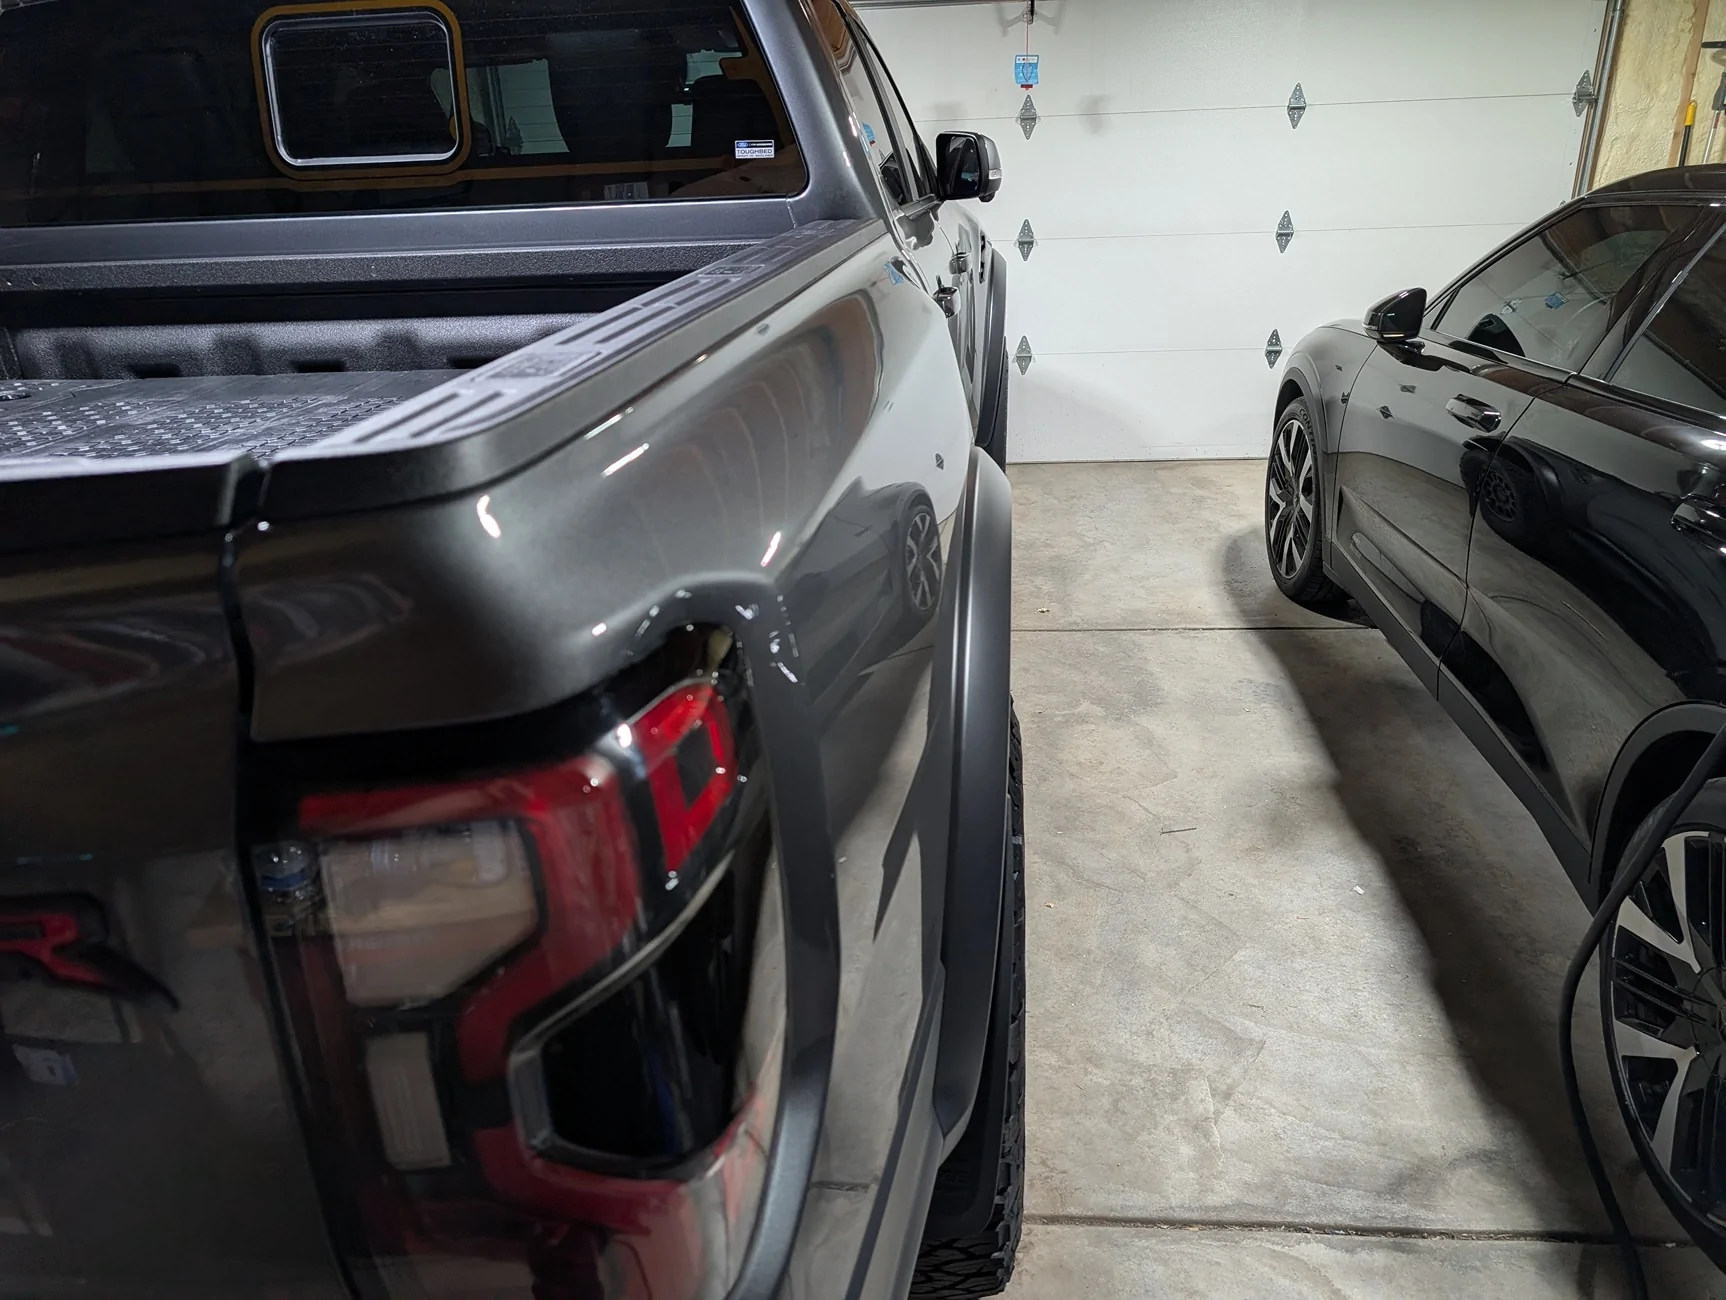
I went with Method Racing 703 wheels in +35 offset. This puts the tires right at the edge of the fender, maybe 1/4" sticking out. I really love the look of these wheels on the truck.
The 35" tire does fit as a spare as well, just sticks down a bit. Still fits with the trailer connector relocated next to the license plate.

Forscan tire size and suspension calibrations
After changing the suspension around and changing tire sizes, you need to run through some procedures in Forscan. You will need an "extended" license to do these steps. There's other threads around about doing this and it's pretty straight forward, but you will need a Windows PC and an OBDII dongle. The USB ones do seem to work better than the Bluetooth ELM327 adapters.
I set my tire circumference to 2650mm, that seems to match my GPS correctly.
After changing the tire size you will get DTCs and a check engine light. To clear this you need to:
Driving Impressions
Switching back to stock springs was the right way to go. The ride is still plush, and the various suspension modes all work to tighten things up, it's a great setup. For the amount of weight I've got on the truck, the aftermarket springs were just too much. Maybe if I had a camper or something, just not the right fit for this setup.
This truck still fits in my home garage, most parking garages (it's just under 6' 6" tall, though I did replace the antenna with a stubby one). Not fitting in garages would have been a deal breaker.
The 35" tires are definitely heavier, and it feels a bit more sluggish at times, but by no means bad at all. I've got the "performance calibration" as well, so I'm sure that helps. It still really gets up and goes if you punch it, so much fun to drive. I might switch to a 295/70r17 or a little lighter option, but I'm still just getting used to it again and it's fun as hell to drive. Gas mileage has taken a pretty big hit, was at 17.5 maybe before (with the bumper and the Decked drawer full of junk) and has gone down to about 16.1 now. Not great, not (too) terrible.
I'm going to road trip out to Moab over the holiday and will try to get some wheeling done here in Colorado soon as well.
First some glamor shots

Parts List
Bumper, winch and lights
- Rival 4x4 bumper
- Rigid SR-series Pro 20" light bar
- Connector for wiring in the light bar
- Fog lamps
- Warn VR EVO 10s winch
- Warn fairlead
- Factor55 flat link
Suspension
- GOAT 2" front + 1" rear spacers
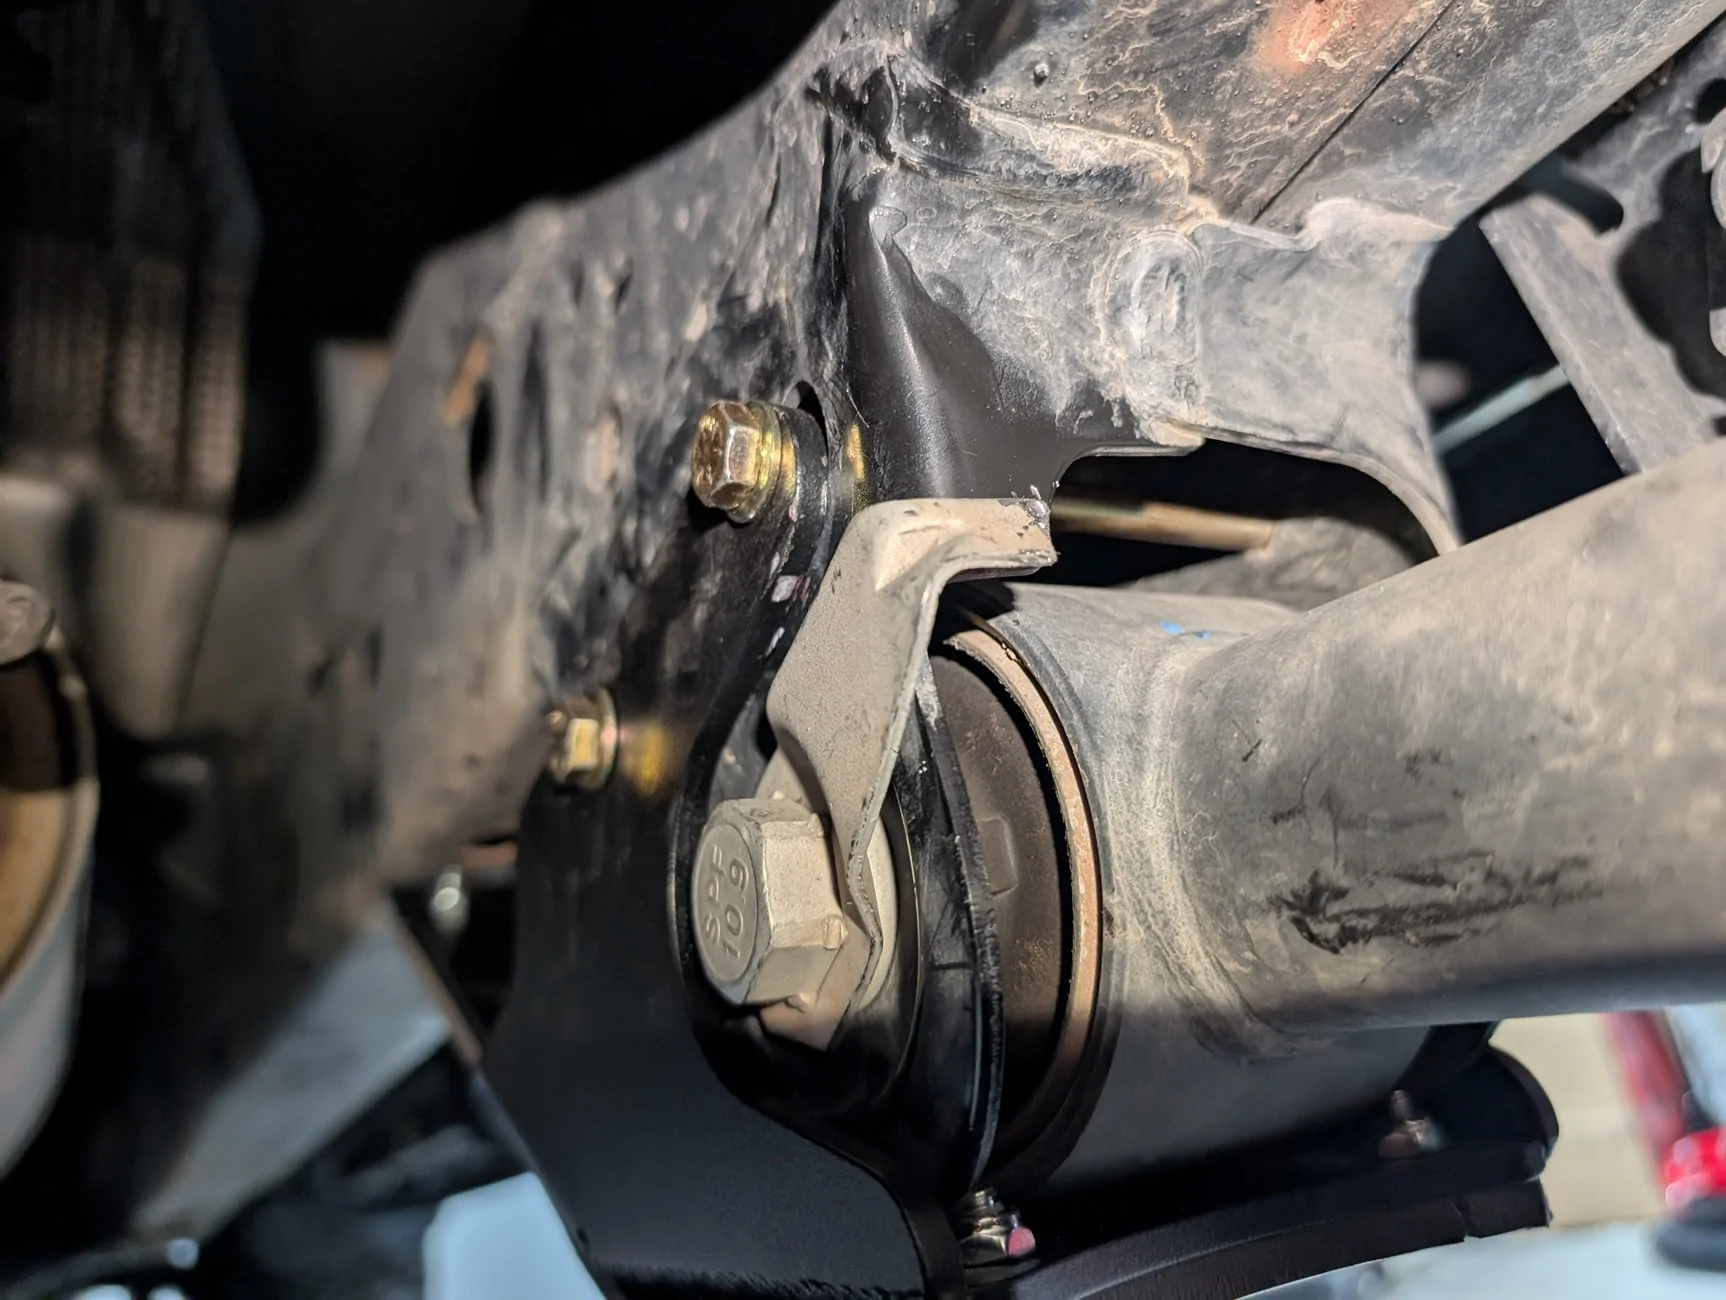
- Foutz front-lower-rear-pivot reinforcement kit
- This is a little brace that reinforces the lower rear pivot point of the front suspension. I figured it was easy to add while everything was taken apart.
- https://www.foutzmotorsports.com/co...raptor-front-lower-arm-rear-mount-support-kit
- Foutz Upper Control Arms
- Foutz Tie Rods
Wheels and Tires
- Method Racing 703 +35 offset
- Tires
- BF Goodrich K03 in 315/70r17
Skid Plates
- Foutz rear lower arm guard and slider
- Rival engine skid plate
- Rival transmission skid plate
- Rival transfer case skid plate
- Rival gas tank skid plate
Misc & Tools
- Milwaukee power ratchet
- Easily the most useful tool I've bought in a while, should have picked it up a while ago.
- https://amzn.to/4rTMkaY
- Stubby antenna (the Maverick one fits)
- Rotary tool
- Flex shaft for rotary tool
- Tungsten carbide bits
- Tap and Die set
- OBDLink EX USB cable for Forscan programming
Bumper Install
Pretty straight forward but takes at least a full day as there are a lot of steps. I think I did this over the course of like 3 or 4 days taking breaks and getting other things done. Get a couple folding tables to do the prep work on and make sure you take the time to go over all the bolts and nuts with the tap & die set to clear out powder coating.
It's a very tight fit to get the winch in place and the bumper shell aligned. The winch plate goes in first, then the winch, then the rest of the bumper shell. Super happy with the result but this was a process for sure. The Rival install video is excellent, just plan on watching it a bunch of times.
Here's the winch plate installed with the winch, ready to bolt the bumper shell to the winch plate.
Here's s side view of the bumper shell. The front crash bar gets removed but the shell is very sturdy. Also you can see the recovery points, these are bolted right to the frame.
Once I got the shell loosely bolted in place, I was able to use my floor jack in one specific spot on each side to rotate the shell forward and get it all aligned and bolted together. In my case the bumper really wanted to rotate "back" around that bottom bolt you see and it had a big gap on the driver's side and a bigger one on the passenger side.
I was able to put the lip of my floor jack on this section of the bumper shell and push it up to rotate the shell "forward" away from the grille, etc. Had to do this on both sides to get it to where I was happy with it. Definitely would have benefitted from another few sets of hands, but I was able to do this solo with the jack.
Light Bar Wiring
The 20" SR-series Pro bar is extremely bright -- 17,400 lumens or something, it's pretty amazing.
I wired up the 20" light bar to aux switch #6, which is up front and has its own ground nearby. The connector I got off Amazon just barely reaches when I ran it through the front frame by the radiator. The rest of the power runs down with the bumper wiring harness, turned out very clean. This pic is looking down on the driver's side front of the engine bay with the plastic covers removed. Small connector on the bottom half is for the light, the larger connector is the bumper wiring harness.
Skid Plates Install
Pretty easy really. The instructions are good and there's some YouTube videos that go through it. The gas tank skid is a bit of a pain to get in, but not too terrible, the rest are very easy.
Rear Arm Skids
The Foutz rear arm skids are nice but I had to cut off the flags on the bolts to get them out far enough to rotate. I can't imagine this compromises the flags. I had to use the rotary tool and the "flex shaft adapter" to be able to get the cutting bit angled into the place to cut the flags. On the driver's side, the flag prevents the bolt from coming out since it hits the gas tank. On the passenger side it was probably fine, but I didn't like how close the flag was to crimping the suspension arm. Yes the flags still keep the bolts from moving.
Here's the driver's side, you have to get these bolts out far enough to rotate the flags around because the hole the flag is in gets used to mount the skids.
Driver's side after cutting
Passenger side after cutting
Here's the finished product on the driver and passenger side. Really nice protection for the bulbous lever point of the rear arms. The driver's side takes a little finagling to get into place with the bumper skid, but it all came together nicely. You can also see the position sensor guards.
Misadventure With Springs
Some of these pics have silver springs -- I initially had the GOAT 2" front and 1" rear spacers and also replaced the springs front and rear with Eibachs (the +1.5" front and +1.6" rear springs). It turned out that I didn't have enough weight in the truck to compress the new springs, so the front driveline was at too steep an angle, and accelerating in 4A or 4H I had a lot of vibration on the front end. Way too much vibration for comfort so I ended up going back to just the stock springs and the spacers. I thought about maybe keeping the springs and removing the spacers or trying to drop the front diff or slicing the front spacers in half, etc, but didn't want to keep digging the hole deeper and it seemed like a lot of other people had just the spacers. Simple is better. Pretty annoyed at having gone down this route but all good now.
I did the bumper and skid plates installs myself, but I had a shop do the suspension work (spacers, springs, UCA, tie rods). I am not at all saying the springs were bad, etc, they are in fact very nice, it's just that in this case the truck isn't heavy enough to need them plus the spacers.
Tie Rods and Upper Control Arms
The Foutz tie rods and UCA are super nice, they seem to make a bunch of great parts. I got the "raw aluminum" tie rods and the black UCA. Tie rods are gigantic compared to stock.
Wheels and Tires
I went with Method Racing 703 wheels in +35 offset. This puts the tires right at the edge of the fender, maybe 1/4" sticking out. I really love the look of these wheels on the truck.
The 35" tire does fit as a spare as well, just sticks down a bit. Still fits with the trailer connector relocated next to the license plate.
Forscan tire size and suspension calibrations
After changing the suspension around and changing tire sizes, you need to run through some procedures in Forscan. You will need an "extended" license to do these steps. There's other threads around about doing this and it's pretty straight forward, but you will need a Windows PC and an OBDII dongle. The USB ones do seem to work better than the Bluetooth ELM327 adapters.
I set my tire circumference to 2650mm, that seems to match my GPS correctly.
After changing the tire size you will get DTCs and a check engine light. To clear this you need to:
- Run the ride height calibration to pick up new suspension geometry
- Run the PCM module init/re-learn procedure
- Run the AWS module init/re-learn procedure
Driving Impressions
Switching back to stock springs was the right way to go. The ride is still plush, and the various suspension modes all work to tighten things up, it's a great setup. For the amount of weight I've got on the truck, the aftermarket springs were just too much. Maybe if I had a camper or something, just not the right fit for this setup.
This truck still fits in my home garage, most parking garages (it's just under 6' 6" tall, though I did replace the antenna with a stubby one). Not fitting in garages would have been a deal breaker.
The 35" tires are definitely heavier, and it feels a bit more sluggish at times, but by no means bad at all. I've got the "performance calibration" as well, so I'm sure that helps. It still really gets up and goes if you punch it, so much fun to drive. I might switch to a 295/70r17 or a little lighter option, but I'm still just getting used to it again and it's fun as hell to drive. Gas mileage has taken a pretty big hit, was at 17.5 maybe before (with the bumper and the Decked drawer full of junk) and has gone down to about 16.1 now. Not great, not (too) terrible.
I'm going to road trip out to Moab over the holiday and will try to get some wheeling done here in Colorado soon as well.
Sponsored
Last edited:
")